
I Am... Mexican Rice
Mexican rice is probably one of the best versions of rice in the world.
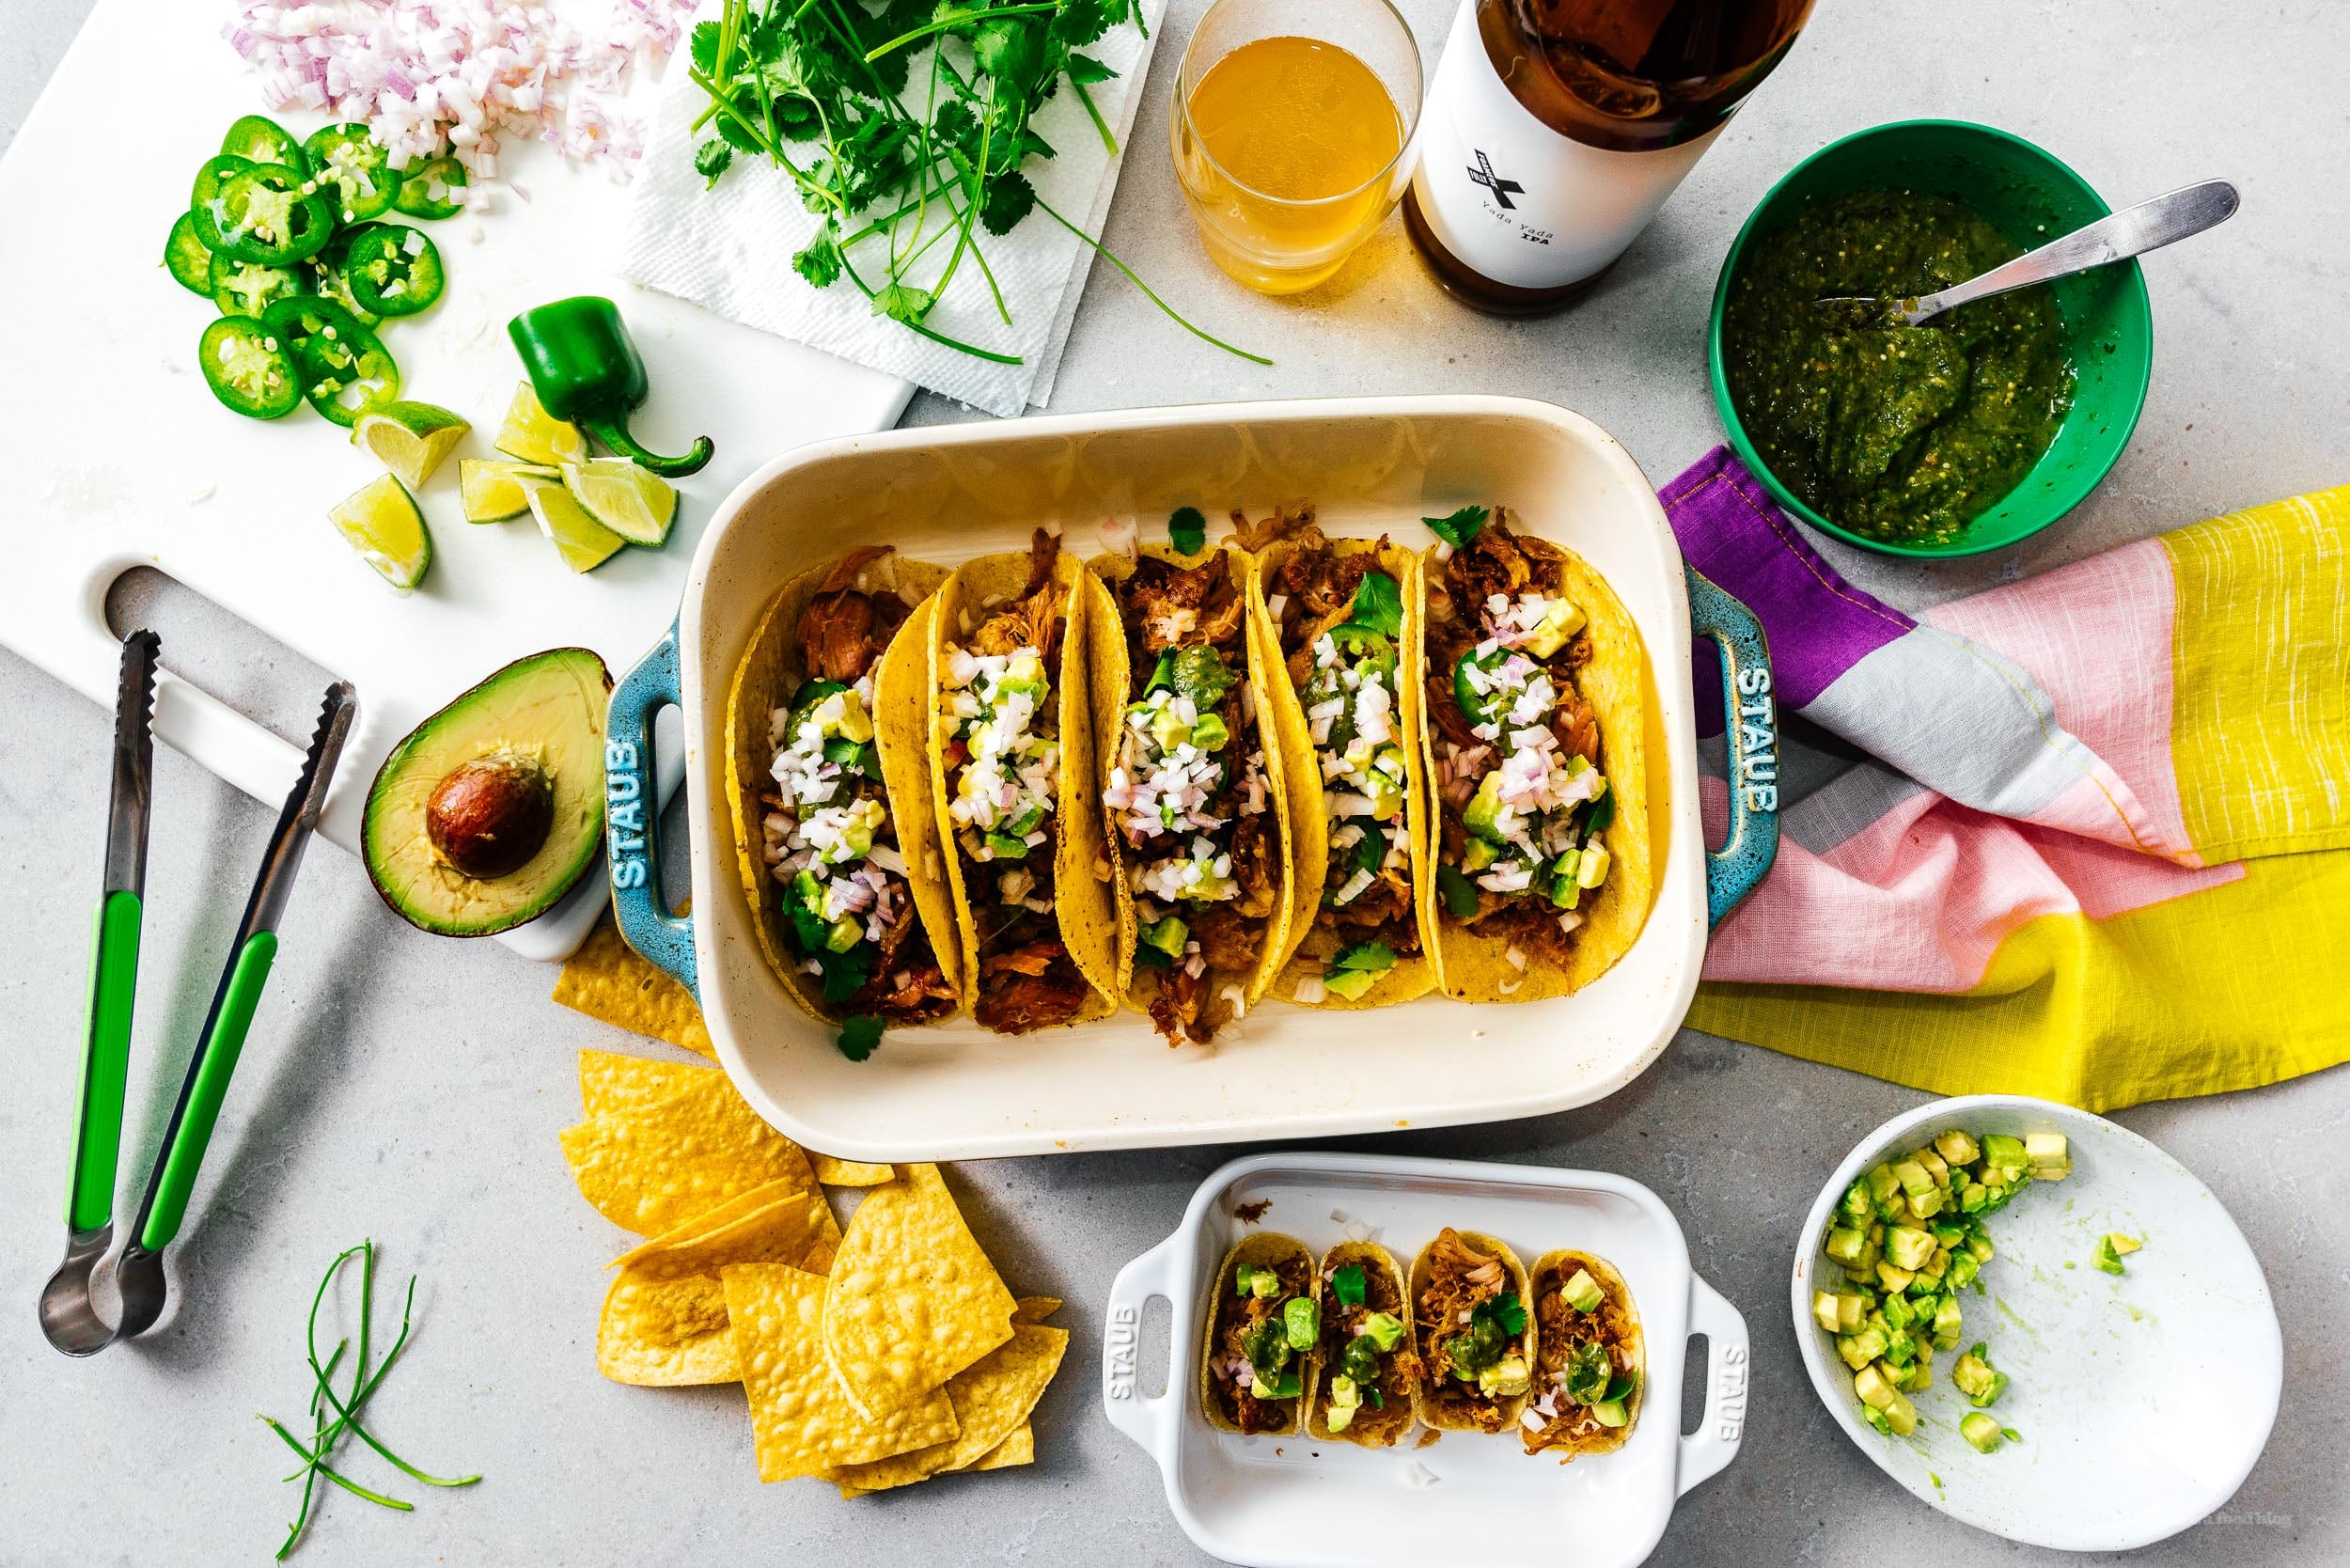
It's right up there with Hainanese chicken rice, fried rice, and paella. Who doesn’t love Mexican rice? But did you know it’s super easy to make at home and way healthier than buying those bags of premade rice that account for 80% of your daily sodium (seriously, check the nutrition info on those bags). If you ever wanted to amp up taco night, mexican rice, refried beans, and homemade salsa are the low hanging fruit.How to make Mexican rice
There's two basic kinds of rice in the world: fluffy and pre-fried. Mexican rice is the pre-fried kind. To make Mexican rice, you:- Fry your aromatics. For me, this is onions, but you can add garlic, fennel, whatever you like. Onions are essential though.
- Toast your rice and spices. Fry your rice until it becomes aromatic and translucent. Fry your dry spices now too, which is blooms them and enhances their flavors.
- Cook your tomato sauce and oregano. Frying tomato sauce caramelizes it and kills that sometimes sour tomato taste that not everyone loves. The more you dislike tomatoes, the more you should fry it, but don't skip the tomatoes, because they add an essential umami layer of flavor™.
- Add water, cook, and steam the rice. For perfect-almost-all-rices, add 1.25 cups of water for every cups of rice, bring to a boil, cook for 17-20 minutes (depending on how al dente you like your rice) then steam for 10.
- Fluff and serve. As soon as that last 10 minutes is up, fluff up the rice, then serve with your favorite Mexican sides.
Do you really need to fry rice?
Frying the rice is probably the most vital step here to getting that restaurant texture. Let it get really nutty and brown, it’ll improve the final dish.Can you make Mexican rice without tomatoes?
I have a range of tomato sauce here, from 1/2 cup for those who don’t really like tomato sauce to 1 cup for those who do. 1 cup is better. If you really, really, really hate tomatoes, you can remove them, but the rice will not taste or look the same.Mexican oregano vs regular oregano
Mexican oregano is actually a bit different than the usual stuff you find in the spice aisle. It's actually a different plant altogether! Mexican oregano is indigenous to Mexico and has a more woodsy, citrus-lime earthy flavor compared to your typical oregano, which is Mediterranean oregano. You can find Mexican oregano in the Mexican aisle at the grocery store and if you can’t, you can sub regular oregano, but try and find some, it makes a difference. (Unless you already have regular oregano in your pantry, because nothing beats free).What's the best rice to use for Mexican rice?
Mexican rice is best made with long grain rice. We just usually use jasmine, which isn't all that authentic but I find it to be fluffier and moister. You can also use brown rice, which is inauthentic but doesn't taste much different and it's arguably healthier.What to serve with Mexican Rice?
Here are some ideas:- Barbacoa
- The Best Stovetop Carnitas
- Birria Tacos
- Green Chile Enchilada
- Oven Baked Carne Adovada Pork Tacos
- Tacos al Pastor
- Hatch Green Chile Wonton Two Ways
- Hatch Chile Verde Recipe pork stew
- Oven-Baked Hatch Chile Salsa Verde Honey Chicken Thighs
The Best Mexican Rice Recipe
Mexican rice is the perfect side or main for any Mexican or Southwestern recipe you can think of.
- nonstick pan with a lid
- 1 tbsp oil
- 1 clove garlic (minced)
- 1/2 onion (roughly chopped)
- 1 cup long grain rice
- 1 tsp cumin
- 1 tsp Mexican oregano
- 1/2 cup tomato sauce ((or up to 1 cup))
- 1.25 cup water
Heat 1 tablespoon of oil over medium-high heat and add onions. Fry until onions are just translucent, about 3 minutes
Add the rice, garlic, and cumin. Continue frying until rice is golden brown and nutty, about 2-3 minutes
Add tomato sauce and oregano. Stir until rice is evenly coated with tomato sauce.
Add water and bring to a rolling boil over high heat.
When the water has reached a boil, immediately cover with a lid and reduce heat to the lowest setting. Set a timer for 20 minutes and don't disturb or peek under the lid for any reason.
When the 20 minutes are up, remove from heat, continuing not to touch the lid, and let steam for another 10 minutes. After 10 minutes, fluff and serve.

I Am... Duck Sauce
Do you always ask for extra duck sauce? Are you as addicted as I am to those little orange packets of sweet and tangy sauce you get with Chinese takeout? Duck sauce is perfect: sweet and sour and the best for for dipping, glazing, or drizzled on rice or noodles.
What is duck sauce?
Even though it’s called duck sauce, ducks are not in duck sauce. Duck sauce is a fruit sauce - usually made with plum, apricot, peaches, or pineapple. It’s seasoned with ginger, sugar, and sometimes a tiny bit of chili for mild heat. Vinegar is what gives the sauce its contrasting signature tang. It’s basically a umami forward sweet and savory jelly. The sweet and sour notes pair well with deep fried things and duck, of course!How to make duck sauce
Making duck sauce at home is super easy: all you do is stir together the ingredients, let them meld, then dip and enjoy. The best part about going homemade is how customizable it is. You can adjust the taste just how you like it. Plus, you can make a giant batch and dip to you heart’s content with no one to judge you.What is duck sauce made of?
Duck sauce ingredients
- apricot jam or jelly - you could make this with fresh fruit: you’d need to cut it up, stew it, then blend it, but the easier thing to do is buy a high quality jar of apricot jam or jelly. Make sure you love the taste of the jam you buy as it will make up the bulk of your sauce.
- rice vinegar - rice vinegar adds tang, lightness, and helps thin out the sauce. Rice vinegar is readily available at grocery stores; look in the Asian aisle. If you don’t have rice vinegar, you can substitute white vinegar but it won’t have quite the same flavor.
- sugar - you might not need sugar, this will depend on the sweetness of your jam and how sweet you want your sauce. I didn’t include sugar in the recipe, but if you need to, adjust the flavor of your sauce by adding in a teaspoon of sugar, tasting, and going from there.
- ginger and garlic - powdered ginger and garlic are the way to go. Using powdered ginger and garlic (which is literally dried and pulverized ginger and garlic) ensures that are are no bits in your sauce, making it smooth just like the stuff in little packets.
- soy sauce - just a touch of soy sauce adds saltiness and umami. Don’t add too much or your duck sauce won’t be that classic orange color.
- pickled Chinese plum - this is completely optional, but if you happen to be at an Asian grocery store and really want that just-can’t-put-your-finger-on-it flavor, a pickled Chinese plum is going to give you all the right notes. They come jarred and people usually use them in sauces, braises, and soups.
Is it a traditional Chinese sauce?
Duck sauce can be found at Chinese restaurants, but if you have an idea of an authentic Chinese sauce, plum sauce is probably what you’re thinking of. Plum sauce, popular in Cantonese cuisine, is sweet and sour and served with duck. It’s the same orange hue and as the name implies, contains plums. Plums cook down into a jammy-like sauce with sugar, vinegar, and spices.Is duck sauce the same as sweet and sour sauce?
It's not quite the same as sweet and sour sauce, but the flavors are pretty similar. I would say that duck sauce is more for dipping and sweet and sour sauce is used more for coating and glazing, as in sweet and sour pork or sweet and sour chicken. The ingredients differ slightly too. Traditional Cantonese sweet and sour sauce contains sugar, vinegar, preserved plums, and hawthorn candy. Nowadays in North America, the common ingredients are sugar, ketchup, vinegar, soy sauce, and cornstarch to thicken.Uses
You can eat it with pretty much anything, but some good bets are:- chicken (especially air fryer chicken!)
- deep fried egg rolls
- panko shrimp
- crispy chicken wings
- tofu nuggets
Duck Sauce Recipe
Making duck sauce at home is super easy
- 1/4 cup apricot jam (or jelly)
- 2 tsp rice vinegar
- 1/2 tsp soy sauce
- 1/4 tsp ground ginger
- 1/4 tsp garlic powder
- 1 pickled Chinese plum (pit removed, optional)
Stir together the apricot jam, rice vinegar, soy sauce, powdered ginger, and garlic. Use a fork to squish the plum into the sauce, if using. Mix well, taste, and adjust with rice vinegar (and sugar, if needed) to balance the sweet-tart contrast. Enjoy!
The sauce will keep, in a clean, airtight container in the fridge for up to 1 month.

I Am... Korean Marinated Eggs / Mayak Eggs
Sweet and savory jammy soy sauce Korean mayak marinated eggs are incredibly delicious. They’re fun and easy to make and taste amazing over a bowl of piping hot rice.
What are marinated eggs?
Mayak eggs or mayak gyeran are Korean marinated eggs. Literally translated mayak gyeran means “drug egg.” They’re one of the most addictive Korean banchan out there, hence the name. These eggs are garlicky, savory, jammy, and absolutely delicious. The yolks are soft and perfect for yolk porn over a bowl of hot rice. The sweet, savory, spicy marinade is incredibly addictive. Honestly, these eggs and a bowl of rice is the perfect comfort meal.What do marinated eggs taste like?
They’re sweet and savory and a bit spicy if you add in a chili pepper. If you’ve ever had a marinated ramen egg, they taste a little bit like that but with even more flavor. The yolks are jammy and full of creamy flavor and the whites are infused with an umami-forward soy-honey garlic mixture with a bit of nuttiness from the toasted sesame seeds.Marinated egg ingredients
- eggs - you can use as many or as few eggs as you like, as long as the eggs submerge completely in the marinade. soy sauce - this is what gives the eggs a salty, umami flavor. Use a soy sauce that you love the flavor of and always, always use a natural brewed soy sauce.
- honey - using honey instead of sugar makes it easy to mix into the soy sauce and it adds a slight malty honey flavor instead of straight sugar. Many mayak eggs use rice syrup so if you have that on hand, you can use that as a substitute.
- green onions, garlic, toasted sesame seeds - these are the aromatics that add layers of flavor. Garlic, of course adds a hit of mild spicy garlicky flavor, the green onions add a hint of freshness, and the toasted sesame seeds add a lovely layer of nuttiness.
- sliced chili - if you love spice (or even if you like a little spice!) I recommend adding sliced chili peppers into your marinade. There are so many chilis out there with varying degrees of spiciness, so you can use the pepper that most suits you. If you want a milder spice, go for sliced jalapeños and if you want spicier eggs, go for thinly sliced red bird’s eye peppers.
How to make marinated eggs
- Prep the marinade. Simply mix together soy sauce, honey, sliced green onions, garlic, toasted sesame seeds, and sliced chili peppers. The only thing you need to think about in regards to the marinade is do you have enough to fully cover your eggs. This depends on what size/shape the container you marinate your eggs in. You may need to double the marinade recipe depending on container size.
- Boil your eggs. You want a boiled egg between soft and medium boiled for this recipe. As the eggs marinate in the fridge, the yolks become a brilliant, gooey, flavorful jammy center.
- Marinate. Once your eggs are ready, it’s time to marinate them in the marinade for a minimum of 4 hours (or overnight) so all the flavors soak in.
- Enjoy. Once your eggs have soaked up all the flavor, it’s time to enjoy!
How to make jammy eggs
- Remove your eggs from the fridge. Let them come to room temp for a bit while you’re bringing your pot of water up to a boil. This helps them cook more evenly since they won’t be as cold as straight from the fridge. When you shock a cold egg from the fridge into boiling water it has a tendency to crack due to the rapid change in temperature.
- Bring a pot of water up to a boil. Choose a pot that’s large enough for your eggs, but not too big. You want enough water in the pot to easily cover the eggs when they’re lowered in. Bring the water to a hard boil over high heat. If you like, you can add a pinch of salt and a tsp of white vinegar into the water – this helps the shells slip off the eggs more easily.
- Lower your eggs into the water. When the water is at a rolling boil, lower the heat and gently add your eggs in using a slotted spoon.
- Simmer. Turn the heat back up to medium-high and maintain a happy bubbling simmer for 7-8 minutes (less if your eggs have been sitting at room temperature for over an hour).
- Put the eggs in an ice bath. While your eggs are cooking, prepare an ice bath by filling a large bowl with ice and very cold water. When the eggs are ready, immediately use a slotted spoon and scoop them from the pot into the ice bath to let them chill for 5-10 minutes or until they are cold to the touch.
- Peel. Gently tap the eggs at the wide egg of the egg, then flip and tap the narrow end. Very gently roll the egg on the counter top. Start peeling at the wide base and make sure to peel the membrane away from the egg. When the eggs are ready to go, it’s time to marinate.
Mayak egg marinade
It’s super simple to make mayak egg marinade. All you do is mix together soy sauce, honey, green onions, toasted sesame seeds, and sliced chilis.How long do you need to marinate eggs
Once your eggs and marinade are ready, all you need to do is add the eggs to the marinade and marinate for a minimum of 4 hours and up to overnight. The longer the eggs marinate, the more flavor they soak up. You can keep the eggs, covered in the marinade, in the fridge for up to 4-5 days.Meal prep mayak eggs
Meal prepped mayak eggs are amazing. You can make a huge batch for the week and have eggs and rice easily for every meal. You can also serve the eggs with noodles or just as a quick protein snack.How long do marinated eggs last in the fridge?
You can keep your marinated eggs in the fridge for about 4-5 days, making them ideal for meal prepping on Sunday night so you have marinated eggs throughout the week.What can I do with the leftover marinade?
You can definitely make another batch of eggs, but they won’t have the same amount of flavor and because the fresh ingredients (the garlic, green onions, chilis) are older, the eggs and marinade won’t keep as long as the first batch. Instead, you can spoon the marinade onto rice, along with your eggs, or use it in stir-fries to flavor meats or noodles.What to serve with mayak eggs
- They taste amazing on their own and also on top of rice with a bit of roasted seaweed.
- They’re a great addition to a salmon rice bowl
- With spicy chili garlic noodles
- With super savory scallion oil noodles
Marinated Eggs
Sweet and savory jammy soy sauce Korean mayak marinated eggs
- 4 large eggs
- 1/2 cup soy sauce (low sodium preferred)
- 1/4 cup honey (or rice syrup)
- 4 cloves garlic (crushed)
- 1 green onions (sliced)
- 1 Thai bird’s eye chili (sliced, or pepper of choice)
- 1 tbsp toasted sesame seeds
Take the eggs out of the fridge and leave them on the countertop. Bring a pot of water to a rolling boil over high heat. If desired, add a pinch of salt and 1 teaspoon of vinegar to the water to make the eggs easier to peel. Prepare and set aside a large bowl with ice and cold water for when the eggs finish cooking.
While the water is coming to a boil, make the marinade. In a container with a lid, mix together 1/2 cup water with the soy sauce, honey/rice syrup, garlic, green onions, chili, and toasted sesame seeds. Set aside.
Once the water is at a rolling boil, turn the heat down to medium-high and gently add the eggs in with a slotted spoon. Maintain a simmer for 7-8 minutes, depending on yolk preference.
When the time is up, remove the eggs from the water and immerse in an ice bath to cool.
When the eggs are cool to touch, peel and immerse the eggs into the marinade. Marinate for minimum 4 hours or overnight.
Remove the eggs from the marinade and serve over rice, enjoy!

I Am... How to Make Birria Ramen
When birria ramen popped up on my radar, I knew it was going to be an instant favorite and it did not disappoint. It’s no secret that Mike and I are noodle folk. We live that noodle life – traveling to try noodles, perfecting noodle recipes, and basically noodling everyday. If there are noodles involved, I’m there.
What is birria?
Let’s step back a bit and talk about birria, which is a Mexican stew. It’s kind of a celebratory dish, the kind that is traditional at weddings, holidays, and celebrations. It’s usually served as a stew with corn tortillas for dipping, but lately birria tacos have been exploding on the taco scene and they are EVERYWHERE. I am obsessed. I think I’ve watched ten thousand videos of birria taco trucks making birria tacos. It’s mesmerizing: they dip corn tortillas into the ruby red oil from the stew, top it off with birria meat and fry everything up until it’s crispy and serve it with a little cup of consomé. The best is when they make quesabirria: a extra gooey melted cheese version. We don’t have a birria taco truck in our neighborhood, but it’s okay because we’ve been making birria tacos at home! Mike has an awesome recipe so if you don’t want to miss out on the birria taco train, please check it out. Anyway, the other kind of birria that has been on my drool list is birria ramen. I keep seeing LA taco trucks marrying the two and to me it seems like the perfect combination. So, birria ramen... let’s taco about that!What is birria ramen?
Birria ramen is a mash up of birria and ramen. Birria is a savory, slightly spicy, sweet, sour, and super savory Mexican (traditionally lamb) beef stew. Chunks of beef are marinated in dried chiles, chipotles in adobo, vinegar, herbs, and spices and slow cooked into a tender, fall apart, juicy beef stew. Ramen is a Japanese noodle soup with a rich, deep flavorful broth full of umami, chewy noodles, and toppings. For this birria ramen, the birria consomé (that’s the soup that you get when you make birria) stands in for the ramen broth, to which we’ll add noodles, chunks of meat, shredded cabbage, onions, cilantro, jalapeños, a birria ramen egg, and a squeeze of lime.Ingredients for birria ramen
- Birria stew. This is the base of your ramen: both the soup and the meat component. Most ramen stocks are made from bone broth but in this case we’re going to use the super flavorful consomé that you get when you cook birria. Most cuts of beef will work in the stew but I recommend going for shank because it has as bone in it, which will add extra flavor to the broth. Read more about birria stew here.
- Ramen noodles. You can go all out and make your own ramen noodles or you can go the easy route and buy fresh ramen noodles. Making your own noodles is always better but often way too much work, even for us, so we usually go with fresh/frozen. More on that below.
- Toppings. It’s always fun when a bowl of ramen has complementing and contrasting flavors and textures. This birria ramen has shredded cabbage for crunch, pickled onions for a tart sharp bite, chopped cilantro for a fresh herbaceousness, sliced jalapeños for spice, a wedge of lime for brightness, and a birria ramen egg, because what even is ramen without a ramen egg. Oh, and a crispy birria taco, just because!
The best noodles to use for homemade ramen
Fresh ramen noodles would be my top choice for birria ramen. We recommend Sun Noodles (pictured below) – you can get them at most Asian supermarkets in the frozen section. You can also use dried instant ramen noodles. I like the thick and chewy texture of Nongshim Shin Ramyun (not the cup ones).How to make birria ramen
- Make the birria. Marinate the beef (overnight if you have the time, but for 2 hours minimum) and then make the stew in the Instant Pot on high pressure. The Instant Pot does a great job of cooking your meat and locking in flavors in a super short time. Of course you can make this on the stove or a slow cooker as well. When the birria is done, remove the meat and shred it. You can strain the stock too, but if you don’t want to, at least make sure you take out the bay leaves, cloves, and cinnamon. When the meat and consomé are done, it’s time to cook your noodles.
- Cook the ramen noodles. Cook your ramen noodles in a giant pot of boiling water. Bring a large pot of water to a rolling, hard boil. You want a big pot so when you add your noodles, it doesn’t drop the temperature of the water. If your pot is too small, it’ll take time for your water to come back to a boil, which means your noodles will be cooking for longer than the intended time they suggest on the package. Soggy noodles are a travesty. You want chewy, toothsome noodles with a bit of bite. Drain well.
- Assemble the bowl. Ladle pipping hot consomé into deep bowls (ones that can hold at least 3 cups of liquid). Add the drained ramen and loosen a bit with chopsticks. Top with a generous amount of beef, a birria ramen egg, shredded cabbage, onions, jalapeños, cilantro, and a wedge of lime.
Tips and Tricks
- Marinate. If you have the time, marinate the beef overnight - it’ll make for a more flavorful ramen.
- Make ahead. You can make this completely ahead of time, prepping the stew and all of the toppings. When it’s time to eat, all you need to do is heat stuff up. It’s (almost) instant gratification! Plus, if you make the birria the day before, you can strain and chill the consomé. When you put the consomé in the fridge (store the beef separately), the fat will rise to the top and solidify so you can easily remove it and add it back in. You definitely want to add some of the oil back in, it’s flavor!
- Make sure you have bowls. Ramen is meant to be served in deep bowls - bowls deep enough to hold your soup and your noodles - a regular shallow soup bowl isn’t going to cut it. If you don’t have dedicated ramen bowls, use the largest, deepest bowls you have, ones that can hold at least 3 cups of liquid.
- Make tacos. Make a taco (or five) and serve them up with the birria ramen for dipping. The contrast between the crispy, crunchy taco with the ramen is amazing.
Birria Ramen Recipe
This mash up of birria tacos and ramen is just too good to be missed!
- instant pot
Birria Stew
- 2 lbs beef shank, brisket, chuck roast, or mix (see notes)
- 3 dried guajillo peppers (see notes)
- 7 oz chipotle peppers in adobo (1 small can)
- 1/4 cup vinegar (rice vinegar preferred)
- 14 oz crushed tomatoes (1 small can)
- 5 cloves garlic
- 1 tsp dried oregano (Mexican preferred)
- 1/2 tsp smoked paprika
- 1 tsp cumin
- 1 medium onion (chopped)
- 1 cinnamon stick
- 2 bay leaves
- 6 whole cloves
- 2 qt chicken stock (or beef stock, sodium free/unsalted preferred)
To make the ramen
- 4 portions ramen noodles
- 4 large eggs (optional)
- 1/2 red onion (sliced)
- cabbage (shredded)
- lime wedges
- jalapeños (sliced)
- fresh cilantro (chopped)
Bring a large pot of water to a boil and then remove from heat. Soak your dried guajillo peppers for 15 minutes. Meanwhile, cube your beef and season all sides with salt and pepper. Set aside.
Add chipotles in adobo, vinegar, tomatoes, garlic, oregano, smoked paprika, and cumin to the blender. When the peppers are done soaking, hold them by the tip over the sink and use scissors to cut the stem off and allow the seeds to fall out, then add to blender. Blend the marinade into a smooth paste. Marinate the meats for a minimum of two hours or up to overnight.
Set your Instant Pot on saute high or use a skillet over medium heat. Add 1-2 tbsp oil, then saute the onions until golden and translucent (6-8 minutes).
Add the meats, marinade, bay leaves, cinnamon stick, and cloves to the pot. Cover with chicken broth, then set to high pressure for 45 minutes. If using a slow cooker or stovetop, set to low heat for 4-6 hours. When the instant pot is finished, allow a natural release, then remove the meat. Shred, set aside, and discard the bones (if any). Taste and season with salt and pepper, if desired.
Keep the consomé on warm and cook your noodles in rapidly boiling water, according to the package. Drain well.
Ladle 2 cups of piping hot broth into deep bowls. Add the noodles and top with birria meat, shredded cabbage, onions, chopped cilantro, jalapeños, and birria ramen egg if desired.
Good ramen requires fat to cling flavor to the noodles. To get the required amount of fat, if you choose to use mainly chuck, you'll probably want to throw a small bit of a fattier cut into the mix as well.
If desired, chill the stock overnight and remove the fat (it will solidify) so you can add the fat back in according to how much oil you want in the soup (at least 1 tbsp per bowl).
You'll probably end up with extra meat. If you'd like to make some birria tacos as a side dish or garnish, see our birria taco recipe for instructions.
If you would like to make the optional birria ramen eggs: boil the eggs for 6 minutes and 40 seconds over medium high heat. Immediately immerse in ice cold water and let chill until you can peel them. Place the peeled eggs in the birria stock to marinate.
Since noodles vary wildly in nutrition based on if they are deep fried (as in instant noodles) or fresh, estimated nutrition does not include noodles.

I Am... Cottage Cheese Ice Cream
We’re back again with another TikTok hack – this time it’s ice cream, more specifically, the extra viral TikTok cottage cheese ice cream. If you love cottage cheese and ice cream, this will be right up your alley. Who doesn’t love ice cream, especially now that the weather is heating up? Something about a scoop of smooth, creamy, cold ice cream hits the spot every time. But if you don’t want to indulge every day, and maybe want to get more protein into your life, this easy homemade ice cream is here to save the day.
What is cottage cheese ice cream?
Essentially, it’s exactly what it sounds like: ice cream made with cottage cheese. Traditional ice cream uses heavy cream, sugar, and flavoring. Cottage cheese ice cream replaces the cream with cottage cheese. It has a super close consistency to real ice cream and the flavors are spot on. It’s creamy, cold, delicious, and satisfying.Cottage cheese ice cream ingredients
cottage cheese - you’ll want to use whole fat cottage cheese and it’s best if you use a cottage cheese that you like. sweetener - honey is the classic sweetener used in cottage cheese ice cream, but you can use your favorite. Some other sweetener ideas: maple syrup, agave syrup, sugar, brown sugar, dates, or if you want to be really really exceptional, sweetened condensed milk. banana - this is optional, but if you’ve ever had banana “nice cream” you’ll know that a frozen banana adds a lovely texture and makes homemade ice cream easier to scoop. add ins/flavors - go wild! Extracts can add a huge amount of flavor for almost no calories or you can use in season fruit. Nuts add crunch andHow to make cottage cheese ice cream
- Place the cottage cheese and sweetener in a blender (or food processor).
- Blend the mixture until smooth.
- Transfer the mixture to a bowl and stir in mix ins. (You can skip this step if you’re not going to stir in anything extra).
- Move the ice cream to a freezer safe container and freeze until firm, up to 4 hours.
- Enjoy!
Tips and tricks
Use the best cottage cheese you can find
My favorite brand of cottage cheese (not sponsored, I genuinely love them) is Good Culture. For this particular post I tried the double cream classic cottage cheese and it was incredibly creamy and delicious.Stir occasionally while freezing
If you stir your cottage cheese ice cream every so often while it’s freezing, it will give the ice cream a smoother, less crystallized texture because you’ll be breaking up the mixture and mixing around the frozen and unfrozen parts. It’s a simple way of churning the ice cream without using an ice cream maker.Stir in the mix ins while partially frozen
If you don’t want all your mix ins to sink or float to the top, the key is to let the cottage cheese ice cream freeze in increments of 30 minutes. Let it freeze, stir in some mix ins, let it freeze, stir it again with more mix ins, then let it freeze for 30 minutes, give it a stir if you can, then let it freeze completely.Let temper before scooping
Straight from the freezer, cottage cheese ice cream is a little difficult to scoop. Most commercial ice creams have chemical stabilizers that make them easy to scoop straight from the freezer. Since we’re going homemade, we have to let our cottage cheese ice cream temper on the counter for a bit before it reaches a scoop-able texture. Leave your ice cream out on the counter for a couple of minutes before scooping. Or, if you’re a sucker for frustration and pain, use a spoon to dig it straight out of the container from the freezer.Tools
blender/food processor/immersion blender - Any of these will do, the goal is to get the cottage cheese as smooth, creamy, airy, and light as possible. Make sure you use a silicone spatula to scrape down the sides and stir everything together so you blend up all the curds of cottage cheese. container - any container with a lid will do. Most people use a loaf pan (because homemade ice cream always seems to be in a loaf pan, but you can use anything, even the container your cottage cheese came in.Flavors
Go wild! The base of your ice cream isn’t as calorific as regular ice cream so why not heap on a ton of flavor via mix ins!?Extracts and spices
Liquid extracts add so much flavor. You only need 1/2 a teaspoon to a teaspoon. Try: vanilla, lemon, almond, peppermint, or coconut. You can also use spices a bit of cinnamon, nutmeg, cardamom, or ginger will add warm spicy notes.Chocolate and nuts
Chopped chocolate (or chocolate chips) and nuts add textural contrast and deliciousness.Fruit
Fruit is probably the best pairing for cottage cheese ice cream. You can blend it right into the base with the cottage cheese as well as add chunks of fruit in.Swirls
You can swirl in anything jammy or liquid-y to add a pretty and flavorful element. Think: jam, nutella, caramel, melted marshmallows, lemon curd, maple syrup, or honey.Cake, cookies, pie
Chopped up baked goods in ice cream is my absolute favorite. The chunks are the best part, right? Some of my favorites: birthday cake, chocolate cake, brownies, oreos, chocolate chip cookies, pretzels, peach pie, apple pie, gosh I could go on and on but you get the idea.Chocolate
Blend in 2 tbsp cocoa powder. Stir in 1/2 cup chopped chocolate or chocolate chips. Or, chop up some of your favorite candy bars and stir them in.Strawberry
Blend in 1/4 cup roughly chopped strawberries with the cottage cheese, then stir in an additional 1/2 cup of sliced or chopped strawberries. For an extra bit of decadence, stir in 2 tbsp strawberry jam at the end.Banana
Blend in 1 banana and 1/2 tsp vanilla with the cottage cheese. Stir in an additional banana, either sliced or chopped. Optional: stir in 1/4 cup chopped chocolate and 1/4 cup chopped nuts for a take on chunky monkey ice cream.Who invented cottage cheese ice cream?
TikTok cottage cheese ice cream is viral and like most viral recipes it’s a little difficult to discern who made it first. Sometimes, the person who invented the recipe doesn’t go viral – in this case, from what I can tell, Paige Lingren made cottage cheese ice cream go viral.But why?!
Because cottage cheese is delicious and so is ice cream! Cottage cheese is low in calories and high in protein. Why not eat it in a new and fun way? It’s super easy to make, very customizable, fun to make, and delicious. It’s wins all the way down.Why does this work?
The fat content of cottage cheese is lower than that of heavy cream but because they are both dairy products, they mimic each other quite well. Whipping/blending the cottage cheese gives it a creamy, smooth texture that freezes well. Because cottage cheese is mild, it takes on sweetness and other flavors well.What does cottage cheese ice cream taste like?
It’s a creamy, sweet (this is easily customizable to make it sweeter or less sweet), frozen treat. Does it taste like cottage cheese? If you’re a super taster, sure, you’ll be able to tell it’s cottage cheese. If you add a lot of add ins and sweetener, it’s less noticeable that it’s cottage cheese. Really, it depends on what kind of ice cream connoisseur you are. If you think of it as a high protein, creamy and sweet frozen treat, you’ll love it! It reminds me more if frozen yogurt than traditional ice cream, but I’m not mad about it. For my version, I used straight up regular sugar, Lucky Charms marshmallows, and sprinkles. They’re not the healthiest, but it’s colorful and fun and it ended up tasting SO GOOD. Dream combination, for sure. I made a mistake by stirring in the marshmallows and sprinkles right away so the sprinkles fell to the bottom and the marshmallows rose to the top, so if you’re doing mix ins, make sure to check out the tips and tricks for how to stop that from happening. It might look like a slight disaster, but she cute and tasty, so it’s all good. Happy cottage cheese ice cream making! What flavors are you going to be enjoying this summer? xoxo stephCottage Cheese Ice Cream
- 16 oz cottage cheese (whole milk preferred)
- 1/4 cup honey (or sweetener of choice)
- add ins (to taste)
Add the cottage cheese (undrained), preferred sweetener, and any other flavors in a high speed blender or food processor.
Blend until everything is extra smooth and creamy, making sure to scrape down the sides and stir everything together with a silicone spatula. If you want to add any liquid flavor like extracts, now is the time to do it.
After everything is creamy, you can stir in mix ins. I would say you need about 1/2 cup of mix-ins for this amount of ice cream. They can be anything from fruit or nuts to chunks of brownies or cake, really, it’s up to you! Stir the mix ins evenly.
Transfer the ice cream to a freezer safe container, smooth everything down, cover and freeze for 3-4 hours, or until frozen to the consistency of ice cream. Scoop and enjoy!
I Am... 10 Taco Recipes for You If You Love Birria Tacos
Um, why are tacos the BEST THING EVER. I am here for it. Give me all the tacos, all the time. I think if I could live in a world with only Taco Tuesdays, I would...Here are 10 recipes for your Taco Tuesday feasts. Because we all know that we need an excuse to party on Tuesday!
Classic Taco Recipes
Birria Tacos
These birria tacos are so hot right now and it’s not hard to understand why: they’re crispy, gloriously meat and juicy, and they come with a dipping sauce. Birria forever! [wprm-recipe-roundup-item id="31388"]Al Pastor Quesatacos
Everyone’s favorite: al pastor! Those twirling mesmerizing spits of layered pork topped off with a whole pineapple make me heart eye emoji. If you don’t have a taco truck right outside your place, make these! Smoky sweet al pastor pork, melty cheese, and sweet grilled pineapples are a perfect Taco Tuesday for sure. [wprm-recipe-roundup-item id="32722"]Stovetop Carnitas
You don’t need lard to make carnitas! Use pork belly and pork shoulder together so the pork belly fat renders out and it becomes self-saucing. Super easy, barely an inconvenience! [wprm-recipe-roundup-item id="31445"]Slow Cooker 3 Ingredient Carnitas
Of course, if you happen to have some pork fat hanging around, you can go the classic route and use just three ingredients to make this classic carnitas: you won’t believe how flavorful it is. Perfect for tacos! [wprm-recipe-roundup-item id="32727"]Barbacoa Tacos
Barbacoa is a Mexican beef dish that’s slow cooked til juicy, soft and tender, then coated in a savory red chile sauce that has just a tiny hint of spice and a huge hit of flavor. [wprm-recipe-roundup-item id="33286"]Chicken Tinga
Tinga is a Mexican dish made with chicken, called tinga de pollo in Spanish. It’s made with shredded chicken and onions simmered in a tomato and chipotle in adobo sauce. [wprm-recipe-roundup-item id="34129"]Less Famous Taco Recipes
Carne Adovada
If you know adovada, then you know why you shouldn’t sleep on this oven baked adovada recipe. Dark, smoky, soft, and succulent. Usually adovada is served in enchiladas and burritos, as a main with rice and tortillas on the side, but something magic happens when you assemble them as taco with all the toppings.[wprm-recipe-roundup-item id="32736"]Vietnamese Fish Tacos with Carrots and Daikon
These tacos are Vietnamese chả cá thăng long/turmeric fish with dill wrapped up in a tortilla hug. If you love fish tacos you’ll love these! Loads of fresh mint and dill with juicy tomatoes and quick pickled carrots and daikon. Seriously delicious.[wprm-recipe-roundup-item id="32743"]Let’s not forget some sides:
Hatch Salsa Verde
Is it even Taco Tuesday without salsa? I say no. This salsa verde is literally the best thing ever because it’s made with Hatch chiles. Smoky, just the right amount of spice, and so addictive. It only has 4 ingredients, so no excuses. Unless you can’t find Hatch chiles. In that case you can use a mix of Anaheim’s and green Thai chili :) [wprm-recipe-roundup-item id="32764"]Mexican Rice
Is it weird to serve rice with tacos?! I don’t know and really, I love rice, even in my tacos so they become a sort of mini burrito situation but without the rolling, so I’m going to include this rice recipe here just so you to can experience the joy of a street-size taco with rice! [wprm-recipe-roundup-item id="29108"]Pineapple Guacamole
The photos from this guacamole are SO old but we still make pineapple guacamole on the regular. I know there’s a whole internet debate on whether or not pineapples belong on pizza, and I’m here to say, pineapples definitely belong in guacamole! [wprm-recipe-roundup-item id="32753"]Freshly Fried Tortilla Chips
I know, I know, it’s super easy to go buy a bag of tortilla chips at the store. But trust me, warm tortilla chips fresh out of the fryer are GLORIOUS. Please do it. [wprm-recipe-roundup-item id="32748"] Happy Taco Tuesday! xoxo steph PS - If you have someone doing keto in your house, don’t let them miss out on Taco Tuesday! Make them these keto-friendly carnitas tacos with egg tortilla shells and they will love you forever :) Read More →
I Am... Ricotta Toast
Move over avocado toast, ricotta toast is here to stay. It’s creamy, full of protein, and the best base for customizing. Ricotta toast is the perfect way to start your day, as a light lunch, or snack. I love that you can put anything onto it and I love how luxurious yet light it is. I’m a huge fan of toast and ricotta toast, especially whipped ricotta toast is my absolute favorite.
What is ricotta toast?
It’s as simple as the name: it’s ricotta on toast. I’m not too sure where it came from, it’s just about as simple as butter on toast, but so much more luxurious and better. If it’s your first time having ricotta toast, I recommend a really good slice of bread, toasted until it’s golden with a couple of deeply caramelized spots, topped off with creamy whipped ricotta, a drizzle of extra virgin olive oil, flaky sea salt, and freshly cracked pepper. The mild creaminess of the whipped ricotta just about melts into the toast and is deliciously light yet luxurious against the crunch of toast. The beauty of ricotta toast is that you can top it with anything, sweet or savory.What is the best bread for toast?
I love all bread but for ricotta toast I recommend a hearty loaf like sourdough. You want something with structure and crunch. There are so many amazing sourdough bakeries out there right now and if you have the time and inclination, you can even make your own - it’s magic! Good sourdough isn’t sour, it’s perfectly balanced, complex, and the best base for topping. If you don’t have access to really good sourdough and don’t want to make your own, try whipped ricotta toast on slices of a crusty country loaf, a hearty whole wheat bread, or even bagels. Whipped ricotta also tastes amazing on pancakes or waffles.What is ricotta?
Ricotta is an cheese, originally made in Italy but now available worldwide. It’s a soft, creamy cheese with small curds that are mild and slightly sweet. It’s fluffy, fresh, and creamy. You’ll find it in tubs in the refrigerated section and it tastes amazing with pasta, as a base for dips, on pizza, and in desserts.How to make whipped ricotta
To make whipped ricotta, start with whole milk ricotta and add it to a food processor (we have this one and it's lasted us years). Blend until the ricotta is creamy, fluffy, and smooth, about 1-2 minutes. You can season it with salt and pepper right away but I like to leave it plain so I have the option of using it as a base for both sweet and savory toasts. Whipped ricotta will keep in the fridge, tightly covered, for up to 3 days.Ricotta toast variations
1. Classic ricotta toast
Spread a generous amount of whipped ricotta on toasted sourdough, then drizzle with extra virgin olive oil and balsamic (if desired) and finish with flaky sea salt and freshly cracked black pepper.2. Honey and thyme ricotta toast
Spread a generous amount of whipped ricotta on toasted sourdough, then drizzle with a generous amount of honey and finish with fresh thyme. Pro tip, a sprinkle of flaky sea salt takes this over the top!3. Avocado ricotta toast
Spread a generous amount of whipped ricotta on toasted sourdough, top with slices of avocado, a drizzle of extra virgin olive oil, flaky salt, pepper, and herbs, if desired.4. Crispy pesto egg
Spread a generous amount of whipped ricotta on toasted sourdough. Heat up 2 tablespoons of pesto in a nonstick pan over medium heat. Add a cracked egg to the pesto and cook the egg to your desired doneness. Scoop the fried egg and pesto over the ricotta toast. Read more about pesto egg here.5. Tomatoes and basil
Spread a generous amount of whipped ricotta on toasted sourdough, then top with sliced or quartered tomatoes, basil, a drizzle of extra virgin olive oil (and balsamic if desired), flaky salt and black pepper.6. Jam and whipped ricotta
Spread a generous amount of whipped ricotta on toasted sourdough, then top with your favorite jam.7. Prosciutto and peaches
Spread a generous amount of whipped ricotta on toasted sourdough, then arrange thin slices of prosciutto and juicy peaches on top. Finish with extra virgin olive oil and freshly cracked black pepper.8. Cacio e pepe and ricotta
Spread a generous amount of whipped ricotta on toasted sourdough, then top with a generous amount of freshly grated parmesan and freshly cracked black pepper.9. Carbonara ricotta
Spread a generous amount of whipped ricotta on toasted sourdough, then top with crispy pancetta (or bacon), a poached egg, and a generous amount for freshly grated parmesan.10. Berries and ricotta
Spread a generous amount of whipped ricotta on toasted sourdough, then top with fresh berries, a drizzle of honey, and some fresh mint or thyme.What to serve with ricotta toast
- The best bacon ever, twisted bacon
- Crispy fried eggs for an extra boost of protein
- Super addictive hot Chinese chili oil
- Garlicky pan seared mushrooms
Ricotta Toast
Move over avocado toast, ricotta toast is here to stay.
- Toaster
- 1 cup ricotta (full fat preferred)
- 4 slices sourdough bread
- toppings (optional as desired, see post)
Place the ricotta in a food processor and process until very smooth, 1-2 minutes. Remove from the bowl.
Toast your slices of sourdough until golden and let cool slightly before topping with a generous amount of whipped ricotta.
From there, add toppings as you see fit and enjoy!
Estimated nutrition does not include toppings.

I Am... Chow Mein
I love all carbs but I have to admit that noodles are my ultimate fave. I’m pretty sure that I can eat noodles all day, every day for the rest of my life and be perfectly happy. Especially if the noodle dishes include chow mein. I grew up eating chow mein: homemade for lunch or dinner; chow mein at parties; at the end of Chinese banquets; or just all the time, every time. It’s smoky, crispy, full of flavor and so, so good. I love that it’s an all-in-one meal: protein, vegetables, and carbs in one delicious dish.
What is chow mein
Chow mein literally means fried noodles. The dish consists of thin egg noodles stir-fried with aromatics, proteins, and vegetables. It’s the perfect one pan meal: it’s quick to make, and so versatile. There are actually two kinds of chow mein: a crispy version and a saucy version. Calling one crispy is kind of confusing because both versions should be crispy, but the main difference is how the sauce is incorporated into the dish.How to make chow mein
- Prep the ingredients. Wash and cut the vegetables into bite size pieces, slice the chicken into strips and marinate it.
- Soak and drain the noodles. Place the fresh chow mein noodles in a bowl with hot tap water and soak for 1 minute then drain well.
- Make the sauce. In a bowl, mix together the chow mein sauce: oyster sauce, sweet soy sauce, toasted sesame oil, and a bit of water and pepper.
- Cook the protein. Heat up the wok add a generous amount of oil and cook the chicken until seared and cooked through.
- Add the vegetables. Stir in the veggies and cook until tender crisp but not soft.
- Crisp up the noodles. Add the drained noodles and mix everything together.
- Sauce and enjoy! Pour in the sauce, turn the heat up, mix and sear to give it that characteristic smoky chow mein flavor.
Ingredients
- Fresh noodles - The noodles used for chow mein are fresh, thin, crinkly noodles made with flour and eggs. They come sold fresh, refrigerated in bags at Asian grocery stores. More on noodles below.
- Chicken - I like using chicken thighs because they’re juicy and don’t overcook easily, but you can use chicken breast as well. You can also go with beef or pork!
- Soy sauce - We’ll use soy sauce for the marinade for the meat so it gets a salty umami hit. Make sure you get naturally brewed soy sauce. We usually go for Lee Kum Kee or Amoy light soy sauce.
- Cornstarch - Cornstarch adds a little bit of heat protection for the chicken so it doesn’t dry out. It also gives the chicken a slightly soft velvety coat. It’s the difference between restaurant style stir fries and home stir fries. Don’t skip out on the cornstarch!
- Shaoxing wine - This is the secret ingredient to what makes restaurant Chinese food taste so good. It adds a lightly sweet, earthy, nutty, complex aroma to your Chinese cooking. Read more about it here.
- Oyster sauce - Oyster sauce is a thick savory sauce with a hint of caramel sweetness and umami. It can be found in the Asian aisle of any grocery store. If you see Lee Kum Kee bottle with two people in a boat, go for that one. It’s the premium oyster sauce which lists oysters as its first ingredient, unlike the one with the red panda label which has oysters listed further down the list. If you’re vegetarian, they sell vegetarian oyster sauce too!
- Sweet soy sauce - This is the key ingredient that adds umami and sweetness to the sauce. Sweet soy sauce is darker, more caramelized, and will make your noodles beautifully brown. We like Lee Kum Kee brand.
- Toasted sesame oil - Toasted sesame oil adds a light nuttiness and warmth to the sauce.
What noodles to use
Chow mein noodles are yellow, thin, wavy egg noodles. Made from flour and eggs, they come fresh in bags in the refrigerated noodle section at most grocery stores (especially the Asian ones). You can also buy them dry in the noodle aisle, but fresh noodles are best and are usually located in a fridge near the mushrooms or tofu. Sometimes they’re labeled as Hong Kong style or Cantonese style, or steamed.How to prep fresh chow mein noodles
The fresh noodles that you get in the refrigerated aisle are already par-cooked. After buying them, store in the fridge. All you have to do to prep them before adding them to the pan is simply soak them in hot tap water for a couple of seconds then drain well. You don’t want to boil them or leave them in the hot water too long because they’ll get soft, mushy, and break into short strands.Chow mein sauce recipe
The sauce is what gives chow mein all of its seasoning and addictive flavors. It’s a mix of oyster sauce, sweet soy sauce, toasted sesame oil and freshly ground black pepper. It’s full of sweet and savory umami and seriously SO good. To make: in a bowl or measuring cup, mix together 1/3 cup water, 2 tbsp oyster sauce, 3 tbsp sweet soy sauce, 1 tsp toasted sesame oil, and white or black pepper to taste. Add it to the pan with the noodles and turn up the heat to give everything a searing crisp.Crispy chow mein
Crispy chow mein is where the sauce is added to the noodles while you’re cooking. An umami heavy sauce goes into to the wok with the noodles and everything tosses and fries together until smoky and crisp. A classic example is Hong Kong style soy sauce chow mein. In Chinese we call this type dry fried or gon (乾), although it's typically not included in the name of the dish – Chinese people generally know which ones are crispy or saucy.Saucy chow mein
Confusingly, the saucy version also has crispy noodles. In fact, it has an entire giant crispy noodle cake where a thick gravy type sauce containing meats and vegetables is put on top right before serving. At the table, you mix up the sauce with the noodles and enjoy the contrast between the extra crispy noodles and gravy. A good example of this is black bean beef chow mein. In Chinese we call this type wet fried or sup (濕). Also confusingly all chow mein dishes can be either crispy or saucy. Chicken chow mein can come as crispy with pieces of chicken mixed in with the noodles *or* it can come with chicken pieces in a thick gravy that’s served on top of a crispy noodle cake. For the purpose of this post, we’re only going to be talking about the crispy version; the kind without the gravy on top. Now that you know the difference between crispy and saucy, how about chow mein vs lo mein?What is the difference between lo mein and chow mein?
There are two main differences between chow mein and lo mein.- The noodles. Chow mein noodles are thin, crinkly, and crispy. Lo mein noodles are thicker, chewier, and smoother. Both types of noodles are usually made with flour and eggs.
- The way they’re cooked. Chow mein noodles crisp up in the pan over high heat so you get a smoky, crunchy-crispy texture. Lo mein noodles toss gently in sauce over heat so the noodles stay soft and chewy.
Variations
Vegetarian
Skip out on the chicken and just sear a bunch of vegetables until tender crisp. All and any vegetables work here, just be sure to cut them up into manageable bit sized pieces.Beef
Instead of marinating chicken, marinate some beef for beef chow mein. You can use flank steak, skirt steak, or thinly sliced sirloin. Cut it into thin strips against the grain so the strips of beef are tender and juicy.Soy sauce
Hong Kong style supreme soy sauce fried noodles or si yau wong chow mein 豉油皇炒麵 is one of the most popular fried noodles out there, especially at dim sum. It’s a simple soy sauce fried noodle with bean sprouts, scallions, and onion. So simple, but so good! Check out this post to learn more.
Wok Cooking
If you have a carbon steel wok (not a teflon coated one), this is the most authentic way to make chow mein. To ensure that your noodles don't stick to the wok, be sure to get it really hot before adding oil. There's a saying: hot wok, cold oil, and it's true. Have all your ingredients prepped beforehand - wok cooking is fast and there's no time to stop to look for ingredients. To make chow mein in a wok: heat a dry wok on high heat, watching carefully for smoke. Once your wok is smoking hot, add oil, then immediately add your chicken and toss. When the chicken is cooked, remove it and adda little more oil, then toss the veggies. When the veg is cooked, add the noodles, chicken, and the sauce and toss vigorously until the noodles are firm and crisp.Air Fryer Saucy Chow Mein
This is a super simple way of making saucy chow mein - the kind that has a giant crispy noodle cake that has a thick gravy on top that soaks into the noodles making it extra saucy and delicious. My new favorite way of making a giant crispy noodle cake is the air fryer! Simply crisp up the noodles in the air fryer and while it’s doing it’s thing, make the sauce on the stove. When the noodles are crispy, pour the sauce on the noodles, letting it soak into all the crevices. Seriously, so good! To make air fryer saucy chow mein: Soak the chow mein noodles in hot water for 1 minute then drain well. Toss the drained noodles with 2 tbsp neutral oil then arrange the noodles the the air fryer basket. Make sure you lightly oil or line the air fryer basket so the noodle cake is easy to remove. Fry the noodle cake for 10-15 minutes at 350°F, flipping once. While the noodles are crisping, make the sauce. We’re going to use the exact same ingredients as the crispy chow mein down below. Heat up 1 tbsp of oil in a frying pan and add the marinated chicken when hot. Cook, stirring, until browned and no longer pink. Add the onions and green onions and cook until the onions soften. Add the sauce, along with an extra 1/2 cup of chicken stock and 1 tsp cornstarch. Bring the sauce to a simmer until it thickens and coats the chicken. Remove the pan from the heat. When the crispy noodles are done, remove them from the air fryer and place on a platter. Pour the chicken gravy on top and enjoy! Happy noodling!Chow Mein
Chow mein might just be the perfect food: smoky, crispy, and full of flavor with protein, vegetables, and carbs in one delicious dish.
- 1 lb fresh chow mein noodles
- 1 lb chicken (cut into strips)
- 1 tbsp soy sauce
- 2 tsp cornstarch
- 2 tsp Shaoxing wine
- 2 tbsp oyster sauce
- 2 tbsp sweet soy sauce
- 1 tsp toasted sesame oil
- 1/4 tsp white pepper (or to taste)
- 2 tbsp oil for the pan (or as needed)
- 1/2 medium onion (sliced)
- 1 bunch green onions (sliced into 2" lengths)
Soak the noodles in hot tap water for 1 minute, then drain well and set aside.
In a bowl, mix together chicken chunks with the cornstarch, soy sauce, and shaoxing wine. Let marinate.
In another bowl, whisk together 1/3 cup water, the oyster sauce, sweet soy sauce, toasted sesame oil, and pepper.
Heat up a generous amount of oil in a wok over medium high heat. When hot, add the chicken, along with any marinade in the bowl and cook, stirring occasionally, until the chicken browns and cooks through.
Add the onions and cook until the onions soften and the green onions are bright green.
Add the drained noodles and the sauce and toss everything together. Turn the heat up to high and add a searing crisp. Remove the noodles from the pan and enjoy!
Estimated nutrition is dependent on what brand of chow mein noodles you buy.

I Am... Japanese Vegetable Skewers aka Vegetable Yakitori
If you love grilled vegetables, you’re going to love Japanese grilled vegetable yakitori. Eating grilled vegetables off a stick is simply the best, it’s the only way to do it! The best grilled vegetable yakitori I’ve ever had were in Tokyo. I still dream of them today: fresh from the farm vegetables skewered onto wooden sticks lightly grilled over charcoal and dipped in an addictive sweet and savory sauce. If you’ve been to Japan, you’ve most likely have indulged in yakitori: smoky, tender, juicy skewers of grilled chicken either dipped in a savory sauce or sprinkled with salt. Yakitori is the ultimate food. It can be fancy (think 3 Michelin starred restaurants) or be made at home. The chicken yakitori is amazing, but even better are the vegetable skewers. Most fancy yakitori places actually place higher value on the vegetable skewers because seasonal vegetables are exceptional and high value in Japan. You can get special vegetables like the first negi of spring(extra large Japanese green onions) or roasted gingko nuts.
What is yakitori?
Yakitori is Japan’s answer to grilled chicken. Yakitori is bite-size pieces of chicken threaded onto skewers and grilled over binchotan, a special Japanese charcoal that gets extra hot. The skewers come seasoned with salt (shio) or sauce (tare).Is yakitori chicken only?
Yakitori is technically chicken but colloquially, people refer to all grilled Japanese skewers as yakitori. Even at specialized yakitori shops, they have skewers of things like quail eggs, beef, pork, mochi, and vegetables.What is vegetable yakitori
Vegetable yakitori is kind of a misnomer, but essentially, it’s vegetables skewers grilled yakitori style – that is, bite-sized pieces of vegetables threaded onto short skewers and grilled until tender and slightly charred. Vegetable yakitori can be lightly sprinkled with just salt but here we’re going to make a Japanese tare for a glossy, sweet and savory finish.What vegetables for yakitori
The best vegetables for grilling are ones that are slightly sturdy but don’t take too long to cook. In this case, we’re going to grill tomatoes, eggplant, zucchini, red onion, bell peppers, king oyster mushrooms, shishito, and asparagus.How to cut vegetables for vegetable skewers
The best way to cut vegetables for vegetable yakitori is in 3/4 inch by 2.5 inch sticks. Think carrot sticks, but slightly shorter and stubbier. The baton-like shape makes it easy to thread the vegetables onto skewers and the large surface area helps the vegetables cook quickly and evenly. Here’s how you cut/prep everything:- Japanese eggplant - wash, dry, then trim the tips and tails. Cut the eggplant into 2.5-3 inch lengths. Cut each section in half, then cut the halves into thirds. Thread the eggplant onto skewers with 4 pieces per skewer.
- zucchini - wash, dry, and trim the tips and tails. Cut the zucchini into 2.5-3 inch lengths. Cut each section in half, then cut the halves into thirds. Thread the zucchini onto skewers with 4 pieces per skewer.
- king oyster mushrooms - wash, dry, and trim the bottom of the mushroom. Cut the mushroom into equal lengths, making sure to keep the mushroom cap intact with some stem. Cut the mushroom lengths into quarter wedges. Thread the mushrooms onto skewers with 4 pieces per skewer.
- bell pepper - wash dry, and deseed the peppers. Cut into 2 inch by 3/4 inch strips. Thread the peppers onto skewers with 8 pieces per skewer.
- shishito peppers - wash and dry the peppers. Thread them onto skewers, about 4-6 whole peppers per skewer. You can also double skewer these with a bit of space in between the two skewers. Shishitos have a tendency to turn on the skewer as you cook them, so using two skewers helps you flip them easily.
- cherry tomatoes - wash, dry, and thread 4 tomatoes onto each skewer.
- red onion - peel the onion then trim off the top and bottom. Cut the in half along the equator. You should have two half spheres. Place the large cut sides down onto the cutting board, then cut into halves. Cut the halves into thirds, keeping the onion slices together. Thread the wedges onto skewers with 3 wedges per skewer.
- asparagus - trim off the woody ends then cut the asparagus into 2.5 inch lengths. Skewer 6-8 pieces on per skewer.
Vegetable yakitori sauce
Yakitori sauce is tare (which translates to sauce in Japanese) and it contains the classic Japanese combination of sake, mirin, soy, and sugar.- sake - aka Japanese rice wine. It adds umami and a natural sweetness. Just like wine in French cooking adds an extra layer of aroma and flavor, sake is common in Japanese cooking – it’s in almost every sauce. They sell cooking sake at Asian grocery stores, or if you’re feeling flush, you can use the nice sake you have for drinking. Buy a bottle and you won’t regret it, it’ll take your Japanese cooking to another level.
- mirin - Japanese sweet rice wine and the other ingredient that is key in Japanese cooking. Compared to sake, it has a lower alcohol content and higher sugar content that occurs naturally from fermentation. It’s used as a seasoning and glazing agent. They sell mirin in the Asian aisle and at Asian grocery stores.
- soy sauce - I’m pretty sure you have a bottle of soy sauce in your pantry. It adds umami, a glorious brown sheen, and is delicious. A Japanese naturally brewed soy sauce would be best for this tare.
- sugar - this helps thicken the sauce as well as adding a glossy sweetness. We like to use brown sugar but any sugar or sweetener will do.
- green onions, ginger, garlic - these aromatics are optional and aren’t typically found in traditional tare but I find that they add a pleasant flavor that accentuates the freshness of vegetable yakitori.
How to grill vegetable yakitori skewers
The good news is that grilling vegetables is super easy. Heat the grill to medium-high. Brush the grill or the vegetable skewers with a neutral oil then set them on the grill. Flip them every 2-3 minutes so they grill evenly on both sides. They’re done when they’re tender and have a bit of color on them, generally, it takes about 5-8 minutes, depending on the vegetable and size. When the vegetables are tender, move them off the grill and generously brush all sides with tare then place the skewers back on the grill to lightly caramelize the sauce. Enjoy hot, right off the grill, but be careful not to burn yourself on the deliciousness!What kind of grill for yakitori
Traditionally you would use a grill with binchotan - a special type of Japanese charcoal that gets extra hot and burns bright white. At home you can use a regular BBQ grill, a grill pan, a cast iron-pan, or even the broiler in your oven. Our favorite way to grill is to use the tiny electric yakitori grill we packed home from Japan, but we also regularly use our gas BBQ grill as well.What kind of skewers for yakitori
There’s a huge variety of skewers out there for yakitori, from double pronged to thick flat sticks, to simple short rounds. Typically Japanese yakitori skewers are shorter than what you normally see at a BBQ. They’re about 6 inches in length. You can order them on amazon: here are some regular ones and here are the one that have a flat tab at the end). Usually you can find short skewers at the grocery store too. Make sure you soak them in water for at least 1 hour before grilling, otherwise the sticks might burn and break off.Extra seasoning for yakitori
Most yakitori-ya (yakitori shops/restaurants) pride themselves on their tare so they don’t really give you anything extra to season your skewers with. The exception is shichimi togarashi or sansho pepper. Both are delicious!- Shichimi togarashi is a seven spice mixture containing ground chili pepper, ground ginger, sansho, black sesame, white sesame, dried orange peel, and nori. It’s pleasantly spicy with a citrusy aftertaste.
- Sansho is a Japanese peppercorn with a lemony citrus flavor that has a slight numbing effect, kind of like Sichuan peppercorns. It comes finely ground so you can sprinkle it on as you please.
How to throw a vegetable yakitori party
- Make the sauce - you can make the yakitori tare the morning or day before your yakitori party. It’s best to go ahead and make a double batch so you don’t run out. The sauce will keep in the fridge, tightly covered, for up to a week.
- Prep the yakitori - Soak the skewers, wash all the vegetables, cut, and skewer everything. You can do this ahead of time, just make sure to cover everything tightly and keep it in the fridge before grilling.
- Set the table - You’ll need a portable indoor grill or a portable indoor burner with a large pan or grill pan. Place the grill in the center of the table so everyone can reach. Pour some neutral oil into a glass or liquid measuring cup along with a brush so you can oil the grill. Pour the yakitori sauce into a tall, thin container (one that you can easily dip the skewers into). Add plates, chopsticks, glasses, and napkins. Set out the shichimi togarashi and sansho. Have an empty cup for discarded skewers. Add some personal decorative touches. Set out the plates/trays of vegetable yakitori.
- Pour the drinks - anything you like: Japanese beer, sake, maybe some iced oolong tea or sparkling tea.
- Grill and enjoy - Heat up the grill at the table, add the skewers, grill, drink, and chat the night away.
What to serve with vegetable yakitori
Usually vegetable yakitori and chicken yakitori go hand in hand and you end up pretty full. But if you’re making a meal of just vegetable yakitori, I recommend a fluffy bowl of rice, really good miso soup, and some pickled cucumber sunomono. Happy grilling friends! I’m so happy it’s grilling season again! xoxo stephVegetable Yakitori
If you love grilled vegetables, you’re going to love Japanese grilled vegetable yakitori.
- 1 Japanese eggplant
- 1 zucchini
- 2 king oyster mushrooms
- 1 bell pepper
- 24 shishito peppers
- 24 cherry tomatoes
- 1 red onion
- 8 spears asparagus
Tare
- 1/2 cup soy sauce
- 1/2 cup mirin
- 1/4 cup sake
- 2 tbsp sugar
- 4 green onions (whites only)
- 1 clove garlic
- 1 slice ginger
In a very small pot, combine the soy sauce, mirin, sake, sugar, green onion whites, garlic, and ginger. Bring to a simmer over medium heat and when bubbly, reduce the heat to low. Let the sauce bubble away and reduce until it’s thick and glossy, it should take about 20 minutes. Keep and eye on it and stir it every once in a while. While the tare is reducing, you can prep the vegetables. When the sauce is slightly thick, remove the aromatics and discard.
Wash the vegetables and cut into 2-2.5 inch even bite-sized pieces that are easy to thread onto skewers. Long, baton-like shapes work best.
Thread the vegetables onto the skewers, with 4-6 pieces of vegetables per stick.
Grill the skewers on a medium-hot grill, flipping occasionally, until the vegetables are tender and slightly charred, about 5-8 minutes, depending on the vegetable.
Brush the yakitori generously with the tare and continue to grill for 1-2 more minutes or until the tare caramelizes slightly. Enjoy hot!
Estimated nutrition is for 1 tbsp tare, no vegetables.

I Am... Coconut Macaroons
I’m a huge fan of macaroons, especially when they’re homemade. I love coconut macaroons! I don’t mean those delicate, finicky French almond macaron treats – I mean crisp and coconutty haystacks. A good coconut macaroon is a delicious thing: tall and mounded with crisp and crunchy outsides and soft chewy insides. They’re coconutty, hearty, chewy little cookie-cakes that are the perfect tea time snack.
How to make coconut macaroons
Making coconut macaroons is super easy. It’s probably the easiest cook you’ll ever make. All you do is measure, stir, and bake. No whipping eggs, no chill time, just mix, bake, and eat!- Mix. Mix together shredded coconut, a bit of flour, and sugar.
- Stir. Stir in the egg whites until everything comes together.
- Scoop. Scoop out little mounds on to a baking sheet.
- Bake. Bake until lightly toasted, let cool, and enjoy!
Coconut macaroon ingredients
You only need four ingredients for these perfectly plush cookies!- Shredded coconut. You’ll want to pick up a bag of unsweetened shredded coconut, also sometimes called fancy coconut. More on shredded coconut and all of its varieties below!
- Sugar. We’re going to use just enough sugar to bring out the natural sweetness of coconut.
- Flour. Lots of macaroons are gluten free (these can be too, just sub almond or coconut flour!) but I find that just the tiniest amount of flour helps everything hold together properly.
- Egg whites. Egg whites are what is going to bind everything and also give the macaroons crispy edges and a moist middle.
What is a macaroon?
If you haven’t had one, macaroons are little coconut cookie-cakes that are usually mounded up like a cute little snow capped mountain. They’re dense and moist and sweet and are probably going to be the easiest cookie you’ll ever make. They also keep well for days making them the best bake ahead treat. If you like mounds bars or almond joys, you will LOVE these coconut macaroons.Macaron vs macaroons
What is a macaron?
A macaron is notoriously difficult to make little French flat almond floured based cookies that sandwich different flavored fillings.What is a macaroon?
Macaroons are mounded cookie haystacks made with shredded coconut. The only difference between their names is an extra “O” but the difference between the two treats is vast. Personally, while I love having a macaron on occasion (if it’s from a patisserie and well made) it’s more of a sometimes treat. Truth be told, I would much rather eat macaroons.What is shredded coconut?
Shredded coconut is what you think of when you buy coconut for baking. It’s dry, but with a tiny bit of moisture, shredded into thin strips. You’ll find it in the baking aisle. Shredded coconut goes by a bunch of different names: grated coconut, desiccated coconut, dried shredded coconut, and fancy coconut. If you end up getting desiccated coconut, you’ll find that its pieces are not as long as shredded coconut. It will still work for these macaroons, but I prefer the texture of shredded. Whichever type of shred you end up getting, make sure you go for unsweetened.Tips and tricks for coconut macaroons
Use a cookie scoop! I like my trusty medium cookie scoop, which portions out the batter into 1.5 tablespoon cookies. Don’t bake them too long. You want a little bit of golden toastiness, but don’t over bake or you might end up with dry macaroons.How to decorate macaroons
Sometimes I keep them pure and have them plain but a little chocolate bottom with a drizzle of chocolate on top is very festive. You can even make peppermint bark macaroons by putting 1/4 teaspoon mint extract into the batter, drizzle with dark and white chocolate, and sprinkle on crushed up peppermint candy canes!How to make chocolate dipped macaroons
- Melt 1/4 cup (about 2 ounces) of chocolate in a double boiler over low heat while stirring. Or, microwave on low, stirring every 20 seconds, until melted and smooth.
- Take a baked macaroon and dip the bottom in the melted chocolate and place on a parchment paper lined baking sheet.
- Optional: Use a spoon to drizzle extra chocolate on top.
- Let the chocolate set in the fridge.
Why this coconut macaroon recipe?
- No whipping egg whites
- No condensed milk
- Your macaroons will not spread because the batter is stiff
- Your macaroons will not burn because there isn’t a huge amount of condensed milk pooling around the edges
- Super simple, only 4 ingredients
- You can easily make them gluten free by swapping the flour for coconut or almond flour
- Mega coconutty flavor
- Perfectly toasty on the outside and chewy and moist on the inside
- Super fast
How long do coconut macaroons last?
To store and keep your coconut macaroons, keep in an airtight container on the counter for up to 5 days. Happy macaroon-ing! I ate five of these for breakfast today >_< xoxo steph PS - Other things to make with shredded coconut if you have some extra:- Small Batch Triple Coconut Bread
- Blueberry, Coconut, Dark Chocolate Cookie
- Sunday Brunch: Christmas Morning Coconut French Toast
- Coconut Almond Rice Krispie Treat
Coconut Macaroons
A good coconut macaroon is a delicious thing: tall and mounded with crisp and crunchy outsides and soft chewy insides.
- 172 g unsweetened shredded coconut (6oz, roughly 2 2/3 cups)
- 67 g sugar (2/3 cup)
- 45 g all purpose flour (1/3 cup)
- 120 g egg whites (about 4 egg whites)
Preheat oven to 325°F. Combine the coconut, sugar, and flour in a bowl.
Stir in the egg whites.
Use a cookie scoop to portion out the cookies in mounds and place the mounds on a parchment paper lined baking sheet.
Bake for 18-20 minutes or until the edges are very lightly golden brown. Let cool and enjoy!

I Am... Cheesy Potatoes
If you’re looking for a warm comforting side dish or just a great snack, cheesy potatoes are for you. Creamy, tender potatoes baked in a cheesy sauce until bubbly and golden. Perfect for holidays and big dinners, or anytime you need more cheese in your life. If you love potatoes and cheese, this is the ultimate potato casserole. It’s perfect for serving with ham, chicken, pork, or beef. Heck, I even eat it just on its own without a protein. It’s warming, filling, and the best comfort food side dish there is – hearty and homey but delicious enough to serve to company.
What are cheesy potatoes?
Cheesy potatoes are potatoes that are cooked until tender and then baked in a creamy cheese sauce. The potato casserole gets bubbly and hot and the top becomes golden and delicious. Cheesy potatoes are similar to scalloped potatoes but with diced potatoes and a thicker sauce. They’re also a lot easier to make! There are a ton of cheesy potato recipes out there that use canned condensed soup as the base but making your own cheese sauce is simple and so much more satisfying.What makes them so good?
Potatoes are the perfect cozy comfort food and when you pair them with a creamy, cheesy sauce, they are just indescribable. Think of steamy, warm, and fluffy potatoes in a savory gooey cheese sauce that has garlicky-onion flavors and a hint of sour cream tang. SO GOOD.How to make cheesy potatoes
- Cook the potatoes. Bring a large pot of salted water to a boil and cook the potatoes until fork tender, then drain well.
- Make a roux. While the potatoes are cooking, make a roux by melting butter in a saucepan. When it’s melted, add in the flour and spices and stir until everything comes together.
- Add the milk. Pour the milk in slowly, stirring so the sauce is smooth and creamy. When you’re done adding in the milk, let the sauce come to a simmer so it thickens up.
- Melt the cheese. Add the cheese and some sour cream and stir until melted and creamy.
- Stir in the potatoes. Add the drained potatoes and mix everything up. Sneak a bite or five!
- Bake. Put the potatoes in an oven safe dish and top with cheese, bake until bubbly then dig in.
What are the best potatoes for cheesy potatoes?
There are only two kinds of potatoes that are perfect for cheesy potatoes: Yukon golds (my absolute favorite) and Russets. Yukon golds are perfect for cheesy potatoes because they’re slightly starchy, beautifully yellow, and have a rich buttery potato taste. They’re a dense potato with a thin skin, and when you use them, you get a more luxurious casserole. Russets (or Idaho) potatoes are those big potatoes with the dusty skin that most people use for baked potatoes. These are also excellent for cheesy potatoes: fluffy, dry, and starchy, when cooked right. For us these are a good second choice. Russets are the more mild potato of the two potatoes I recommend and if you’re a fan of lighter, fluffier potatoes, they make a cheesy potato with a more delicate, fall apart texture.- Yukon golds: dense, buttery, rich, more potato flavor, sauce won’t be as thick but the potatoes will hold their shape.
- Russets: light, delicate, fluffy, mild potato flavor, will thicken the sauce, but fall apart more.
What kind of cheese for cheesy potatoes
Classic is cheddar with it’s familiar orange glow, but you can also switch it up and use any kind of melty cheese. Some cheeses that will work are: Swiss, marble, Tex-mex, Parmesan, Gruyere, mozzarella, harvarti. Any melty cheese will work great.Do you need to peel the potatoes
That’s completely up to you. There are a lot of nutrients in potato skins and it’s an extra step but I actually do like to peel them just so all the potatoes have the same texture. If you’re a fan of potato skins, just give them a good scrub and leave them on.What size pan
You’ll want to use a 2 quart (8 cups) baking or casserole dish. It can be an 8x8 inch or 11 x 7 inch. As long as it is an oven safe dish with 8 cups capacity, you’re good to go.What to serve with cheesy potatoes
Make ahead
Cheesy potatoes are the perfect make ahead side – you can make the entire dish and hold off on baking OR you can go ahead and bake the dish before hand and then warm it, covered in foil, in a 350°F oven until warmed through, about 15-30 minutes.How to store
Wrap the potatoes tightly and keep them in the fridge for up to 5 days.How to reheat
Simply reheat in the microwave for 1-2 minutes until heated through or warm covered in foil, in a 350°F oven until heated through, about 15-30 minutes. I cannot wait for cheesy potato season, cheesy potatoes are life! xoxo steph PS - Pro tip, I love adding things on top afterwards, sliced scallions, everything bagel spice, Tajin, or even an extra dollop of sour cream and bacon bits!!Cheesy Potatoes
Cheesy potatoes are hearty and homey and delicious enough to serve to company.
- 2 lb potatoes
- 3 tbsp butter
- 3 tbsp all purpose flour
- 1 tsp garlic powder
- 1 tsp onion powder
- 1/2 tsp dry mustard powder
- 2 cup milk
- 2 cup shredded cheese (divided)
- 1 cup sour cream
Heat the oven to 350°F. Peel and chop the potatoes into 1.5-2 inch chunks. Place in a pot and cover with cold water. Add a pinch of salt and bring to a boil over medium high heat and let simmer, uncovered, until the potatoes are fork tender, 13-15 minutes. Drain well.
Meanwhile, in a large saucepan, melt the butter over medium heat. When melted, stir in the flour, garlic powder, onion powder, and dry mustard, until smooth and incorporated.
Pour the milk into the pan in a thin stream while whisking, until smooth. Keep on medium heat, stirring occasionally, until the sauce bubbles and thickens, 3-5 minutes. Add half of the shredded cheddar and the sour cream and stir until melted and creamy.
Add in the drained potatoes, mixing until coated. Taste and season with salt and pepper.
Spread the cheesy potatoes into an oven safe dish and top with the remaining cheese. Bake for 20-30 minutes or until golden brown and bubbly. Remove, let cool slightly, and enjoy!

I Am... The Ultimate Guide to Seitan
Seitan is a super versatile vegan protein made from vital wheat gluten. It's what's used to make vegan chicken, aka fake chicken, and doesn't that lead image look just like chicken? If you’re vegan, or maybe even if you’re not but you’ve been peeping on viral cooking Tiktoks, I’m sure you’ve heard of seitan. These days, many people call it fake chicken because it's made from flour. However, even though it's made from wheat, it's nothing like bread. When it’s cooked it looks and acts like meat! It’s high in protein which makes it the perfect vegan meat alternative. Like meat, seitan can be prepared multiple ways: boiled, baked, deep-fried, pan fried, sliced, crumbled, or shredded. Like tofu it can take on SO many flavors and is extremely versatile.
What is seitan?
Seitan is wheat gluten. Essentially, it’s food made from gluten, the protein found in wheat. The commonly used name, seitan, is Japanese (セイタン) which implies that it was invented in Japan, but wheat gluten first appeared in China in the 6th century. It's an incredibly popular ingredient in Asian and Southeast Asian countries as a vegan alternative to meat because of its chewiness that’s reminiscent of the texture of meat. You can buy it at health food grocery stores or Whole Foods, but even better, it’s really easy to make at home! You can make it one of two ways: either by using whole flour and washing it or by using vital wheat gluten.How to make seitan
- Make the dough: Mix together 1 cup vital wheat gluten with 1/4 cup chickpea flour. Add some seasonings and stir in 1 cup of water or vegetable broth.
- Knead the dough: Knead the dough for 5-10 minutes so it develops strands of gluten - this is what gives seitan its meaty texture. The more you knead, the more chewy it'll be. Conversely, the less you knead, the more tender, so adjust according to what you like. I like to use a stand mixer.
- Let it rest: Let the dough rest, covered for about 5 minutes so the gluten can relax.
- Simmer: Cut the dough into 4 (or more pieces), shape and simmer on low in a flavorful broth.
- Use it in recipes: Your seitan is cooked and ready to eat! You can eat it as is, or use it in recipes where you would use meat.
Seitan ingredients
All you need is vital wheat gluten and water.Where is it from?
Seitan was first invented as a meat alternative for Chinese Buddhist monks because one of the key tenets of Buddhism is strict vegetarianism. There’s a huge amount of Chinese vegetarian food that looks just like regular Chinese food but is made with seitan. Nowadays it's popular all over the world for vegans and vegetarians.How is seitan used?
Seitan is used like most meat and meat alternative products. You can use it anywhere meat is used! It can be shredded and crumbled, sliced, and made into sausages or nuggets. Anything meat can do, it can do too.What does seitan taste like?
Seitan on its own doesn’t taste like much - it’s very mild, a little bit savory and kind of bland. It's more about texture rather than its taste. Texturally, it's ultra meaty and can take on any flavor. You can season it to taste like meat, but most people use it as a blank slate which then can be seasoned when you cook it in recipes.What is seitan made of?
Seitan is made from wheat gluten, the protein found in wheat.The easy way to make seitan
The key to making seitan at home is vital wheat gluten! It used to be a difficult thing to make but now that vital wheat gluten is widely available, it’s the easiest meat alternative you can make at home.What is vital wheat gluten?
Vital wheat gluten is the extracted form of protein found in wheat. It’s what helps make bread bouncy, squishy, and elastic. When you isolate the gluten protein in wheat, you end up vital wheat gluten, which, when mixed with water and kneaded a little, has a dense meat-like texture. Optional: Adding a bit of an alternative type of flour gives you a softer texture. Using just gluten can yield an end product that's a bit tougher than some people like. That’s why when you look at the ingredients of on a commercial package of this stuff, you’ll often see soy protein. You can use any alternative flour you like, I like chickpea or soy flour. If you don’t have chickpea flour but you have dried chickpeas, you can make chickpea flour at home by using a blender or food processor to grind dried chickpeas until they are fine and powdery.Washed flour seitan aka Tiktok seitan
Washed flour seitan is what’s going viral on Tiktok and while it definitely works, it’s a LOT more work than using vital wheat gluten. It can take hours. Here’s how you do it:- Mix 3 parts flour with 1 part water and knead. Place the ball of dough in a bowl of cool water. Wash the dough by kneading and stretching.
- Discard the water, add new water and keep washing, discarding and adding new water, until the water becomes more or less just touch cloudy and your dough is stringy.
- Let the dough rest in a colander for 20 minutes then shape and cook the same as seitan made from vital wheat gluten.
How to cook seitan
Just like meat, there are tons of ways you can cook seitan. I like to simmer it so that the flavor of the stock permeates and flavors the inside. My favorite way to finish it is to rip it into pieces then pan fry after it’s been simmered. Steam: steaming creates a fluffy rise that has bubbles and aeration of the gluten. It’s more dense than simmered seitan and not as juicy - it’s good for searing or stir frying. Steaming is also slightly quicker than simmering. Simmer: Simmering gives you a fluffy rise and lots of aeration of the gluten. It also has the added bonus of adding flavor to the seitan because you can season your broth. When you’re simmering, be careful not to let it come to a boil because it will get overly puffy and lose the meaty texture you’re looking for. Deep fry: Deep frying gives you golden puffs that are airy and have a smooth texture when you cook it again. Pictured below.Where to buy it
If you’re wondering where is seitan at the grocery store, it’s in the fridge section! You’ll find it next to the tofu. Sometimes you may need to go to the local Asian grocery store, where it’ll be in the frozen section as well.How to store
Store it wrapped, in a sealed container in the fridge for up to one week.Is it healthy?
It's an excellent source of lean protein and is a great meat substitute. It’s low in saturated fat and carbs. That being said, if you’re sensitive to gluten or are celiac, you’re better off eating tofu because seitan is made from vital wheat gluten. Hopefully this answers some of your questions about seitan and inspires you to try making it at home! If you’re looking for meat alternatives that aren’t tofu, this is a great choice.Seitan recipes
- chicken fried rice but make it seitan!
- pan fry seitan and slather it in this super addictive Korean fried chicken sauce
- shred or chop up seitan and pop it into taquitos
- slice seitan and add it to super savory fried yakiudon noodles
Seitan Recipe
I can't believe it's not meat!
- 1 cup vital wheat gluten (~120g)
- 1/4 cup chickpea flour (~30g, or soy flour)
- 1 tsp onion powder
- 1 tsp garlic powder
- 1/2 tsp salt
- 3/4 - 1 cup water
- 6 cups broth (of choice, eg: vegetable)
- 1/2 medium onion
- 1 carrot (roughly chopped)
- 1 stalk celery (roughly chopped)
- 1/3 cup soy sauce
In a large bowl, stir together the vital wheat gluten, chickpea flour, onion powder, garlic powder, and salt.
Add the water or vegetable broth and stir into a dough. Turn out onto a work surface and knead for 5-10 minutes. The more you knead, the more meat-y your seitan will be. If you’re looking for seitan that can shred, knead longer. If you want more tender seitan, knead for less time. Cover and let the seitan rest for 5 minutes.
While the seitan is resting, bring the vegetable broth, onion, carrot, celery, and soy sauce up to a boil in a very large pot then turn the heat down to the lowest it will go, so that it’s barely simmering.
Cut the dough into at least 4 large pieces and shape. You can also cut or pull the dough into small strips or chunks.
Optional: Shape and wrap the seitan in foil before simmering. This will give you a more dense, meaty texture because the seitan won’t have as much room to expand.
Add the seitan to the barely simmering broth and cook, uncovered for 1 hour, making sure it doesn’t come to a boil.
When the hour is up, remove from the heat and let cool. Use immediately or store in the broth for future use. Refrigerate for up to 1 week or freeze.
Note: some of the photos feature sweet and sour seitan. To make:
1 lb seitan, torn into small pieces
2 tbsp cornstarch
1/4 cup sugar
3 tbsp ketchup
2 tbsp white vinegar
1 tbsp soy sauce
1 bell pepper cubed
1/2 red onion cubed
Toss the seitan with 1 tbsp cornstarch to coat evenly.
Heat up a bit of oil in a frying pan and lightly fry the seitan until golden and crisp over medium high heat. Remove from the pan and let rest on a wire rack.
Make the sweet and sour sauce: whisk together the remaining 1 tbsp cornstarch with 1/4 cup water. Whisk in the sugar, ketchup, vinegar, and soy sauce.
Add the sauce to the pan and bring it to a boil. Once bubbling, turn the heat to low and add the vegetables. Cook until your desired doneness then remove from the heat (we keep the vegetables almost raw).
Add the cooked seitan to the sauce and toss until well coated. Enjoy!

Popular
 2015 Holiday Giveaway
  One-Pot Lemon Scallop Pea Spaghetti
  Beer Battered Onion Rings, Jalapeno Aioli
  2014 Holiday Gift Guide and a Giveaway
  Easy Gourmet Hot Wings and a Giveaway!
 The Ultimate Veggie Sandwich
  Vegan(!) Creamy Corn Soup Recipe
  Sunday Brunch: Grilled Cheese Eggs Benny
