I Am... Air Fryer Pork Chops
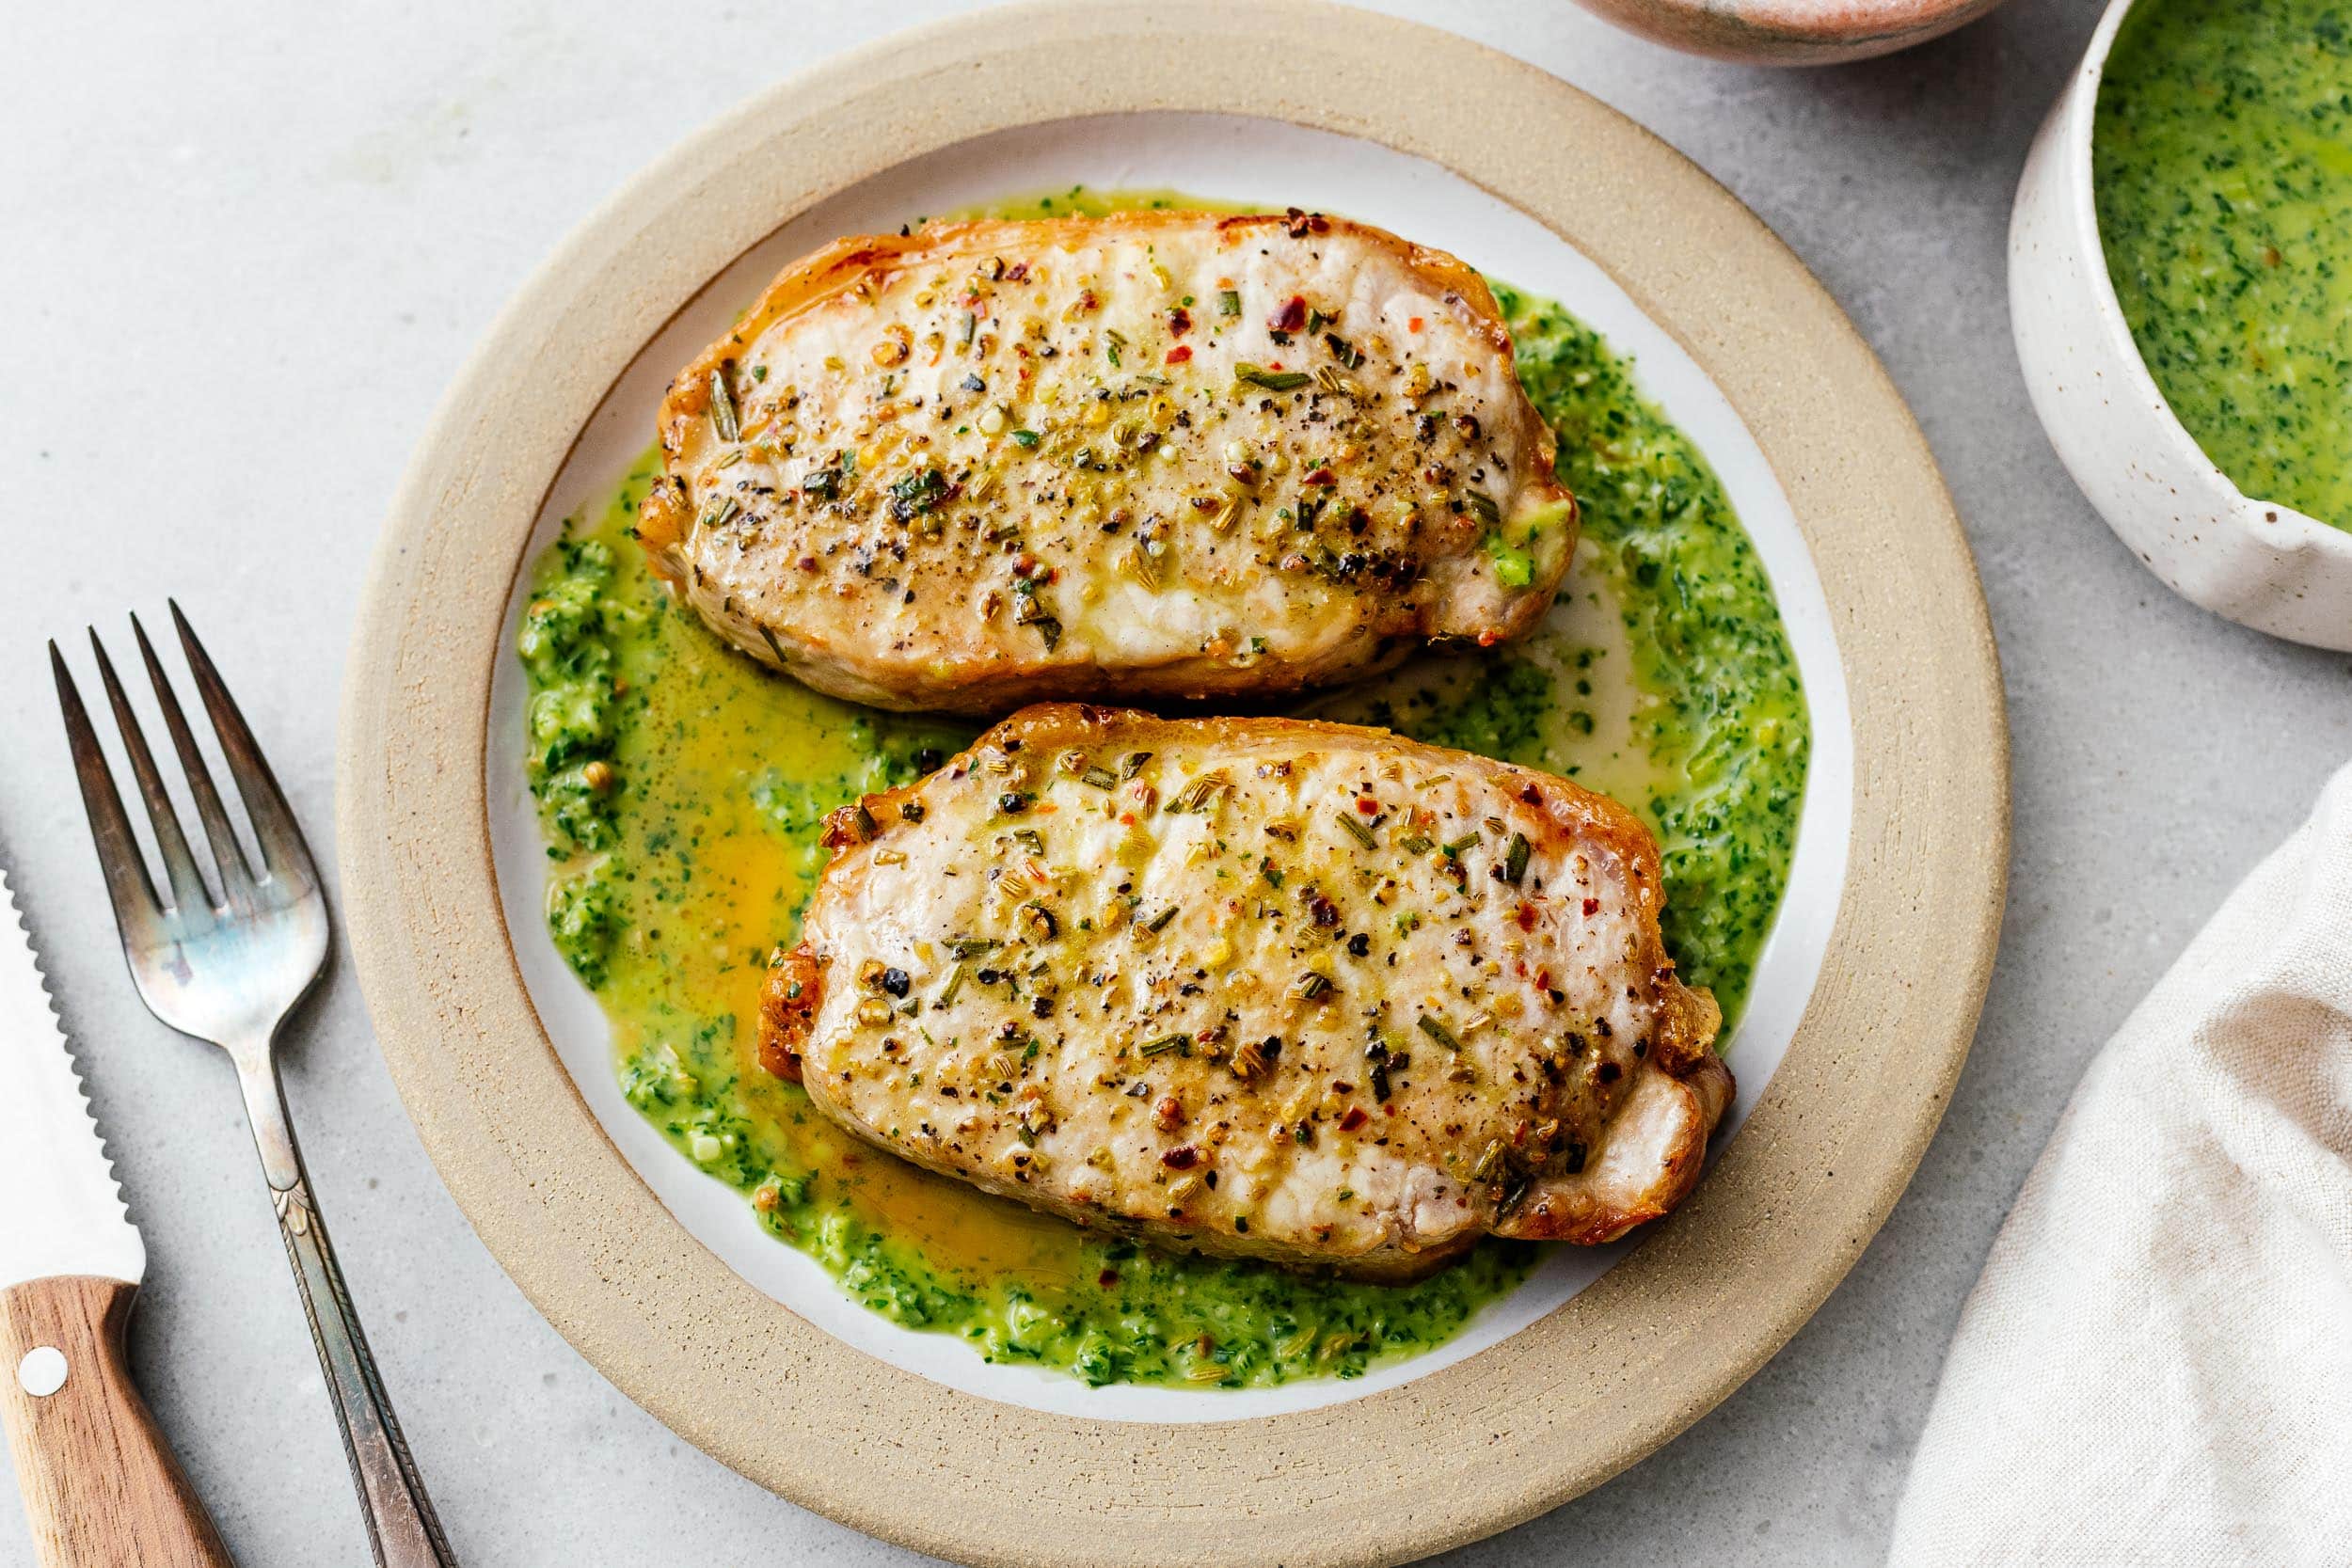
Air fryer pork chops coming in hot and fast with the flavors of Italian porchetta! Do you ever wander by someone’s house and smell what they’re cooking for dinner? Every time Mike and I smell someone’s cooking and it smells good, we turn to each other and say, “PORK CHOPS!” To be honest, it’s probably not pork chops at all but Mike is low-key obsessed with pork chops and it’s a funny little thing we do. Anyway, both Mike and I love pork chops. What’s not to love about a thick cut of juicy pork? There are a couple of secrets to making the best pork chops and I’m going to share them ALL with you.
First off, let’s talk about flavors.
I seasoned these thick and juicy guys with the classic flavors of porchetta, the insanely iconic Italian pork roast that’s stuffed with rosemary, fennel, and herbs. To gild the lily I whipped up a quick salsa verde full of fresh herby lemon flavors. The green sauce and pork chops together are going to blow your mind.To make the best pork chops, buy the right kind of chop
Thick cut pork chops for the win! The best pork chops for air fryer pork chops (or any pork chop in general) is a thick, center cut pork chop. They can be bone-in or boneless, but you want them thick! Thin pork chops cook too quickly and end up being dry. So if you love pork chops, get them thick, at least 1.5 to 2 inches thick.Pork chop temp
The USDA recommends 145°F for pork chops.How to make juicy pork chops
They key to making juicy pork chops is not over cooking them. Pork chops tend to be lean and have a very small margin for overcooking. USDA says that the safe temp for pork is 145°F which is a bit rosy and quite juicy. Most people are used to overcooked pork chops so they’re scared of pink. If you want juicy chops, invest in an instant read thermometer, cook your pork to 145°F (or even to 140° and let the carryover heat bring it up to temp) and you’ll never eat dry pork chops again. Don’t fear the pink!How to cook pork chops in the air fryer
- Dry the chops. Give the pork chops a pat dry with some paper towels. This removes excess moisture from the pork chops so the surface doesn’t steam instead of caramelize.
- Oil and season. Give the pork chops a rub down with some oil (this promotes even browning) then rub on the good stuff: salt, pepper, rosemary, fennel seeds, and red pepper flakes.
- Air fry. Cook the pork chops for 12 minutes at 400°F, flipping halfway, or until the inside temp reaches 145°F.
- Rest. Remove the chops from the fryer (so they don’t over cook in the residual heat) and let rest for a couple minutes, then enjoy the juiciest pork chops you’ll ever eat!
Do I need to preheat my air fryer?
Most of the time I say that you don’t need to, but we did some A/B testing and preheating the air fryer when cooking pork chops led to juicier chops. Preheat your air fryer for 5 minutes at 400°F.How long to cook pork chops in the air fryer?
- Boneless thick cut pork chops: Air fry at 400°F for 10-12 mins, depending on size, flipping halfway.
- Bone in thick cut pork chops: Air fry at 400°F for 12-14 mins, depending on size, flipping halfway.
What if my pork chops are sad, oops I meant thin?
If you can only find sad pork chops at the store, you can still make juicy pork chops, just don’t overcook them. Prep them the same way, then cook at 375°F for 8-9 mins, flipping halfway.What should I serve with air fryer pork chops?
rice: pork chops and rice is one of my all time favorite combos and the green sauce with rice is life smooth and creamy mashed potatoes: who doesn’t love potatoes and pork? mac and cheese: those creamy cheezy noodles go so well with pork! kale with burrata: leafy greens braised in tomato sauce with some rich burrata might be the best paring ever If you’re wondering which air-fryer we have, it’s this one. I don’t know if it’s the best on the market because it’s the only one we’ve used, but it works great. It’s quiet and easy to clean and really big (which is good because you can put a lot of food in it and bad because it takes up a lot of room in our place).Air Fryer Pork Chops
Air fryer pork chops coming in hot and fast with the flavors of Italian porchetta!
- 2 pork chops (center cut, 1.5-2 inches thick)
- 1 tsp fresh rosemary (chopped)
- 1 tsp fennel seeds (crushed and divided)
- 1/4 tsp red pepper flakes (optional)
- 1/4 cup extra virgin olive oil
- 1 cup fresh flat leaf parsley (loosely packed)
- 2 tbsp freshly grated parmesan (authentic Parmigiano-Reggiano preferred)
- 1/2 tsp coriander seeds (crushed)
- 2 cloves garlic
- 1/2 lemon (zested and juiced)
Let the pork chops temper in a cool spot in your kitchen for 15-20 minutes. Preheat the air fryer for 5 minutes at 400°F. Make a rub: in a small bowl, combine 1 teaspoon salt and 1 teaspoon freshly cracked black pepper with the chopped rosemary, 1/2 teaspoon crushed fennel seeds, and red pepper flakes, if using.
Pat the pork chops dry with a paper towel. then rub them generously with 1-2 tablespoons olive oil. Coat them with the rub.
Place the chop in the air fryer at 400°F and cook for 12 minutes, flipping halfway, or until the internal temperature reaches 145°F.
While the chops are cooking, make the salsa verde: combining the remaining oil, parsley, Parmigiano, coriander seeds, remaining fennel seeds, garlic, and lemon zest and juice in a blender and pulse until smooth. Taste and season with salt and pepper.
When the chops are done, remove immediately and let rest for 5 minutes. Slice and serve with the salsa verde!
I Am... Halloween Treats: Spoopy Soot Sprite Brownies
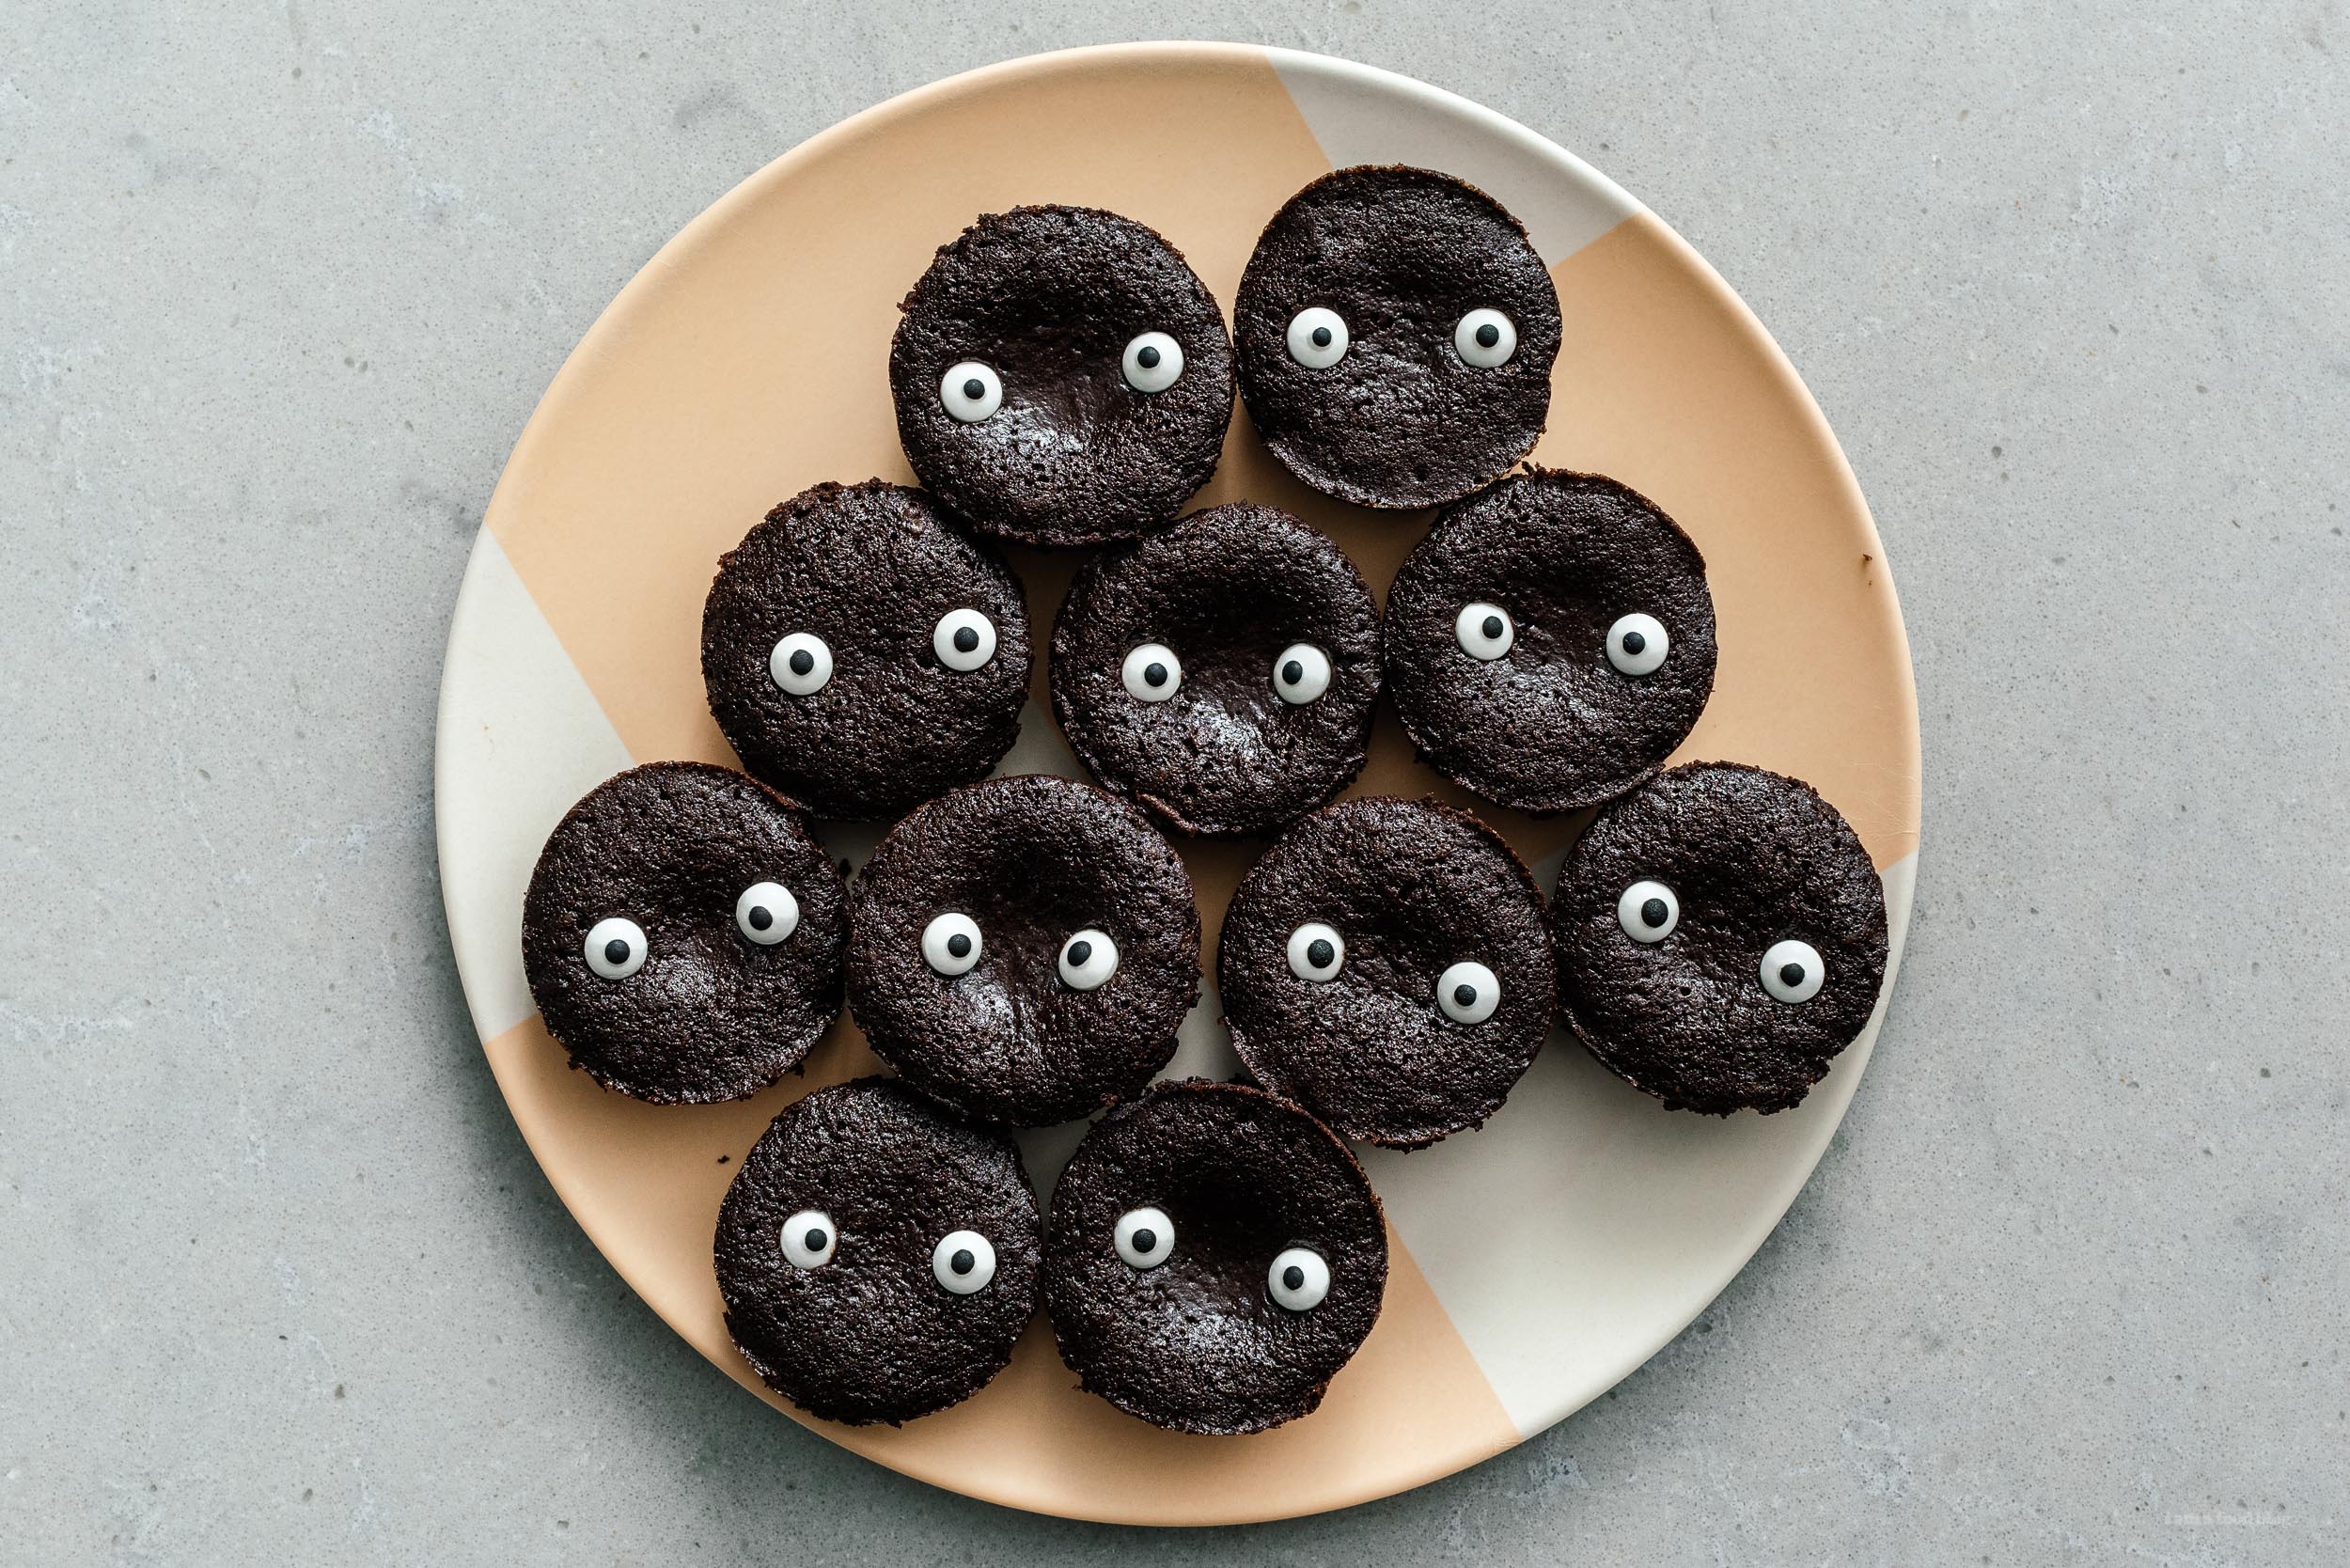
The month of spoopy (cute and spooky) is here! October is truly great, not only because it’s full on autumn and I’m in love with fall leaves, but because it’s the month where we can obsess over ALL the treats. I always make some homemade halloween treats, especially brownies, once October hits because, why not? We all need a little bit of halloween cheer in our lives, am I right? The other day Mike and I were just talking about how the month of October could be so much more: halloween trees, halloween presents, halloween stockings, halloween advent calendars! Halloween all the things! And now that it looks like trick-or-treating is a thing of the past, home baked halloween treats are just the thing. These cute little googly-eyed brownies inspired by the soot sprites in Totoro are just the spoopy cute treat you need in your life.
But wait, what are soot sprites?
If you’re fan of Studio Ghibli and Totoro, then you probably know what soot sprites, or susuwatari, are. If you haven’t heard of them, they’re cute little round dust bunnies with googly eyes and are in two Miyazaki movies: Totoro and Spirited Away. They always remind me of Halloween because a.) they’re fuzzy and b.) Totoro and Spirited Away are both perfect for watching in October.Why soot sprite brownies?
There are a ton of soot sprite cupcakes out there and I’ve even made soot sprite cookies and soot sprite onigiri but these year I was feeling like brownies were the way to go. Who doesn’t love a brownie, especially one that’s been baked in a muffin tin so it’s nice and round and just the right shape for putting eyes onto and calling it a soot sprite?Cakey vs fudgy brownies
There are two brownie camps: cakey and fudgy. I’m a fudgy brownie person all the way. I love dense, thick brownies, and this brownie doesn’t disappoint in that department, but its also more of a balance between cakey and fudgy. It’s an oxymoron, if you will: soft and cakey on the edges with a slightly denser, melty, fudgy middle. I baked them in muffin tins so they all have edges (brownie edges for the win!) and the same structural integrity. As a bonus, you don’t have to cut your brownies and every single brownie looks the same. They also kind of look like slightly larger two-bite brownies, which is hilariously cute because I love two-bite brownies.Cocoa powder vs melted chocolate brownies
These brownies are an all cocoa brownie and you might be wondering, but will it be chocolatey enough? The answer is yes! Cocoa powder is 100 percent cocoa versus chocolate which contains sugar and cocoa fats. Cocoa powder gives you more control when making brownies - you get to decide how much sugar and fat goes into your brownies. Plus, who doesn’t have a canister of cocoa in their pantry? It’s a win-win in my books.The best cocoa powder for brownies
I use unsweetened dutch process cocoa powder, which is cocoa power that has had it’s acidity reduced making the cocoa darker and more chocolatey looking, but more mellow tasting than natural cocoa power. Because natural cocoa powder is simply powdered up cocoa beans it’s more acidic, bitter, and concentrated compared to dutch process.Can you stuff these brownies?
Yes! Simply spoon some of the batter into the muffin tin, put about 1 teaspoon of your stuffing in, then spoon some extra batter on top. You’ll get a stuffed brownie that’s extra melty with a surprise in the middle. Some ideas for stuffing:- chocolate chunks/chocolate chips
- nuts: hazelnuts, walnuts, macadamia nuts, pistachios, pecans
- spreads: nutella, jam, peanut butter, cookie butter
- cookies/candy bars: crushed up oreos, biscoff cookies, chopped up candy bars
How do you get brownies out of a muffin tin?
Make sure you generously butter your tin. I also like to place a strip of parchment paper with some overhang into the tin, so I can use the overhang to easily lift the brownies out.Can you freeze brownies?
Yes, just wrap them individually with plastic wrap and place them in a air tight container. They’ll keep in the freezer for at least a month, if they last that long.Can you make these brownies without the eyes?
Of course! These will make regular brownie bites too.How to make brownie bites
- Butter your tin and line with strips of parchment paper and preheat the oven.
- Melt the butter, let it cool slightly, then mix it with the sugar and salt. Stir in the cocoa powder and instant coffee.
- Mix in the eggs one at a time then stir in the vanilla and water.
- Add the dry ingredients and mix just until there are no flour streaks.
- Bake, cool, and enjoy!
Best brownie bites tips
- Better cocoa powder = better brownies! Use a good dutch processed cocoa powder. Dutch processed cocoa powder is less acidic than regular natural cocoa powder. It’s the key to a good chocolate brownie.
- Instant coffee is the secret ingredient. Instant coffee gives just the tiniest bit of bitterness which will contrast with the chocolate and make i taste even more chocolatey. You won’t taste the coffee at all.
- Under baking is better than over baking. When in doubt, pull the brownies out a bit early. No one likes a dry brownie and the brownies will continue to cook and firm up while they cool, so under bake instead of over bake.
- Let the brownies cool. Letting the brownies cool will make them gooier, and fudgier, with a more intense chocolate flavor. If you want a warm brownie the next day, just warm it up in 30 second increments in the microwave until it’s warmed to your liking.
Homemade Halloween Treats: Spooky Googly Eye Soot Sprite Brownies
These cute little googly-eyed brownies inspired by the soot sprites in Totoro are just the spoopy cute treat you need in your life.
- 1/2 cup unsalted butter (melted and cooled)
- 3/4 cup sugar
- 1/2 tsp salt
- 1/2 cup unsweetened cocoa powder (dutch processed preferred)
- 1 tsp instant coffee
- 2 large eggs (room temp)
- 2 tsp vanilla extract
- 1/4 tsp baking powder
- 6 tbsp all purpose flour
Preheat your oven to 350°F. Lightly butter and line your muffin tins with a strip of parchment paper (so you can pull the brownies out easily).
In a mixing bowl, whisk the melted butter with the sugar and salt. Add the cocoa powder and instant coffee and mix until well combined.
Add the eggs, one at a time, mixing well to combine. Sir in the vanilla and 1.5 tablespoons of water.
Sprinkle on the baking powder, then the flour and slowly mix until just combined with no flour streaks.
Spoon the batter evenly into the muffin tins. Bake for 11-12 minutes. When done the tops will be puffy and the sides will look set. Under baked is better than over baking for a moist and fudgy center. Let cool in the tins for 5 minutes before removing and cooling on a wire rack.
To decorate brownies as Soot Sprites, you’ll need some candy eyes. Push the candy eyes into the brownies right after they come out of the oven and are still soft.
I Am... Halloween Rice Krispie Treats
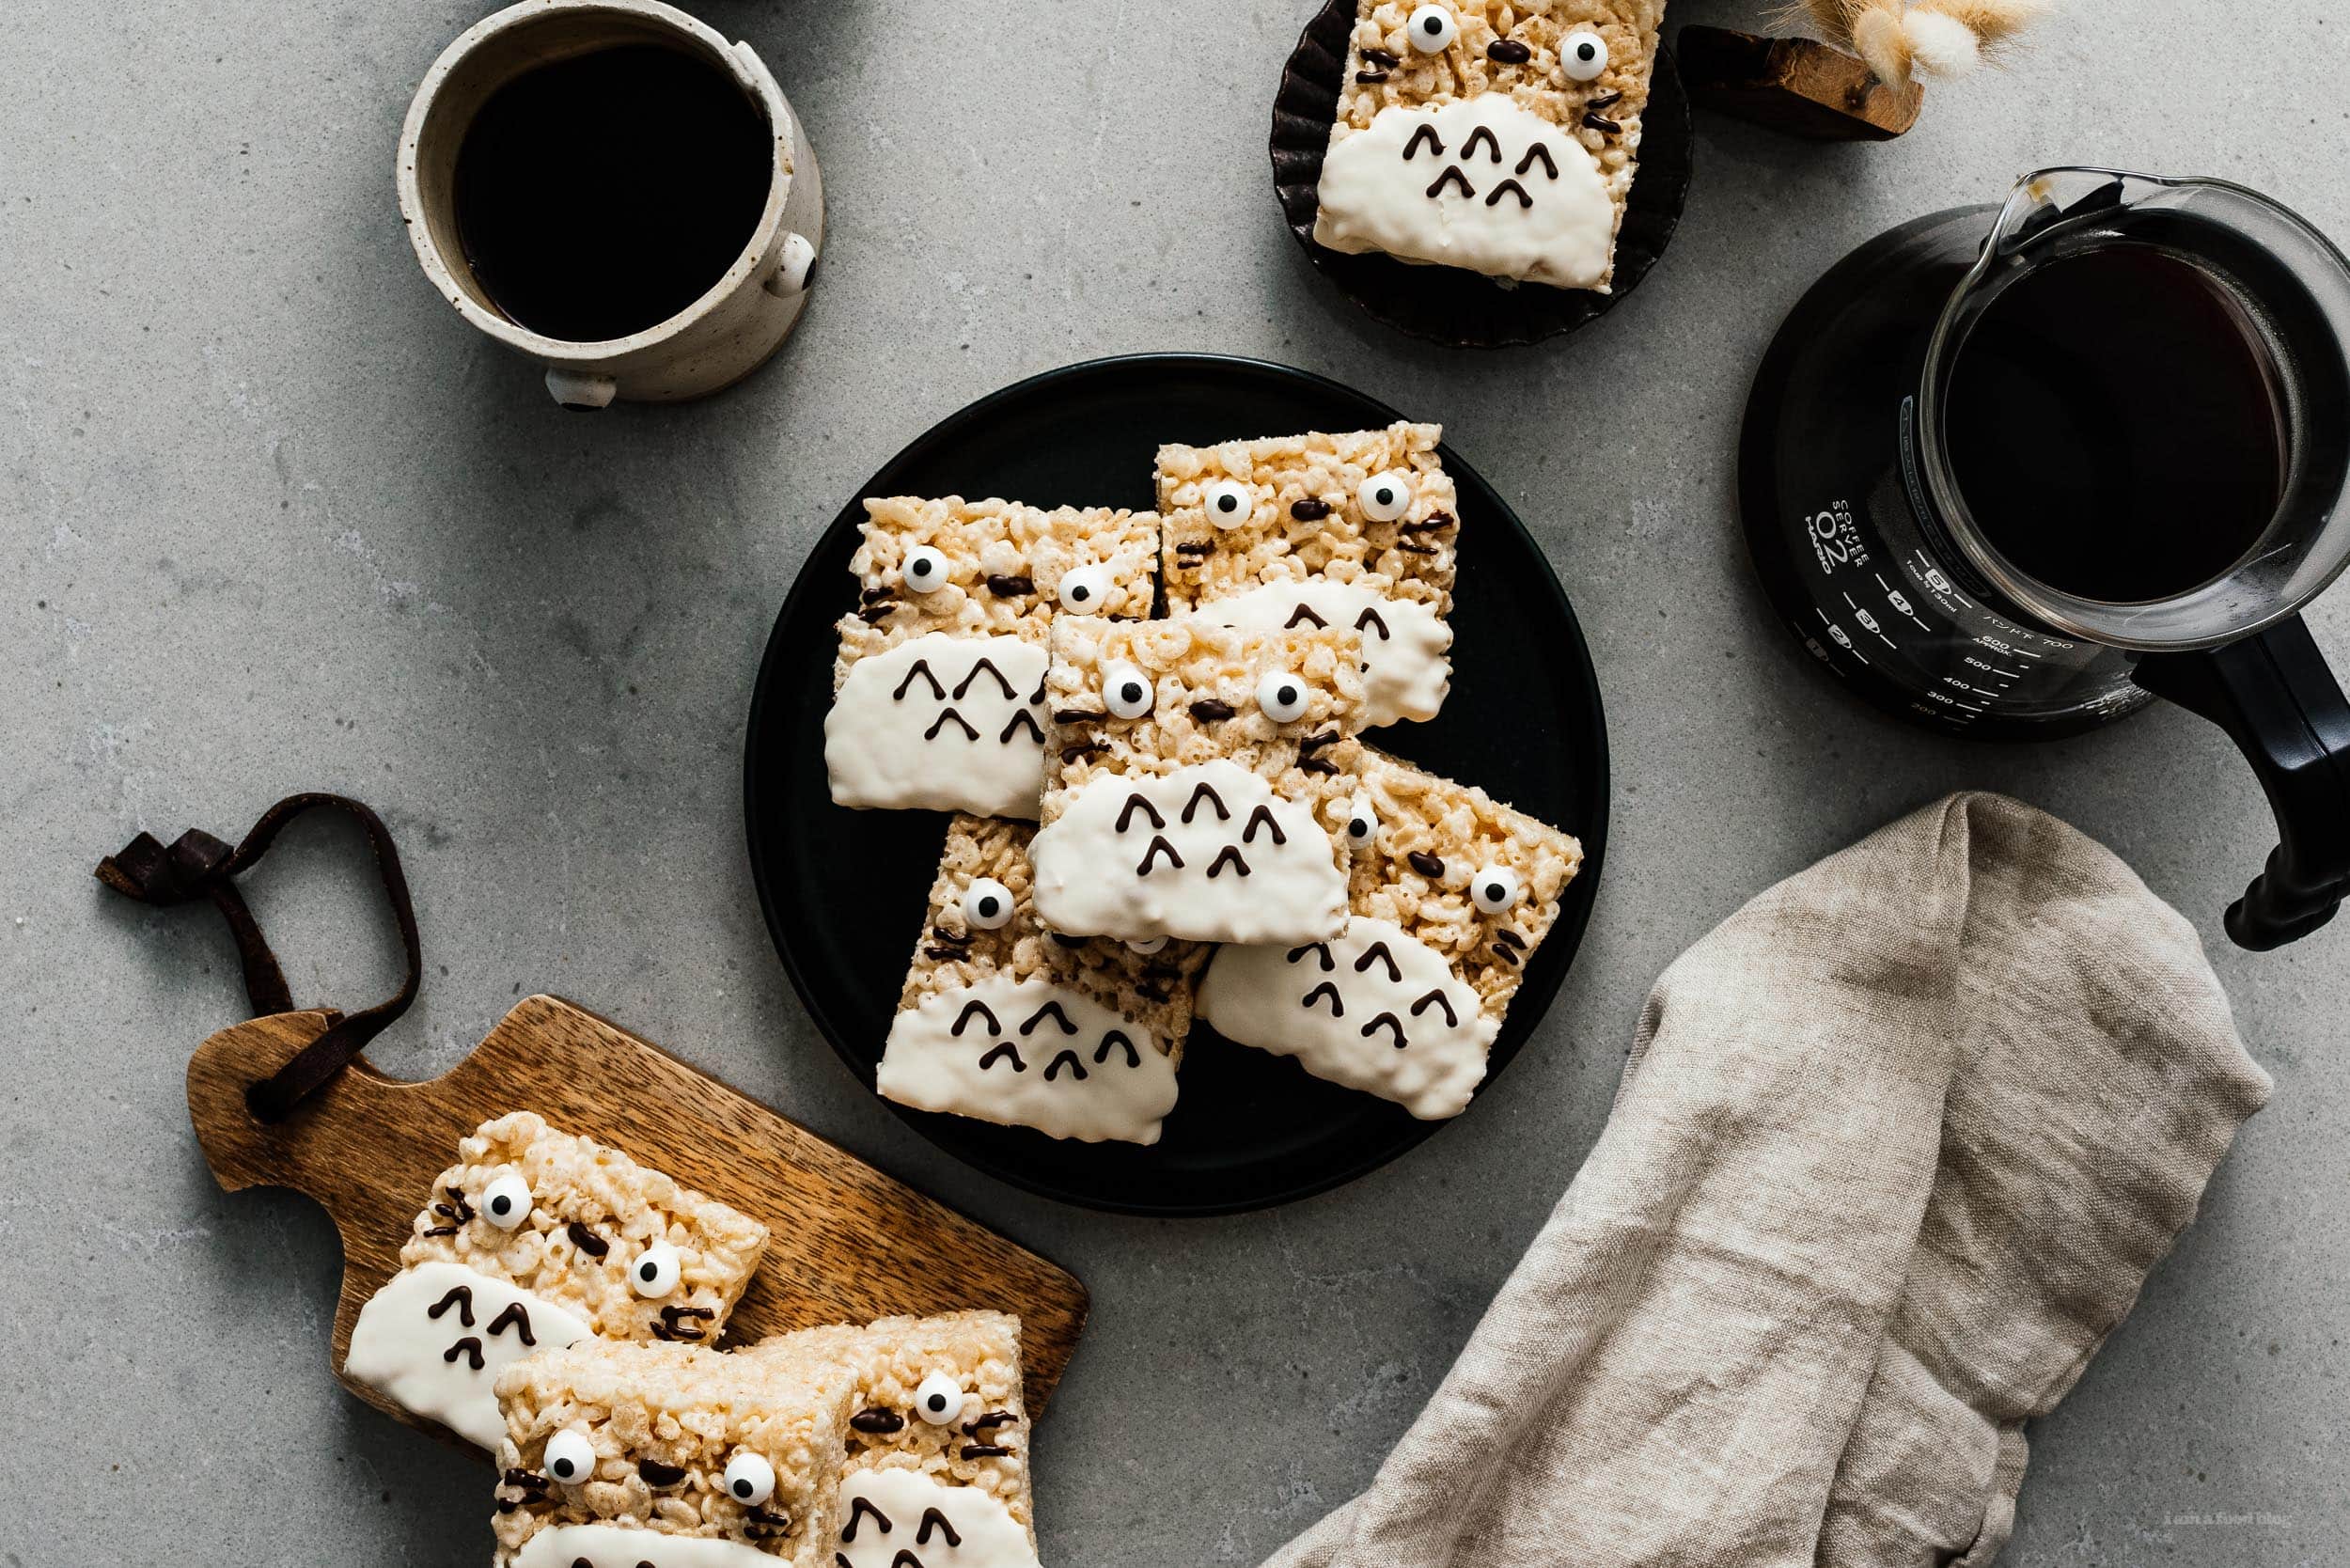
Hello! I’m back at it with some Halloween rice krispie treats dressed up as Totoro, the lovable giant bunny-cat-owl-racoon-looking creature straight from the imagination of Hayao Miyazaki. These treats are delicious, cute, and perfect for a Halloween movie night where you watch Totoro for the ten thousandth time. I feel like halloween rice krispie treats are a halloween tradition. I’ve made ones that look like candy corn, pumpkins, and mummies. This is my first year making Totoro rice krispie treats though. I love how they came out! They are SO CUTE and they taste great too. The rice krispie treats are soft and chewy and crispy: just the right ratio of butter to marshmallow to rice krispies. I don’t think I know anyone who doesn’t like rice krispie treats. They are pure treat perfection, especially when they’re homemade.
How to make super soft rice krispie treats
- Extra butter. Classic rice krispies calls for 3 tablespoon of butter, I’ve doubled it for just the right amount of butter to make these treats extra soft.
- Mini marshmallows. Use minis! They melt more consistently and give you a softer, fresher rice krispie.
- Don’t press down too hard. Don’t squish your treats! If you squish them down too much, when they cool down they won’t be as soft because everything will be compacted together.
- Eat them fresh. Fresh is best. They’ll keep for a couple of days but are softest on day one.
- Store them at room temp. Keep your treats tightly covered in a container at room temp.
How to make rice krispie treats
- Melt the butter. Melting butter over low heat is key, if the heat is too high it’ll burn.
- Melt the marshmallows. Use the residual heat from the pan and the butter to stir in and melt the marshmallows.
- Stir in the krispies. Use a spatula to fold in the krispies.
- Gently pat. Lightly pat the mix down into a pan being sure to not squish it down.
- Let set. It’s tempting to cut into them right away, but let them cool so you can get clean, sharp slices. Then, decorate or eat as many squares as you want!
How to make spoopy chocolate dipped totoro treats
- Make your rice krispies, let them cool, then slice.
- Melt your white chocolate melts or white chocolate in the microwave. The microwave is best for melting chocolate, especially if you do it in short bursts. Heat the chocolate in the microwave in a glass bowl in 15 second bursts, stirring in between until everything is smooth.
- Spoon or dip. You can either spoon or dip your treats. If you spoon, hold the treat over the bowl and use a spoon to repeatedly spoon over the melted chocolate, then tap the treat on the side of the bowl to shake off the excess. This will give you a thicker and smoother coating. Or, simply dip! Let the treats harden on a parchment paper lined baking sheet.
- Decorate. After the chocolate has harded, it’s time to decorate :)
Rice Krispie Treats Recipe
Super soft rice krispie treats that stay soft for days.
- 6 tbsp butter
- 10 oz mini marshmallows (one bag)
- 6 cups rice krispies
Line an 8x8 inch square baking dish with parchment paper. Add the butter to a large sauce pan over medium low heat. Melt the butter slowly, stirring occasionally.
When the butter is melted, turn the heat to very low and add the mini marshmallows, stirring until melted and smooth. Remove the pan the heat.
Use a rubber spatula to fold in the rice krispies until well coated.
Spoon the mixture into the prepared pan and very lightly spread the mix out, using buttered fingertips or a the spatula.
Let cool for 1 hour at room temp then cut into squares.
To decorate as Totoro
You need: 24 candy eyes and dark and white chocolate. In a microwave safe bowl, melt the white chocolate melts in 15 second intervals, stirring in between. Dip the squares halfway in the white chocolate to give Totoro his white belly or spoon white melted chocolate over the bottom half of the treat and tap off the excess. Set on a parchment paper lined baking sheet. Attach the candy eyes with melted chocolate and pipe a nose, whiskers, and chest furries.
To store: Keep in an air tight container at room temp for 3-5 days.
I Am... The Best Chop Suey
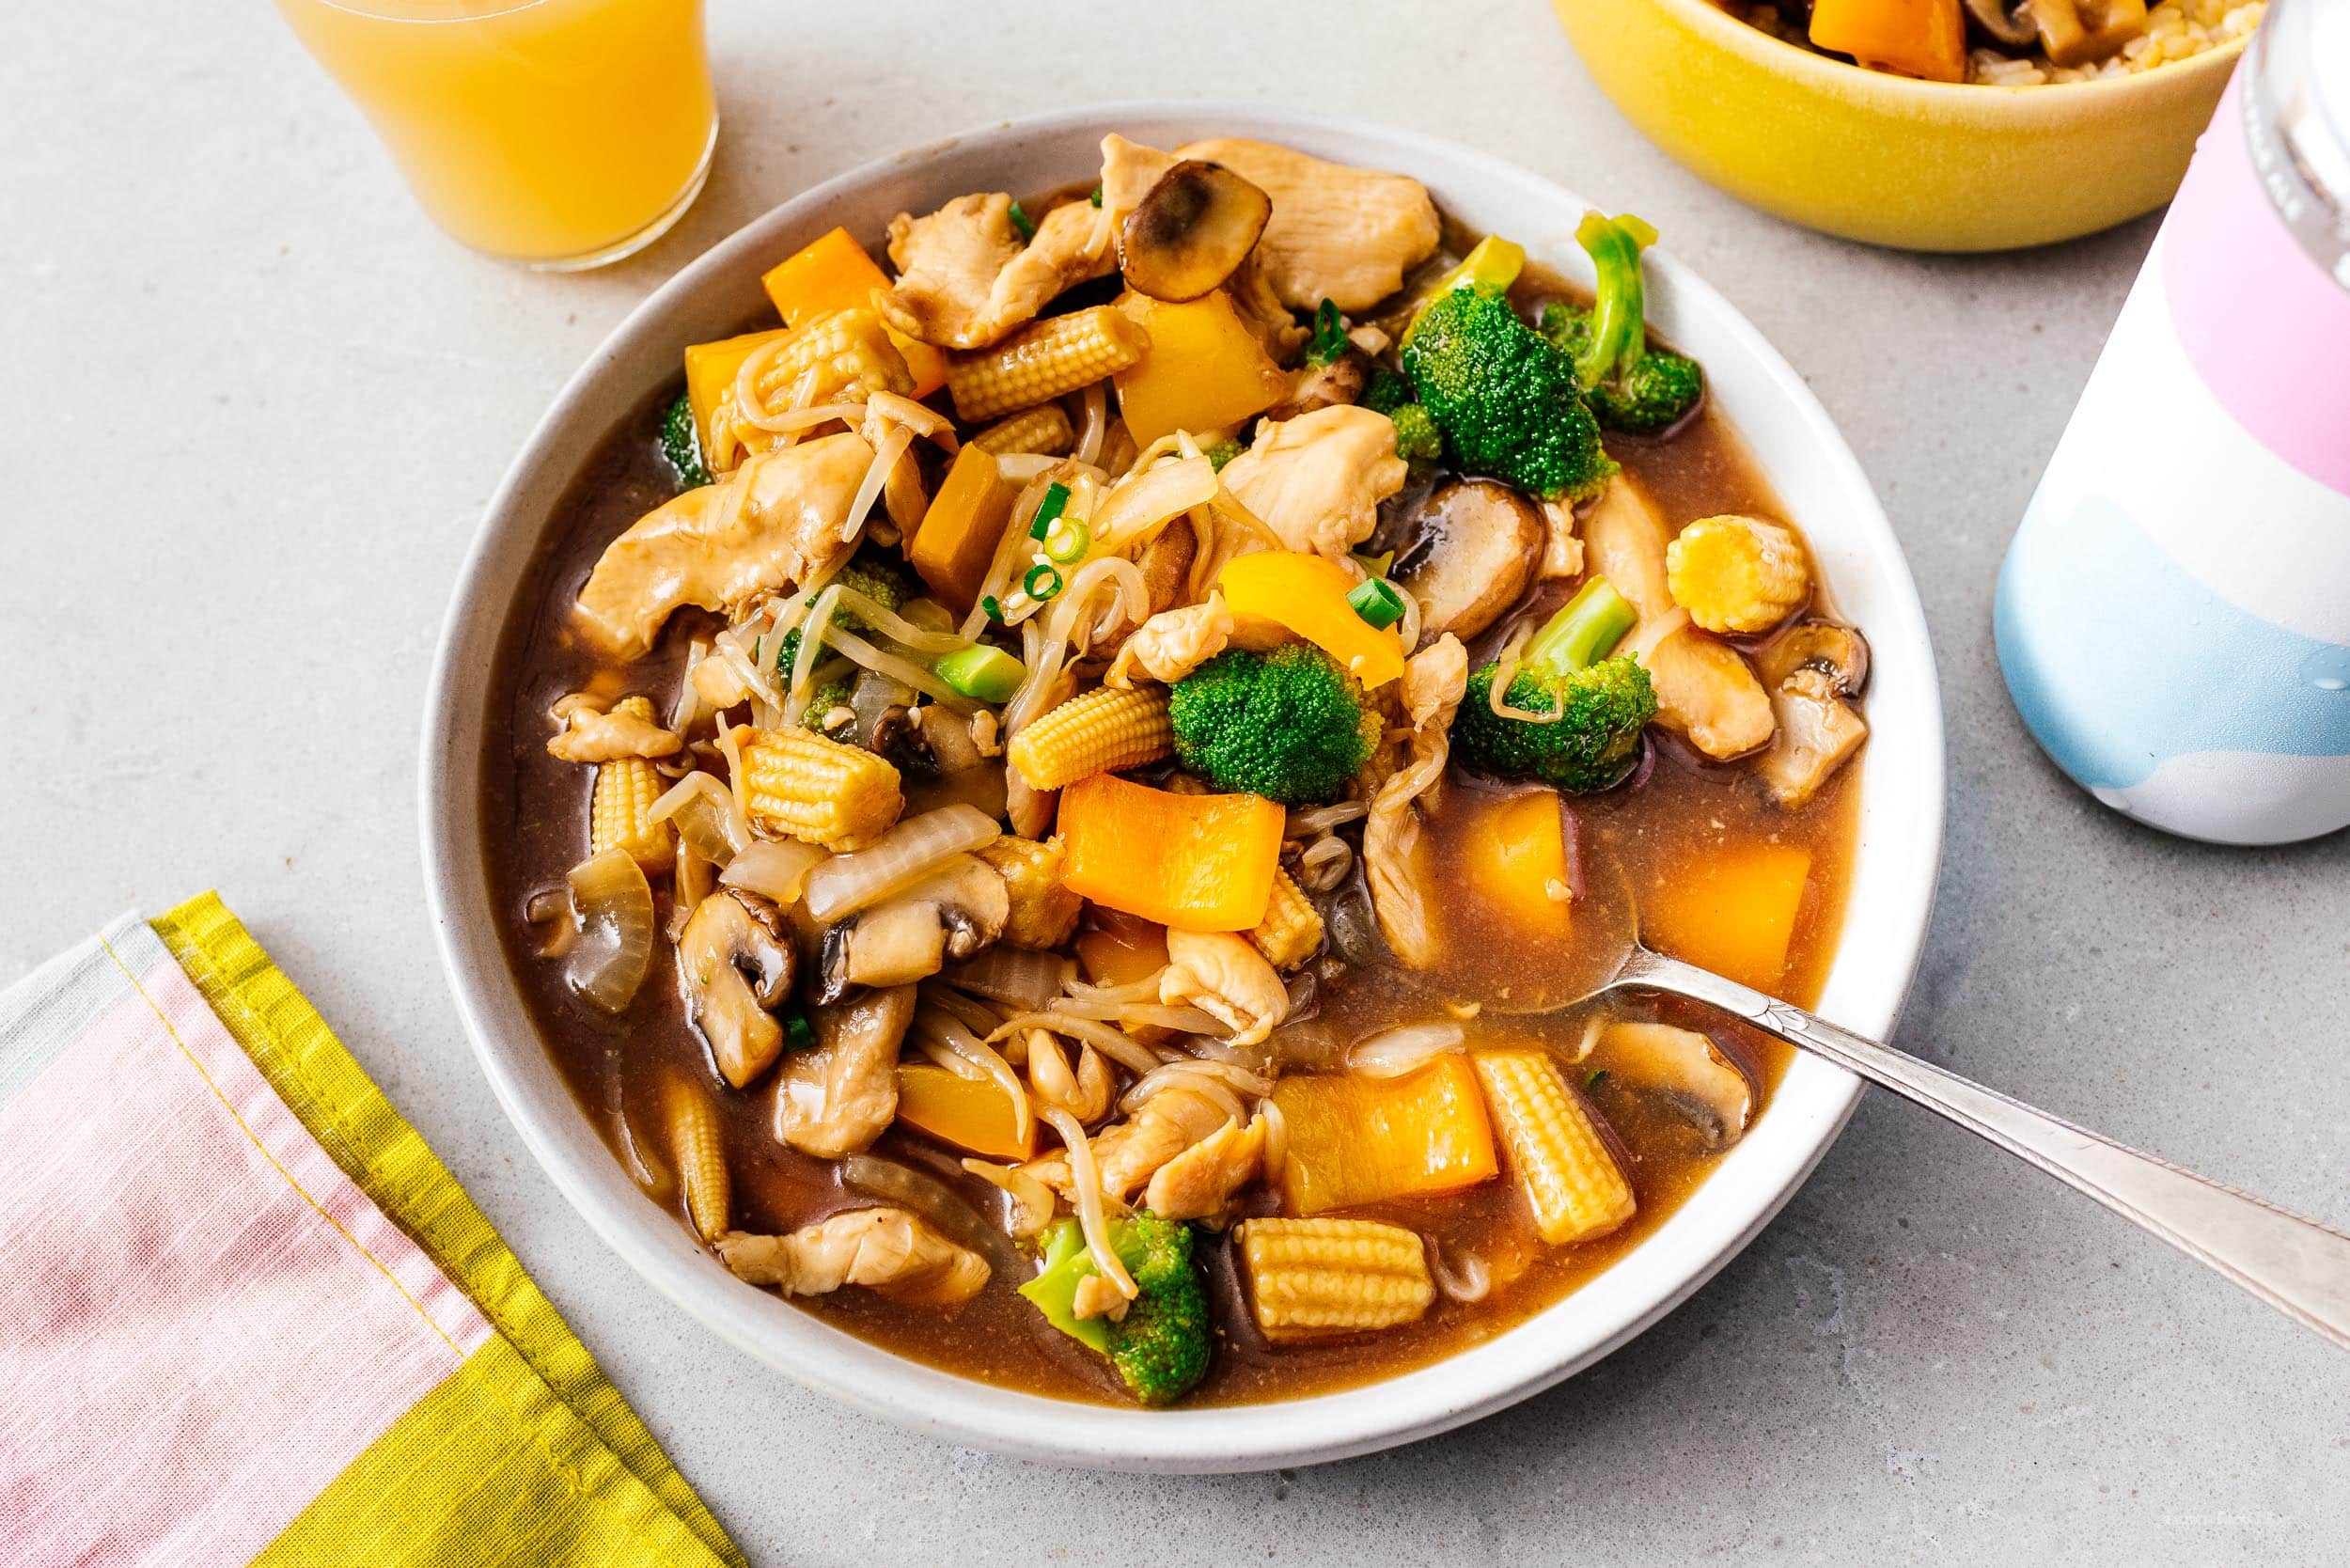
Chop suey is my comfort food. It was ubiquitous in my childhood. Even though the name chop suey has become unfashionable, versions of it are still everywhere. This modern chop suey is so good, you'll never need to go out again. We made a big batch of rice to eat it with but in the end we barely touched the rice at all. It was so satisfying all on its own. Perfectly balanced, as all things should be. I made this one up extra saucy because the whole point of chop suey is that crazy delicious sauce. This is the chop suey of my dreams.
What is chop suey?
There are a lot of people who try to answer this question with a history lesson, but I think that stuff doesn’t matter. At its core, chop suey is a glorious meat and vegetable stir fry with American ingredients. Chop suey is a stir fry of too many vegetables (some canned), a not-quite-authentic Chinese stir fry sauce, way more meat than they’d ever use in China, and way more delicious than it has any right to be. When I went to the mall with my friends as a teenager, my food court joint of choice was that place where I could pick out meat and vegetables by the pound, and they would stir fry it on a giant flat top and serve it over rice. I always got extra rice (grudgingly free, but how can you say no to teenage boys who need extra rice?) and they would always ask which of 10 different sauces I wanted. The answer was always “brown”. And what is that, if not a choose-your-own adventure chop suey?Authentic American chop suey
Other people will tell you it's just a Chinese stir fry gone wrong, but I disagree. Chop suey is through and through an American dish. Does that make it worse or less authentic than "real" Chinese food? I say no: it’s just as authentic as Italian American food, which used to be trashed by “real” Italians, but these days is celebrated as its own thing by people in the know. If you didn't grow up here, you'll probably dismiss chop suey as "westernized Chinese food." Chinese people (even including Steph) tend to instinctively look down on this dish, but they’ll come around, just like how authentic Italian pizzerias actually make American pizza and don't even know. (Update, after tasting this version, Steph came around).The magic of chop suey is in the sauce.
But, that doesn’t mean we shouldn’t incorporate proper Chinese cooking techniques and ingredients into this quintessentially American dish. In this recipe, we use all the secrets of real Chinese cooking (where applicable): Shaoxing wine to add complexity; toasted sesame oil for a creamy nutty umami note; velveting the meat to tenderize it. But is that what makes this what I humbly call the greatest chop suey recipe? No, what makes this a great chop suey recipe is ALL THAT SAUCE. It's gloriously generous, and it's so satisfying to eat. You can't make chop suey without enough sauce to drown in (even if you end up not eating it all).How to make chop suey
- Marinate and velvet the meat for 5-15 minutes (basically as long as it takes to prep everything else, but longer is better).
- Prep your carb base: cook your rice or soak your chow mein.
- Prep the vegetables by cutting them into spoon sized pieces.
- Make the sauce and thicken it.
- Stir fry the meats and garlic. Then remove and set aside so they don't overcook.
- Briefly cook the vegetables. I prefer my vegetables on the still crunchy side.
- Add the sauce and stir everything together.
- Eat to your heart's content.
Ingredients
For me, chop suey is a protein (chicken, pork, or tofu), all the veg you want, but at least one canned (I like baby corn; maybe you like water chestnuts or bamboo shoots?), bean sprouts, a generous amount of brown stir fry sauce, and a carby base: rice or noodles.- Protein: chicken thighs, chicken breast, or pork tenderloin, velveted in corn starch. Or tofu or ground meat too, no velveting needed
- Sauce: my chop suey sauce is mostly made of soy sauce, oyster sauce, corn starch, and the secret ingredient: chicken stock to get that volume up. Because of how much sauce we're making, you need to thicken it on its own instead of the traditional Chinese way of boiling it at the end with everything until it gets thick enough. If you do it that way, by the time the sauce is thickened, everything else will have overcooked.
- Canned vegetables: Canned baby corn/bamboo/water chestnuts provide a bright note and a hit of old school authenticity to this dish. If you didn't grow up with chop suey, you should skip this; it's an acquired taste.
- Fresh vegetables: because we’re better than canned now. Vegetables should be cut up into small bite sized pieces that you can eat with a spoon–chop suey shouldn't be eaten with chopsticks. That means squares, not long slices. The recipe has a list of suggestions but you should use whatever your heart desires: asparagus? check. snow or snap peas? check. All the colors of the rainbow bell peppers? triple check! Super authentic Chinese vegetables like gai lan or bok choy? Only if you want to.
- Carby base: rice or chow mein noodles, please!
Toasted sesame oil: the secret to that authentic restaurant taste
Even though this is firmly an American dish, we can still update some of the ingredients to more authentic fare than was available in the 1800s. The traditional secret of great Chinese food is Shaoxing wine, but in the modern world I would add that toasted sesame oil is on par with it in terms of importance and flavor, and universally available these days. It goes in everything and it’s that subtle nutty note that makes anything better. A little goes a long way though, so use it sparingly. You should be able to find toasted sesame oil in the Asian aisle of any grocery store (or online, as always). We prefer Kadoya, a japanese brand with an iconic bottle.The food of my childhood (and yours too I bet)
Chop suey was the first thing I ever cooked and I bet it was yours too. Like all kids, I had no recipe or any idea of what I was doing, but I knew deep down what I wanted to make: a stir fry with that delicious mystery Chinese brown sauce, the crunchy and colorful vegetables, and that velvety soft tender chicken (or pork) over rice that I got literally everywhere. I'm glad I updated it and made it again because I forgot how good it is. I hope you enjoy it as much as I did. It was simultaneously a throwback to the carefree days of childhood and just a genuinely good weeknight dinner that deserves a place in your rotation. So saucy, -MikeBest Chop Suey Recipe
The stir fry of your dreams.
Protein
- 1 lb chicken breast (sliced, or meat of choice, see notes)
- 1 tsp soy sauce
- 1 tsp oyster sauce
- 1 tsp corn starch
- 1 tsp toasted sesame oil
- 3 cloves garlic (sliced)
Chop Suey Sauce
- 1 tbsp soy sauce
- 1 tbsp oyster sauce
- 2 tbsp corn starch
- 1 cup chicken stock (no sodium preferred)
- 1 tsp sugar
- 1/2 tsp toasted sesame oil
- 1 tsp shaoxing wine (optional but highly recommended)
- 1 tsp dark soy sauce (very optional, for color)
- 1/2 tsp ground white pepper (optional, if you can find)
Suggested Vegetables
- 1 cup broccoli (cut into bite sized pieces)
- 1 cup mushrooms (sliced)
- 1 cup bean sprouts (rinsed)
- 7 oz baby corn (1/2 can)
- 1 bell pepper (cut into squares)
- 1/2 medium onion (sliced)
Combine all ingredients to marinate and velvet the meat (or tofu) and set aside.
Combine all the ingredients of your sauce. Reduce in a large nonstick skillet until suitably thickened, about 2 minutes. Transfer to another container and set aside.
Prepare your fluffy white rice or crispy chow mein if needed. Then, heat up 1 tbsp of oil in the same nonstick skillet over medium-high heat. When hot, add your protein and quickly stir fry until cooked through, about 3-4 minutes, then remove.
Add all the vegetables except the beansprouts to the now empty skillet and give them a very quick toss, 1-2 minutes (or to your preference).
Add the meats, bean sprouts, and sauce to the skillet and allow the sauce to come to a boil, 1-2 minutes. Serve immediately, with green onions and sesame seeds and chili flakes.
You can use any protein you like, such as pork chops, chicken thighs, tofu, etc. If using tofu or ground meats, omit the corn starch.
I Am... Shaoxing Wine
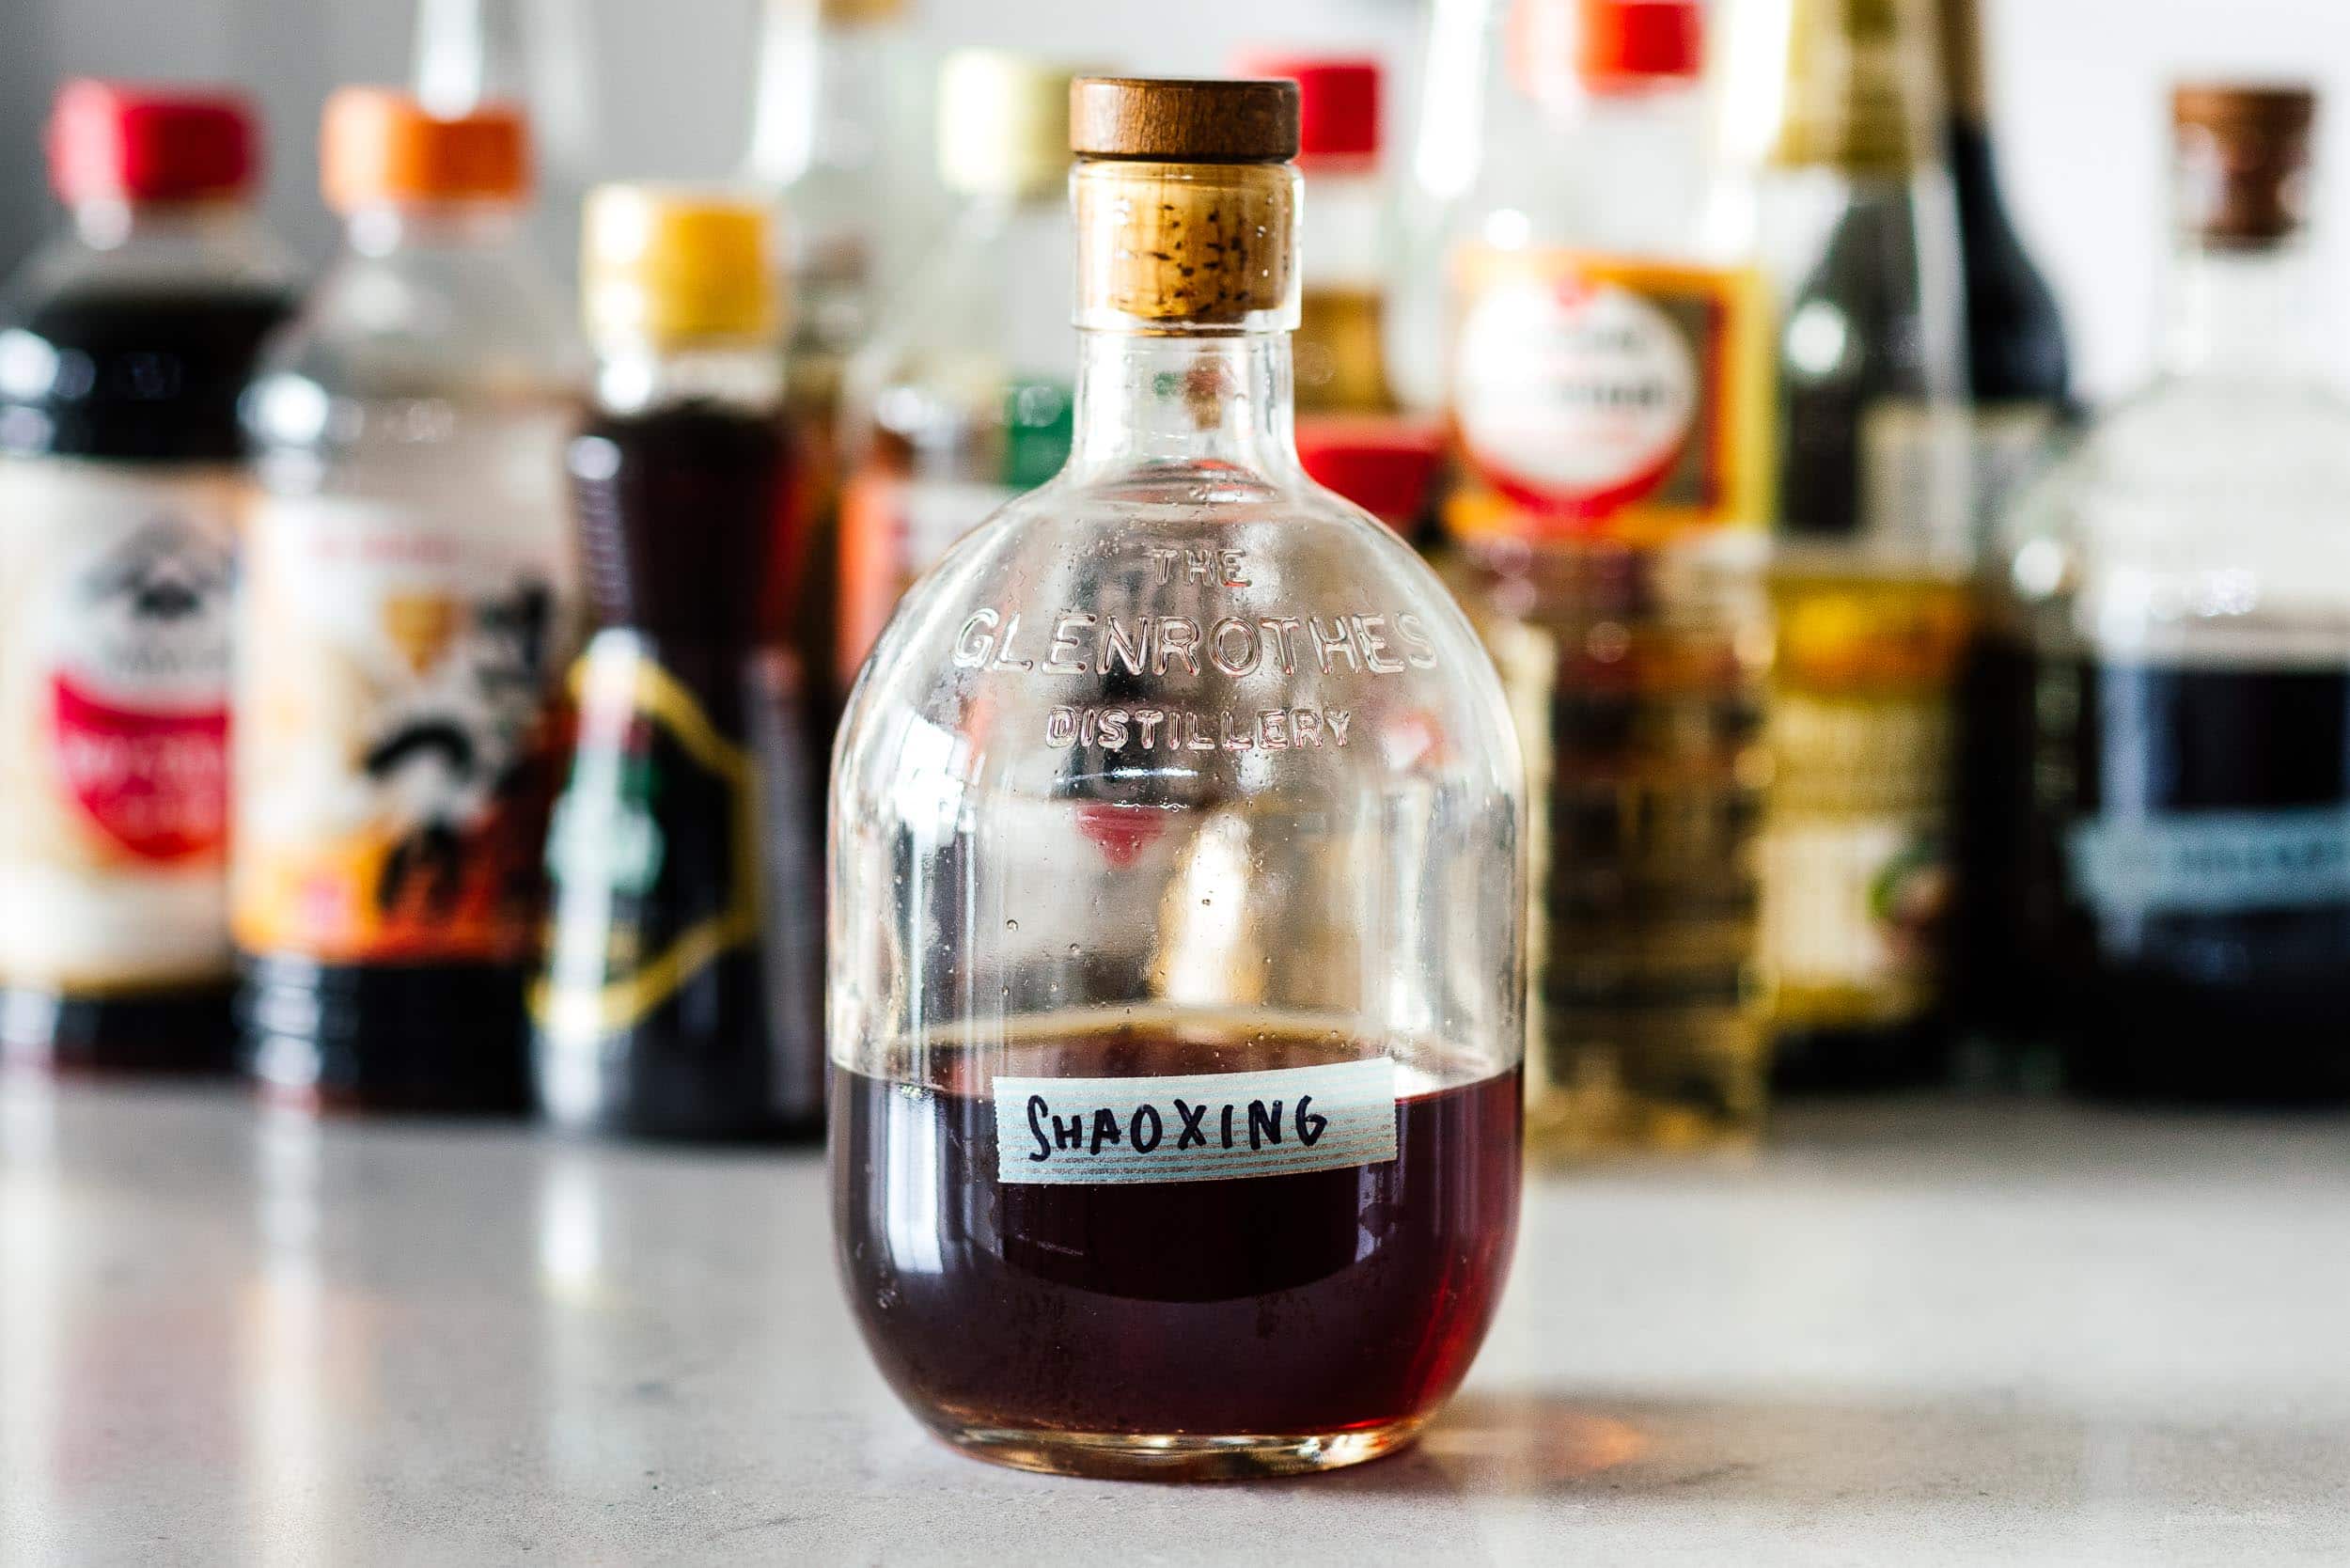
If you asked me what was in my pantry that is a surprise unsung hero, I would most definitely say Shaoxing wine. Shaoxing wine is the not so secret ingredient that adds an authentic flavor to all of our Chinese dishes. You know how sometimes you eat Chinese food, whether it's takeout or fine dining, and it's really really good and you can't quite put your finger on it? Maybe you've suspected it's MSG? It's actually not; most likely that flavor you can't identify is Shaoxing. Or if you cook Chinese food at home but feel like it’s missing that special something compared to restaurant Chinese food, it’s probably Shaoxing wine.
What is Shaoxing wine?
Shaoxing is a type of Chinese rice wine. In Chinese it’s called 绍兴黄酒 or Shaoxing huang jiu, which translates to Shaoxing yellow wine. The Shaoxing part of it refers to the city of Shaoxing, which is in the Zhejiang Province which is famous for rice wine. Shaoxing has a very long history, both as an alcoholic beverage and as a cooking wine. It’s made from fermenting brown glutinous rice, water, and a tiny bit of wheat. Shaoxing wine has a clear, translucent golden amber hue.Do I need it?
If you’re a fan of Chinese food and the Chinese food you’ve been making at home feels like it’s missing something, then yes, I recommend getting a bottle! It's fairly cheap (although very expensive versions exist), it lasts a long time, and it’s an ingredient you’ll use again and again in Chinese food and once you start cooking with it you’ll ask yourself how you ever lived without. It's as unthinkable as cooking Italian or French food without wine, or Japanese food without sake and mirin.Shaoxing wine substitute
The best substitute for Shaoxing wine is dry sherry. Use it as a one-to-one sub.Where to buy it
You can buy it at Asian grocery stores or online. Some well stocked supermarkets might have it in their Asian aisle. Depending on the laws where you live, the best place to find a good unsalted one might be a well stocked liquor store.Should I buy salted or unsalted?
Unsalted is the one you want! Check the label, it shouldn’t have any salt in it. They sell salted Shaoxing as way to label it as cooking wine so it doesn’t have to be exclusively sold in liquor stores. Salted Shaoxing is super salty and won’t add that delicate flavor you’re looking for. If it's what you can find, go for it, but you should reduce the salt in the rest of your recipe. Not this one:The best Shaoxing wine brand
Our favorite brand of Shaoxing wine is Pagoda Huadiao Rice Wine No Salt. It’s been around forever. You can also get a salted version on Amazon. If you somehow have a great selection at the Asian grocery or liquor store, as with most things, the more expensive the bottle, the better the product, and unsalted is always better than salted.Shaoxing vs mirin
Compared to mirin, Shaoxing is less sweet and has a completely different flavor profile. In a pinch, you can substitute mirin.Non alcoholic substitutes for Shaoxing wine
If you don’t do alcohol, I recommend using chicken broth as a sub.What does it taste like?
It’s kind of hard to describe but it tastes lightly sweet, nutty, earthy, and complex. It’s incredibly aromatic.Is it the same as rice wine?
Shaoxing is a rice wine so, yes. But if you’re asking if Shaoxing and sake are the same, the answer is no. Can you use sake as a sub for Shaoxing? Yes, but just know that it won’t taste exactly the same.How do I store Shaoxing wine?
Keep it in a cool dark place. We keep ours in our pantry. If you have space you can store it in the fridge, but it’s not necessary.What dishes use Shaoxing wine?
Shaoxing adds depth and complexity to Chinese dishes. It’s used as a marinade or in braises, or as a flavoring component to soup, meats, veggies, stir-fries, and dumplings. Shaoxing is in:- Potstickers
- Kung pao chicken
- Char siu
- Orange chicken
- Beef and broccoli chow mein
- 3 cup chicken
- General Tso’s chicken
- Chili oil wontons
- Claypot chicken rice
- Chicken chow mein
- Soy sauce chow mein
I Am... Instant Pot Brown Rice
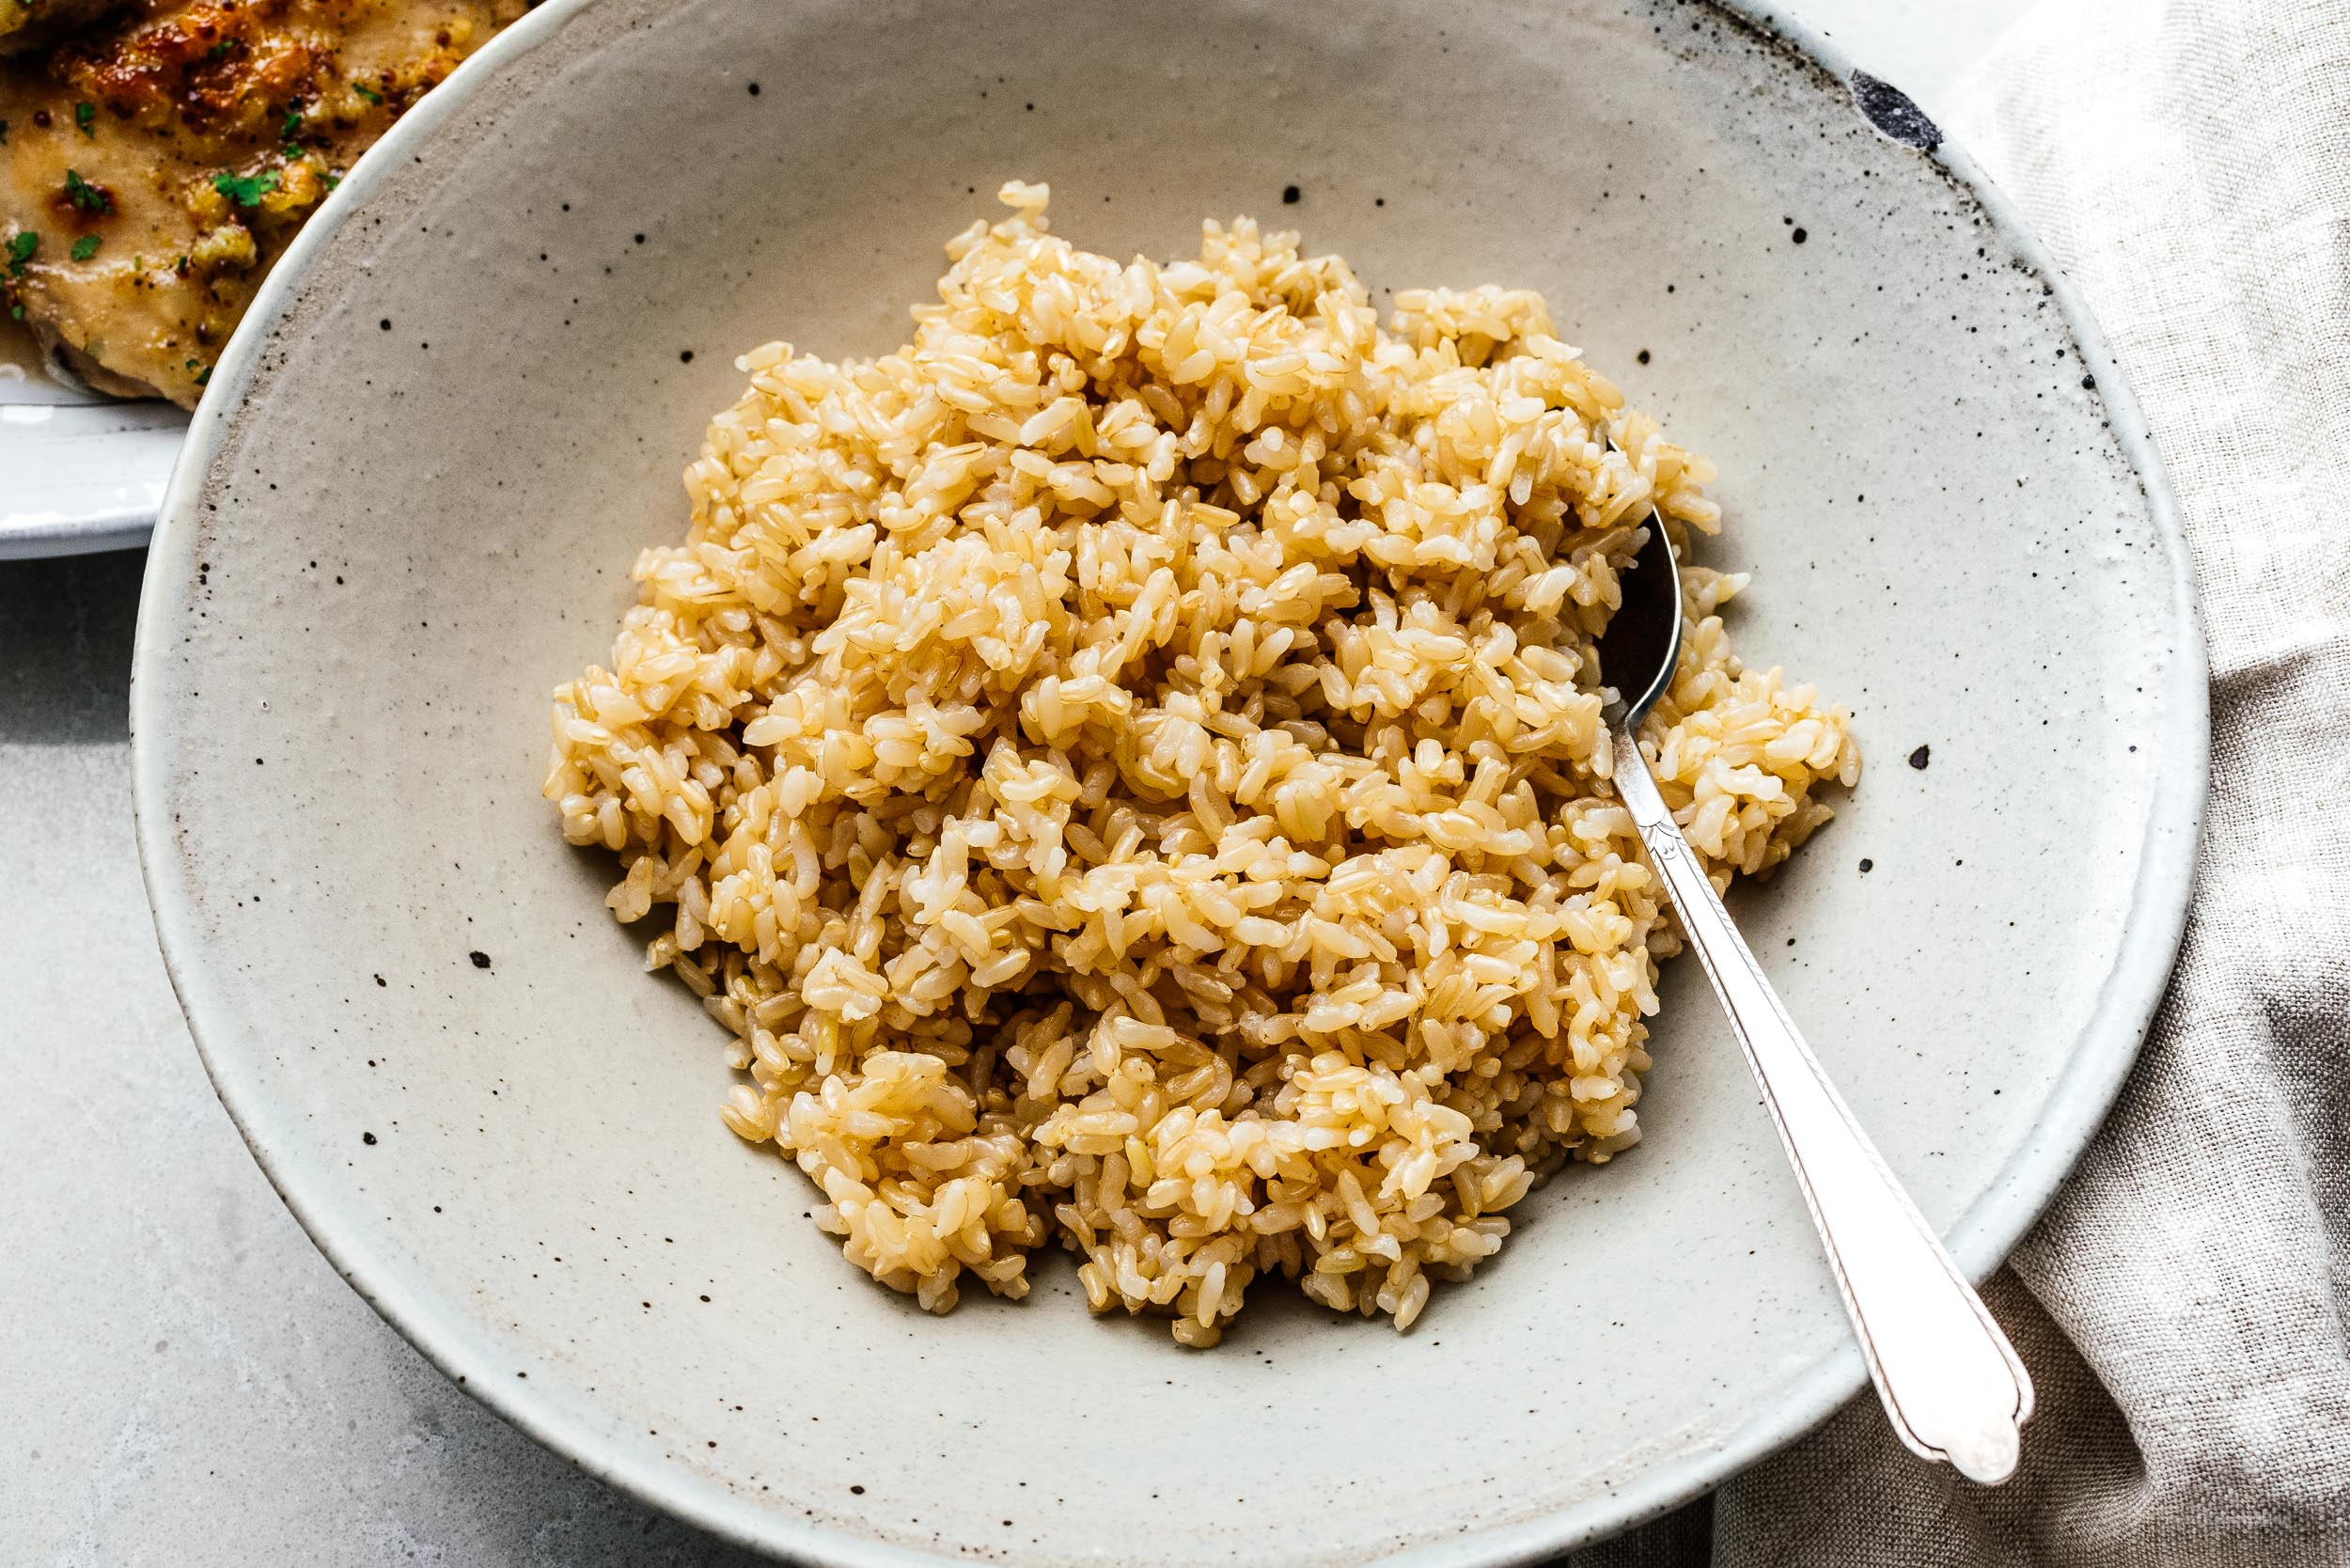
Are you team white rice or team brown rice? I love both, but truth is, I don’t make brown rice as often as I would like because it takes a bit longer to cook than white rice. But with instant pot brown rice, I’m team brown rice all the way. It’s fast, healthy, and best of all, it’s nutty and delicious.
Instant pot rice
If you don’t own a rice cooker, cooking rice can be a bit of a chore. But guess what?!? If you own an Instant pot, you already do own a rice cooker. Ever since we got our instant pot, we haven’t ever pulled out our (really nice, tiny) rice cooker because the instant pot does such a great job.The secret to faster instant pot brown rice
If you want your brown rice faster (doesn’t everyone?!?) the secret is to use really hot water. The instant pot does a lot of things fast but it doesn’t heat up water as fast as a gas stove or even your tap, so we like to use either really hot tap water or boiling water (if you have a gas stove) to give it that little extra boost.How to cook instant pot brown rice
- Rinse your rice. You need to rinse brown rice for cooking in the Instant Pot, it’ll make your rice more tender because it has a bit of extra moisture from rinsing. Generally brown rice needs more water than white rice so rinsing it will add a touch more water to the recipe. Place the brown rice in a bowl, lightly soak, and swirl with your hand then drain with a fine mesh strainer.
- Cook on high pressure. Pop the rice with an equal amount of water into the insert of your Instant Pot. Set your pot to High Pressure for 20 minutes.
- Quick release. When the Instant Pot is done, immediately carefully press the quick release to vent all the steam and pressure.
- Fluff and serve. When the steam and pressure has fully escaped, open the lid, fluff up the rice and enjoy!
Rice to Water Ratio
The best rice to water ratio for the instant pot is 1 cup of brown rice: 1 cup of water. That’s it, it’s just a one to one ratio of rice to water. This means that you can use any sort of measuring tool you want, just make sure the water and rice volume is equal.Should I wash brown rice?
In this case, yes! Brown rice takes longer to cook than white rice and generally needs a bit more moisture so rinsing the rice gives it a bit of a head start with hydrating the rice. By rinsing it, you’ll allowing some moisture to go into the kernel of the rice before it even starts cooking in the Instant Pot.What’s the best brown rice?
We like short grain brown rice because it’s glossy, nutty, and fluffy. This recipe will work for long grain brown rice as well though.Brown rice vs white rice
While brown rice and white rice have a similar amount of carbs and calories (not as much as you'd think!), brown rice is a whole grain that has more vitamins and dietary minerals in it and has a lower glycemic index. But, I just love it because it tastes nutty and has more heft and chew and makes me feel more full when I eat it.What to serve with instant pot brown rice
- Mapo tofu
- Oven baked sweet and sour chicken
- Salted egg yolk fried chicken
- Air fryer char siu
- Garlicky mushrooms
Instant Pot Brown Rice
- 1 cup brown rice
- 1 cup hot water
Rinse the brown rice and drain well.
Add the rice and 1 cup hot water to the insert of the Instant Pot.
Make sure the pressure valve is in the sealed position. Set the Instant Pot to pressure cook high for 20 minutes. When the pot is done, quick release. Open the lid carefully, fluff and enjoy!
I Am... 12 Fall Recipes to Get You in The Mood For Fall
I don’t know about you, but I’m ready to carb-load for fall. I love all the warm and comforting flavors of fall food. Give me a bowl of food and a giant blanket and the equivalent of a roaring fire (the modern day roaring fire is Netflix) and I’m the happiest fall camper of them all! Here are 12 fall recipes to get you in the fall feels, right now.
Read More →I Am... Oreo Mug Cake
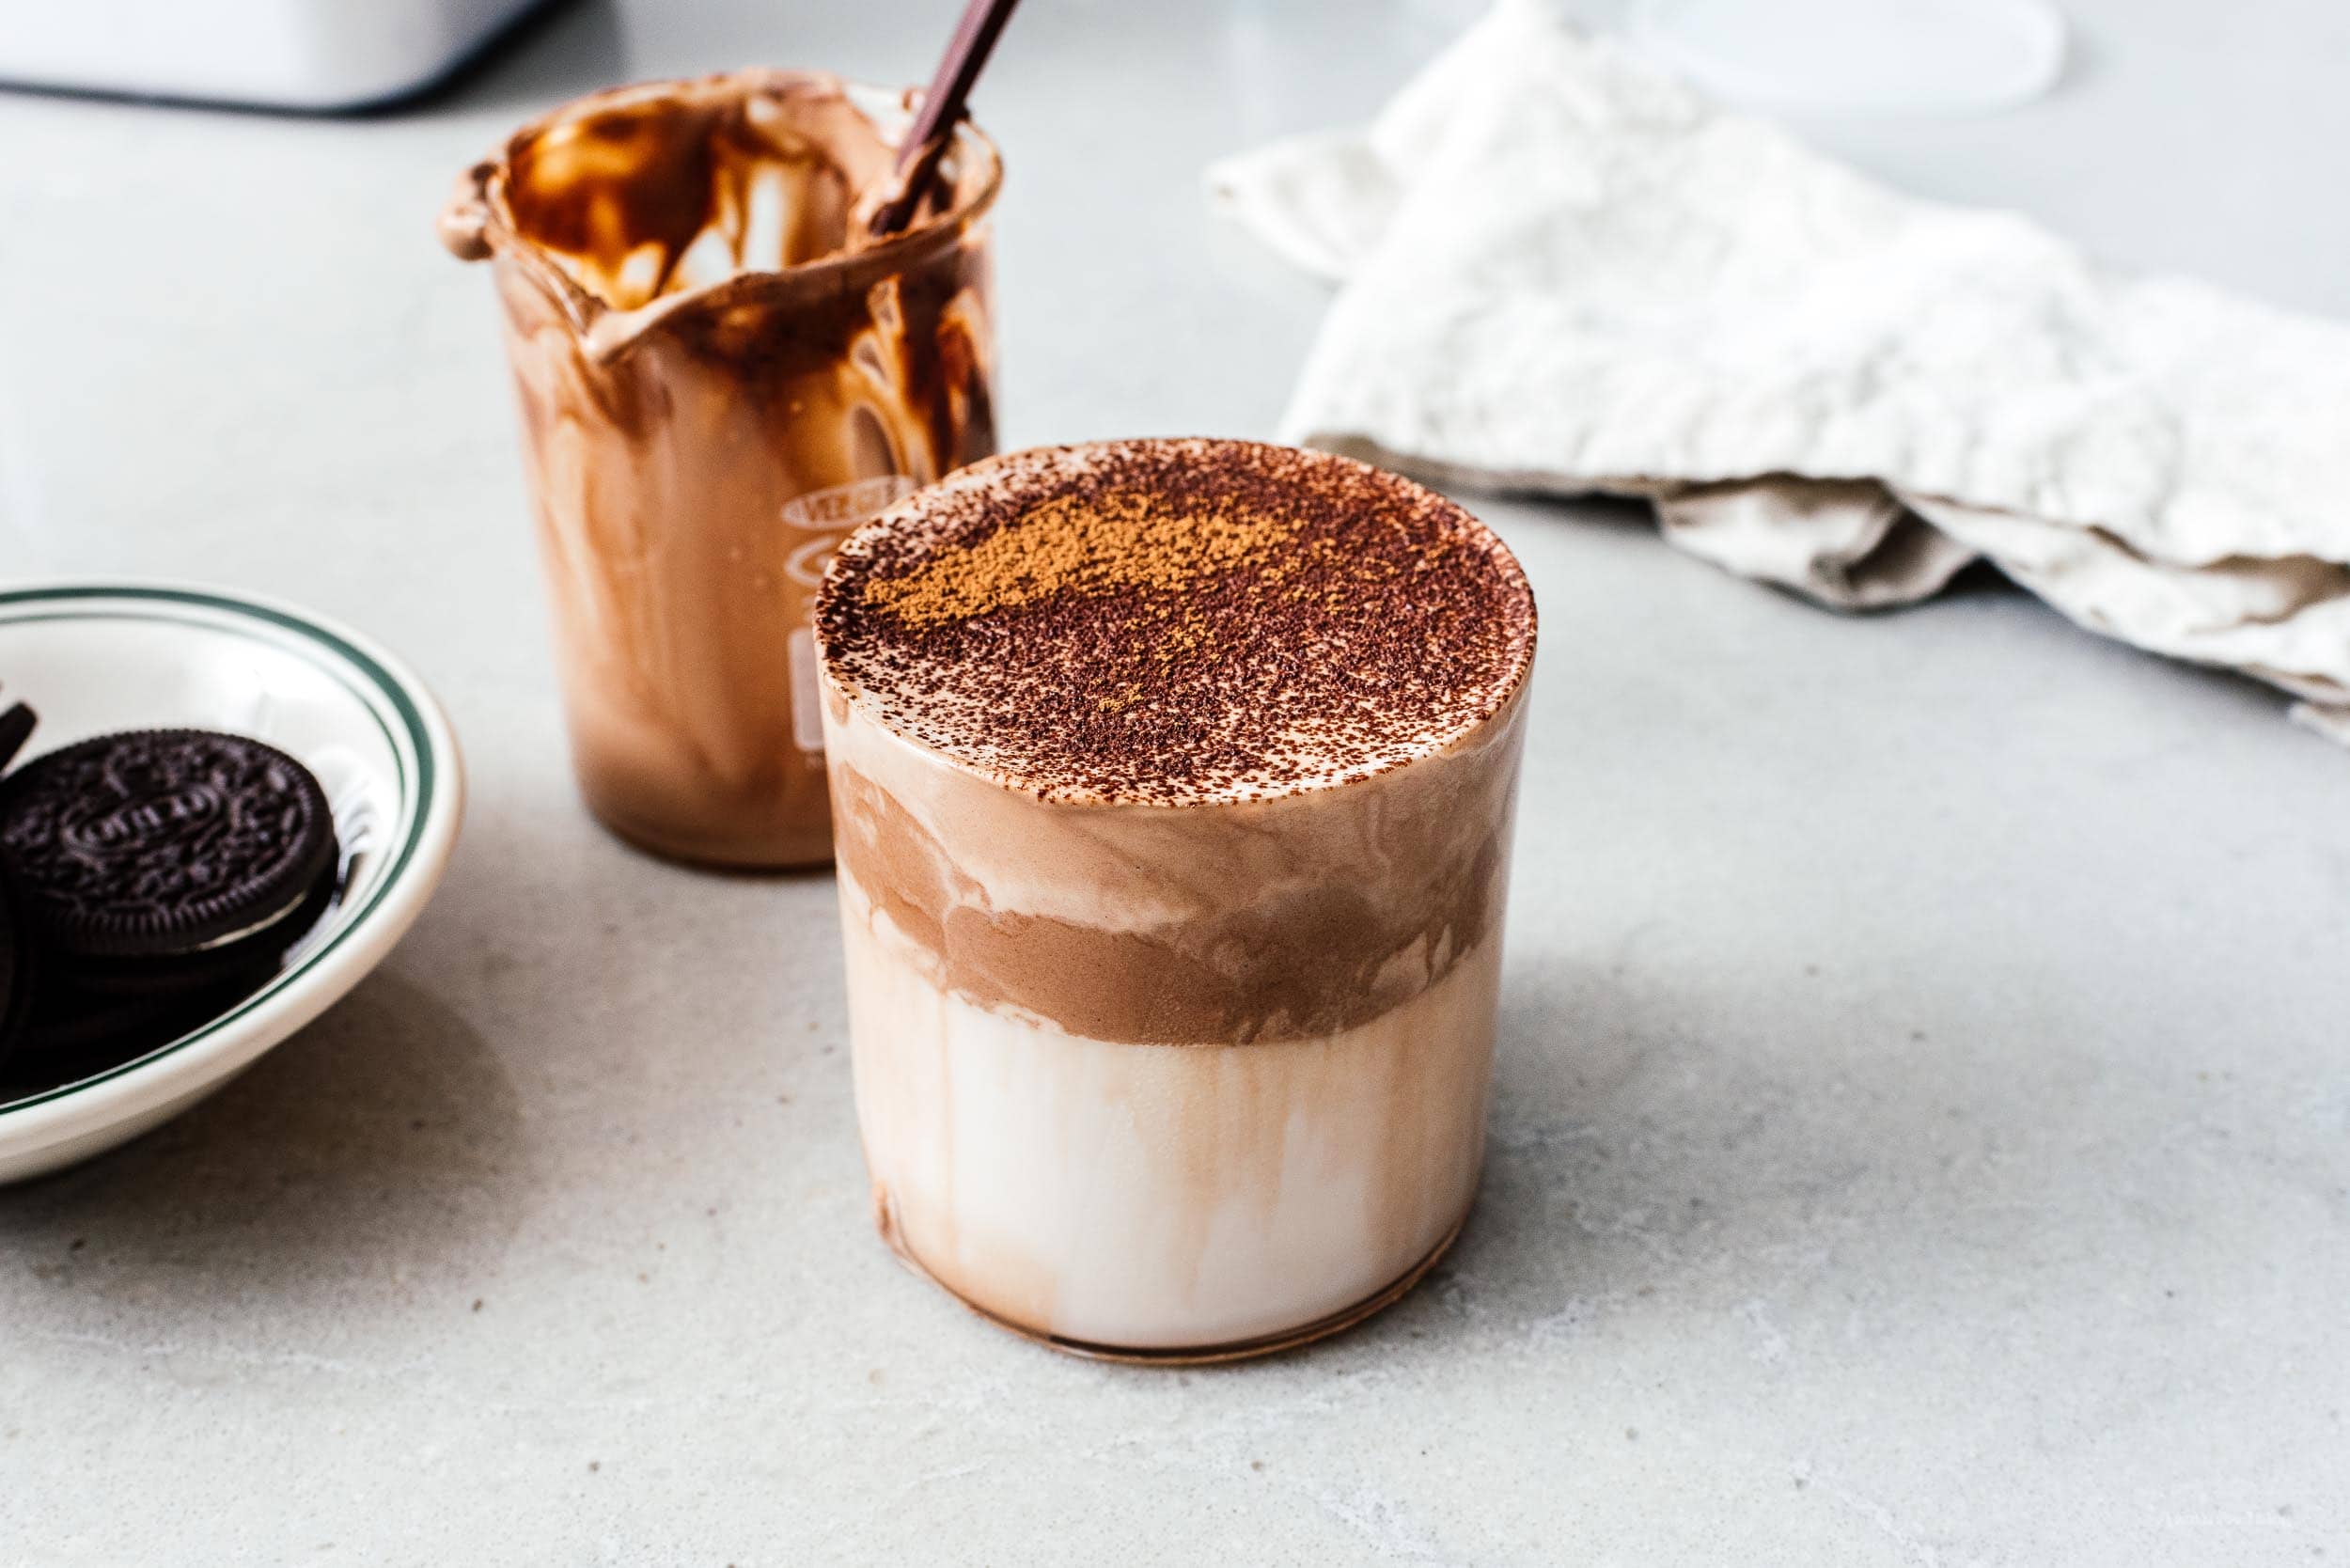
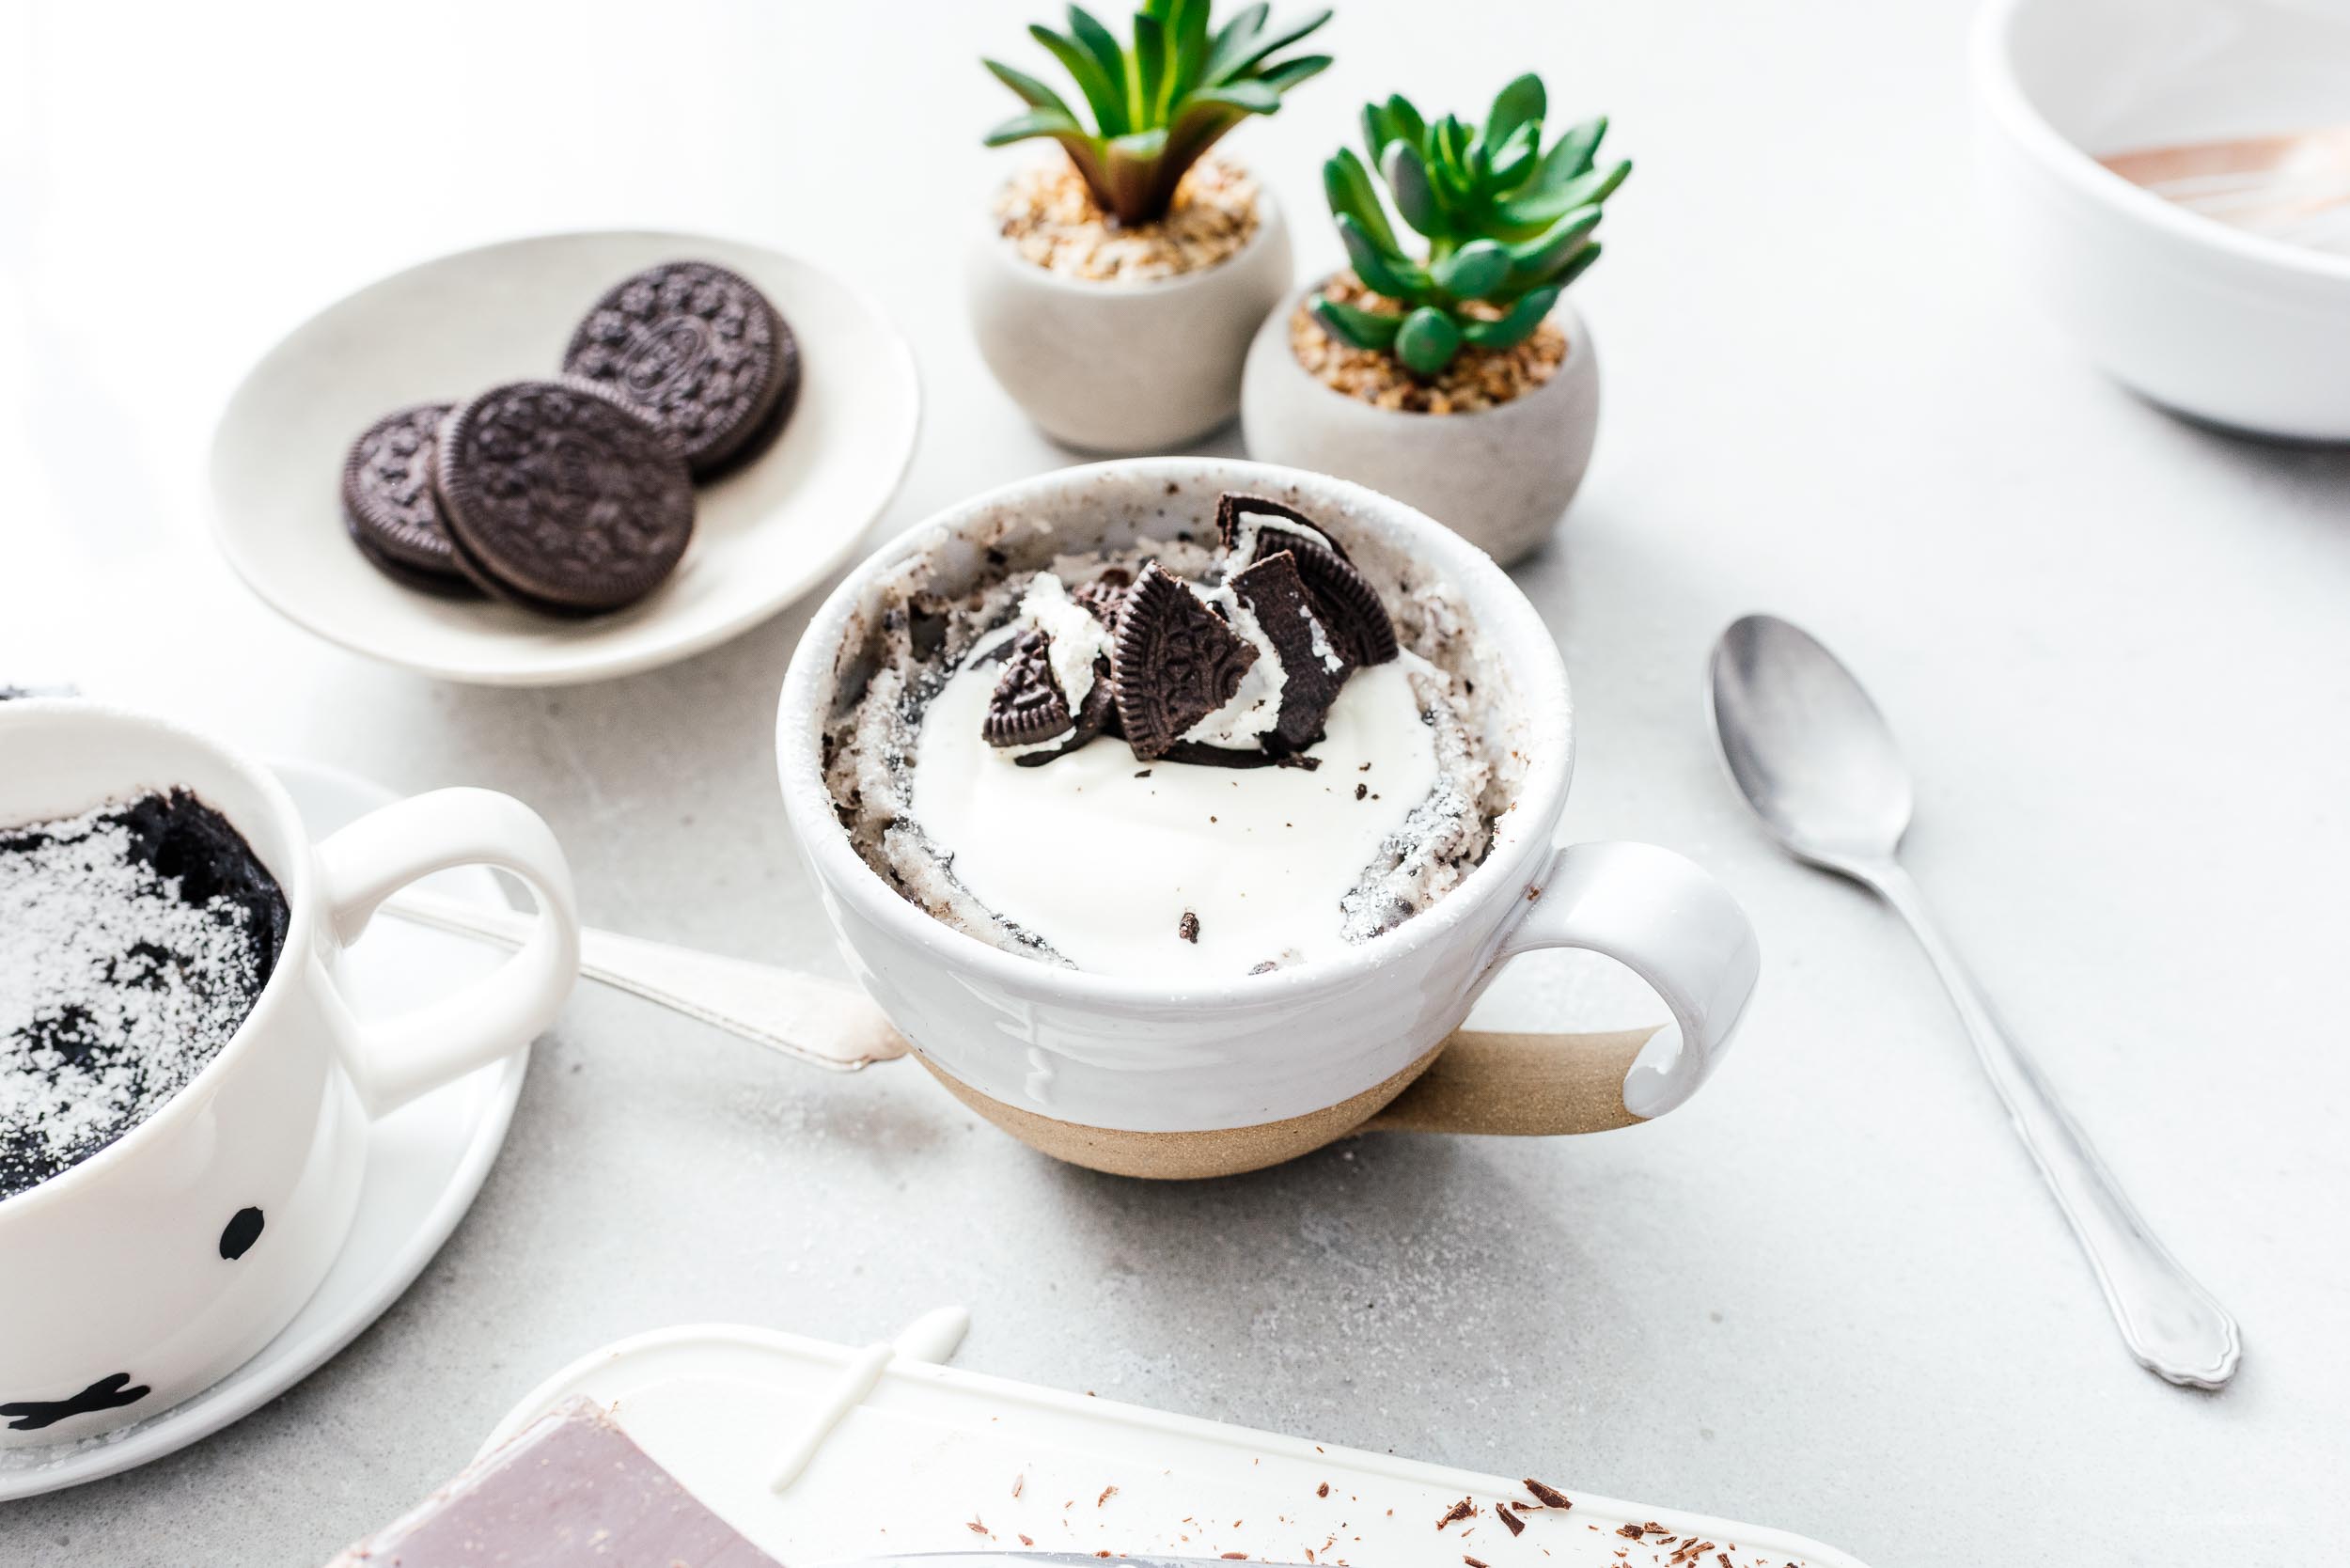
I’m on a mug cake streak. I have been making mug cakes every day for a sweet treat to cap off the night. Is it wrong to have cake everyday? Maybe it’s wrong, but it feels so right, especially when it’s Oreo mug cake! Um, please give me all the Oreos. They are my one true store-bought cookie weakness. I just love the combination of that dark cocoa cookie and creamy center. Heck I even love ALL the seasonal varieties. Anyway, we almost always have a package of Oreos in the pantry – that is unless I’ve eaten them all. When I saw all those videos about the two ingredient TikTok Oreo mug cake floating around I wanted to try it too. But I almost couldn’t bring myself to do it because I love eating Oreos just as they are. Plus I also have a killer mug cake recipe that is super easy and delicious. I decided to do a side-by-side taste test. The results will shock you! Or will they?! I ended up liking my Oreo mug cake better. It was more moist and fluffy and it tasted more like cake. The Oreo and milk only mug cake was good…if you’re desperate. JK JK it tastes kind of like a very dense chocolate cake. It was a little molten and gooey in the centre.
What is a mug cake?
A mug cake is a cake baked in a mug, in the microwave. It’s perfect for a single serving and super easy to make. Mug cakes are great for treats, snacks, and desserts. Maybe even in the morning? JK pls don’t eat cake for breakfast. Unless it’s coffee cake.What is TikTok Oreo mug cake?
TikTok Oreo mug cake is a mug cake recipe that’s floating around where you make a mug cake using only two ingredients: Oreos and milk. The oreos are crushed up and mixed with milk then microwaved into a cake. Obviously they are really, really easy to make.Mug cake tips and tricks
- Always microwave your mug cake on a plate. Even though I have my mug cakes down to an art and I know exactly how high they will rise, I always microwave on a plate because if there’s some sort of freak accident where my mug cake overflows, I don’t want to be cleaning cake out of the microwave.
- Start off microwaving for 1 minute then add 10 seconds as you go. Some microwaves are stronger than others plus it really depends on how soft and gooey you like your cake. For my microwave, 1 minute 10 seconds is perfect.
- Use a microwave safe mug! I probably shouldn't have to say this one, but yes, please use a microwave safe mug, not plastic.
- For the oreo and milk only mug cake be sure to crush up your oreos as fine as possible, so that it almost looks like flour.
What kind of mug should I use?
For my Oreo mug cake, I suggest using a mug that’s big enough to hold 1 and 3/4 cups water. To find out if you mug does this, take a measuring cup and measure out 1 3/4 cups water into your mug. There should be a little bit of space on top still. If it fits, it sits and you’re good to go. For the Oreo and milk only mug cake, you can pretty much use any mug as long as it’s not tiny. There isn’t a lot of rise with that mug cake, so go ahead and use your favorite mug as long as it’s not an espresso cup.Oreo Mug Cake
This is a better tasting version, see notes for the original TikTok version!
- 6 tbsp milk
- 1 tbsp oil
- 1/4 cup flour
- 2 tbsp unsweetened cocoa powder
- 2 tbsp sugar
- 2 oreos (lightly crushed, plus extra to top)
- 1/4 tsp baking powder
- 1 pinch salt
- 1 tbsp chocolate chips (or chopped chocolate)
In a large mug, whisk together the milk and oil.
In a small bowl, mix together the flour, cocoa, crushed oreos, sugar, baking powder, and salt.
Add the flour mix to the mug and mix well until there are no lumps.
Sprinkle on the chocolate and extra crushed oreos, if using.
Place on a microwave safe plate and microwave for 1 minute and 20 seconds.
Let cool slightly and enjoy!
For the tiktok version, just do the following:
- In a large mug, crush 6 oreos completely, until they are very fine, then stir in 1/4 cup milk.
- Microwave (place the mug on a plate) for 75 seconds. Remove, let cool slightly and enjoy!
Note: For either version, you may want to microwave your cake for a bit longer depending on how gooey you like your cake. Microwave in 10 second increments after the first minute until it’s done to your liking.
I Am... Dalgona Coffee Recipe
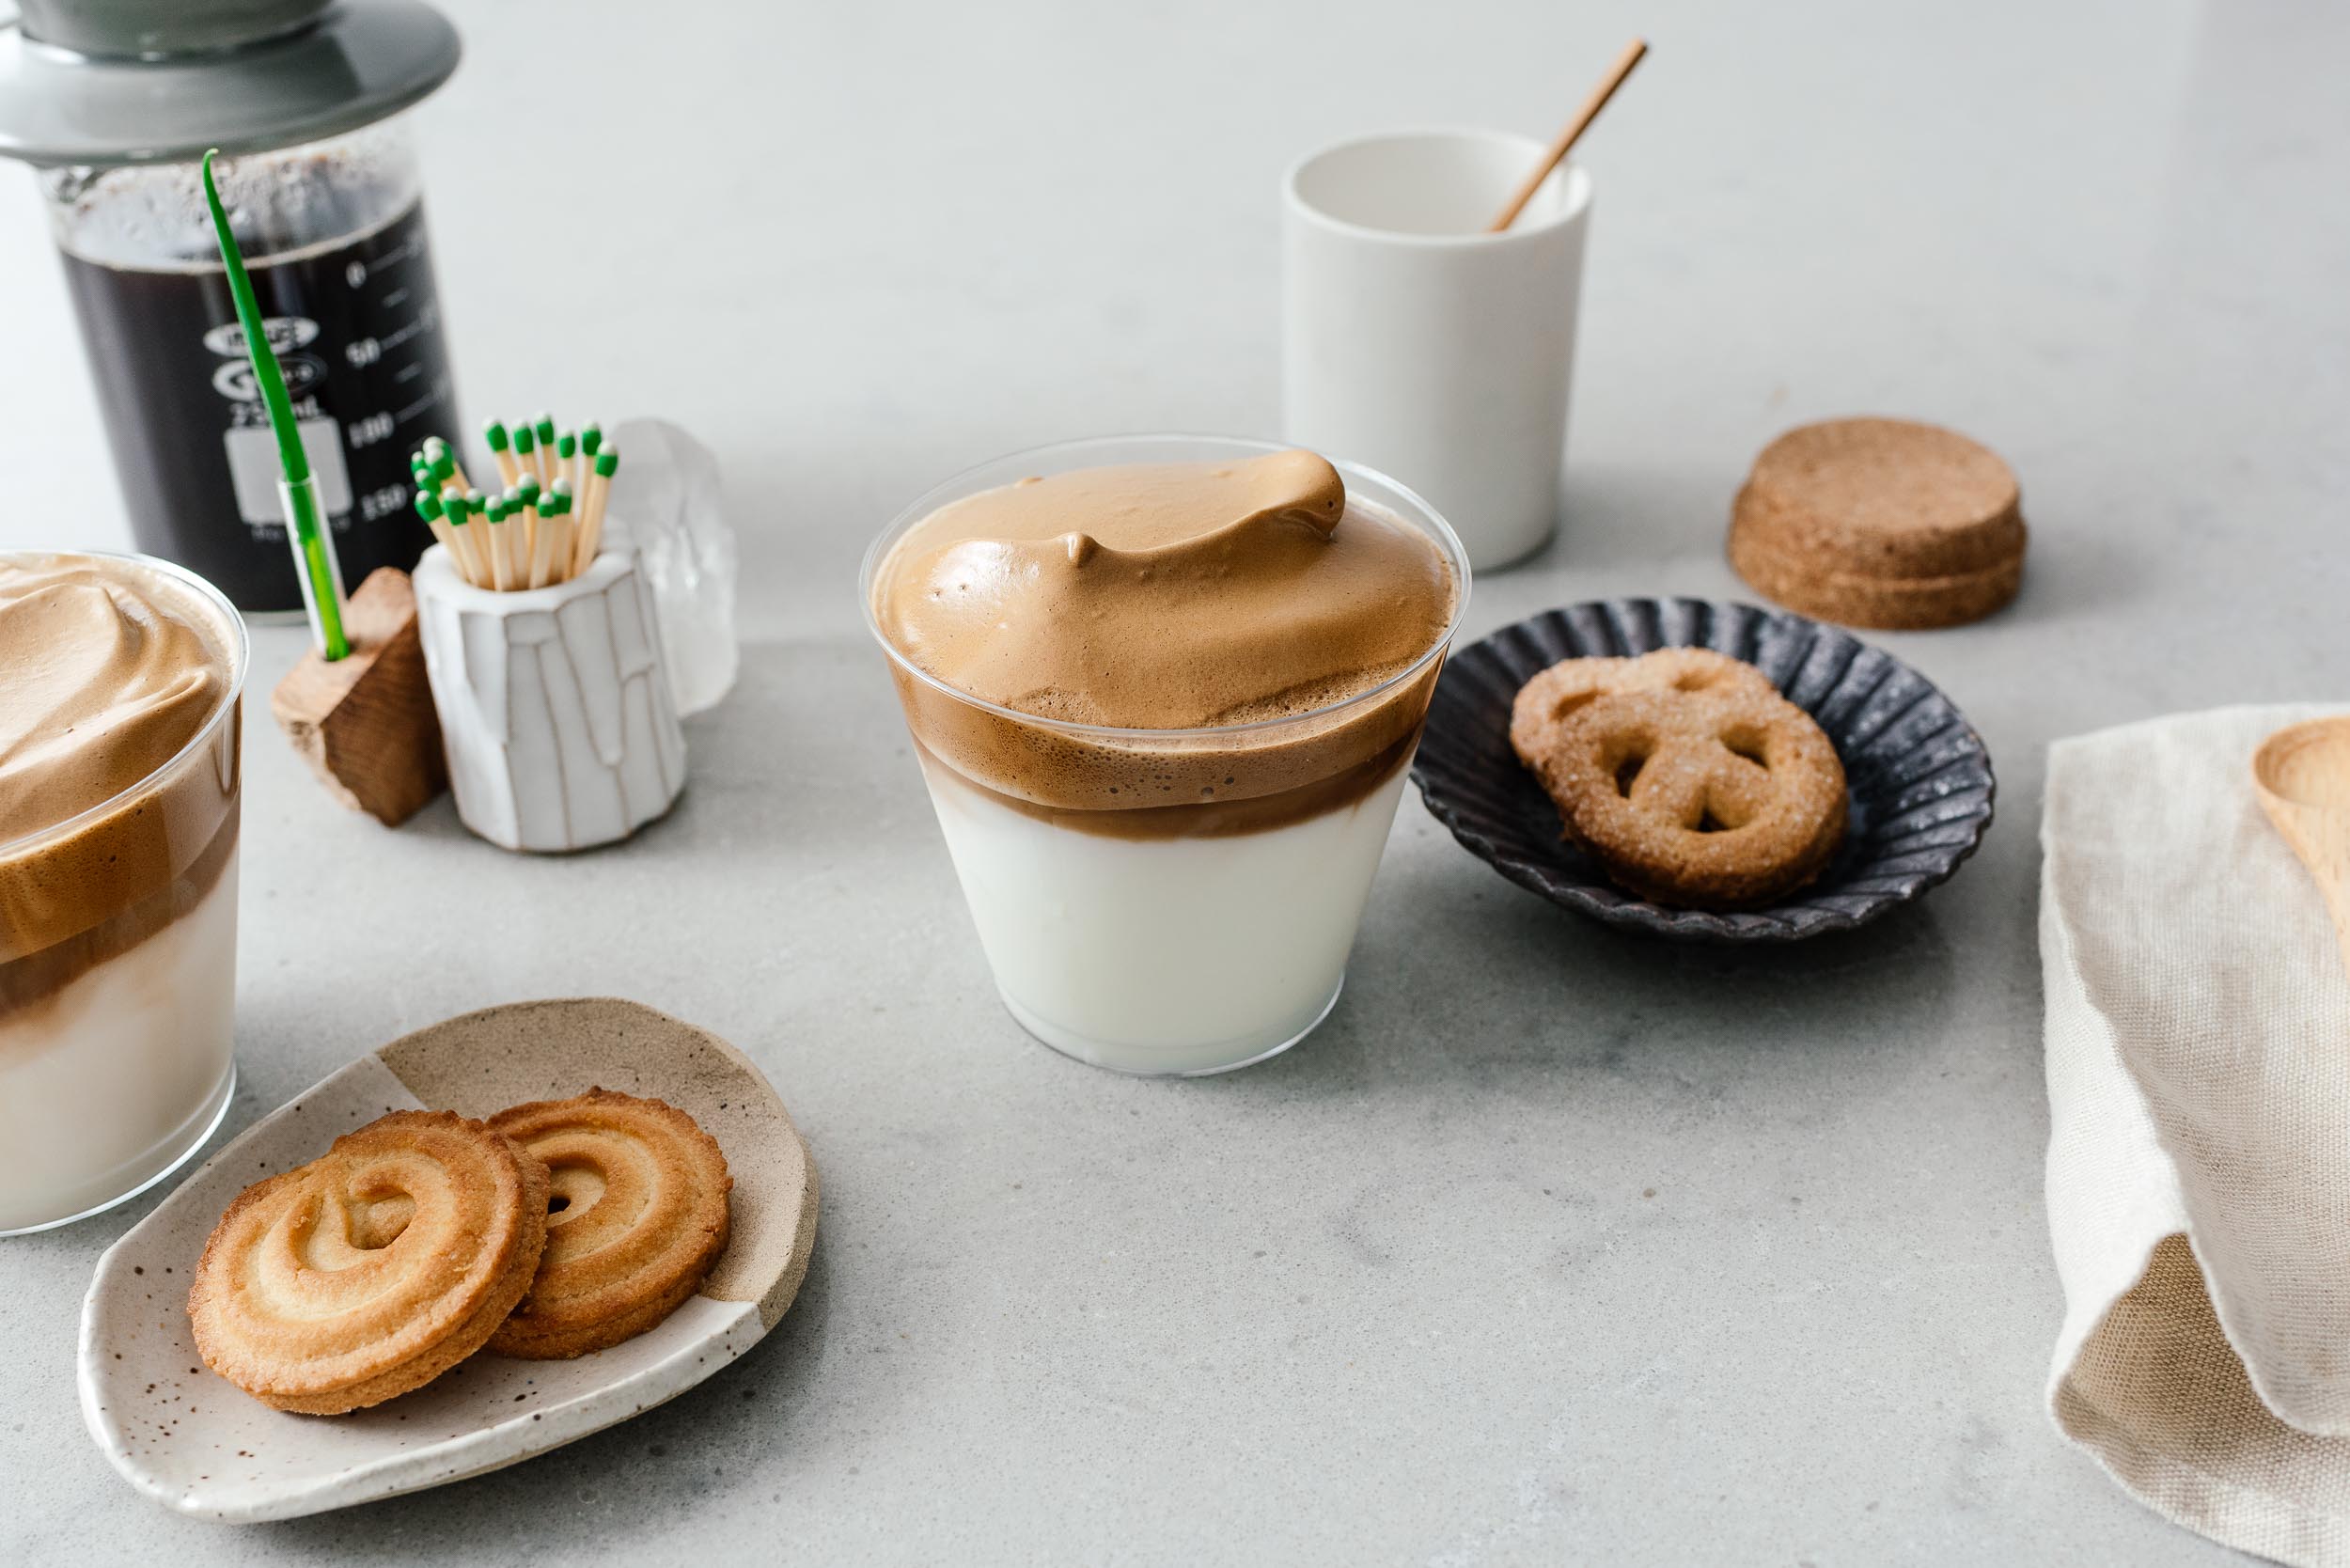
Dalgona coffee is having a moment. This whipped coffee is viral on TikTok, trending on Twitter, and blowing up my insta feed. It’s pretty, it tastes good, and it’s probably the best way to to spend some time while you’re at home during the stay home covid campaign.
Read More →I Am... The Juicy Lucy Burger
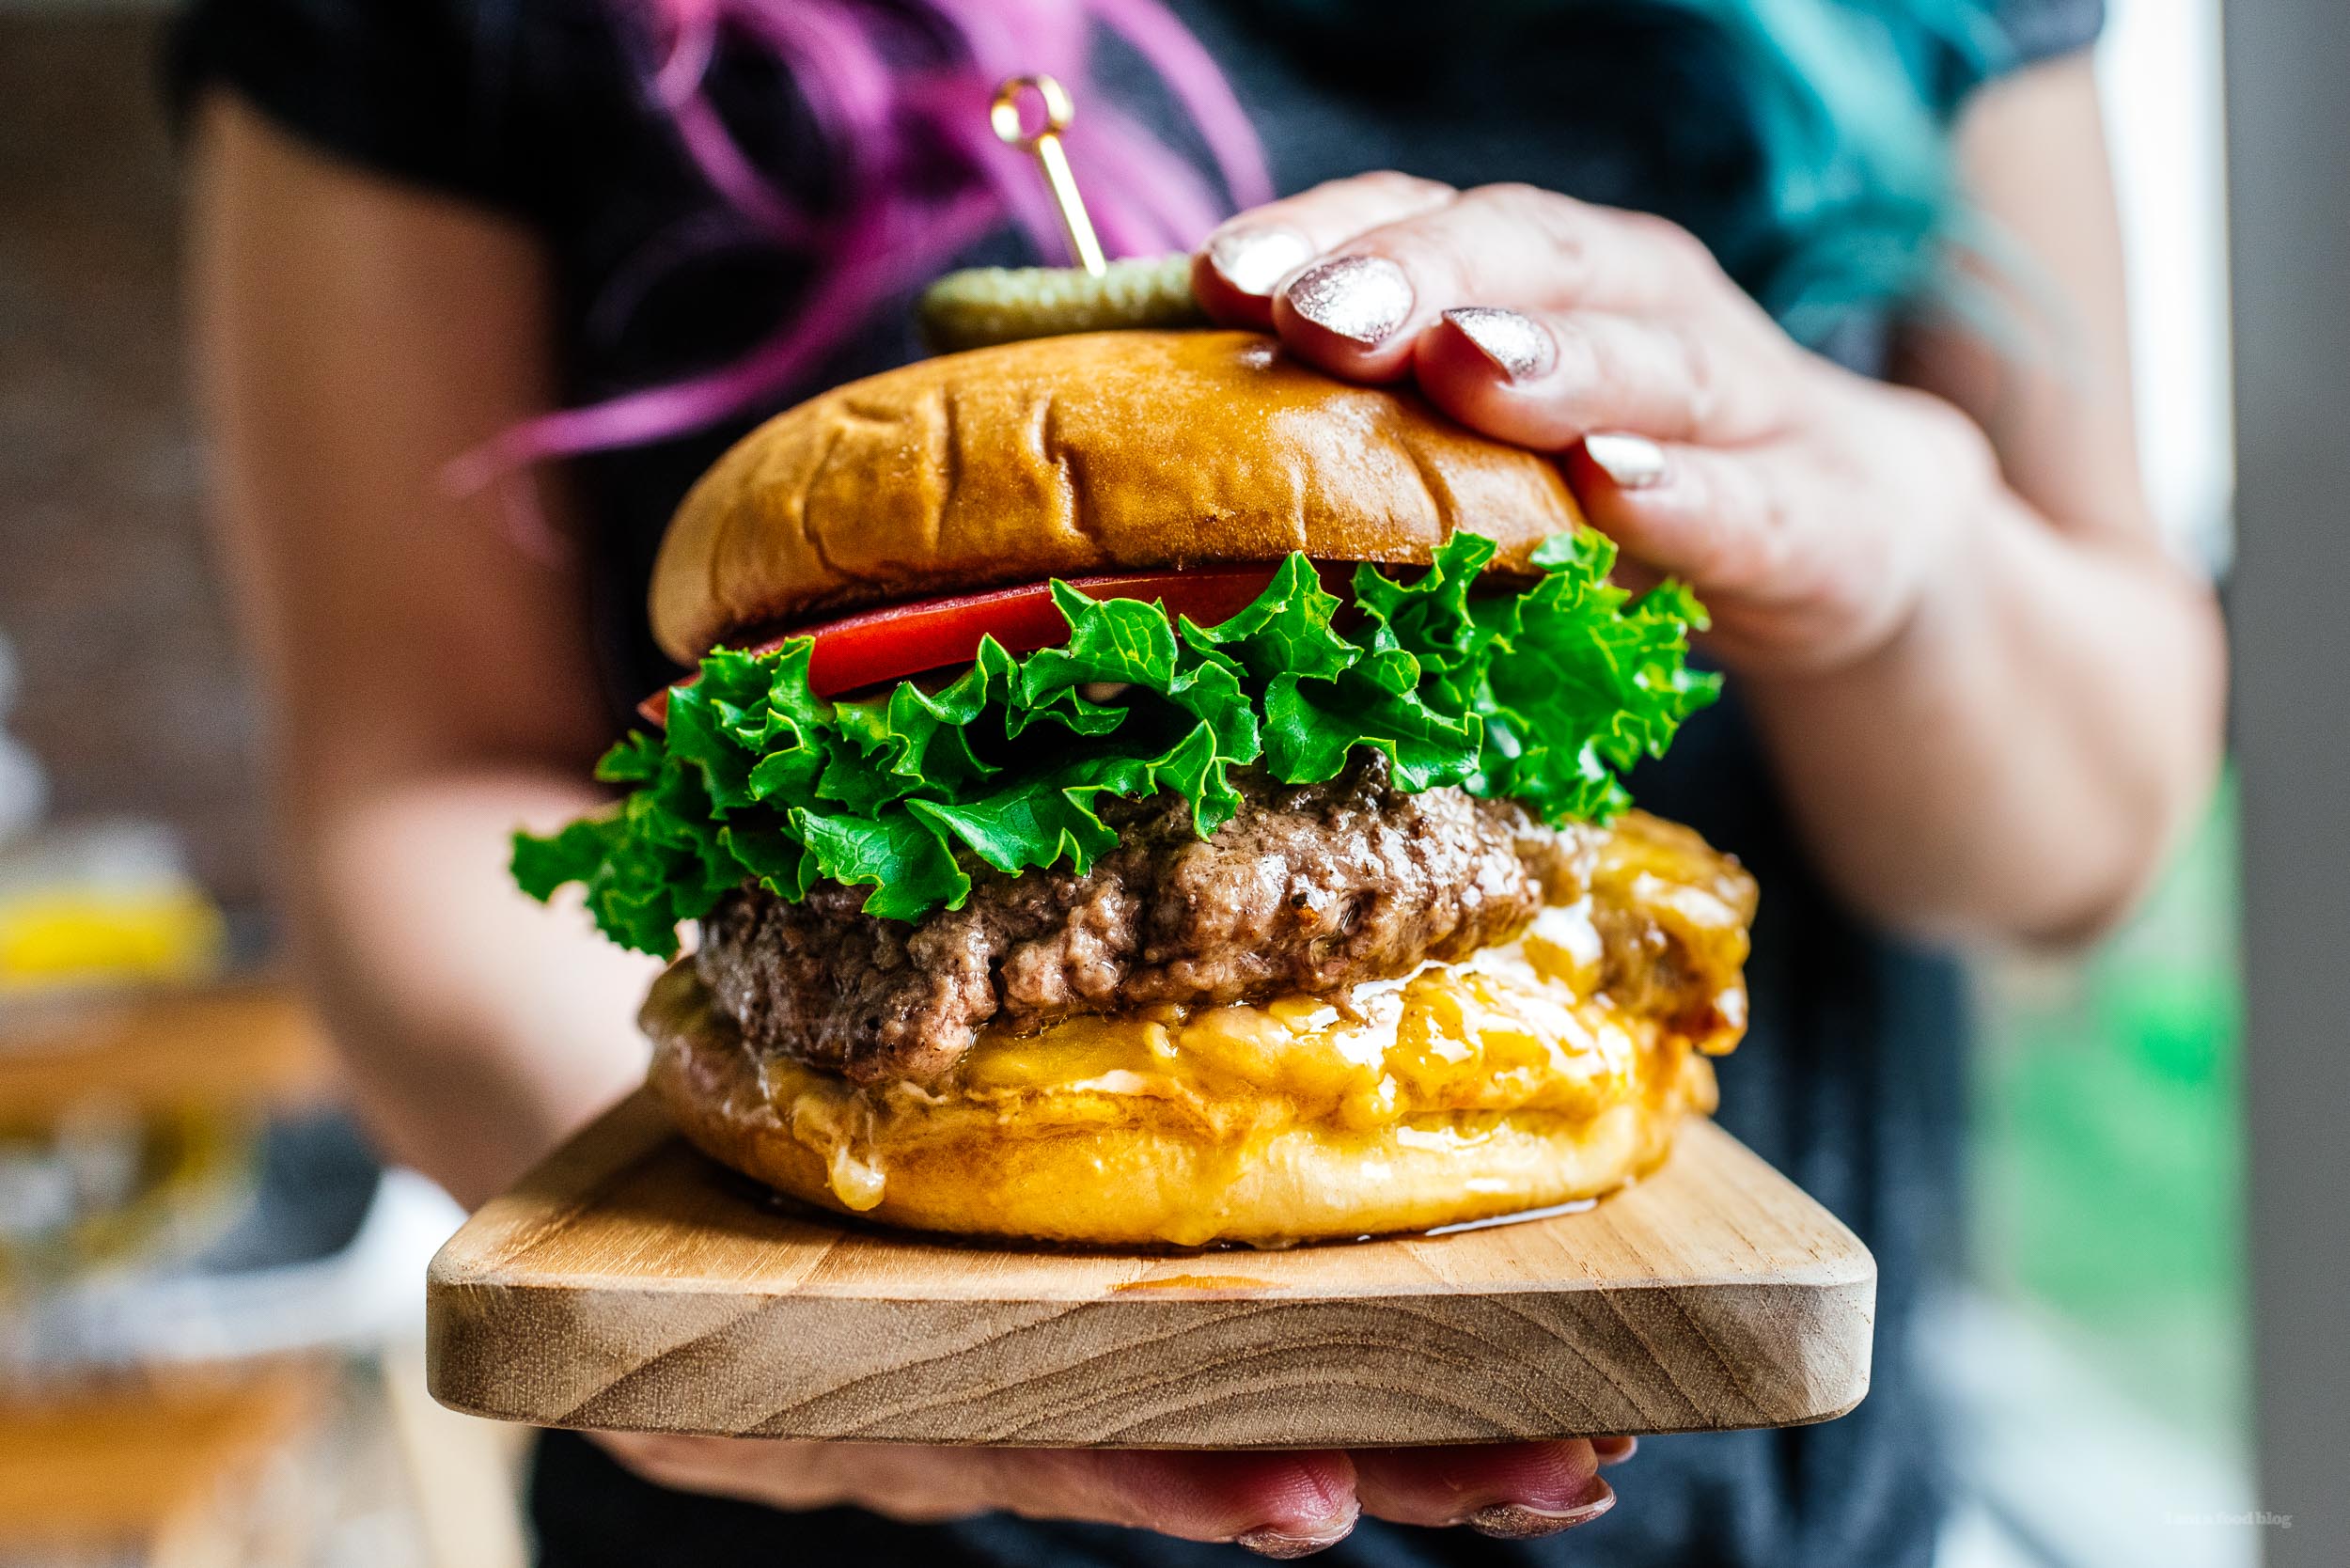
It's burger season! Time to break out the grill or cast iron pan, if that's what you make your burgers in, and get your burger on. If you're doing burgers I hope you get a chance to make a Juicy Lucy. I first heard about the infamous Juicy Lucy a couple of years ago. I was headed to Minneapolis for a quick trip and before I flew out, Mike did a quick search on what kind of foods Minneapolis is known for. The thing that came up again and again was a Juicy Lucy. According to lore, Juicy Lucys (Lucies?) were invented in the city in the 50s in two different bars independently of each other. I think there's some sort of Juicy Lucy rivalry going on between the two, but regardless, they both make a burger where the cheese is inside the patty instead of on top. The cheese makes everything extra juicy, thus Juicy Lucy. Of course, after Mike discovered Juicy Lucys, I got really excited. I mean, a burger with the cheese inside the patty? I could just imagine how gooey and melty and cheese pull friendly it was going to be. We watched a bunch of YouTube videos on them – the most notably weird one being of Richard Blais making a Juicy Lucy where the cheese wasn't even melted. That led us down a Richard Blais YouTube hole. Did you know he calls his fans "Blaisians?!" Shudder. Anyway, the most important part of a Juicy Lucy is the molten cheese core. To get that you have to cook your burger on the stove to get that nice seared crust, then finish it in the oven so that the cheese gets extra melty. I think I put a bit too much cheese in mine though because the cheese started to ooze out a bit. I'm not complaining though because the patty ended up with a cheese crust and crusty, crispy cheese is always a good thing. Happy burger-ing! Hope you get some Juicy Lucys soon. PS - I never did get a chance to try a Juicy Lucy in Minneapolis. Have you ever had one? We'll have to go back one day!
What is a Juicy Lucy?
A Juicy Lucy is a cheeseburger where the cheese is inside the patty instead of melted on top! Juicy Lucys have a melted oozy core of cheese. They were invented in Minneapolis, but it’s debatable who invented them first. There are two dive bars that claim to be the original inventor of Juicy Lucys: Matt’s Bar and 5-8 Club. Juicy Lucys are delicious, especially if you love melted cheese.Juicy Lucy ingredients
- Ground beef. Use a nice ground beef - go for grass fed, organic if you can. The better the quality of beef the better your burger will taste
- Cheese. You can use any melty cheese you want. I went with cheddar because I love the flavor, but traditionally it’s made with American cheese for a creamy, super smooth, liquid molten melt.
- Seasonings. I kept it simple with salt and freshly ground pepper but you can also season your burger patty with garlic powder, onion powder, a bit of paprika, and a pinch of cayenne.
- Burger buns. I love super squishy burger buns and I love them toasted with butter. If I’m buying buns, we’ll go for a brioche-type bun or a potato bun. Of course you can go all out and make your own buns too.
- Burger sauce. Again, we kept it simple with the classics: mayo, ketchup, and mustard. You can also go for a jalapeño burger sauce or a copycat Shake Shack sauce or copycat In-N-Out spread
- Burger toppings. These are entirely up to you! I never say no to lettuce or tomato on a burger and Mike loves a good pickle. You could also do some onions, either raw or caramelized. Sky’s the limit.
What kind of cheese should I use for a Juicy Lucy?
You should use the cheese you love! If you want to do as the Minnesotans do, use American cheese – it’s the meatiest of the melty cheese. You can also use cheddar, pepper jack, blue cheese, mozzarella, fontina, gruyere, provolone, or even a mini brie!Grilled or pan-fried Juicy Lucy?
You can either grill or pan-fry your Juicy Lucy. We’ve done both and usually I prefer pan-fried because I love the crust it gets.How to make a Juicy Lucy
- Make the patties. Stuff your burger patties with ALL the cheese.
- Cook the patties. Cook up your burgers anyway you like, we prefer pan fried but you can grill them too. Let the patties rest while you toast the buns.
- Toast the buns. Toasted buttered buns are essential to a good burger.
- Assemble. Spread on your condiments of choice, place the Juicy Lucy patty on then top with burger toppings of your choice and the top of the burger. Enjoy but be careful, the cheese is hot!
How to put the cheese in the center of a Juicy Lucy
The molten core might seem like a mystery, but it’s really easy to put cheese inside the middle of a burger patty.- Form. Take a portion of ground beef and then divide it into 2 patties, one a bit smaller than the other. Form them, one slightly bigger than the other, with a little indent in the middle.
- Fill. Put a bunch of cheese in the middle of the indent of the slightly larger patty then top it off with the slightly smaller patty.
- Seal. Pinch the patties shut, sealing in the cheese. Done!
Juicy Lucy
Meet the Juicy Lucy, the ultimate cheeseburger with the cheese inside the patty.
- 1/4 lb ground beef (chuck preferred)
- 1/4 cup shredded cheese (cheddar preferred)
- salt and freshly ground pepper
- 1 burger bun (see notes)
- 1 leaf green leaf lettuce (torn)
- 1 slice tomato
- pickles (if desired)
- condiments (if desired)
Divide the beef into roughly 1/3 and 2/3 portions. Shape the 2/3 portion into a burger shape with an indent in the middle. Try to make the burger slightly bigger than your bun as it will shrink while cooking. Put the cheese in the center of the larger patty.
Top with the remaining beef and shape compactly into a burger patty. Season both sides with salt and pepper.
Heat a cast iron pan over medium-high. Butter and toast your buns, then set aside.
Add the burger, and fry for 3-4 minutes on each side, until charred and a crust starts to form.
Spread ketchup, mayo, and mustard, to taste, on the bottom bun. Top with the burger, lettuce, tomato, and the top bun. Enjoy immediately!
Burger buns are one of the most important and overlooked component of any burger. We prefer Martin's potato rolls, every time.
