
I Am... Japanese Style Tamagoyaki French Toast
A super soft and custard-y japanese tamagoyaki inspired french toast is 100 percent the best way to start the day. I am a true lover of french toast and all it’s varieties. I’m pretty sure I’ve talked about my dream french toast restaurant before – the one that would kind of be like IHOP but for french toast instead of pancakes. Needless to say, I’m a french toast fanatic. I like to try french toasts wherever we travel to. Usually they tend to be just like the classic french toast: bread dipped in eggs and milk and fried, but sometimes I encounter a new style of french toast. My most recent french toast obsession is Japanese french toast! It’s soft and custardy and very similar to classic french toast while being completely different.
What is Japanese Style French Toast
Japanese style french toast is almost just like regular - it uses bread and eggs and is fried, but somehow the sum of its parts ends up being different than the french toast you know and love. First off, Japanese french toast starts off with shokupan: super fluffy milk bread. The crusts are almost always cut off and the super soft and fluffy bread soaks up liquid like a sponge. They also tend to soak their bread in a more custard-y egg mix with eggs, milk or cream, and sugar. The bread is soaked for a long time so that the bread is completely saturated. There’s a famous french toast at a popular Tokyo hotel that soaks their bread overnight which results in the most tender, custard-y french toast ever. The bread is then cooked low and slow ensuring that the insides are creamy and cooked through while the outsides are just the slightest bit golden. The eggs get puffy and fluffy and it is just SO GOOD. Lots of the cafes in Tokyo do Japanese style french toast as well.How to Make Tamagoyaki French Toast
- Cut the bread into thick slices and trim the crusts off the bread.
- Create a savory egg custard mix by whisking together the eggs, cream, sugar, soy, and mirin. For an extra smooth french toast, strain the mixture.
- Soak the bread for minimum 1 hour on both sides, flipping carefully. If you can go longer, do it – you want the bread to be completely saturated.
- Heat up a bit of oil in a non-stick pan over very low heat. Let the piece of bread drain a little bit then place in the pan and cook, covered, on very low heat for about 8-10 minutes. Use an offset spatula and take a peek, the bottom should be golden and the top should be puffy. Flip, cover, and continue to cook until golden and puffed up. Serve on a plate with powdered sugar, syrup, and whipped cream, if desired.
What is Tamagoyaki
Tamagoyaki (literally grilled egg) is one of my favorite sushi pieces. It’s the one that is bright yellow and looks like egg (duh!) and is sweet and savory and really good. Essentially it’s a rolled omelette made with with eggs seasoned with soy sauce and mirin (a kind of sweet Japanese very low alcohol content rice wine). I love making tamagoyaki and I love french toast so I thought I’d combine the two into the ultimate Japanese french toast, mixing sweet and savory.You Should Make Japanese French Toast if you:
- love french toast
- love tamagoyaki
- have some mirin in the pantry and want to use it up
- have some fluffy bread hanging around
- love custard-y french toast and hate french toast that is dry in the middle
- or, if you want to try a new french toast technique!
Tips and Tricks
- If you can, use shokupan, milk bread, or bread you buy at the Asian grocery store. It has the fluffiness and ability to absorb the custard. Best is if you buy unsliced bread so you can cut it into thick slices for extra fluffy french toast.
- Strain the egg mixture before soaking the bread. It’s an extra step that might seem a bit extraneous but if you want french toast that’s a uniform golden yellow and doesn’t have bits of egg whites speckling the surface, this is what you want to do.
- Soak the bread as long as you can, evenly on both sides to ensure that the custard saturates and soaks all the way through. This is not a french toast recipe that has dry insides. You can even soak overnight. This of course depends on your bread though. If it’s too fresh, it might just fall apart on you, so make sure you keep an eye on it.
- Cook on extremely low heat and take your time. The key to cooking the custard all the way through is low heat, covered. The low heat, combined with the fact that the pan is covered will make your toast puff up gently and ensures softness and jiggles.
- If you love fluffy Japanese pancakes, you’ll love this fluffy Japanese french toast! I hope you give it a try and if you do, tag @iamafoodblog on instagram, I’d love to see!
Super Soft and Custard-y Japanese Style French Toast
This Japanese tamagoyaki-inspired french toast is soft and custardy on the inside and crisp on the outside. The perfect combination of sweet and savory!
- 2 slices thick cut bread (preferably shokupan)
- 2 large eggs
- 1/4 cup cream
- 1 tbsp sugar
- 1 tbsp soy (low sodium)
- 1 tbsp mirin
- oil for the pan
To Serve
- whipped cream
- maple syrup
- powdered sugar
Trim the crusts off the bread and set aside.
In a liquid measuring cup, whisk together the eggs, cream, sugar, soy, and mirin. If you want to go the extra mile, strain the egg mixture.
Divide the egg mixture equally between two shallow bowls and add one slice of bread to each. Let soak for 1-2 hours covered, in the fridge, then very gently flip and let soak, covered, for another hour to two.
When ready to cook, heat up a non-stick pan over very low heat. Add a touch of oil and add the custard soaked bread (let the excess drip back into the shallow bowl) and cook, over low heat, covered, for 8-10-15 minutes, until slightly golden on the bottom side. Gently flip and continue to cook, covered, until the other side is golden and the toast is puffy.
Serve and enjoy hot, either unadorned or with whipped cream, syrup, and powdered sugar, if desired.

I Am... Trippa alla Romana: Roman Style Tripe in Tomato Sauce
Mike and I love Italian food. So much so that we were recently talking about taking a dream trip to drive up and down Italy just to eat. It’s probably a noodle-y fever dream, but it does tell you we are serious about Italian food. We pretty much try to hit up an Italian restaurant in every city we go to. We have a couple here at home too, but we just demoted one of them, partially because their food hasn’t been that good and partially because they don’t have tripe anymore. They were the only Italian joint in the city that served trippa alla Romana, or Roman style tripe: super tender, rich tripe slow braised in a savory tomato sauce. Trippa alla Romana is usually served showered with parm, with a large amount of toasted bread alongside. The soft and chewy tripe, along with toasty crunchy bread and savory tomato sauce is one of my all time go-to comfort food winter dishes.
Why tripe?
Tripe is one of those foods that isn’t really common and I think it’s so sad. If we’re going to be eating animals, we should really be eating nose to tail. I know nose to tail is kind of trendy (well, maybe not so much anymore) and it’s not trendy to like trendy, but the off cuts are often the most delicious and most rewarding. Not to mention cheap!Trippa alla Romana at home
Anyway, since we haven’t been able to have tripe out, Mike came up with the brilliant idea of making trippa alla Romana at home. I don’t know why I never thought of doing it before, but it was really easy and so good. We picked up some honeycomb tripe from our local Asian grocery store and from there it was just a question of slow cooking it and making a delicious tomato sauce to braise it in. We served it up with a bunch of toasty bread (there was way more bread than in the photos) and went to town, no expensive restaurant needed!Tips and tricks
- You can buy tripe at the butcher, or if you head to a local Asian grocery store, they’re pretty much guaranteed to have it. The kind of tripe you want is honeycomb tripe, which is pretty distinctive looking, with a honeycomb pattern.
- If you want a really tender tripe, you’ll need to simmer it for 1-2 hours. Some people like to add a tiny bit of vinegar to the water to get rid of the “tripe” smell, but I didn’t find that necessary.
- We used some guanciale (cured pork cheek) in the base of our tomato sauce, but it was totally over the top and not necessary.
- If you happen to have leftover tomato sauce in your fridge (or even a meat sauce), you can add the tripe to it and just use that. It’ll probably even more delicious!
Side dishes
Trippa alla Romana is great all on its own but what is life (or a great meal) without side dishes:- One Day No-Knead Focaccia
- Super Creamy Cacio e Pepe Pasta
- Bolognese
- Risotto with mushrooms and eggs and parm
- Kale Salad
Trippa alla Romana: Roman Style Tripe in Tomato Sauce
Super tender and rich honeycomb tripe slow cooked in a savory Roman style tomato sauce.
- 1 lb honeycomb tripe
- 1-2 ounces chopped guanciale (optional)
- 1/2 onion (chopped)
- 3 cloves garlic (minced)
- pinch of crushed red peppers (to taste)
- 1 tbsp tomato paste (optional)
- 14 oz canned tomatoes
- salt and freshly ground pepper
- freshly ground parmesan (to finish)
Place the tripe in a pot and cover with water. Season with salt and bring to a boil over medium high heat. Turn the heat down to a very low simmer and simmer for 1 to 2 hours, covered, until very tender. Add water as needed. Remove the tripe from the cooking liquid, reserving the cooking liquid. Let the tripe cool slightly before cutting into 1 x 2 inch strips.
Meanwhile, while the tripe is cooking, make your tomato sauce: In a pot, crisp up the guanciale or pancetta until brown and crispy and the fat renders out. If not using, heat up 1-2 tablespoons of oil over medium heat. Add the onion and garlic and cook, until soft but not brown. Stir in the crushed red peppers and tomato paste. Add the tomatoes, the cut up tripe, and 1/2 cup of the tripe cooking liquid. Bring to a simmer for for 30 mins to 1 hour, partially covered. Taste, season, and finish generously with parm. Enjoy with toasted bread, if desired.

I Am... Kewpie Mayo
I am a huge Kewpie mayo fan. Give me a squishy soft red-capped bottle of the good stuff and I’ll be squeezing it on everything. But if you don't have any nearby, read on for a good substitute recipe. Kewpie mayonnaise is my number one condiment of choice. I love it with fries, I love it on sandwiches, I love it as a dip, I just LOVE it. If you’ve never had Kewpie mayo or you have heard of it but haven’t tried it, you need to. It will change your life, I’m not even kidding.
What is Kewpie mayo
Kewpie mayonnaise is Japan’s favorite mayonnaise and salad dressing brand. Invented in 1924, it’s pretty much ubiquitous in every Japanese kitchen. It’s rich, yet light, and incredibly delicious. Kewpie mayonnaise is so beloved in Japan that they even have specialty Kewpie mayo cafes to celebrate all things Kewpie. There’s even a Kewpie mayo terrace slash museum where you can learn all about Kewpie, get samples, and make your own!What is the difference between Kewpie and regular mayo
Mayonnaise is an emulsion of oil, egg, and an acid. Regular mayonnaise uses whole eggs and white vinegar whereas Kewpie uses only egg yolks and rice or apple cider vinegar. The result is an extra rich and thick texture with a bit more sweetness and tang. If you don’t like mayo give Kewpie a try, it will surprise you how different they taste.What does Kewpie taste like
Kewpie mayonnaise is tangier, sweeter, thicker, and creamier than regular mayonnaise. It has a huge amount of umami.Iconic Japanese dishes with Kewpie mayonnaise
Kewpie are deeply ingrained in Japanese cuisine, where it's used as a dipping sauce, seasoning, and topping. It’s one of their favorite condiments and an essential in any Japanese kitchen, right along side soy sauce, dashi, mirin, and sake. It’s beloved for a reason - it tastes amazing! Some iconic Japanese dishes where kewpie mayo is the star include: Takoyaki, Japanese Potato Salad, and Japanese Egg Sandwiches. There are even more below. Thankfully you don’t have to go to Japan to experience the magic of Kewpie. You can find it, in its signature squeeze bottle with a red flip top at most grocery stores these days, in the Asian aisle. The mayo itself is a bit more golden that your standard mayo and much more creamy and luxurious. Kewpie mayo uses just egg yolks – as opposed to regular mayo which uses whole eggs – and rice or apple cider vinegar for a hint of sweetness. It’s absolutely addictive and we always have a bottle in the fridge. It’s the not-so-secret ingredient to ALL delicious things.Where to buy Kewpie mayo
You can find Kewpie mayonnaise at most grocery stores in the Asian aisle. If your grocery store doesn’t carry it, you can find it at your local Asian grocery store or online. They even sell it at Costco sometimes.What can I sub for Kewpie mayo?
If you can’t get Kewpie mayonnaise you can grab another brand of Japanese mayonnaise, but the original and best is Kewpie brand. If you can’t get your hands on any Japanese mayo at all, you can make a substitution at home. Recipe below!Kewpie mayo substitutes
If you can’t find Kewpie mayo but you absolutely need it in your life, you can sub regular mayo and add a bit of rice vinegar and sugar to make a Kewpie mayo substitute. A good recipe is below.How to use Kewpie mayo
Kewpie mayonnaise comes in an incredible squeeze bottle with a red flip lid. It has a thin tip that is perfect for piping kawaii faces onto omelettes or making beautiful lines of mayo on okonomiyaki. If you unscrew the lid, there’s also a star tip that let’s you squeeze out blobs of mayo for those times when you need more, like when you’re making potato salad.What is Kewpie mayo good on?
It honestly tastes amazing with everything. You can use it as a dip for vegetable sticks or use it anywhere you would use ranch dressing. Kewpie mayonnaise and breadsticks? Yes please! Kewpie mayonnaise on pizza? Absolutely. It is great with all proteins and especially delicious when you dip chicken nuggets or tenders into it.The difference between Japanese and American Kewpie
Did you know that there are actually two kinds of Kewpie mayo? There are the ones that are produced in Japan and imported and there are ones that are made right in the United States in California. The main difference between the two formulas is MSG. The American Kewpie mayo instead leans on yeast extract (kind of like nutritional yeast) to add umami. It’s a bit disingenuous though because yeast extract actually has naturally occurring MSG, much like tomatoes and Parmesan cheese. We decided to do a blind comparison taste taste and I totally prefer the Japanese version. There’s a creamy, distinct unctuous to it that is just SO delicious. It definitely has a noticeably savory umami note. Japanese kewpie all the way!Recipes to make with Kewpie mayonnaise
Here are some recipes that use Kewpie mayo to get your mayo-imagination up and running.- Mayo ramen - for an extra rich luxe restaurant style ramen
- Ebi chili mayo - Deep fried tempura prawns with sweet and spicy Kewpie
- Japanese Egg Sando (or this one) - Japanese egg salads aren’t Japanese unless you use Kewpie. This is gonna be the best egg salad you’ll ever taste
- Japanese potato salad - It just hits different. It’s the Kewpie!
- Takoyaki - the classic takoyaki topped with Kewpie
- Deviled eggs - eggs get an upgrade with Kewpie mayonnaise
- Sushi bake - because it’s the creamiest, warmest, most satisfying casserole
- Vietnamese Pizza - just a super fun street food you can make at home
Kewpie mayo recipe
Make this easy hack version of classic Kewpie mayo if you're in a bind, but it's better to get the real thing
- 2 tbsp mayonnaise (Hellmann’s/Best Foods preferred)
- 3/4 tsp rice vinegar
- 1/4 tsp sugar
Mix everything together until smooth and eat on everything.

I Am... Easy Better Than Takeout Kung Pao Chicken Recipe
Kung pao chicken is so quick and easy to make at home it'll be a weeknight dinner favorite in no time at all.
What is kung pao chicken?
Kung pao chicken is a classic Chinese stir fry dish with diced chicken, dried chilis, and peanuts. It comes from the land of fire-y spicy hot Chinese food, Sichuan. It’s also a really popular Americanized Chinese take out order. Everyone loves kung pao chicken with its tender bits of chicken and complex sauce of salty, sweet, tangy, and spicy flavors. This particular kung pao isn’t quite the way it’s made in Sichuan. In Sichuan, they classically dry fry it with just a touch of sauce. This kung pao is a saucy riff, more in the style of takeout American Chinese kung pao. The sauce makes it perfect for eating with rice.How to make kung pao chicken
This stir fry comes together super quick and easy after you prep all of the ingredients. If you want do this faster than takeout will arrive at your door, prep everything before you start cooking.- First off, make some rice. Unless you’ve smart and have rice meal-prepped in your fridge. Then in that case, skip this step because you’re already winning at life.
- Cut up your chicken into bite sized pieces. Place them in a bowl with the marinade and set aside while your prep the sauce ingredients.
- Prep the ginger and garlic. Whisk up all the sauce ingredients in a small bowl or liquid measuring cup. Use a garlic press for the garlic and a ginger grater for the ginger. Both are huge time savers.
- Time to cook! It’ll take just a few minutes: cook the chicken, add the sauce, let it reduce a bit, and you’re ready to eat.
Kung pao sauce
Kung pao sauce is a magic sauce that makes everything taste good! It’s so delicious that they sell bottles of it at the store (there’s even Panda Express kung pao sauce) but it’s really easy to make at home and store in the fridge. From there you can add it to random clean out the fridge stir fries and boom, instant kung pao. To make kung pao sauce, mix together 1 tbsp + 1 tsp cornstarch, 1/4 cup hoisin sauce, 1/4 cup sambal oelek, 2 tbsp rice vinegar, 2 tbsp sugar, 4 cloves minced garlic, and 1 tbsp grated ginger. Cook in a non stick sauce pan over medium heat, stirring until the sauce becomes thick and glossy. Let cool completely then pour into a clean container and keep in the fridge for up to 2 weeks, tightly covered. Add to stir fries during the last step, after everything has been cooked.Kung pao chicken ingredients
Most of the ingredients in this kung pao chicken can be found at your usual grocery store. You need chicken thighs, soy sauce, rice vinegar, cornstarch, sugar, garlic, ginger, scallions, and peanuts (or your nut of choice). The other handful of ingredients can be found at your friendly Asian grocery store, online, or in places like Whole Foods.The hard to find stuff
- Shaoxing wine: This is the secret ingredient that will make your Chinese food taste like restaurant style Chinese food. Shaoxing wine is a sweet, nutty, earthy Chinese rice wine. Read more about it via our ultimate guide to Shaoxing wine.
- Hoisin sauce: Hoisin is pretty much sold everywhere now, from Target to your basic grocery store. It’s a thick, sweet brown sauce that’s used in marinades and as a dipping sauce. It’s super flavorful: sweet and savory, tangy, and full of umami. Hoisin can taste different based on brand, and for us, the best brand of hoisin is Lee Kum Kee. Bonus, it comes in a squeeze bottle!
- Sambal oelek: This is not an authentic ingredient in kung pao chicken in Sichuan, but it packs a fresh chili-garlicky punch.
- Whole dried chilis: These are completely optional, but if you want your kung pao to look authentic, you’ve got to have dried chilis! They sell whole Chinese dried chilis online and in Asian grocery stores. We use dried heaven facing chilis but you can sub the chile de árbol you see in the Mexican aisle too. Most people don’t eat the dried peppers, but some do, especially if the peppers are high quality, toasty, and good.
Nuts or nut free?
Peanuts are the classic nut in kung pao. The key is to fry them a bit to enhance their nuttiness. I went for a peanut-free kung pao with cashews. If you like, you can sub in any nut or leave them out entirely. To fry your nuts: heat a bit of oil in a non-stick pan or wok. Stir fry, moving constantly for 2-3 minutes until they start to smell roasty and delicious. Remove from the pan and set aside. If you’re not going to fry your nuts, make sure you’re using toasted/roasted nuts.Chicken breast or chicken thighs?
Chicken thighs are superior in this stir fry because they are super flavorful and have more fat content than breasts. You can use breasts too, just make sure you cook them for less time.Does this taste like Panda Express kung pao chicken?
This isn’t an ingredient-for-ingredient copycat recipe for Panda Express but it is pretty darn close!Tips and tricks
- Cut your chicken into even pieces. Take the time to chop up the chicken into small even pieces. It’ll cook faster and more evenly.
- Velvet your meat. Marinating the chicken in Shaoxing wine, soy sauce, and cornstarch is called velveting. It gives the chicken flavor and the cornstarch protects the chicken from too much heat which makes it juicer when it cooks. It’s what gives stir fried meats their silky texture.
- Toast the nuts. Toasting the nuts draws out the flavors making them more nutty and crunchy.
- Use a non stick pan. I like to use a non-stick pan because cornstarch has the tendency to stick to regular pans and with a non-stick you have the option of not using as much oil. Some people think that non-stick pans are not professional, because they don’t give you the maillard reaction (or wok hei, if you’re going that deep) you’d get with a regular pan, but when you’re making stir fry, not steak, it’s not an issue. Plus, the name of the game is ease and if you have an annoyingly difficult to wash pan after dinner is done, that’s not easy. These pans are my favorite.
What to serve with kung pao chicken
Kung Pao Chicken Recipe
Highly addictive and super easy to make at home.
Chicken
- 1 lb chicken thighs (cut into bite size pieces)
- 1 tbsp soy sauce
- 1 tbsp Shaoxing wine
- 1 tsp cornstarch
Kung Pao Sauce
- 2 tsp cornstarch
- 2 tbsp hoisin
- 2 tbsp sambal oelek
- 1 tbsp rice vinegar
- 1 tbsp sugar
- 2 cloves garlic (crushed)
- 2 tsp ginger (grated)
Stir Fry
- 1 tbsp oil
- 8-10 dried red chiles (if desired)
- 1/4 cup roasted cashews (or peanuts)
- 2-3 green onions (cut into 2" lengths)
Marinate the chicken thighs in the soy sauce, shaoxing wine, and 1 teaspoon of cornstarch. Set aside while prepping your sauce.
In a small bowl or liquid measuring cup, whisk together the remaining 2 teaspoons of cornstarch with 1/4 cup water, hoisin, sambal oelek, rice vinegar, sugar, garlic, and ginger.
Heat up the oil in a large non-stick frying or sauté pan over medium high heat. Add the chicken and cook, stirring occasionally until golden and cooked through.
Turn the heat to medium, add the peppers and the sauce and stir to coat. Cook, until the sauce starts to thicken and turn glossy.
Add in the green onions and cashews.
Enjoy hot!

I Am... 5 Ingredient Honey Garlic Chicken
Sweet and sticky, savory and garlicky, 5 ingredient honey garlic chicken is always the answer when you need a quick weeknight dinner. This is the best 5 ingredient back pocket recipe. Honey garlic is my jam: I can eat it on literally everything, including toast. It’s one of the easiest most flavorful sauces you can make at home and is a definite crowd pleaser. Bonus, it's also one of the cheapest mains you can make out there (unless you're buying very fancy honey).
How to make honey garlic chicken
- Cook the chicken. Lightly pat your chicken dry, season it on all sides with salt and pepper then cook it in a pan with a bit of oil. When it’s cooked through, it’s time to add the garlic.
- Cook the garlic. Add the garlic to the pan (add a bit of oil if the pan is dry) and cook until it’s soft but not brown and smells amazingly garlicky.
- Add the sauce. Stir in honey, soy sauce, and vinegar and let it bubble away and thicken, coating all the nooks and crannies of the chicken.
- Enjoy! Remove the chicken from the pan along with all the sauce and enjoy!
Honey garlic chicken ingredients
- chicken - I used bone in skin on thighs because I love how much flavor you get from bone in chicken and I love chicken skin! You can use literally any part of the chicken that is your favorite. I’ve included a handy cooking time chart just below.
- garlic - this is a garlicky honey garlic with 6 fresh cloves. You can add more or have less based on your garlic preferences. For me, the more garlic the better. Oh, and save yourself some time and get a garlic press, it’s a prep game changer!
- honey - mild, pure, 100% clover honey is what I reach for when cooking so the flavors don’t overwhelm the dish. Because we’re cooking the honey you don’t need raw honey, save that for your tea, toast, or oatmeal.
- vinegar - vinegar adds a bit of acid and tang to this sauce and balances it out so it’s not just all sweet. I like to use rice vinegar but you can sub white vinegar or white wine vinegar too. Or lemon or lime if that's easier.
- soy sauce - just a touch of soy sauce for umami and flavor. As always, use a soy sauce you love the flavor of and go for a naturally brewed soy sauce.
Pan-fried chicken cooking time chart
- boneless breast: 10-15 minutes, flipping as needed
- boneless thighs: 6-10 minutes, flipping as needed
- bone-in thighs: 20-25 minutes, flipping as needed
- drumsticks: 20-25 minutes, flipping as needed
- wings: 10-15 minutes, flipping as needed
Air fryer honey garlic chicken
Mix together the garlic, honey, rice vinegar, and soy sauce, and coat the chicken evenly. Add the chicken, skin side down, along with the sauce, to a heat safe container that fits inside the air fryer. Cook for 15-20 minutes at 350°F, flipping halfway, or until the internal temp reaches 165°F. Remove, stir up the sauce and spoon it over the tops and enjoy.Baked honey garlic chicken
Mix together the garlic, honey, rice vinegar, and soy sauce, and coat the chicken evenly. Add the chicken, along with the sauce, to an oven safe casserole dish. Bake the thighs at 425°F for 20-30 minutes, or until the internal temp reaches 165°F. Remove, stir up the sauce and spoon it over the tops and enjoy.Instant Pot honey garlic chicken
Mix together the garlic, honey, rice vinegar, and soy sauce, and coat the chicken evenly. Add the chicken skin side up, along with the sauce, to the insert of the instant pot. Cook on High Pressure for 7 minutes and then do quick release. Carefully open the Instant Pot. If desired, reduce the sauce down a bit. Remove the thighs, and turn the pot up to sauté high and reduce the sauce, stirring, until desired thickness. Enjoy!Raw vs real vs fake honey
There's all kinds of honey out there and it can get confusing. You should use what you like and can afford, but if you're curious, here are some quick tips on honey (feel free to discuss in the comments):- There's lots of honey out there that are primarily or even completely corn or other syrups
- Avoid honey with more than one ingredient
- Choose local honey if you can get it for the best honey quality
- There is no such thing as truly organic or raw honey
- But! Unpasteurized honey may be closer to the real thing if that's what you're looking for
- Good honey does tend to crystallize
- To decrystallize your honey, soak in warm (120ºF) water for up to 30 mins, stirring or shaking every few minutes to distribute the heat.
Side dishes
Honey garlic chicken should be served with a carb (we like basic white rice but brown is great too) and a nice quickly blanched green such as the broccoli you see here. It's basic good comfort food:Why you should make homemade honey garlic chicken
- super easy, barely an inconvenience
- making it at home means your chicken can be extra saucy
- you can customize it to your own taste with extra garlic or not too much garlic
- it’s faster than delivery
- the pure satisfaction of a home cooked meal
Honey Garlic Chicken
The best 5 ingredient back pocket recipe.
- 1 lb chicken (of choice)
- 6 cloves garlic (minced)
- 1/3 cup honey
- 1 tbsp rice vinegar (or vinegar of choice)
- 1 tbsp soy sauce
Pat the chicken dry and season all sides with salt and pepper. Heat a skillet over medium high and add a bit of oil. When hot, add the chicken, skin side down if using skin on chicken and cook, until golden and cooked through, flipping as needed. See chart for approximate cook times.
When the chicken is cooked through, push the chicken to one side of the pan and add the garlic and cook, stirring, until soft and fragrant. Stir in the honey, vinegar, and soy sauce and let bubble and simmer, stirring. Coat the chicken in the sauce and let it thicken slightly. Remove from the pan, being sure to scoop up the extra sauce and enjoy!

I Am... Air Fryer Grilled Cheese
All you need is ten minutes for this perfect air fryer grilled cheese. It’s hands-off, quick and easy perfection with extra crispy toasty outsides and gooey melty cheesy insides I love grilled cheese sandwiches. They’re one of my all time favorite comfort foods. I love simple, classic grilled cheese and fancy grilled cheese - to me, all grilled cheese is good grilled cheese. But, when I’m starving and I need grilled cheese almost instantly, an air fryer grilled cheese is my go-to.
Why air fryer grilled cheese?
Remember when I said all grilled cheese is good grilled cheese? Well, I lied. I absolutely abhor any kind of burnt grilled cheese. Or even worse, when the outsides are toasted but the cheese isn’t melted. For such a simple sandwich, there are so many things that can go wrong if you’re not patient at the stove. That’s why air fryer grilled cheese is amazing. It comes out the same every single time you make it. Once you set the temp and time, you can just chill out and let the air fryer do its thing. No fiddling with looking at how golden your bread is, no burnt bits, and thankfully, no unmelted insides.How to make air fryer grilled cheese
Making a grilled cheese sandwich in the air fryer is much the same as making one on the stove in a pan, minus the standing at the stove. Here’s how you do it:- preheat - preheat your air fryer while you’re prepping your sandwich.
- butter - use softened room temperature butter to generously butter two slices of bread.
- build - place one slice of the buttered bread in the basket of the air fryer and top with two slices of cheese. Place the other slice of bread on top of the cheese, butter side up.
- air fry - air fry the sandwich for 3-5 minutes, then flip and continue to air fry until perfectly golden.
- enjoy - remove, slice if desired, and enjoy!
What kind of cheese for air fryer grilled cheese?
There’s only one cheese for classic grilled cheese: American. It’s the perfect melty, cheesy filling for a grilled cheese. Yes, you can get fancy with sharp cheddar, gouda, or whatever your favorite cheese is, but if you want pure comfort food, American cheese is what you want. For those times I don’t go with American cheese, I like one slice of cheddar and one slice of mozzarella.What is American cheese?
Contrary to what you’ve heard, American cheese is cheese. It’s perfect for grilled cheese sandwiches because it’s mild, creamy, and has a low melting point. American cheese has a bad reputation because it’s processed, but in reality, all cheese is processed. What people are really complaining about is the fact that it’s pasteurized, which makes people think that it’s “plastic.” American cheese is in fact, made from cheese, more specifically cheddar or Colby cheese that’s been melted with sodium citrate (a citric acid salt aka salt from the the acid found in citrus fruits) so it can be pasteurized into a creamy texture that doesn’t separating. Anyway, that was just a long way of me saying that American cheese is real cheese and it’s good!The best bread for grilled cheese
For a classic grilled cheese so all you need is simple sandwich bread. It’s up to you if you want to go for white or whole wheat, but if you’re having a grilled cheese sandwich, I recommend white bread. My favorite kind of white bread for grilled cheese is super soft shokupan/Japanese milk bread but obviously I don’t always have homemade bread hanging out in the kitchen. My next favorite choice is any sort of fluffy, super squishy sandwich loaf.Tips and tricks for a perfect air fryer grilled cheese
- use room temp butter so you don’t tear your bread trying to spread hard butter on soft bread. If you don’t have room temp butter, melt some in the microwave and brush the bread with the melted butter. If you don’t have butter, you can always substitue mayonnaise.
- preheat the air fryer, even if it’s not for a long time. Just press the preheat button while you’re assembling your sandwich. It really does make a difference in the heat transfer and toasting of the bread.
- use 2 slices of cheese. It seems like overkill, but one sandwich with two slices of cheese is the way it should be. You want enough cheese in the middle of your grilled cheese to melty and gooey. No one likes a grilled cheese that skimps on the cheese.
- choose regular sandwich bread thick bread. The bread to cheese ratio is perfect when you go with a regular thickness. This is not the time for thick slices of bread; too thick and your grilled cheese won’t be as crispy.
- add a rack or a small baking sheet to the basket and place the bread and cheese on top if you don’t want your grilled cheese to have air fryer basket marks.
Which air fryer is this?
We have a Cosori air fryer with a clear window. I love it because you can peek inside without opening the drawer. So much of knowing when something is done cooking is about appearance and the little window lets you see everything that’s going on inside. I also love that it’s so big. It doesn’t look absurdly large but it fits a lot of food inside and it hasn’t let us down yet. It’s kind of hilarious but Mike and I love it so much that we joke all the time about getting a second one so we can air fry multiple things at once. (not sponsored, btw) That’s it, air fryer grilled cheese for the win. Hope your future is cheesy! xoxo stephAir Fryer Grilled Cheese Recipe
Quick and easy perfection with extra crispy toasty outsides and gooey melty cheesy insides.
- 2 slices bread
- 2 slices cheese (of choice, American preferred)
- 1 tbsp butter (room temp)
Preheat the air fryer to 400°F. While the air fryer is heating, butter both slices of bread.
Place one slice of bread, butter side down, in the air fryer basket.
Top the slice of bread with 2 slices of cheese.
Place the other slice of bread on top, with the butter side facing up.
Air fry until golden brown, about 3-5 minutes, then flip and air fry for an additional 1-2 minute or until the grilled cheese reaches your desired toastiness.

I Am... Easy Valentine’s Day Dinner Ideas
Valentine’s Day is just around the corner and almost everyone I know is scrambling for ideas. While lots of people are still going the dinner out route, lots of friends are also asking, what are some easy Valentine’s day dinner ideas? If you're in the same boat, read on below for all the recipes, all in one place.
Why you need an easy Valentine's Day dinner
Valentine's Day shouldn't be hard. After all, how romantic is it really to run around cooking up a storm? It's far better to set and forget some of these easy recipes, then relax and unwind with your person and a nice glass of your drink of choice.Red Wine Spaghetti
If there is ever a time to make a pasta dish with a whole bottle of red wine, Valentine’s is it! Rich, creamy, yet somehow light, this classic Italian spaghetti, aka drunken spaghetti, is the perfect date night to show your person you have the chops to make fancy restaurant style pasta, right at home.Red Wine Spaghetti
Spaghetti ubriachi is rich and creamy, slightly tart, and absolutely addictive.
- 2 tbsp olive oil (plus extra to finish)
- 6 cloves garlic (finely minced)
- 1/4 tsp red pepper flakes (or more as desired)
- 4 tbsp butter
- 8 oz spaghetti
- 1.5 cups red wine
- 2 tsp soy sauce
- 1/4 cup Parmigiano Reggiano cheese (finely grated)
Add the olive oil, garlic, chili flakes, and 1 tbsp butter to a large skillet and heat over medium heat. Cook, stirring occasionally until the garlic is soft, but not brown, about 3 minutes.
Add the wine and increase the heat to medium high and bring to a rolling simmer until it starts to reduce.
While the sauce is cooking, cook the pasta 3 minutes shy of al dente. Pull the spaghetti straight from the cooking water using tongs and place it into the reduced wine sauce.
Add the remaining butter and and soy sauce bring to a simmer. Cook, stirring occasionally, until the sauce thickens and the pasta is glossy and well coated.
Remove the pasta from the heat and add the cheese, tossing to melt evenly. If needed, add pasta water 1 tablespoon at a time to help melt the cheese evenly.
Serve topped with freshly cracked pepper and a drizzle of finishing olive oil. Enjoy!
Kimbap and Tteokbokki
Are you and your partner K-drama fans? You know how they’re always eating tteokbokki and kimbab after getting caught in the rain? Skip the being drenched in rain part and make a cute lil Korean dinner together then and cue up your favorite show.Kimbap
How to make the best kimbap
- 4 cups cooked rice (short grain preferred)
- 1/2 tsp kosher salt (or to taste)
- 4 tsp toasted sesame oil
- 1/2 lb steak of choice (thinly sliced)
- 2 tsp soy sauce
- 2 tsp sugar
- 8 oz spinach (baby spinach preferred)
- 1 large carrot (cut into small matchsticks)
- 4-8 strips danmuji (see notes)
- 4 sheets seaweed
Place warm rice in a large bowl and sprinkle with 1/2 tsp kosher salt and 1 tsp toasted sesame oil. Fluff the rice, mixing the salt and and oil into the rice evenly. Let cool while you prep the other ingredients.
Marinate the thin slices of steak with 2 tsp soy sauce, 2 tsp sugar, and 2 tsp toasted sesame oil. Set aside.
Quickly blanch the spinach in boiling hot water and cool immediately in ice water. Squeeze the water out of the spinach and mix with a sprinkle of salt and a 1/4 tsp toasted sesame oil. Set aside.
Massage the carrots with a sprinkle of salt and let soften for 2-3 minutes then squeeze any excess water out of the carrots. Sauté the carrots in a non-stick frying pan over medium low heat with a 1/4 tsp toasted sesame oil until slightly soft, 1-2 minutes. Remove from the pan and let cool.
If needed, prep the danmuji by making sure it’s trimmed to fit the length of the seaweed sheets.
Fry the beef in a nonstick frying pan over medium-high heat stirring as needed until cooked through. Remove from the pan and let cool.
Place a sheet of seaweed, shiny side down, on a rolling mat. Evenly spread 1 cup of the prepared rice onto the seaweed, leaving 2 inches uncovered on the top portion of the seaweed. Place 1/4 of the beef, carrots, daikon, and spinach evenly in a neat row in the middle of the rice.
Use both hands and the mat to roll up the rice and seaweed tightly over the fillings until you reach the top of the seaweed where there is no rice. Let the kimbap sit, seam side down, while you repeat with the remaining ingredients.
Lightly brush the rolls with toasted sesame oil then slice into 1/2 inch bite size pieces and enjoy!
Quick pickled danmuji
makes 1 lb picked daikon
prep 10 minutes
pickle 24 hours
8 inch length daikon
1 cup water
1 cup rice vinegar
1/4 cup sugar
2 tsp kosher salt
1/4 tsp ground turmeric
Peel and cut the daikon into 4 inch long strips that are about 1/4 inch thick.
Combine the water, rice vinegar, sugar, salt, and turmeric in a small pot and bring to a simmer of medium heat, stirring, until the sugar and salt dissolves. Remove from the heat.
Place the daikon strips into an airtight container and carefully pour the pickling water over the daikon. Let cool, then cover, submerging the daikon in the pickling juice. Pickle for 24 hours minimum before enjoying!
Tteokbokki
Tteokbokki is probably THE most famous street food from Korea: chewy rice cakes simmered in an addictive mix of sweet, savory, spicy sauce.
- 1 lb tteokbokki tteok
- 3 tbsp gochujang
- 1 tbsp gochugaru
- 1 tbsp soy sauce
- 1 tbsp sugar
- 3 cloves garlic (minced)
- 3 cups anchovy stock (sub dashi or other stock if needed)
To Finish
- 1 tsp toasted sesame oil
- 1 tbsp green onions (thinly sliced)
- 1 tsp toasted sesame seeds
Soak the tteokbokki tteok in warm tap water while you prepare the sauce.
In a small bowl, mix together the gochujang, gochugaru, soy sauce, sugar, and minced garlic. (See notes for a mild version of the sauce.)
Add the anchovy stock to a pot and stir in the sauce. Bring to a simmer over medium high heat.
Drain the tteokbokki and add to the pot. Stir occasionally and bring to a simmer for 3-4 minutes. Turn the heat down to low and let the sauce bubble and reduce, stirring so they don’t stick to the bottom of the pan, about 10-15 minutes depending on how thick you want the sauce.
Before serving drizzle with toasted sesame oil and finish with toasted sesame seeds and sliced scallions. Enjoy warm!
Brown Buttered Noodles
The nutty addictiveness of brown butter is on display with these simple to make, even easier to slurp grown up brown butter noodles. For the noodle lover in your life.Grown Up Buttered Noodles: Garlicky Brown Butter Parmesan Noodles Recipe
When you’re craving a bowl of childhood comfort with just a hint of adulting, make yourself a bowl of these garlicky brown butter parm noodles
- 6 ounces pasta of choice (I used bucatini)
- 5 tbsp butter (divided)
- 4 cloves garlic (crushed or minced)
- 1/2 cup finely grated parmesan
- salt and freshly ground black pepper (to taste)
Bring a large pot of salted water to a boil and cook the pasta 2 minutes shy of al dente. Reserve 3/4 cups pasta water and drain.
While the pasta is cooking, melt the 4 tablespoons butter in a large pan over medium heat. Add the garlic and cook, swirling, until the butter foams, smells nutty and toasted, there are golden brown solids, and the garlic is lightly golden. Remove from the heat and stir in the last tablespoon of butter.
Carefully add 1/2 cup of the pasta water to the melted butter – and bring to a boil over high heat, whisking or swirling often to emulsify the pasta water and butter, about 1 minute.
Add the pasta to the pan and cook, turning the heat up, tossing occasionally, until pasta is al dente and the sauce reduces and becomes thick and glossy, adding pasta water as needed, about 2-3 minutes.
Stir in the cheese and toss well to melt and combine, thinning with extra pasta water if needed. Season with salt and pepper to taste and enjoy immediately.
Garlic Lobster Pasta
When you want to be fancy but not too fancy (ie, you don’t want to go out and spend your hard earned paycheck on an overpriced Valentine’s Day set menu), make this garlic lobster pasta. It looks like it’s from a fancy restaurant, but it’s from your kitchen and it’s super impressive. The best part is, you don’t have to cook the lobster yourself, just grab some of those precooked lobster tails from the seafood counter. Seriously so good!Garlic Lobster Pasta
The best aglio e olio base lobster pasta loaded with pieces of lobster and finished with crunchy bread crumbs and a secret ingredient.
- 4 tbsp olive oil (divided)
- 1/4 cup bread crumbs (coarse, see note)
- 2 tbsp fresh flat leaf parsley (chopped)
- 6 ounces spaghetti
- 1 head garlic (sliced)
- 1 tsp red pepper flakes
- 1.5 tbsp oyster sauce
- 1 lobster (cooked, shelled and roughly chopped, about 1-1.5lbs)
Add 1 tbsp olive oil to a pan and toast the breadcrumbs until golden and crunchy. Remove from the heat and stir in a pinch of parsley. Set aside.
In a pot of salted water, cook the spaghetti one minute shy of al dente.
While the pasta is cooking, heat up the remaining oil in a skillet over medium heat. Add the garlic and cook, stirring, until fragrant and slightly soft, but not brown, 20 seconds to 1 minute. Stir in the red pepper flakes, flat leaf parsley, and oyster sauce. Add 1/3 cup pasta water to the pan and bring to a simmer to emulsify into a sauce, stirring occasionally.
When the pasta is ready, use a pair of tongs to move the cooked pasta over to the pan with the sauce. Leave the heat on medium, add the lobster and toss to combine, until the sauce is glossy and clings to the noodles. Add extra pasta water if the pasta gets too dry.
Finish with toasted bread crumbs and enjoy!
Note: I like to blitz up old sourdough bread in the food processor for fresh, coarse crumbs.
Super Creamy Cacio e Pepe
Speaking of Italy, the Italian grandmas out there won’t like this one because it’s not a classic cacio e pepe, but that’s because it’s better! Super easy to make and the best dish for the partner who only loves mac and cheese. You know what I mean, your palate is a bit more adventurous but they’re stuck in their chicken nugget era. This is the dish that will make you both happy!Super Creamy Cacio e Pepe Style Pasta Recipe
- 1 tbsp butter
- 1 tsp freshly cracked black pepper
- 1 tbsp flour
- 1/2 cup whole milk
- 3 oz finely grated pecorino (about 1.5 cups)
- 1/4 cup pasta water (more if needed)
- 6 oz pasta (I used homemade garganelli)
In a skillet, melt the butter and add the pepper, letting the pepper infuse the butter as it melts. Stir in the flour and cook for about three minutes, until completely smooth and incorporated.
Pour in the milk in a thin stream while whisking. It might start out lumpy, but keep whisking and it will smooth out into a thick paste. Stir in the pecorino in batches, and remove from the heat. The sauce will be very thick.
Bring a pot of salted water to a boil and cook the pasta according the packaging or until it is al dente.
Take 1/4 cup of the hot starchy pasta water and stir it into the cacio e pepe sauce, whisking over medium low heat until smooth and glossy. Add the drained pasta, stirring in extra pasta water as needed until the sauce coats the pasta. Enjoy with extra pepper and crushed red peppers, if desired.
loosely based on https://www.pastasocialclub.com/post/cacio-e-pepe-style-pici
It wouldn't be Valentine's Day without Steak
Steak frites is the ultimate romantic dinner idea that can remind you of dinner out at a bistro. It doesn't even have to be expensive steak. Sometimes the cheap supermarket cuts are just what you need to relax and unwind. Steak sauce is the key and there are many to choose from in this post but I've also included my favorite classic peppercorn here:Classic Peppercorn Steak Sauce Recipe
Classic creamy peppercorn steak sauce
- 1/4 cup brandy or cognac
- 1/2 cup no sodium beef broth
- 1/3 cup heavy cream
- 1-2 tsp crushed whole black peppercorns
- salt (to taste)
In the same pan that you browned the steak, deglaze with the brandy/cognac over medium heat, scraping up any brown bits in the pan. When the brandy/cognac has reduced a bit, stir in the beef broth and cream. Add the peppercorns and bring to a gentle simmer, stirring occasionally, until thickened to your liking. Season with salt to taste.

I Am... Air Fryer Steak
Is there anything better than a good steak to improve your day? There are so many great ways to cook steak, and now there's one more. For those days when you don’t have time and energy, air fryer steak is the perfect answer. Or even when you do have energy, you'll be surprised how good an air fryer steak can be.
Steak in an air fryer?
Why make steak in an air fryer when you have cast iron, reverse seared, or flame grilled steak? While all of those are excellent ways to make steak, an air fryer can have your steaks from raw to less raw (aka, perfectly cooked) in under 10 minutes, with almost zero cleanup. After a long work day, this seems way better to me than hand scrubbing a cast iron skillet with kosher salt or preheating your grill, oiling your grill, scrubbing your grill, etc. Even if it's for a special occasion, why not make life easier? It's not more special because it was hard to do.How to get a good sear
Air frying with its fan and high-ish temps can replicate the same kind of sear you get on a grill or cast iron pan. The trick is getting the steak as close to the heating element as possible. For these photos, I used air fryer racks to lift the steaks right up to the heating element, and the resulting crust is what you see.Air fryer racks
Air fryers are great, but air fryers with racks are a game changer. Racks allow you to lift the steaks up closer to the heating elements, cook more steaks at once, and prevent any weird grill patterns from the air fryer’s basket. You can use any racks that stack, and fit inside your air fryer. This is the one I'm using, but be sure to measure your air fryer and make sure the rack fits inside before buying. Ideally you want to get your steak as close as possible to the heating element while leaving an inch of airspace to be sure nothing spontaneously combusts. Don’t walk away for the 7 minutes the steaks are cooking just in case.Smoke
There will be lots of smoke. These butter basted steaks are cooked an inch from a 400ºF heating element and are going to get smoky. I put our air fryer right under our hood fan on high and it did the trick. There’s not really a way around the smoke if you want a good crust. It might even be worth it to take your air fryer outside.The best cut for air fryer steak
Let's be real, this isn’t a high dollar steak kind of recipe. There are better ways to cook expensive steaks. I tried this with a striploin and a sirloin, for science. Both were about 1.25” thick or so and both came out perfect for my tastes. The fat cap on the striploin rendered out enough not to be chewy and unappetizing. The sirloin was still tender and juicy and not at all tough or tasteless.Preheating your air fryer
Preheating an air fryer can seem like an unnecessary step, but it’s really helpful for a fast cooking recipe like steak by reducing the time it takes to get your air fryer up to temp. I threw some oil coated garlic cloves into the basket while preheating (and cooking the steak) and they came out roasted and gooey.Air Fryer Steak temps
For a quick and easy reference, steaks are roughly done at: Rare: 125ºF Medium-rare: 135ºF Medium: 145ºF Medium-well: 155ºFDry Rubs & Marinades
A steak is pretty good all by itself. I also like cajun butter steak and steak diane, if we're into flavored steaks.Steak sauces
Check out this post for our best steak sauces such as classic peppercorn, mustard cream, garlic mushroom, coconut curry, or Japanese chimichurri.And of course you need potatoes
- The creamiest mashed potatoes
- Triple cooked chips
- The crispiest roast potatoes
- The best baked potato
Perfect Butter Basted Air Fryer Steak
Juicy, deeply crusted, perfectly cooked steak in under 10 minutes for those days you don't have time or energy.
- air fryer
- 2 8~10oz steaks (of choice, striploin or ribeye preferred)
- salt and freshly ground pepper
- 2 tbsp butter (or high heat oil)
- 4 cloves garlic (unpeeled, optional)
Season the steaks and allow to rest on the countertop for about 30 mins.
Preheat your air fryer at 400ºF for 3 minutes. If using garlic, place them at the bottom of the basket before preheating.
Microwave the butter for 20 seconds, then another 20 seconds, or until melted.
Brush the steak down with butter, then place in the basket as close to the top as possible.
Cook at 400ºF for 7 minutes without flipping for medium rare. See notes for other times.
Let rest for 5 minutes, then slice and serve.
Approximate times
Rare: 5 min
Med Rare: 7 min
Med: 9 min
Med well: 11 min
I Am... Tokyo Food Guide: In Search of the Best Tokyo Gyoza
Are you here for the love of gyoza? It's not hard to fall in love with those little packages of crispy bottoms, tender tops, and juicy meaty insides. I can't remember when I had my first gyoza, but I can tell you that my love for gyoza runs deep. I legitimately love all the food in Tokyo, but when I'm there, there is a special gyoza-sized hole in my heart that just needs to be filled. When you love gyoza as much as I (and Mike!) do, the only logical thing to do when in Tokyo is: GYOZA HUNT.
Here are a few things we learned from our intensive study in Tokyo gyoza houses
- Gyoza houses have a relatively limited menu: gyoza, rice, some small sides, and beer.
- Most people order meat gyoza. Some places also offer vegetable/yasai gyoza, but I would say that meat are standard.
- Generally, gyozas come with garlic or without. The staff will ask you, "niniku?" and the answer should always be hai/yes. If, for some reason, you're a vampire and don't like garlic, you can say: niniku janai. Side note: lots of the newer, hip gyoza places don't have garlic in their gyozas – the lack of garlic is supposed to be so buisness peeps can enjoy gyoza without worrying about garlic breath.
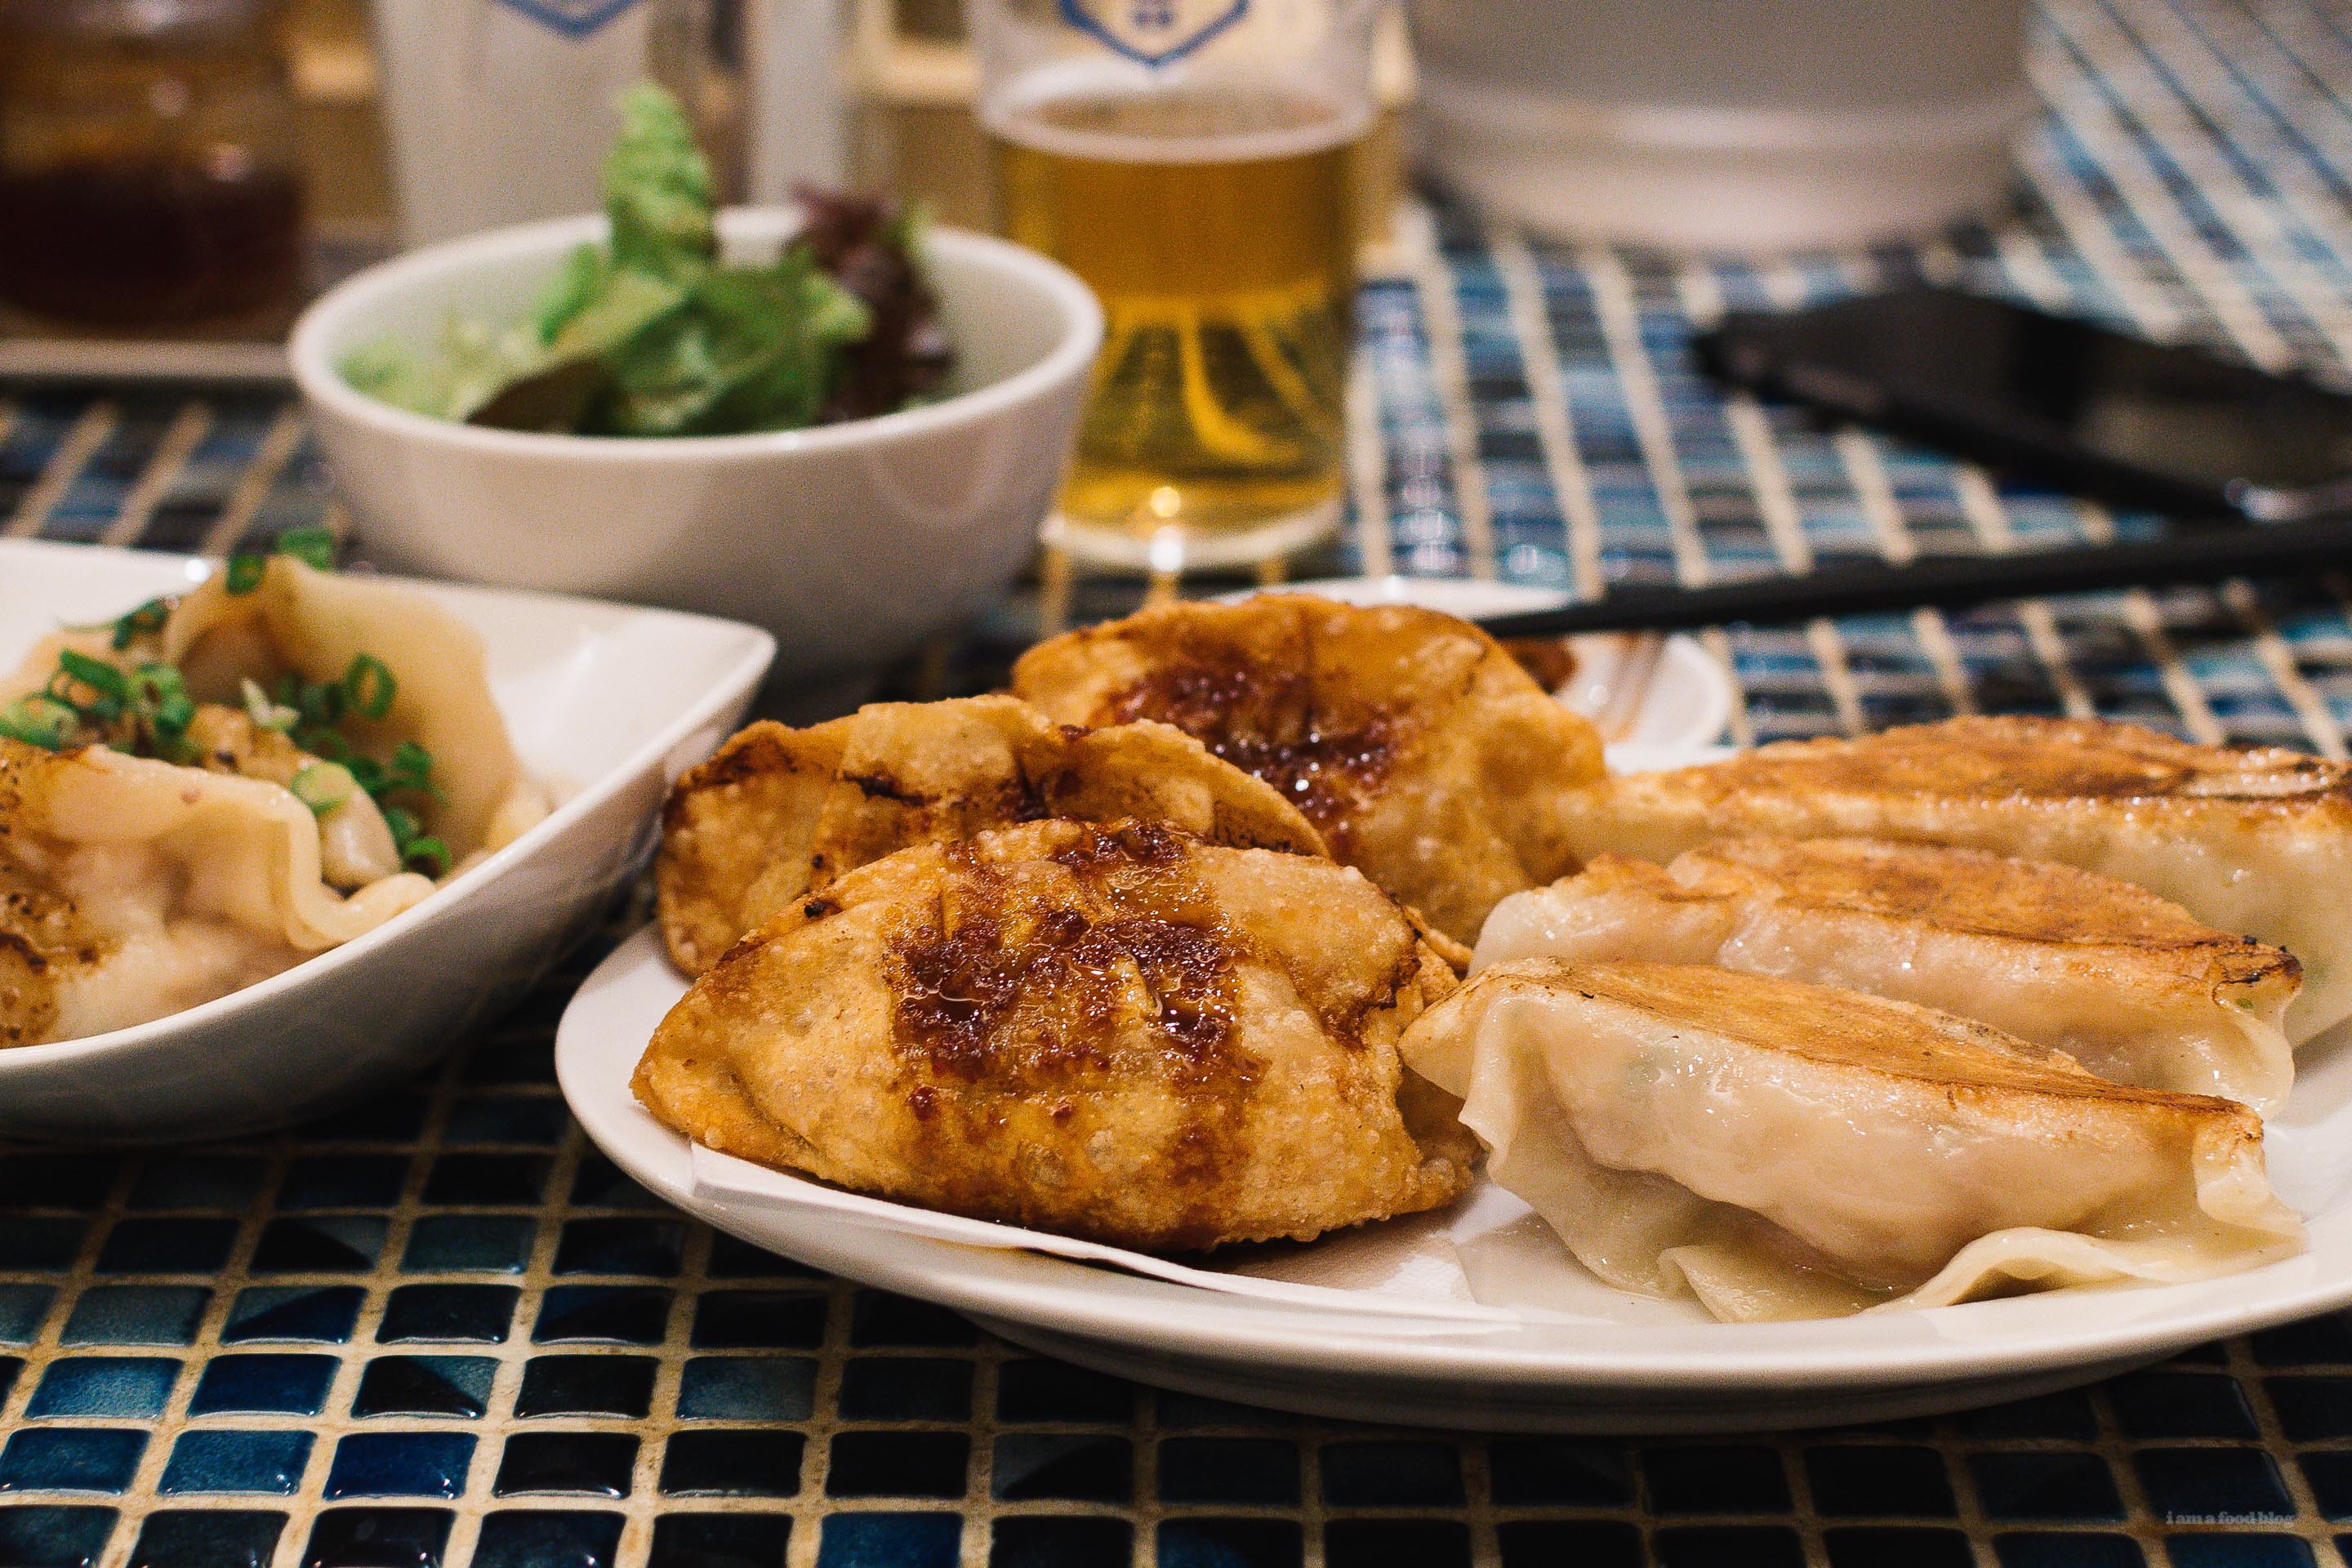
- Gyoza generally come yaki (pan-fried) or sui (boiled). I say go for an order of each – usually everyone goes for yaki because hello crispy bottoms, but sui really let the gyoza flavor shine and their soft and silky texture will leave you wanting more.
- The sauces are as important as the gyoza. There will always be shoyu (soy sauce), su (vinegar), and some sort of rayu (chili oil) or chili sauce. Mix them up as you please in the tiny dishes that are set at every table and dip to your heart's content.
- The standard order is about 2 plates of gyoza – 6 gyoza per plate, per person – but gyoza houses are pretty relaxed, so if you only want to order one per person, it's no big deal.
Gyoza no Fukuho
Gyoza no Fukuho is our absolute favorite gyoza place. No frills, no nonsense, and the best tasting gyoza around. There are several locations – it's a chain – but the one we go to most is right next to Shinjuku Gyoen. There's a lunch special for 590 yen that gets you 2 orders of gyoza, a fluffy bowl of rice, and a bowl of seaweed soup. It's the BOMB. With thin skins and just the right amount of filling, the yaki-gyoza are crisp but not overly oily, extremely flavorful with an a good hit of garlic. The sui gyoza are tender, silky and juicy. If you're looking for a cheap and delicious lunch in Tokyo look no further because who doesn't love rice and gyoza? Bonus, along with the standard soy, vinegar, and hot sauce, they also have a little pot of red miso and packets of karashi, hot Japanese mustard. Gyoza no Fukuho Rating: 5/5Kanda Gyoza
Kanda Gyoza is an old school gyoza house with many branches in Tokyo. They serve a bunch of other Chinese food too (gyozas are known as Chinese food in Japan), but they're most well known for their gyoza. They have giant kurobuta gyoza that are delicious, but even more than the pork gyoza, we love their veggie gyozas. They're juicy, thicker-skinned, and kind of on the bigger side. Kanda Gyoza Rating: 4/5Harajuku Gyoza Rou
This is the place that shows up most when you do a search on "must eat gyoza in Tokyo." Cheap, friendly, and delicious, this little hole in the wall in the back streets of Aoyama, just off of Cat Street, is definitely serviceable and pretty good if you're just beginning your gyoza journey. But, I will say, give it a pass if they have a line. For some reason, there almost always is, unless you're there at 3 in the morning. The gyoza at Gyoza Rou are thin-skinned (a sign of a good Japanese gyoza), juicy and if you choose it, full of garlic-y flavor. I have to say that it's a true hole-in-wall, or as much of a hole-in-the-wall as you'll find in Tokyo. I feel like the place hasn't been cleaned since the 80s, but, you know, most Tokyoites and toursits have pretty fond memories of hitting this place up during late nights. Harajuku Gyoza Rou Rating: 2/5Gyoza Bar Comme a Paris
If you're looking for more of a night time bar feel, Comme a Paris is the place to be. While most gyoza houses have beer as the drink of choice, this cozy Aoyama bar pairs their gyoza with wine or champagne by the glass. Their gyoza is proudly garlic-free and comes with three different dipping sauces: tomato, white miso, and black chili oil. The skins are thin and tender, the bottoms crunchy, and the varieties creative. We loved the onion gratin gyoza, a take on French onion soup with a cheesy gyoza standing in for the traditional crouton. I also especially loved it because they have fries on the menu and gyoza and fries go together almost as well as gyoza and rice. Update: This one is permanently closed, friends :( Gyoza Bar Comme a Paris Rating: 3/5Kitchen Tachikichi Gyoza
This Omotesando gyoza joint is kind of all about aesthetics with their cute blue tiled counters and custom glasses and plates. But don't worry, they're not just about looking good – the gyozas at Tachikichi happen to be delicious. They much larger then what you normally see in Tokyo so if you want to cut down on your normal order, you'll still be full. They have slightly thicker skins and the pork used is sourced from Yamagata. As always, the lunch set is your best option. I went with the 2 set option: 2 each of yaki, sui, and age/deep fried. The sets come with salad, kimchi, and unlimited serve yourself rice and miso soup! Update: the Omotesando store seems to be closed but the tachikichi gyoza lives on at their (original) Shibuya main branch. Kitchen Tachikichi Gyoza Rating: 3/5Anda Gyoza
Anda has a charming, quaint room and a Michelin bib gourmand recommendation. Their gyoza are Taiwanese style with thicker skins flavored with roasted brown oats. They're more jiaozi than gyoza, with a tortellini shape. All of the gyoza here are served sui/boiled and have interesting flavor combinations like pork and daikon, carrot and curry, chicken and ginger. The lunch set rice looks like a plain bowl with pickles, but there is a little bonus pork hidden at the bottom, so mix it all up before devouring. Anda Gyoza Rating: 2/5Awaya Gyoza
Another one of those hipster places that serves gyoza and booze in a cheery, modern hipster space. Awaya is located in Kichijoji so when you're tired of shopping, pop on in. We liked the cheesy gyoza: crispy pan-fried pork gyoza topped off with a slice of American style cheese. Sounds like it it'd be bad, but it was so good. Update: This one is permanently closed too. Awaya Gyoza Rating: 2/5And there you have it, all the knowledge you need to go forth on your own gyoza journey in Tokyo. To be honest, there are TONNES of gyoza places in Tokyo so let me know which place is your favorite. We're always on the looking for gyoza! Note: The gyoza rating is based purely on taste alone, not atmosphere. Read More →

I Am... Dishoom Black Dal aka Dal Makhani
Dishoom's Black Dal is Creamy, luscious, and absolutely addictive I love dal. It’s warm and cozy, full of flavor, creamy, rich, and hearty. It can be an all day affair or a quick 1 hour in the instant pot. This particular dal recipe is a riff on the dal at popular London restaurant, Dishoom. Think: tender lentils in a rich and creamy tomato gravy seasoned with cinnamon, coriander, cardamom, fennel, garam masala, and more. Trust me when I say that it is the BEST vegetarian comfort food dish you’ll ever eat. Dishoom is a beloved Irani-style Bombay inspired cafe in London. Their most popular dish is the house special, black dal. When you go, you’ll see every table with a little pot of dal alongside warm naan. Dishoom is one of our go-to restaurants in London and we always, always get the dal. The rumor is that the iconic black dal made at Dishoom is cooked for over 24 hours. They have released the recipe for the dal in their cookbook, but it’s a scaled down, home-style recipe that simmers for 5-6 hours. I loosely based this recipe on that, but we went all out and cooked ours for 24 hours because we wanted it to taste as close to the real deal as possible. The result is a decadent, indulgent dal that you will not believe came from your own kitchen. For those not interested in waiting over 24 hours for an amazing dal, we have an instant pot version too.
What is dal?
Dal are dry pulses such as lentils, peas, and beans. The term refers to both the types of soups and stews made from the pulses and the pulses themselves. Dal is cozy, nourishing, and packed with plant-based protein and fiber. It’s an excellent choice for a satisfying meal, especially served along side rice or naan.What is dal makhani?
Dal makhani is a dish that originated in New Delhi, India. It’s a modern take on traditional dal but made with black beans or black lentils. What makes it different is the inclusion of butter and cream. Makhani means “buttery” and the butter is what makes this dal special.What does dal makhani taste like?
Think of a thick, flavorful soup made from lentils. This particular recipe’s flavor profile is deep and dark and full of savory flavors. The lentils hold their shape yet also burst in your mouth with the slightest pressure - tiny bursts of explosions of flavor. It’s thick and spiced with a hint of sweetness from the tomato and lush and rich from the butter and heavy cream.Dal ingredients
- black lentils: technically dal makhani uses urad dal, which are in the mung bean family. They’re not super common though and usually need to be special ordered, at least where we are. The black lentils that we usually see are black beluga lentils or petit black lentils. Most likely the black lentil you’ll find at the grocery store will be beluga black lentils which are perfect. Other lentils such as red, brown, or green lentils will work too, but their skins are thinner so they might break down more while cooking. French lentils have a slightly thicker skin so they won’t break down as much.
- spices: whole cloves, star anise, ground coriander, ground cumin, cayenne, fennel seeds, garam a masala, cardamom, bay leaf, and a cinnamon stick. Whew! There’s a large amount of spices in this dish and I feel like they all contribute equally. That being said, I know that many people make their dal makhani with little to no spices and let the lentils, butter, and cream shine. Personally, I find that the warming spices add so much. Lightly toasting the spices in a dry pan will bring out their flavors and aromas, so don’t miss out on that.
- onion: finely minced onion adds sweetness, especially when slow cooked in butter.
- ginger: the warmth of fresh ginger cooks and mellows out deliciously. You’ll want to mince it very finely or use a grater. I like to use a Japanese style ginger grater and measure out 1 tbsp of the grated ginger and all of the ginger juice too.
- garlic: who doesn’t love garlic? Use a garlic press so the pieces of garlic are tiny and melt into the gravy.
- tomato paste: the tomato paste in this recipe condenses, sweetens, and adds so much umami. Again, the smoothness of tomato paste is key here. You want the texture focus of the dal to be the lentils so tomato paste is ideal compared to fresh tomatoes.
- butter: it wouldn’t be dal makhani without butter. I use unsalted butter I can control the salt content, but I must admit, when it’s time to serve, a pat of salted butter that melts down into the warm dal is amazing. cream: heavy cream adds a luscious creamy thickness.
What is the difference between black lentils/black beluga lentils and urad dal?
Urad dal, which are in the mung bean family, are larger and look like a whole mung bean. They’re about 1/4 inch in length and oval shaped with a small white speck on one side. Black lentils are smaller and disk-shaped. They’re about 1/8 inches in diameter and have a tiny yellow speck.How to make dal
This dal takes 24 hours to make, but I promise you, it is so worth it. It’s almost entirely hands off so you don’t actually do much. A covered pot just sits in a low oven and all you do is give it a stir every now and then. The results are incredible!- Soak. Give the lentils a rinse and then soak them in plenty of cold water, overnight. Lots of lentil recipes say you can skip this step and that might be true, but I always soak mine. I feel hydrating them makes them keep their shape even after cooking.
- Cook. The next day, rinse the lentils off and drain well. Place them in a large pot with cold water and bring to a hard boil, then lower the heat and simmer. Cook until the lentils are soft, but still hold their shape, topping up with water if needed. When they’re soft, drain and set aside.
- Toast. While the lentils are cooking, toast the spices in a dry pan to release their aromas. Crush or use a spice grinder to blend everything up and set aside.
- Sweat. Heat up a bit of oil and butter in a pan and slowly cook onion, garlic, and ginger until everything melds and melts into a soft paste. Stir in the spices, tomato paste, cooked lentils, and a bit of water to make everything come together in a thick soup. Bring to a simmer then remove from the heat.
- Braise. Take a note of the time. Cover the pot tightly and place in a 325°F oven for 3-4 hours, checking every so often to see if the dal is dry and you need to add water.
- Overnight. Turn the oven to 200°F and let the dal cook overnight.
- Finish. The next day, turn the temperature up to 300°F until you’ve reached 24 hours in the oven. Stir in cream and butter and season with salt. Enjoy!
How to make Instant Pot dal
If 24 hours is much too long for your dal craving, Instant Pot dal is here for you. Here’s how you do it:- Lightly toast the spices in a dry pan over low heat to bring out the aromas, then crush or grind them.
- Add butter and oil to the Instant Pot insert. Turn on to sauté high and stir in diced onions, minced ginger, and minced garlic. Cook briefly. Stir in the spices then add uncooked rinsed black lentils, tomato paste, and 2 cups of water.
- Seal and cook on high pressure for 15 minutes. Quick release, carefully vent, and open the lid. Stir in butter and cream to finish. Taste and season with salt and enjoy!
Instant Pot dal vs stove top/oven dal
It’s really hard to choose, but if I had to choose, I would choose the 24 hour dal. The 24 hour dal has so much more depth of flavor! It’s smoky and rich and dark. The Instant Pot version is light and creamy. It definitely had something to do with the amount of time the tomato paste has to cook and condense down. The 24 hour dal has just a hint of tomato – you almost have to be looking for it to identify the flavor, where as the Instant Pot version has tomato as one of the first flavor notes. I love both so it’s hard for me to say if one is better the other, but if I’m in a dal-rush, the Instant Pot version is AMAZING. Also, sometimes you’re just hungry. ¯\_(ツ)_/¯Tips and tricks
- Soak your lentils overnight. This is the number one thing you need to do for this recipe. It will help your lentils hold their shape and be tender after cooking. Many lentil recipes say that you don’t need to, but it’s not a difficult step and I’ve never skipped it.
- There’s a certain smokiness comes from the long braise in the oven. This isn’t a quick recipe, but the hands-off time comprises most of the time. Slow cooking in the oven gives you a smokiness that you won’t get if you just make this on the stove.
- A small pot is your friend. Use a small heavy bottomed cooking vessel with an oven-safe lid. I use our 1.5 quart petite Staub and the depth and width makes it the perfect dal pot. It’s about 5 inches across and 6.5 inches high. If you use a pot with too large of a base the dal will come up shallow and may lead to burning/drying out. If you don’t have small pot, transfer your dal to a taller oven safe dish and cover it with foil.
Extra smoke
If you’re looking for extra smoke you can complete this last step. You’ll need a small metal bowl, a piece of all natural hardwood lump charcoal, and a way to light the charcoal on fire.- When the dal is ready and you’ve stirred in your butter and cream, place a small metal bowl directly onto the surface of the dal. The thickness of the dal should hold it up.
- Safely light your charcoal outside and let it burn until it is hot and lightly covered with white-gray ash, about 4-5 minutes.
- Use a pair of tongs and carefully put the hot charcoal in the mental bowl and add 2 tablespoons right on top of the hot charcoal. It will instantly start to smoke.
- Quickly cover the dal with the lid and let smoke for 5 minutes then remove the lid and the bowl with the charcoal.
What to serve with dal
- Naan is always the right answer and fluffy, chewy, homemade naan is the perfect accompaniment.
- Cheesy naan or garlicky naan are good too!
- Creamy butter chicken
- Sweet and spicy ruby chicken curry
- Savory, hearty chicken biryani
Dishoom’s Black Dal Recipe
Creamy buttery lentils, zero effort.
- 1 cup black lentils (I used black beluga lentils)
- 2 whole cloves
- 1 star anise
- 1 tsp ground coriander
- 1 tsp ground cumin
- 1/2 tsp cayenne pepper
- 1/2 tsp fennel seeds
- 1/2 tsp garam masala
- 1/4 tsp ground cardamom
- 3 tbsp butter
- 1 tbsp neutral oil
- 1 small onion (finely diced)
- 1 tbsp ginger (minced)
- 1 tbsp garlic (minced)
- 1 bay leaf
- 1 cinnamon stick
- 5.5 oz tomato paste (1 can)
- 2 tbsp heavy cream
- salt (to taste)
Soak the lentils in cold water overnight. The next day rinse and drain well. Place the lentils in a large pot and cover with cold water by 2 inches. Bring to a hard boil over high heat for 5-10 minutes, skimming if needed. Reduce the heat and simmer, stirring occasionally, until the lentils are soft, but hold their shape, about 40 minutes to 1 hour. If needed, add water to the pot to prevent the lentils from drying out. Drain and set aside.
Heat the oven to 325°F. In a small dry pan, over low heat, lightly toast the cloves, star anise, coriander, cumin, cayenne, fennel, garam masala, and cardamom, stirring constantly, until very fragrant, about 30-45 seconds. Make sure not to burn! Remove the spices from the pan and add to a spice grinder or mortar and pestle. Crush/grind until fine. Set aside.
In an small, oven-safe heavy-bottomed pot, heat up 1 tbsp each of butter and neutral oil over medium heat. Add the onion and cook, stirring, until soft, about 5-8 minutes. Add the ginger and garlic and cook, stirring, for 1-2 minutes.
Stir in the spices, cinnamon stick, and bay leaf. Add the tomato paste and 1 cup of water to bring everything to a thick, soup-like consistency. Add the drained lentils to the pot, adding a bit of water to thin out, if needed.
Tightly cover the pot with foil (or the oven safe lid) and place in the oven for 3-4 hours, checking every 30 minutes or so to stir. Add water, a tablespoon at a time, if needed, to maintain a soup-like consistency.
After 4 hours, take a note of the time and turn the oven to 200°F. The next morning, when you get up, turn the temperature up to 300°F, check if you need to add a tiny bit of water, stir, then continue to cook in the oven, covered, until you hit 24 hours from the time you started the dal in the oven.
Remove the pot from the oven and stir in 2 tbsp each of heavy cream and butter. Taste and season with salt. Enjoy with basmati rice or naan.
If desired, you can pull the dal after 4 hours in the oven at 325°F and finish with butter and cream.

I Am... One Pan Sesame Chicken
This one pan sesame chicken is the answer to all your quick and easy weeknight dinner dreams. Sesame chicken is a sweet and saucy dish of crispy bits of chicken coated in a sticky savory sauce, sprinkled with toasted sesame seeds. It’s a classic Chinese take-out favorite and one of my must order dishes. It’s extremely versatile – go with whatever pieces of chicken you have in the fridge or picked up at the store on sale, either breasts or thighs will work. I prefer skin off, but skin on works too. The name of the game is ease. From there, your chicken gets a little coat of cornstarch for both tenderizing and to add a bit of crisp.
What is sesame chicken?
Sesame chicken is a super popular American Chinese chicken dish that is most likely inspired by real Chinese dishes like sweet and sour pork or lemon chicken. It’s almost just like General Tso’s chicken but instead of on the spicy side, it’s sweet. Like General Tso’s chicken, no one is quite sure of the origins of sesame chicken. Sesame chicken is uniquely Chinese-American and incredibly delicious.How to make sesame chicken
- Season and cornstarch your chicken. Cut the chicken into bite sized pieces then mix it up with some cornstarch.
- Fry the chicken. Heat up a bit of oil and pan-fry the chicken until golden and crisp.
- Make the sauce. Push the chicken to the side and fry the garlic for a minute, then add all the sauce ingredients. Cook until it starts to bubble and thicken, stirring occasionally.
- Make it rain. Sprinkle on the sesame seeds and enjoy hot with fluffy white rice!
Ingredient notes
- Chicken - I used boneless skinless thighs but you can use whatever boneless chicken you happen to have, skin on or skin off doesn’t really matter. Both breasts and thighs will work in this recipe. Versatility is the name of the game.
- Cornstarch - this is what we’re using to dry coat the chicken with before it gets pan fried. Cornstarch doesn’t have any gluten in it which will help make the chicken a little bit crispy and golden. Garlic - just a bit of garlic for those mellow warm garlicky flavors we all know and love.
- Honey - this is what is going to add the sweetness and also cook down nicely into a sticky, thick sauce.
- Soy sauce - There are so, so many soy sauces out there, but in this case, the best one is the one in your pantry. That being said, if you’re running out or want to expand your soy sauce collection, make sure you go for a naturally brewed soy sauce for its complex deep aroma and flavor. We like both Amoy and Lee Kum Kee.
- Rice vinegar - rice vinegar adds that signature little bit of tang that sesame chicken has. The tanginess highlights the sweetness and that contrast is what makes sesame chicken irresistible. We like to use Marukan or Kikkoman unseasoned rice vinegar. If you don’t have any on hand, you can substitute white vinegar.
- Toasted sesame oil - Toasted sesame oil will add a huge hit of sesame flavor! It’s intensely nutty, toasty, and so so good. It’s not the same as regular sesame oil. Toasted sesame oil is made from toasted sesame seeds and is a finishing oil, much like a really good olive oil. Our favorite brand is the Japanese one, Kadoya, with its signature bottle shape and yellow cap. You can find it in the Asian aisle at most grocery stores, in your local Asian grocery store, or online.
- Toasted sesame seeds - These guys are the finishing touch. Look for toasted sesame seeds at the store, they have a nuttier, toastier flavor.
What’s in sesame chicken sauce?
Sesame chicken sauce is made of garlic, honey, soy sauce, rice vinegar, and toasted sesame oil, which gives it that sesame-ness.Crispy sesame chicken
Personally I love the ease of this one pan sesame chicken but if you NEED crispy sesame chicken, I’ve got you. The recipe is exactly the same, the only difference is: you’re going to shallow fry the chicken in more oil. You can also choose to bake or air fry for a crispier coat.How to fry
In a cast iron skillet, or heavy bottomed pan, heat up 1/2-1 inch of oil over medium heat. When it’s hot and shimmery, add in the cornstarch coated chicken, making sure to shake off any excess cornstarch. Fry the chicken, flipping as needed, until the chicken is golden brown and crisp. Remove and drain on a rack so it crisps up more while you use another pan to make the sesame sauce. When the sesame sauce is thick, add the crispy chicken to the sauce and toss to coat.How to bake
Baking will give you a slightly crisper chicken than simply pan frying but it takes a lot longer in the oven. To bake: heat the oven to 420°F and lightly oil a rack. Place the coated chicken on the rack and bake for 15-20 minutes until the internal temperature reaches 165°F and the juices run clear, flipping once, halfway. When the chicken is almost done, use a nonstick pan to make the sesame sauce. When the sesame sauce is thick, add the crispy chicken to the sauce and toss to coat.How to air fry
Air frying will give you a similar crunch to shallow frying but is a bit more hands off. To air fry: oil the air fryer basket and lay in the cornstarch coated chicken in a single layer. Air fry at 400°F for 12-15 minutes or until the internal temperature reaches 165°F and the juices run clear, flipping halfway. When the chicken is almost done, use a nonstick pan to make the sesame sauce. When the sesame sauce is thick, add the crispy chicken to the sauce and toss to coat.Why this is the best sesame chicken recipe out there
Most sesame chicken recipes are deep fried chicken but I love this one-pan version because it’s the easiest way to make homemade sesame chicken from scratch. Instead of coating each piece of chicken in a batter and deep-frying, we’re going to toss our chicken cornstarch to give it a slightly crispy coat. Not quite the same as deep fried, but 1000 times easier and quicker, which is what everyone needs on a weeknight. This sesame chicken is definitely faster (and healthier) than ordering take out!Pro tip
If you want your sesame chicken to have a deeper, nuttier, sesame flavor, and you don’t have toasted sesame seeds on hand, you can toast untoasted sesame seeds yourself. Toasting them right before you add them to the chicken will unlock the ultimate nutty sesame aroma. To toast sesame seeds, add a table spoon of sesame seeds to a dry pan and heat over low, shaking the pan constantly until the seeds start to smell nutty and turn slightly golden. Remove the seeds from the pan immediately as they have a tendency to burn.What to serve alongside
More Chinese takeout dishes you should try
Sesame Chicken Recipe
This one pan sesame chicken is the answer to all your quick and easy weeknight dinner dreams.
- 1 lb boneless skinless chicken thighs (~4 thighs, or sub 2 breasts, cut into 1 inch pieces)
- salt and freshly ground pepper
- 1 tbsp cornstarch
- 1 tbsp oil
- 2 cloves garlic (crushed)
- 2 tbsp honey
- 1 tbsp soy sauce
- 1 tbsp rice vinegar
- 1 tsp toasted sesame oil
- 2 tsp toasted sesame seeds
Season the chicken with salt and freshly ground pepper, then toss with 1 tablespoon cornstarch.
Heat up oil in a large skillet over medium high heat. Cook the chicken in a single layer, until cooked through, golden brown, and crispy, flipping once. Cook in batches, if needed.
Push the chicken to one side, then add the garlic to the pan and cook until soft, but not brown.
Add soy sauce, honey, rice vinegar, and sesame oil. Cook over medium heat, stirring until the sauce turns slightly thick and glossy and coats the chicken. Finish with toasted sesame seeds and enjoy hot!

I Am... Chinese Pork Dumplings Recipe
Potstickers, Chinese pork dumplings, jiaozi, guotie, whatever you want to call them, they’re delicious, and homemade dumplings are the most delicious of all. Dumplings are definitely a staple in our home. We always keep a bag of frozen homemade dumplings for those emergency hungry times. Pan-fried dumplings are incredibly satisfying: crispy on the outside, juicy on the inside, filled with so much flavor. You could just buy a bag of frozen dumplings at the grocery store and call it a day or you could make your own at home and impress yourself with your amazing dumpling making abilities. Golden brown and crispy on the bottoms with a juicy pork filling inside, these Chinese pork dumplings will make you feel like you’re at your favorite dumpling spot.
But what even are dumplings though?
Dumplings are juicy, crispy little bundles of deliciousness. In this particular case, we’re talking about Chinese dumplings, or jiaozi. Jiaozi are a ground meat filling (sometimes vegetable) wrapped up in a piece of thinly rolled out dough. Chinese dumplings can be deep-fried, boiled, steamed, and pan-fried. They’re served in soup and on their own with a dipping sauce. Dumplings are super versatile, you can eat them for breakfast, lunch, dinner, a late night snack, you name it, and dumplings can be there for you.The best dumplings are the ones you make at home.
There is something gratifying about making something from nothing. It’s why sourdough is so popular - making food from scratch will give you a deep satisfaction. It’s why generations of families sit together at the kitchen table at dumpling making parties. But also, let’s face it, those dumpling making parties are just an excuse to wrangle kids in to doing free labor. Still, take an afternoon to make some homemade dumplings – heck make a triple batch and freeze the extras – and you’ll be eating like dumpling royalty for days. Also, if you make your dumplings at home you can customize them infinitely. Dreaming of shrimp and chives? Maybe a green chile cheeseburger dumpling? You can have it all, wrapped up in one beautiful bite.The perfect homemade dumpling dough
The key to any good dumpling is the dough. You want it to be plush and chewy and pliable. There is a space in the world for thin skinned dumplings (like xiao long bao) but for homemade potstickers you want a rustic al dente wrapper that you can really sink your teeth into. There are different kinds of doughs for different kinds of dumplings - how much flour and water you add yields different textures. For our potsticker dumpling dough we’re going to be using a hot/warm water dough which makes a very pliable, easy to work with dough. It has a 55% hydration, which is perfect for crispy, yet chewy dumpling skins. All you need to make homemade Chinese dumpling wrappers is water and flour. Because it’s a warm/hot water dough, this basic dumpling wrapper recipe is perfect for potstickers or steamed dumplings. Incidentally, boiled dumpling dough usually uses cold water so the dough can hold up to the rigors of boiling. Boiled dumplings, or shui jiao, are actually considered more difficult to make than dumplings for pan-frying or steaming.How to make homemade dumpling dough
Put some flour into a bowl. Add hot/warm water. Mix. That’s it, you have dumpling dough! It really is that simple, but let’s break it down a bit.- Add flour to a large bowl. I like to use a kitchen scale because it means less washing up and more accuracy. It’s really win-win. After you add the flour to the bowl, make a well in the middle, just like when you make pasta.
- Add warm water to the dough. Pour warm water in to the well. Warm water helps the starch form gluten which means our dough will be soft, stretchy, and easy to work with. Use a pair of chopsticks to mix the water into the dough so that it forms a shaggy ball.
- Knead. From here you can knead the dough by hand until it becomes a smooth ball or you can do what I do and use a stand mixer. I almost always prefer using a stand mixer when I can, it makes kneading hands off.
- Rest. This is just where the dough takes a little nap so it’s easier to roll out the wrappers. You can optionally re-knead and let it rest again so that it’s even easier to roll out.
- Roll and shape. The classic way to portion out dumpling dough is by poking a hole in your dough and then stretching it out into a big thin doughnut/bagel. From there you cut it and you have a thin rope of dough that you can cut small pieces off of. The pieces are then rolled out using a small rolling pin and you’re ready to make dumplings!
What are Chinese dumplings filled with?
You can pretty much fill dumplings with anything. Most of the time they’re filled with ground meat (pork, beef, chicken, lamb), vegetables, aromatics, and sesasoning. The vegetables are what makes the inside of your dumplings extra juicy and the aromatics add flavor.How to make homemade dumpling filling
- Prep: The first step to making a good dumpling filling is prepping the vegetables. You could go with an all meat dumpling but I find that all meat dumplings tend to be missing something – vegetables add an extra bit of moisture, flavor, and texture that just compliments the meat. We’re going to be using cabbage but you can use chives, spinach, carrots, kale, hearty greens, mushrooms, anything you want. The key is not having too much moisture. In the case of cabbage, we’re going to salt it a bit then squeeze it to remove some moisture so our dumplings don’t get too soggy.
- Mix: Once you vegetables are being salted, it’s time to mix up the meat. Mix together a bit of cornstarch with water then stir it into the ground pork. Stirring in a bit of cornstarch and water will make the insides of your dumplings super tender. It’s the secret to juicy, tender dumplings! When you stir in the water-cornstarch mix everything will come together into a homogenous paste, which is exactly what you want. When the pork is nice a smooth, mix in the vegetables.
- Season: It’s all about the aromatics and seasoning! Ginger, garlic, shaoxing wine, soy sauce, toasted sesame oil, and salt are you friends. Stir them all in and your dumpling filling is ready to go.
How to wrap dumplings
There are infinite ways of wrapping dumplings. My tip to you is: don’t worry about it! If your first batch of dumplings is just folded over and pressed together it’s totally fine! You can even just pinch up the sides, it’s a style. The goal is to make homemade dumplings, not to stress out about different dumpling folds.How to freeze homemade dumplings
You might be wondering, can I eat 40 dumplings in one sitting? The answer is yes, but if you are more regular person this recipe will probably give you some extra dumplings. Or, if you’re smart you’ll double or even triple this recipe so you can have extra dumplings in the future. Dumplings are one of those things that do extremely well frozen. They take almost no extra time to cook from frozen and it’s basically an instant home cooked meal. To freeze your dumplings, space out uncooked, formed potstickers in a single layer on a baking sheet and freeze until solid. Transfer to freezer bags.How to cook dumplings
All hail crispy bottom dumplings! Crispy bottom dumplings are the best dumplings, am I right? That textural contrast between super crispy burnished bottoms and the tender steamed tops is the best. To get crispy bottoms on your dumplings, pan fry them in a bit of oil over medium heat for 2-3 minutes, the add a bit of water and cover to steam to 4-5 minutes. Lift the lid off and continue to cook off the water and the bottoms of your dumplings will be golden and crisp and the insides will be tender and cooked through.How to make a crispy dumpling skirt
- Heat up a bit of oil in a non-stick pan over medium to medium high heat.
- Add your dumplings, leaving a bit of space between them.
- Crisp up the bottoms of the dumplings, 2-3 minutes.
- Whisk 2 teaspoons of flour with 1/3 cup of water and add to the pan. Cover the pan with a lid and steam for 3-4 minutes.
- Remove the lid and continue to cook until the flour slurry starts to evaporate and crisps up golden brown.
- Flip the dumplings over on to a plate and admire your extra crispy dumpling skirt.
You should make homemade dumplings if you:
- want to learn a new cooking skill
- want to impress your dumpling loving friends
- don’t live anywhere near an Asian grocery store and can’t get your hands on frozen dumplings let alone dumpling wrappers
- want to customize your dumpling fillings
- love dumplings
How to Make Homemade Dumplings
Homemade crispy bottomed dumplings are 100x worth it.
Homemade Dumpling Wrappers
- 300 g all purpose flour (about 2 cups)
- 165 g very warm water (about 2/3 cups, 110ºF-120ºF)
Dumplings
- 1.5 cups cabbage (finely chopped)
- 1 tsp cornstarch
- 1 lb ground pork
- 2 tbsp ginger (minced)
- 2 tbsp garlic (minced)
- 1/4 cup green onions (thinly sliced)
- 2 tbsp soy sauce
- 1 tbsp Shaoxing wine
- 1.5 tsp toasted sesame oil
- 1/2 tsp salt
- 1/2 tsp white pepper
Make the dumpling wrappers
Add the flour to a large bowl and create a well in the middle. Pour the very warm water into the well and use a pair of chopsticks to whisk, incorporating the flour little by little until everything comes together into a very shaggy dough.
Tip the dough out onto a work surface and knead until smooth. Shape into a ball, cover with plastic wrap and let rest for at least 30 minutes. After 30 minutes, knead the dough again so that it is smooth and elastic. You can use it right away but it will roll out even better if you let it rest for another 30 minutes. Shape it into a ball. (See notes for stand mixer instructions).
Make the dumpling filling while you wait for the wrappers to rest
Toss the cabbage with a pinch of salt in a large bowl and mix well. Let rest for 10 to 15 minutes, the squeeze out and drain as much of the extra water as possible.
Mix together 2 tbsp water with the teaspoon of cornstarch and stir into the pork until it forms a paste.
Mix in the ginger, garlic, green onions, soy, shaoxing wine, sesame oil, salt, white pepper, and squeezed out cabbage until incorporated.
Make the dumplings
After the dough has rested, poke the center of the dough with your finger and stretch it out to create a bagel shape. Keep stretching and rotating it out into a large, thin ring.
Cut the ring and you should have a rope of dough. Roll it out until it is about 1.5 inches in diameter. Cut off 6 pieces and weigh the pieces of dough, about 10-12 grams each, which looks like about 1 tablespoon of dough. Cover the rope of dough so it doesn’t dry out.
Take each piece of dough and roll it into a ball then flatten it with your palm until it is about 1.5 inches, lightly dusting with flour as needed. On a lightly floured work surface, use a small rolling pin and roll out the edges of the flattened disk, rotating and rolling so that the edges of the wrapper are slightly thinner that the middle. Aim for the wrapper to be 3.25 to 3.5 inches in diameter. Lightly flour and cover with plastic wrap while you roll out the other 5 portions of dumpling dough. Once you’ve rolled out 6 wrappers, shape your dumplings. (See notes on how many dumplings you should make at a time).
Place 1 tablespoon of filling in the middle of the wrapper. Fold over into a half moon shape and pinch the edges to seal. You can also pleat/fold the dumplings: start by folding the dumpling skin in half and pinching. From the middle, fold over/ pleat one side of the dumpling skin and push against the back skin to secure. Repeat until you reach the edge the pleat the other side. If you're using store bought wrappers, lightly moisten the edges of the wrapper with water before folding.
After you’re done making the 6 dumplings, continue to roll out and make your dumplings with the rest of your dough, 6 at a time.
Cook your dumplings
In a nonstick pan, over medium heat, heat up a touch of oil. When hot, lay the potstickers in the pan, in one layer. Cook, until slightly browned, then add 2-4 tablespoons of water and cover and cook for 3-4 minutes. When the water has cooked off, lift off the lid and continue cooking until the bottoms are brown and crisp. Enjoy hot, with soy sauce and chili oil!
Stand mixer dumpling wrappers
Add the flour and water to the bowl and whisk together with chopsticks. Use the dough hook and knead on low until all the water has been absorbed. Mix on medium-low until a dough starts to form, about 2-3 minutes, scraping down the bowl as needed. When the dough comes together, shape it in a ball, and let rest, covered for 30 minutes before kneading it again.
How many dumplings to make at once
If you’re working with a partner, one of you can roll out dumpling dough while the other makes dumplings, otherwise if you’re by yourself, 6 is probably the right amount. Freshly made dumpling wrappers need to be used almost immediately otherwise they become dry and difficult to shape and the pleats won’t hold together.
Storage
It’s best to use the dumpling wrappers fresh but if you absolutely need to store them for later, make sure you brush them well with tapioca or potato starch in between each wrapper before stacking them together.
Once they are generally dusted and stacked, wrap them tightly with plastic wrap and then place in a air-tight container, refrigerate, and use within the next 2 days.
To freeze dumplings once you've made them: space out uncooked potstickers in a single layer on a baking sheet and freeze until solid. Transfer to freezer bags. Cook from frozen adding a couple of minutes to the covered cooking time.
Estimated nutrition is based on one serving = 6 dumplings.
