I Am... How to make kimbap
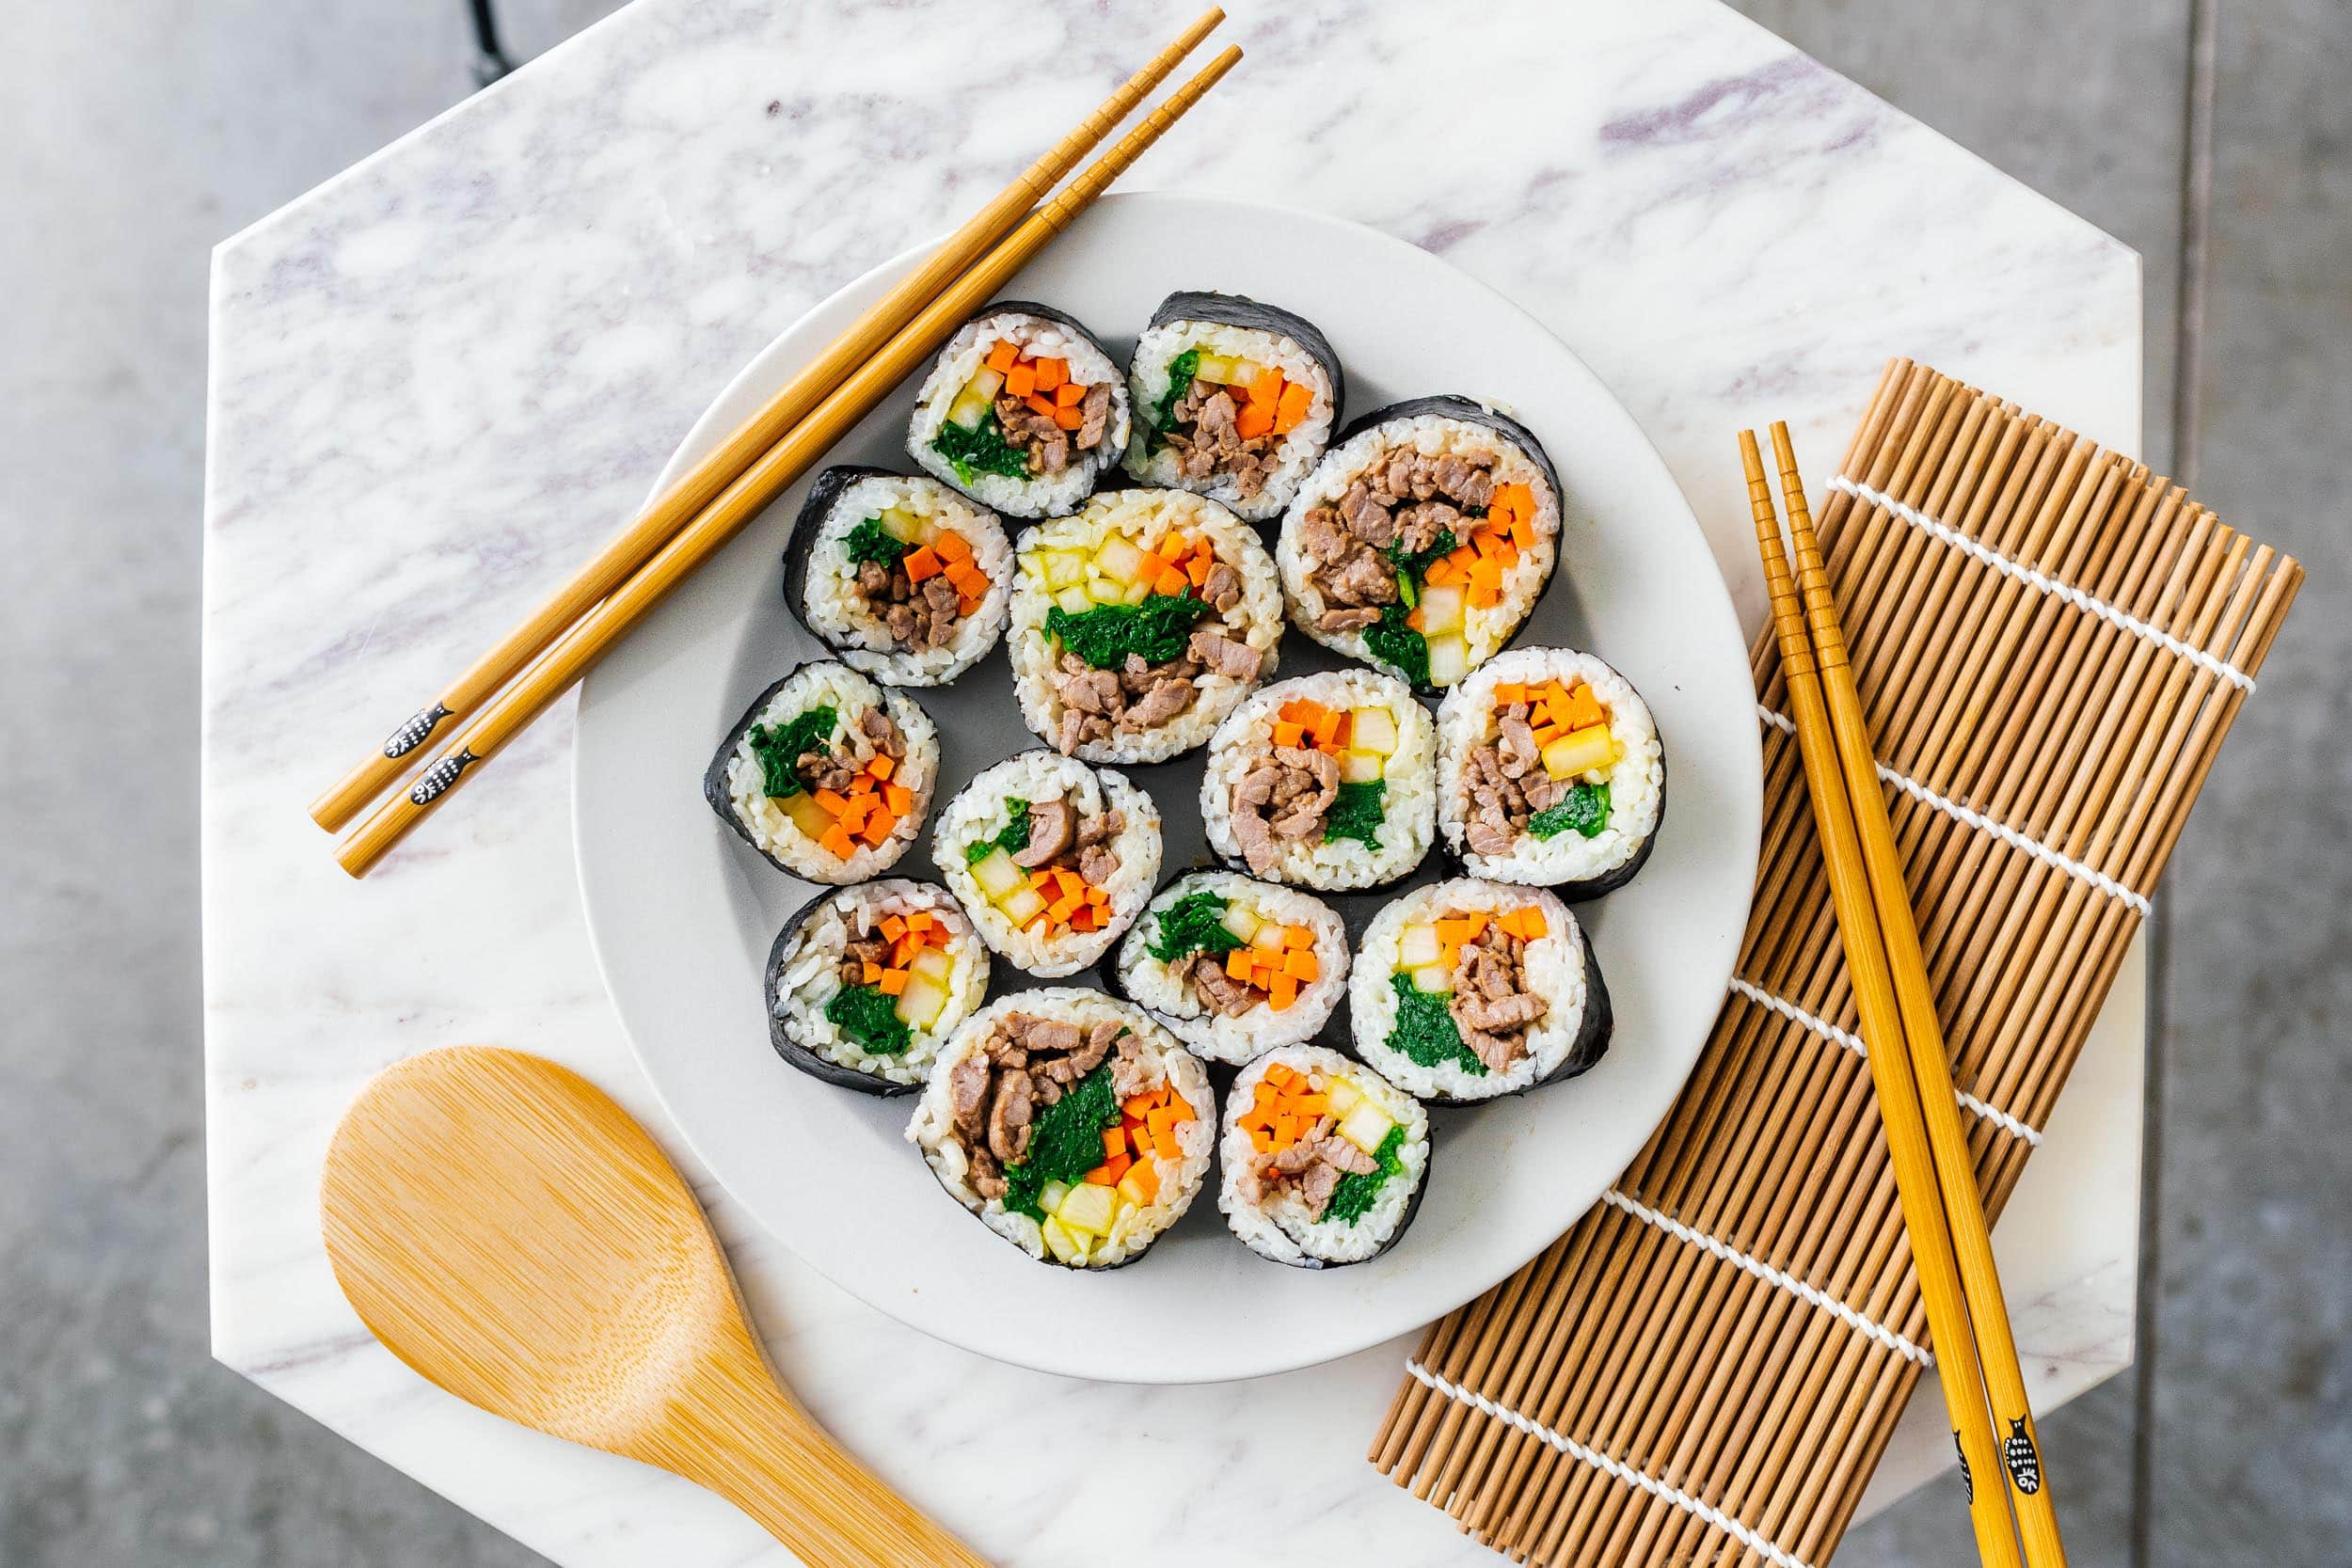
I was perusing the frozen section at Trader Joe’s last week, as one does, and I noticed that they had frozen kimbap. Of course we had to try it! I didn’t even know frozen kimbap was a thing, but apparently it’s super common in Korea and at Korean grocery stores. We tried it at home and were wowed. These days you might not be able to find it in store, or if you are looking for a more fresh version, read on for the recipe to make it at home yourself.
How to make kimbap
- Make and season the rice: Sprinkle salt and toasted sesame oil over warm rice, mixing in gently.
- Prep the beef: marinate thinly sliced beef with soy sauce, sugar, and toasted sesame oil. Fry it over medium high heat until it’s cooked through, then set aside.
- Prep the spinach: blanch the spinach, then squeeze out all of the water. Season with salt and a bit of toasted sesame oil.
- Prep the carrots: massage the carrots with a bit of salt and let them soften. Squeeze out any excess water then gently fry in toasted sesame oil and let cool.
- Prep the daikon: Trim the daikon radish into the right length spears so it fits neatly onto the seaweed sheet.
- Roll: Place a sheet of seaweed, shiny side down on a rolling mat. Evenly spread rice onto the seaweed, leaving a slight gap at the top. Place the fillings in the middle of the rice covered seaweed sheet, then use the mat to tightly roll the rice and seaweed over the fillings. Repeat as needed.
- Slice: Slice the kimbap into 1/4 inch slices and arrange onto a plate.
- Enjoy: Dig in and enjoy the fruits of your labor!
Kimbap ingredients
For this kimbap we’re going to go with a classic mix of pickled daikon, carrot, spinach, and beef.- rice - short grain rice is what you need because it’s soft and slightly sticky.
- seaweed - large sheets of roasted seaweed, just like the kind used for sushi.
- danmuji - danmuji is bright yellow pickled daikon. They sell it at Korean grocery stores whole and you can cut it yourself OR you can make it at home with fresh daikon. If
- you’re making danmuji at home, make sure you do it the day before because it needs to pickle for 24 hours.
- carrot - matchstick carrots are a massaged with salt then gently cooked so they add a bright orange punch and crunchy texture.
- spinach - blanched spinach seasoned with toasted sesame oil adds a hint of softness and color.
- beef - thinly slice steak marinated with soy and a bit of sugar hints at a quick take on bulgogi.
- toasted sesame oil - toasted sesame oil is key! It adds so much flavor to kimbap.
Trader Joe’s kimbap review
Spoiler alert: I liked them! Enough to want to buy them again! Mike wasn’t particularly invested, but after tasting it, we both agreed it was pretty good. We bought one roll to try the first time and I like it so much that the next time we went to Trader Joe’s we bought two rolls. I promptly ate both of them by myself and experienced major disappointment when they were sold out on our next TJ’s run. Apparently they’re having some supply chain issues – they didn’t expect it to become such a popular item and now won’t have any more available until November. Tragedy!How to eat frozen kimbap
Having never seen frozen kimbap, I wasn’t sure how it was going to work. Kimbap is almost always freshly made then served the same day, mostly due to the rice. Cold rice, as I’m sure you know, doesn’t retain the same softness and moisture as fresh rice. For the Trader Joe’s kimbap, the instructions have you microwave it for two minutes then let it rest for one. After resting, you just eat it! You don’t need any dipping sauces because unlike with sushi, Kimbap is meant to be perfectly seasoned as-is.What is kimbap
If you’re reading all this and wondering, what is kimbap, I got you! Kimbap (or gimbap) is a Korean roll similar to a maki sushi roll with rice, seaweed, vegetables and cooked protein. The name kimbap 김밥 comes from kim/gim which means seaweed and bap, which means rice. Unlike Japanese norimaki sushi rolls, kimbap is always made with cooked protein and finished with a brush of toasted sesame oil. Kimbap is for snacking, picnics, lunch boxes, and takeout. Its convenient portability and deliciousness makes it a perfect food.Controversy
Trader Joe’s kimbap went viral on Tiktok. There were a bunch of Tiktok taste test videos, ranging from high praise to don’t waste your money. That was more than enough to cause massive interest. A casual google search led to reddit threads where people reported customers buying up to 15 rolls in one shopping trip. Add to that many people saying that kimbap is easy to make and readily available at Korean grocery stores and you have yourself a full blown kimbap controversy.When will Trader Joe’s have more kimbap?
They’re saying a restock will happen in November but some Trader Joe’s still have a lot of rolls, so maybe they’ll move them around to stores that have demand. The kimbap comes from Korea and the factory there needs time to produce more.Where else can I find frozen kimbap?
If you live near a Korean or Asian grocery store, check the frozen aisle, you might find a variety of frozen kimbap there. There are multiple imported Korean brands that make frozen kimbap.Where can I find it fresh?
Korean grocery stores sell fresh kimpab in with they’re ready to eat offerings. You can also order kimbap from a Korean restaurant. If you live in a city with a large Korean population, you should be able to find at least one dedicated kimbap restaurant.Can you make it at home?
Definitely! It’s something that all Koreans enjoy at home. It takes a bit of time to make all the components but the process of cooking the components and assembly of the rolls is simple. The most common fillings are: pickled radish, carrots, cucumber, egg, spinach, imitation crab meat, burdock, fish cake, bulgogi, tuna salad, and kimchi. A mix and match of these ingredients is what you’ll find in most kimbap. Have you tried the Trader Joe’s rolls? Will you be making your own (recipe coming soon!) or are you going to make your way to a Korean grocery store to grab some freshly made rolls? Either way, happy kimbap-ing! xoxo stephKimbap
How to make the best kimbap
- 4 cups cooked rice (short grain preferred)
- 1/2 tsp kosher salt (or to taste)
- 4 tsp toasted sesame oil
- 1/2 lb steak of choice (thinly sliced)
- 2 tsp soy sauce
- 2 tsp sugar
- 8 oz spinach (baby spinach preferred)
- 1 large carrot (cut into small matchsticks)
- 4-8 strips danmuji (see notes)
- 4 sheets seaweed
Place warm rice in a large bowl and sprinkle with 1/2 tsp kosher salt and 1 tsp toasted sesame oil. Fluff the rice, mixing the salt and and oil into the rice evenly. Let cool while you prep the other ingredients.
Marinate the thin slices of steak with 2 tsp soy sauce, 2 tsp sugar, and 2 tsp toasted sesame oil. Set aside.
Quickly blanch the spinach in boiling hot water and cool immediately in ice water. Squeeze the water out of the spinach and mix with a sprinkle of salt and a 1/4 tsp toasted sesame oil. Set aside.
Massage the carrots with a sprinkle of salt and let soften for 2-3 minutes then squeeze any excess water out of the carrots. Sauté the carrots in a non-stick frying pan over medium low heat with a 1/4 tsp toasted sesame oil until slightly soft, 1-2 minutes. Remove from the pan and let cool.
If needed, prep the danmuji by making sure it’s trimmed to fit the length of the seaweed sheets.
Fry the beef in a nonstick frying pan over medium-high heat stirring as needed until cooked through. Remove from the pan and let cool.
Place a sheet of seaweed, shiny side down, on a rolling mat. Evenly spread 1 cup of the prepared rice onto the seaweed, leaving 2 inches uncovered on the top portion of the seaweed. Place 1/4 of the beef, carrots, daikon, and spinach evenly in a neat row in the middle of the rice.
Use both hands and the mat to roll up the rice and seaweed tightly over the fillings until you reach the top of the seaweed where there is no rice. Let the kimbap sit, seam side down, while you repeat with the remaining ingredients.
Lightly brush the rolls with toasted sesame oil then slice into 1/2 inch bite size pieces and enjoy!
Quick pickled danmuji
makes 1 lb picked daikon
prep 10 minutes
pickle 24 hours
8 inch length daikon
1 cup water
1 cup rice vinegar
1/4 cup sugar
2 tsp kosher salt
1/4 tsp ground turmeric
Peel and cut the daikon into 4 inch long strips that are about 1/4 inch thick.
Combine the water, rice vinegar, sugar, salt, and turmeric in a small pot and bring to a simmer of medium heat, stirring, until the sugar and salt dissolves. Remove from the heat.
Place the daikon strips into an airtight container and carefully pour the pickling water over the daikon. Let cool, then cover, submerging the daikon in the pickling juice. Pickle for 24 hours minimum before enjoying!
I Am... Dirty Soda
Icy, fizzy, and creamy, dirty soda is the perfect sweet treat to sip on this summer. This is no April Fool's joke. If you’re not from Utah, you’re probably thinking: what the heck is “dirty soda” and why would I ever want to drink it? But, if you’ve ever stoped by a Swig or Sodalicious, you know. Oh, you know. Dirty soda is seeing a surge in popularity thanks to Tiktok and Olivia Rodrigo and I am here for it.
What is dirty soda?
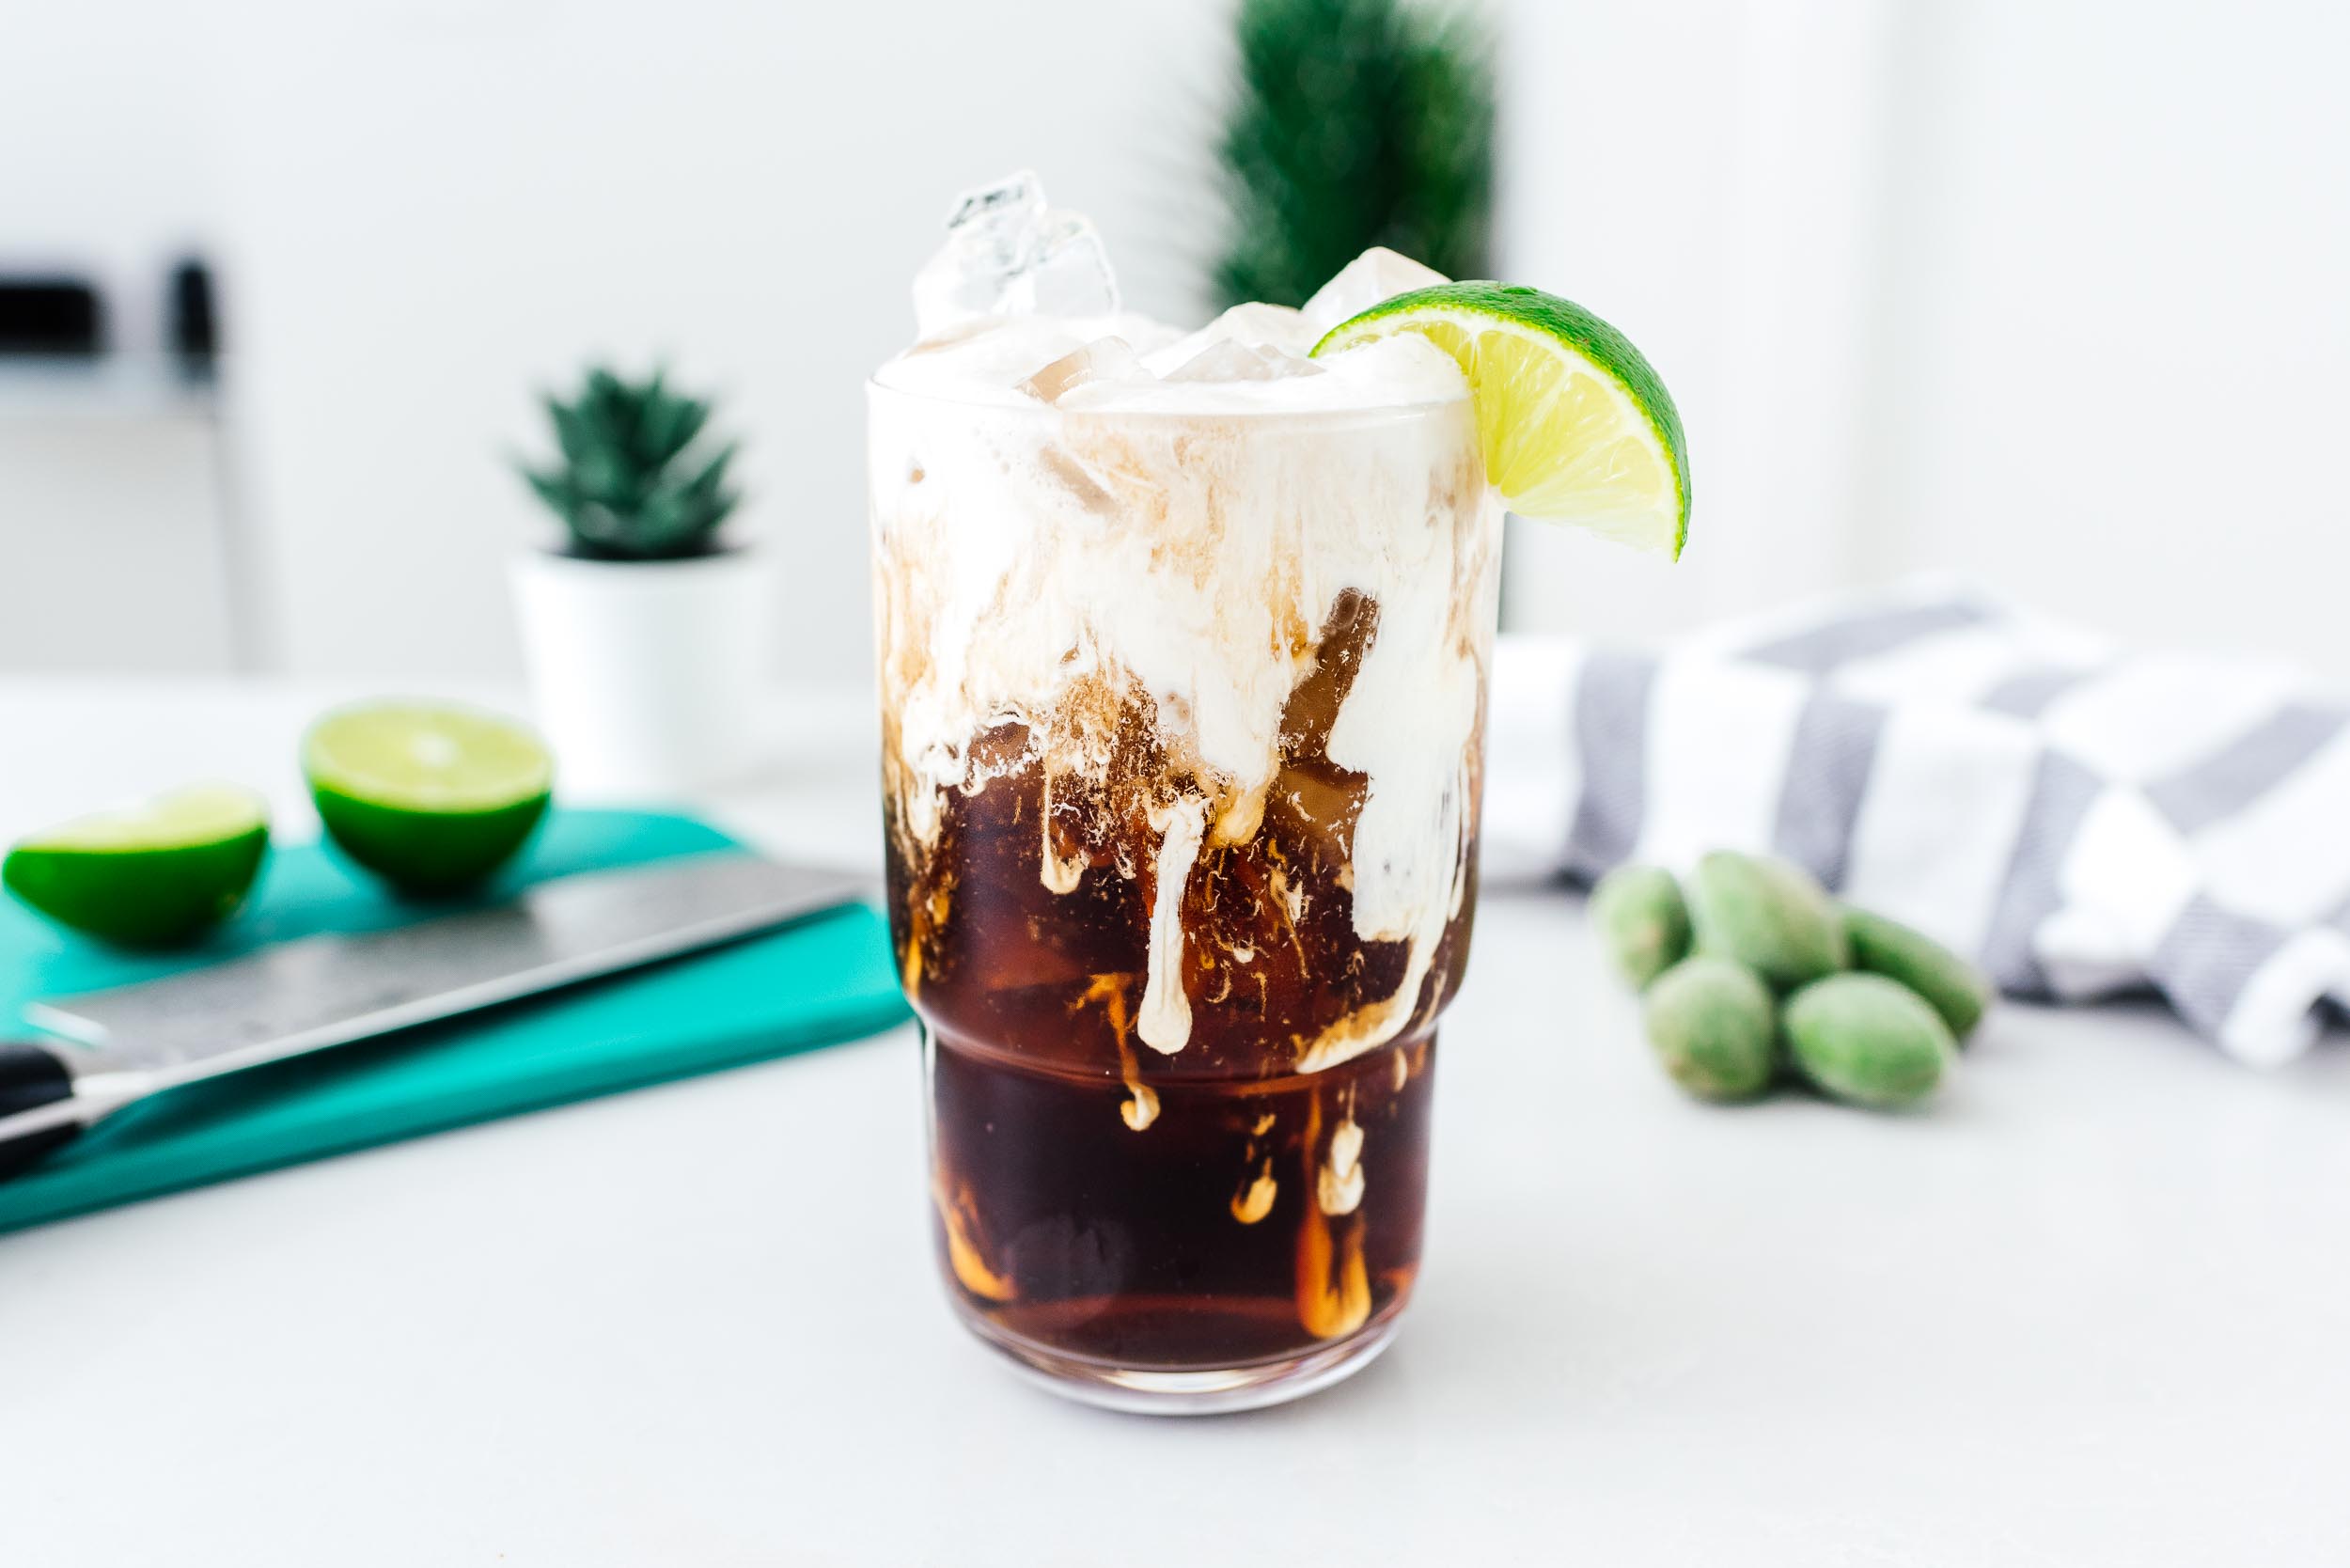
Dirty soda is fountain soda mixed with flavored syrups and cream, all served up over nugget ice. There are literally millions of recipes you can make and you can definitely find a flavor catered to you. The original version is: Diet Coke over ice, with coconut syrup, lime juice, and half and half. It’s creamy and refreshing all at the same time. Think of dirty soda as a customizable non-alcoholic fizzy cocktail.Where did dirty sodas come from?
Dirty sodas are from Utah, where there’s a large Mormon population. Because Mormons don’t drink alcohol (or coffee!), dirty sodas came about as a fun way to enjoy non-alcoholic mixed drinks.What makes it “dirty”?
It’s the cream! I am not sure why – if you know, let me know in the comments – but adding the cream is what makes it dirty. Maybe it’s because cream and soda doesn’t go together smoothly until you mix it?Wait, aren’t these just melted floats?
Remember floats? Soda topped off with a perfect scoop of vanilla ice cream? I LOVE floats, especially root beer floats. Essentially, dirty sodas are a variation of a ice cream float, but with heavy cream instead of ice cream.Can I make dirty soda at home?
Yes! It’s super easy to make dirty soda and it just takes regular grocery store ingredients. In fact, hold a dirty soda party and have a bunch of sodas and mix ins and customized to your heart’s galore. There are bunch of flavored coffee creamers these days and they work perfectly if you don’t want to buy coffee syrups.How to make dirty soda
- Ice: First, start off with a large glass of ice. Nugget ice is preferable (more on that below) but obviously most people don’t have $700 nugget ice machines at home so go with whatever ice you have.
- Syrups: To the ice, add your syrups of choice. For the classic dirty soda, we’re going to add 2 pumps of coconut syrup (1 tbsp) and 1 tbsp of fresh lime juice.
- Soda: Next, we’re going to top it off with Diet Coke.
- Cream: The cream is what makes it dirty! Pour on the heavy cream and watch as it swirls in prettily.
- Stir and enjoy. Give everything a stir and sip!
What is nugget ice?
If you’ve ever had the ice at Sonic, you’ve experienced the joy of nugget ice. I am truly obsessed with nugget ice. So much so that Mike seriously thought about buying me a nugget ice maker for me for my birthday. I love that squishy, crunchy, chewable ice. I’m not alone in my love either, nugget ice has a cult following. Sadly, I don’t have a nugget ice maker, (update: I do now! it’s this one and it works great!) but loads of ice is key in dirty sodas: it keeps them ice cold and also helps waters them down to the perfect drinkable sweetness. Nugget ice is definitely superior - the ice is chewable, and it’s somehow light and fluffy with aeration which let’s the soda soak into the ice, equalizing the ratios of the sweetness of soda. Above: sadly, not true nugget ice.What else can you use coconut syrup for?
If you’re a coconut lover like me, you probably won’t have an issue using up a bottle of coconut syrup, but if you need some ideas, here’s what you can do:- coconut lattes: make a regular latte and sweeten to taste with coconut syrup
- cold brew with coconut syrup: sweeten cold brew to taste with coconut syrup
- coconut lemonade: leave the sugar out of your favorite lemonade recipe and sweeten with coconut syrup to taste
- coconut banana smoothies: blend together 1 small frozen banans with 1/2 cup coconut milk and coconut syrup to taste
Dirty soda ideas
- DDD: Dr. Pepper + coconut syrup
- Malibu: Dr. Pepper + coconut syrup + vanilla syrup
- Naughty and Nice: Dr. Pepper + English toffee syrup + half and half
- Buttery Beer: Root beer + butterscotch syrup + vanilla cream
- Riptide: Sprite + cranberry + raspberry + fresh lime
Other fun drinks to try
- Whipped lemonade (pictured above)
- Coconut cloud smoothie
- Mango smoothie
- Blueberry ginger ale spritz
- Lemongrass mint lime spritz
- Mint mojito coffee
Dirty Soda Recipe
Think of dirty soda as a customizable non-alcoholic fizzy cocktail.
- 1 tbsp coconut syrup (~2 pumps, see notes)
- 1 tbsp lime juice
- 12 oz Diet Coke
- 2 tbsp heavy cream
- ice (as needed)
In a large glass filled with ice, layer on the coconut syrup, lime juice, Coke, and heavy cream. Stir well and enjoy!
You can sub the coconut syrup and heavy cream for 2 tbsp of coconut creamer.
I Am... Japanese Pancakes
I MADE FLUFFY PANCAKES!! I MADE FLUFFY JAPANESE PANCAKES!! Sorry for shouting, but I'm so excited!! Ever since the first time I laid eyes on those giggly giant fluffy Japanese pancakes, I've been obsessed. We may or may not have been to almost every fluffy pancake place in Tokyo because of my obsession – here's a run down on the places we've been to. I love the way Japanese pancakes taste: light, airy, and oh so delicious.
Read More →I Am... A Guide to Jackson Hole, WY
Jackson, the town nestled in the valley of Jackson Hole, is known for skiing, cowboys, and two national parks: Grand Teton and Yellowstone. Whether you’re visiting to ski down the couloirs of Jackson Hole Mountain Resort or are hoping to spot bison in the Tetons, you’ll need to eat and sleep. Here’s the best of the best in Jackson Hole.
Best bakery Jackson Hole
Persephone is a beloved Jackson bakery cafe serving up specialty coffees, baked goods, breakfast, and lunch. It’s been named the most aesthetic bakery in all of Wyoming and the pastries are out of this world. Be sure to try their rotating seasonal latte (if you manage to get the pistachio crème you won’t be disappointed) and grab some pastries to go. There’s almost always a line at the cafe in Jackson, but it moves relatively quickly, especially if you’re getting something to go. Pro tip: if you’re skiing at Jackson Hole Mountain Resort, just stop by the location in Wilson (pictured below), it’s way less busy and right on the way to the mountain. Persephone Cafe - Jackson 145 E. Broadway Jackson, WY 83001 7am - 6pm daily Persephone Cafe - Westbank 3445 N. Pines Way Wilson, WY 83014 7am - 3pm dailyBest pizza Jackson, WY
If you’ve ever wanted to eat wood-fired pizza inside a James Turrell inspired dining room, check out Hand Fire Pizza. Located in the historic Teton Theater, Hand Fire Pizza is hands down, the best pizza in Jackson. You can see right into the open kitchen from the entire dining room, which is bathed in a pink to purple ombré of neon light. They use locally sourced organic ingredients, and their pizza is a mix between neapolitan and New York, about 12 inches across with a bubbly charred cornicione with a sturdy-ish but slightly softer centre. Hand Fire Pizza 120 N Cache St #1137, Jackson, WY 83001 Fri-Sun 11:30am - 9pm Mon-Thur 5-9pmBest bar Jackson, WY
The Million Dollar Cowboy bar is famous, and rightly so. The bright neon sign, saddle seats at the bar, and live music make it a must visit when in Jackson. Located in the town square, it’s honky tonk at its best. Live music, dancing, and drinks, you can’t go wrong. Plus, if you’re looking hungry for steak, you can head on upstairs to the Million Dollar Steakhouse for a real cowboy experience. Million Dollar Cowboy Bar 25 N Cache St, Jackson, WY 83001 11am - 1am dailyBest après Jackson Hole
If you’re doing après, that means you’re skiing, probably at Jackson Hole Mountain Resort, located about 20 minutes away (with no traffic) from the town of Jackson. You should do après right and stay on the mountain. The Handle Bar, with its slope side patio is the best place to enjoy a boot - yes a boot! - of beer and snacks. Shout out to the sausage platter that comes with a pickle salad and three different sausages, house made mustard, and beer cheese. It’s perfect for sharing while you warm yourself by the outdoor fire, watching everyone as they ski down the slopes. The Handle Bar 7680 Granite Loop Rd, Teton Village, WY 83025 11am - 8:30pm dailyBest Sushi in Jackson
Sushi?! In the mountains? Yes! Kampai, located in downtown Jackson, is a beautiful room with beautiful, fresh fish. Grab a seat at the bar where you can chat with the chef and ask what they recommend. Kampai is a true sushi bar experience, right in the middle of the mountains. The chef we had worked in Tokyo (at one of our now shuttered favorite Tokyo sushi restaurants!) and frequently goes back to stay in the sushi loop. Kampai’s shari, or sushi rice, is seasoned heavily with akazu, aka red vinegar, and is the perfect choice for the mountains. The seasoned rice with perfectly fresh fish and creative flavor flourishes make each piece of nigiri a delight. Pro tip: Finish with a negitoro hand roll, they way they do in Japan - very finely chopped toro and chives on top of warm seasoned rice nestled in a sheet of Japanese sourced roasted nori. Kampai 175 Center St, Jackson, WY 83001 Tues-Sat 5-9pmBest ski resort Jackson Hole
Did you know there are two ski resorts next to the town of Jackson? The mountain that you can see when you’re in Jackson is actually Snow King Resort, not Jackson Hole Mountain Resort. Don’t be fooled! Snow King is known for being steep, but if you’re in Jackson, you best be there to ski JHMR. Snow King features a smaller footprint without the variety of terrain that JHMR offers. Plus, the snow at JHMR is worlds above what the locals call Sheet of Ice King. While at JHMR be sure to take the iconic red aerial tram and get the waffles from Corbet’s Cabin! Jackson Hole Mountain Resort Teton Village, WY 83025Best Restaurant Jackson Hole Mountain Resort
If you’re looking for a hearty delicious dinner after skiing, check out Corsa, it’s Italian trattoria style food at its best. With its warm and inviting room -there are fireplaces scattered throughout the dining room as well as a pizza bar facing a pizza oven- it’s utterly cozy and the perfect snowy vibe restaurant. The bar is beautiful and there are plenty of drinks to explore, especially now that Italian aperitifs and cocktails are trendy again. The pizza is especially good, with a gloriously charred cornicione and robust tomato sauce. It hits, especially after a long day of hitting the slopes.Where to stay in Jackson Hole, Wyoming
Jackson has what seems like a million places to stay, from the moderately priced (The Cache House)to the ultra high end (Amangani). You can even camp in the Tetons. We’ve done camping, motel-ing, and vacation home-ing, and I’m not sure which one I like best, but I would say it’s best to plan your stay on what it is you’re looking to do. If you want a pure Jackson stay, look for something in the town of Jackson. If you’re wanting to explore the national parks, book a campsite, and if you’re looking to ski, stay in Wilson, WY.Where to stay if skiing Jackson Hole Mountain Resort
You might be tempted to stay in the town of Jackson - after all, it’s only 20 minutes away - but if you stay in Wilson, you’ll be right on the road that leads you directly to the resort. There are a ton of vacation rentals in Wilson and it’s a real town, complete with a grocery store, cafes, restaurants, and bars. Typically there isn’t traffic between Jackson and the mountain, but why risk it. After all, you’re there to ski, not sit in traffic. Check out The Aspens or even these cute geodomes. You could, of course, stay right on the mountain in Teton Village, but the flexibility of being between JHMR and the town of Jackson is infinitely more flexible.Is skiing in Jackson Hole hard?
If you’re an intermediate skier, you’ll find Jackson Hole skiable. Would I recommend it to a beginner? Maybe no. The majority of the terrain is intermediate/advanced or higher and if you don’t like pitchy terrain you might not like JHMR. Do I think Jackson Hole deserves its reputation for being one of the most difficult mountains to ski? Maybe no. They have a couple of extreme runs but I don’t think the resort is as insane as the hype implies. They have a lot of terrain variety and they’ve done a lot in recent years to appeal to everyone. When you’re looking at the map, progressing from right to left is going from easier to more difficult.Best runs
Obviously the most iconic JHMR run is Corbet’s Couloir (above). With its narrow opening, upside-down funnel shaped chute, 3 sides of rock faces, and mandatory cornice drop, it’s not for the faint of heart. Unfortunately for those who want to prove their mettle, Corbet’s only opens in later in the season and usually only when the snowpack is almost perfect. Is it the best run at JHMR? After the mandatory air, the run opens into an average expert run. If you have the skillz, try it! For a less intimidating run that’s almost just as iconic, take the Rendezvous Bowl. It’s the major right off the Tram. It’s big and wide with a moderate pitch. Because it faces South, the snow can range from powder, packed, to icy-rock hard. It also can suffer from poor visibility. That’s it! Hope you enjoy cowboys and girls! xoxo steph Read More →I Am... Shrimp Fried Rice
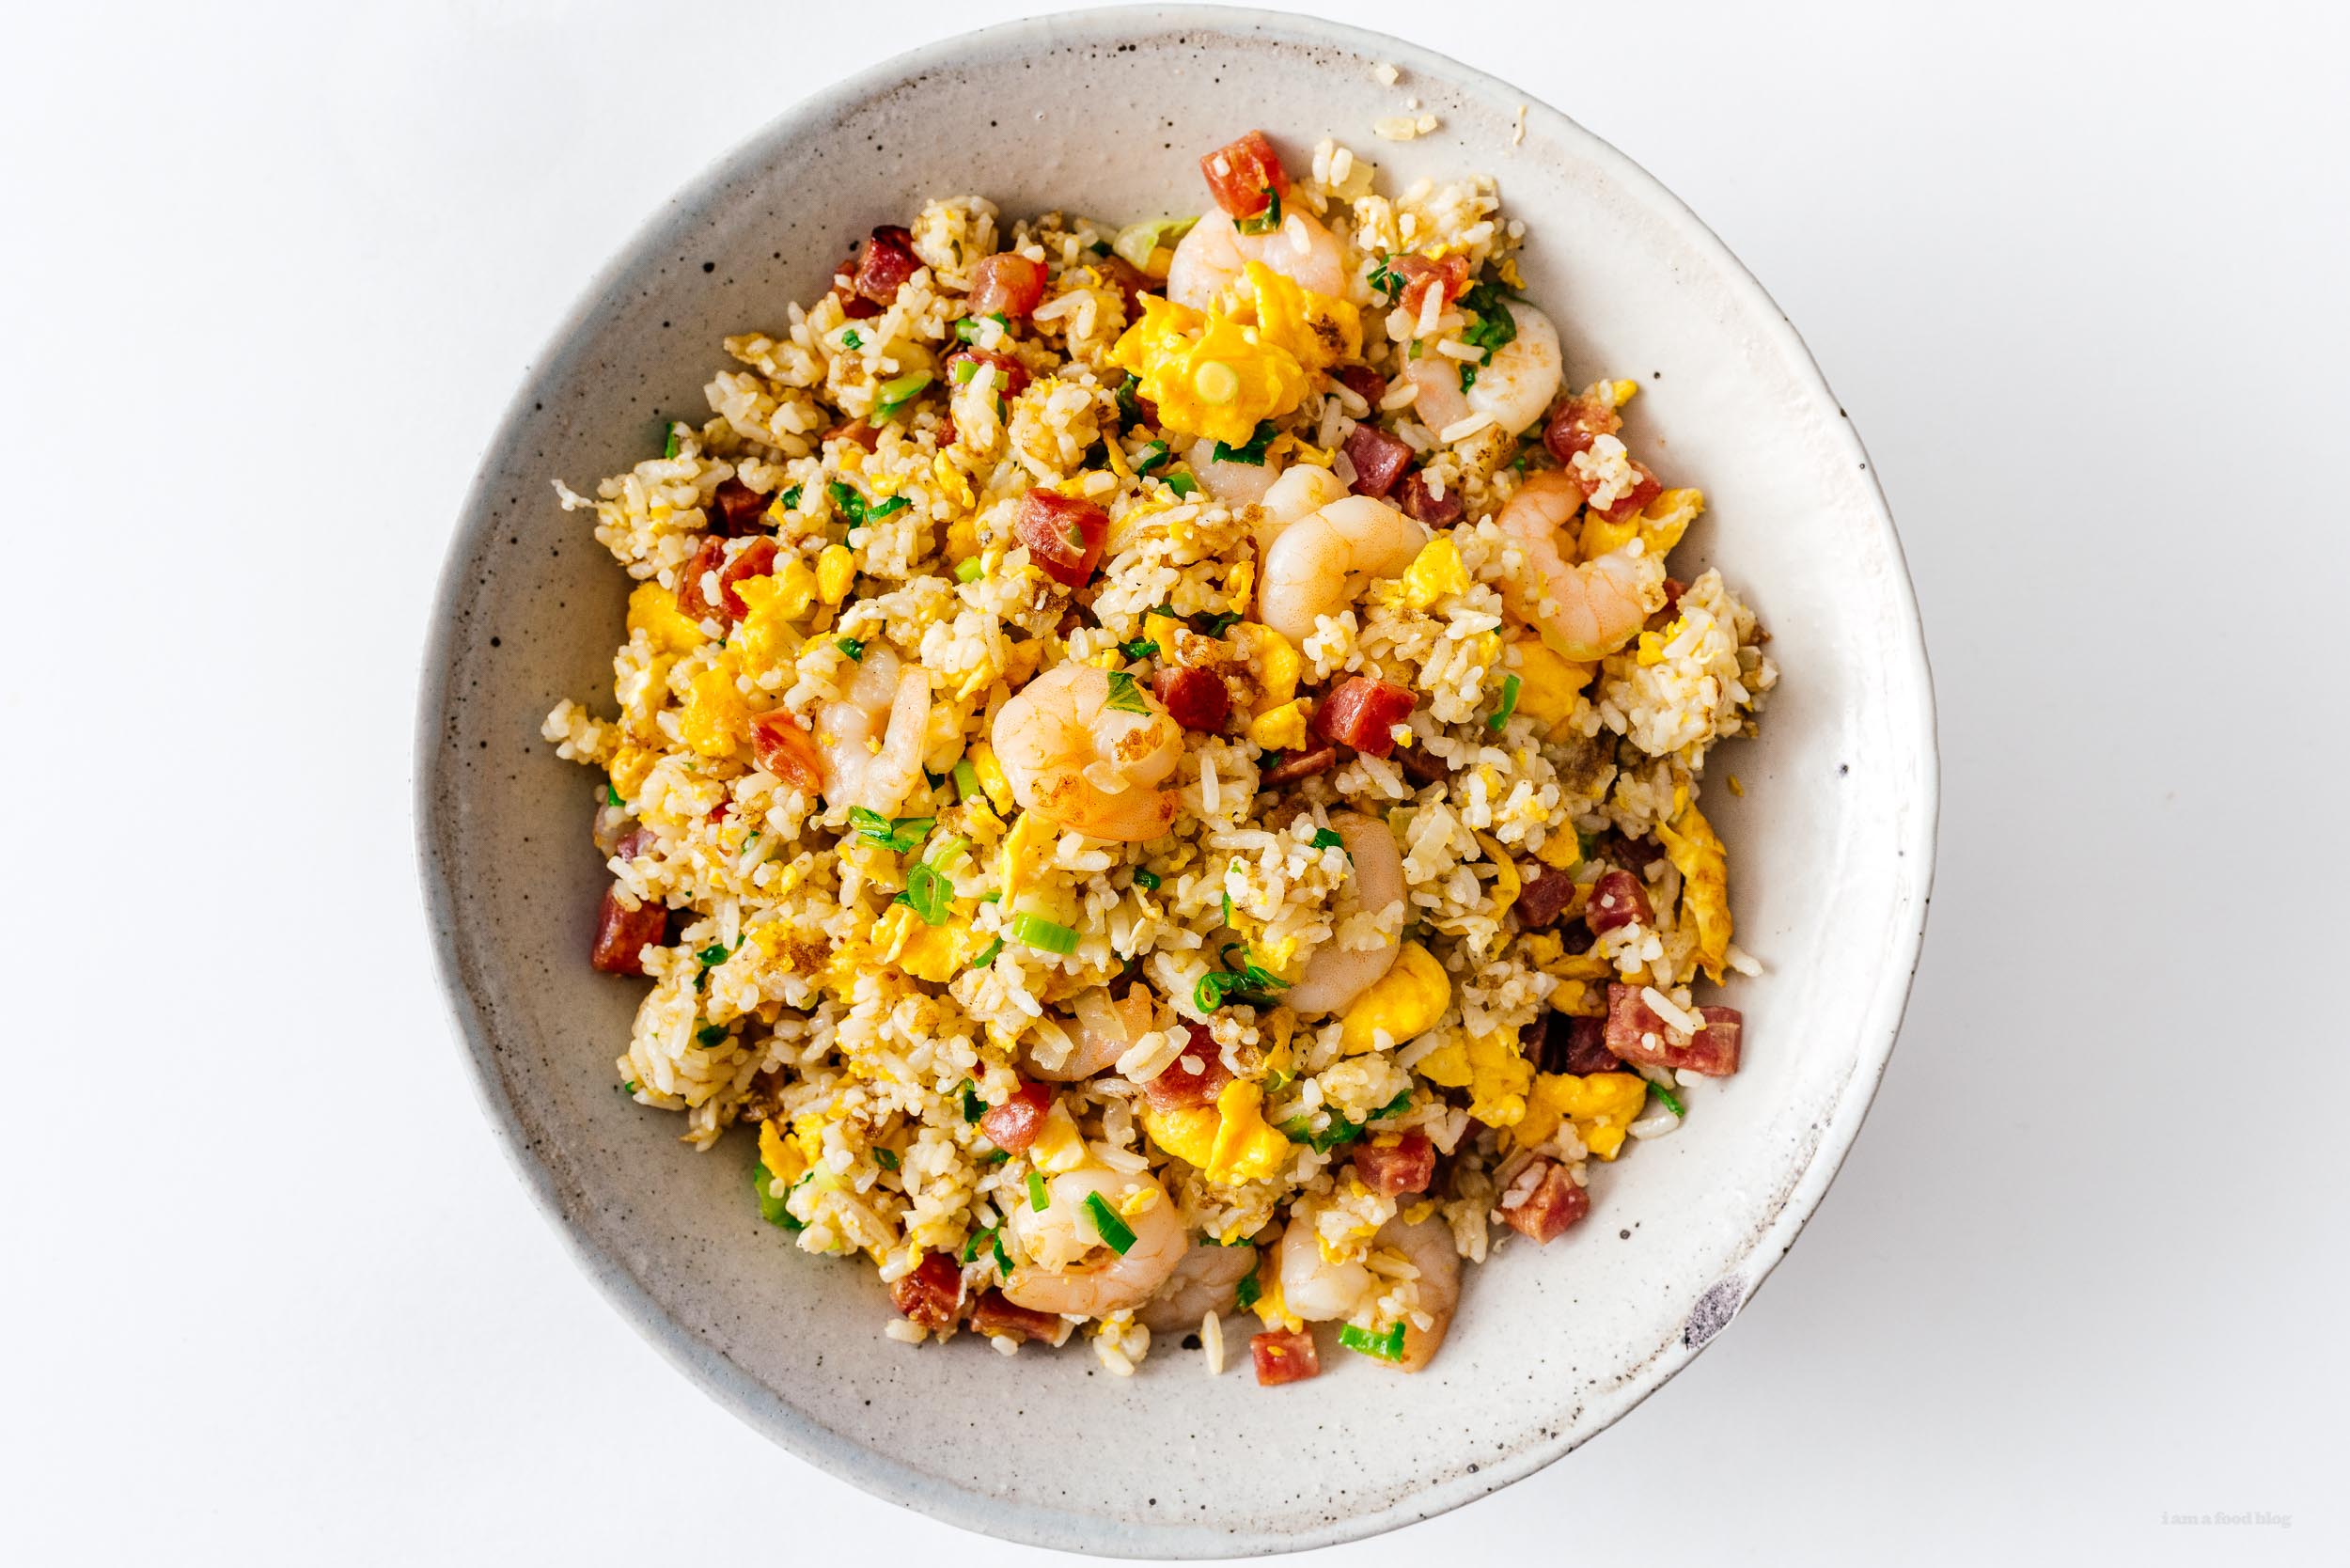
Shrimp fried rice is one of the best fried rices out there. You’ll love this fried rice with juicy plump shrimp, crispy rice, fluffy scrambled eggs, sautéed onions, bonus Chinese sausage, and salty, bombastic flavors bursting with hints of ginger, garlic, and white pepper. It’s amazing what flavors you can get out of ordinary ingredients with the right technique.
How to make shrimp fried rice
- Prep. Make sure all your ingredients are ready to go. The shrimp should be prepped, the sausage should be chopped, the onion should be diced, the rice should be ready, and the seasoning should be mixed up. Fried rice cooks fast and having everything prepped makes it a lot easier.
- Scramble the eggs. Scramble the eggs in a hot wok until they’re barely set, then remove them from the wok and place in a bowl.
- Cook the sausage. Cubes of Chinese sausage add a sweet and salty umami punch. Cook them until they crisp up and some fat renders out. Scoop them out of the wok and put them in the bowl with the egg.
- Cook the onions and shrimp. Add the onions to the rendered fat and cook, stirring, until soft, then add the shrimp, briefly stir fry, until just opaque and cooked through, and scoop everything out into the bowl.
- Fry the rice. If the wok is dry, add some oil and when it’s hot, add the rice along with the seasoning. Searing the rice, stirring occasionally, until it is heated through, fluffy, and crisp.
- Mix and serve! Add the bowl of eggs, sausage, onions, and prawns back into the wok, along with the green onions. Toss everything together until it’s all mixed up and enjoy, hot!
Ingredients
Most of the ingredients for shrimp fried rice are pretty standard: oil, eggs, onions, green onions. Here are a couple notes on the rest:- Shrimp - plump and juicy 51/60 size shrimp are perfect for fried rice. Not too tiny and not too big. Frozen, uncooked shrimp is great - it’s the same as the defrosted shrimp in the case. Make sure to defrost and pat dry before using.
- Chinese sausage - Chinese sausage is sweet, smoky, savory, and packed with umami. Find it at your local Asian grocery store or in the Asian aisle at any supermarket. This is an optional ingredient for shrimp fried rice but it adds so much amazing flavor, don’t sleep on it! You can even get it online if you need to.
- Rice - day old rice is best, but if you’re using fresh rice, be sure to spread it out and cool it down entirely so it’s not too moist. I like to use jasmine rice.
Seasoning
We’re going to season with chicken stock, garlic powder, ginger powder, salt, and white pepper:- Chicken stock. The chicken stock adds a bit of umami as well as moisture. It helps the rice get fluffy and crisp without sticking to the pan too much.
- Dehydrated spices. Dehydrated ginger and garlic add all the flavors without chopping.
- White pepper, if you have it, adds a bright floral pepper flavor.
Great fried rice
All fried rice is good, but great fried rice is life changing. Each grain of rice should be fluffy and distinct and each spoonful should have a bit of everything in it for the perfect bite. It should be hot and have a little bit of crisp on the rice and all the ingredients should be perfectly cooked. Good fried rice can stand on its own and needs no accompaniments – it should be so satisfying that you crave another bowl before you’ve finished the one in front of you. Fried rice is usually thought of as a quick 20 minute dish that you just throw together on a weeknight when you can’t think of what to make. It’s true that fried rice comes together in a flash, but it shouldn’t be a second choice when it comes to making dinner.Why you should make authentic fried rice
To be honest I’m kind of disappointed in the first couple of google results for shrimp fried rice. I shouldn’t make assumptions, but it looks like those recipes don’t have a huge amount in common with authentic fried rice. Do you need to be Chinese to make or enjoy fried rice? Absolutely not. Should you look at a recipe with Chinese roots when you want to be inspired before doing your own take on fried rice? Absolutely.3 key tips to make your fried rice taste like restaurant style fried rice:
1. Wok
If you have a wok, use it! A wok, with its different heat zones, due to its cute and round shape, is made for frying and tossing, perfect for fried rice. If you use a wok, you’re going to get some wok hei, that essential smokey essence you get when you get when you use a wok over hot heat. Chinese people are crazy about wok hei, which means “wok breath” and if you want that authentic fried rice flavor, a wok is how you’re going to get it. A good carbon steel wok is usually not too expensive and will last you a lifetime. If you have a gas stove, you’ll want a wok that is perfectly round on the bottom. It's truly a game changer. If you are on electric or induction, you need to get a flat-bottomed wok. In either case, it’s best to get a pre-seasoned one so you don’t need to remove the handle and season it yourself. If you don’t have a wok, using a cast iron or non-stick pan is perfectly acceptable, just make sure it it’s big enough and remember that with non-stick, don’t turn up the heat as much. Of the multiple kinds of non-stick pans out there, a ceramic/non-teflon coating is probably your best bet.2. Oil
Don’t be stingy – if you want restaurant quality fried rice, you’re gonna have to get a little oily. Hot oil helps everything not stick, distributes heat, and helps with distributing flavor. Having said that, please don’t go overboard, no one likes super oily fried rice.3. Cook step by step
The right way to cook fried rice is to cook everything separately and then combine at the end. This ensures that everything is cooked to perfection. Cooking everything separately, scooping it out and then adding it back in seems like extra steps but this is the KEY to good fried rice. If you add everything to the pan at once or leave things in the pan, things are guaranteed to be overcooked.Rice
I like using day old jasmine rice. Break the rice up before you add it to the wok by slightly wetting your hands and gently squeezing and breaking into loose individual kernels. Each grain of rice should be firm, fluffy, and distinct.What to serve with fried rice
Go forth and make the best fried rice of your life!
Shrimp Fried Rice
Authentic shrimp fried rice with juicy plump shrimp, crispy rice, fluffy scrambled eggs, and salty, bombastic flavors.
- 1/4 cup chicken stock (no sodium preferred)
- 1 tsp salt
- 1 tsp ground ginger
- 1 tsp garlic powder
- 1/8 tsp ground white pepper (optional)
- 2-4 tbsp neutral oil
- 4 large eggs (lightly beaten)
- 4 links Chinese sausage (diced, about 1 cup, optional)
- 1/2 medium onion (diced)
- 4 oz shrimp (raw, peeled and deveined, small preferred)
- 4 cups cooked rice (day old jasmine preferred)
- 2 green onions (thinly sliced)
In a small bowl, mix together the chicken stock, salt, ground ginger, garlic powder, and white pepper. Make sure all your other ingredients are prepped and ready to go. In a large skillet or wok, heat up a some of the oil over high heat and scramble your eggs until mostly set, but still slightly runny. The eggs will cook a bit more when you fry everything together at the end. Remove and set aside in a bowl.
If you are using Chinese sausage: Crisp up the Chinese sausage over medium high heat, cooking until slightly browned, stirring occasionally. You shouldn’t need to add oil to the pan as the Chinese sausages will render out a bunch of fat, but if they’re sticking, add a bit in. Remove the Chinese sausage from the pan and add it to the bowl with the eggs.
Sauté the onions for 1-2 minutes in the rendered fat, stirring occasionally. Add a bit of oil to the pan if needed and cook the shrimp with the onions very briefly, until just opaque and cooked through. Remove from the pan and pop it into the egg and sausage bowl.
Heat up 2 tablespoons of oil in the pan and add the rice. If you’re using rice from the fridge, it’s best to break it up with slightly wet hands before putting in the pan. Add the seasoning to the rice and fry over high heat, stirring occasionally until the rice is fluffy, crispy, and heated through.
Add the eggs, sausage, onion, shrimp, and green onions and toss everything together so that everything is evenly distributed. Enjoy hot!
Estimated nutrition does not include optional ingredients
I Am... cowdog coffee Vancouver
There’s a new coffee shop in town and it’s adorable. cowdog coffee - one word, no caps - is a twice a week pop up coffee shop, open on Sundays and Mondays. It’s located inside Dear Gus Snack Bar on Quebec Street and it’s Vancouver’s newest cafe darling.
About cowdog coffee
Started by partners Ryan Dean Dexton and Joe Lee, cowdog coffee is a pop up shop that operates out of Dear Gus Snack Bar in Vancouver, BC.What to order at cowdog
I love it when a cafe has a limited menu and cowdog is no exception. Their features are definitely tea lattes: matcha, hojicha, and the especially photogenic strawberry matcha. They also do pourover, batch brewed coffee, and espresso with either a little milk or a lot of milk. Typically there’s a seasonal special as well. The drink they sell out of the most is definitely the strawberry matcha latte. Not only is it pretty with distinctive layers of color, it’s delicious too. The sweet-tart house made strawberry puree, high quality grassy matcha, and your choice of milk combine into the perfect quaffable sip. Unfortunately the strawberry matcha latte is a limited time drink, so double check their instagram to see what season ly specialty they have before you go. They’ve recently added a cookie butter latte and it is AMAZING. They use the cookie scraps from their speculoos, blend them up into a syrup then do a latte that is spiced and perfectly balanced. If you like cookie butter or biscoff cookies, this is the drink for you.Something sweet?
cowdog has the CUTEST little biscoff scottie dog cookies aka speculoos. Warm spices, crisp and crunchy, there’s a reason why speculoos are the biscuit to have with coffee. They also do canelé in different flavors. If you haven’t had canelé before, they’re a French pastry baked in a copper mold. Canelé are delightfully caramelized, crunchy, and dark on the outside with tender custardy insides. cowdog bakes them fresh in the mornings. Some past flavors have been: coffee cream, lemon pistachio, and salted caramel. These guys sell out quick, so hop in line early if you’re looking to snag one.When to go
They’re only open two days a week, so you don’t really have much of a choice, go on a Sunday or Monday. Sundays are usually busy with line ups because it’s the weekend, but Mondays are pretty busy too. If you want any of the more popular items, I’d say plan to be there before 10am. Also, be prepared to wait in line. They hand craft all of their drinks and good things take time.Location and hours
Inside Dear Gus Snack Bar at 2040 Quebec Street, Vancouver BC Sundays and Mondays from 7am - 3pmExtra notes
They don’t charge extra for oat milk and they don’t accept tips! They are also workshopping a hojicha caramelized white chocolate cookie that looks absolutely amazing. I hope you support this lil pop up. I think their branding is super cute and their drinks, from what I’ve had, are delicious. It’s always fun to watch people work towards and achieve their dreams :) Read More →I Am... Corned Beef Hash
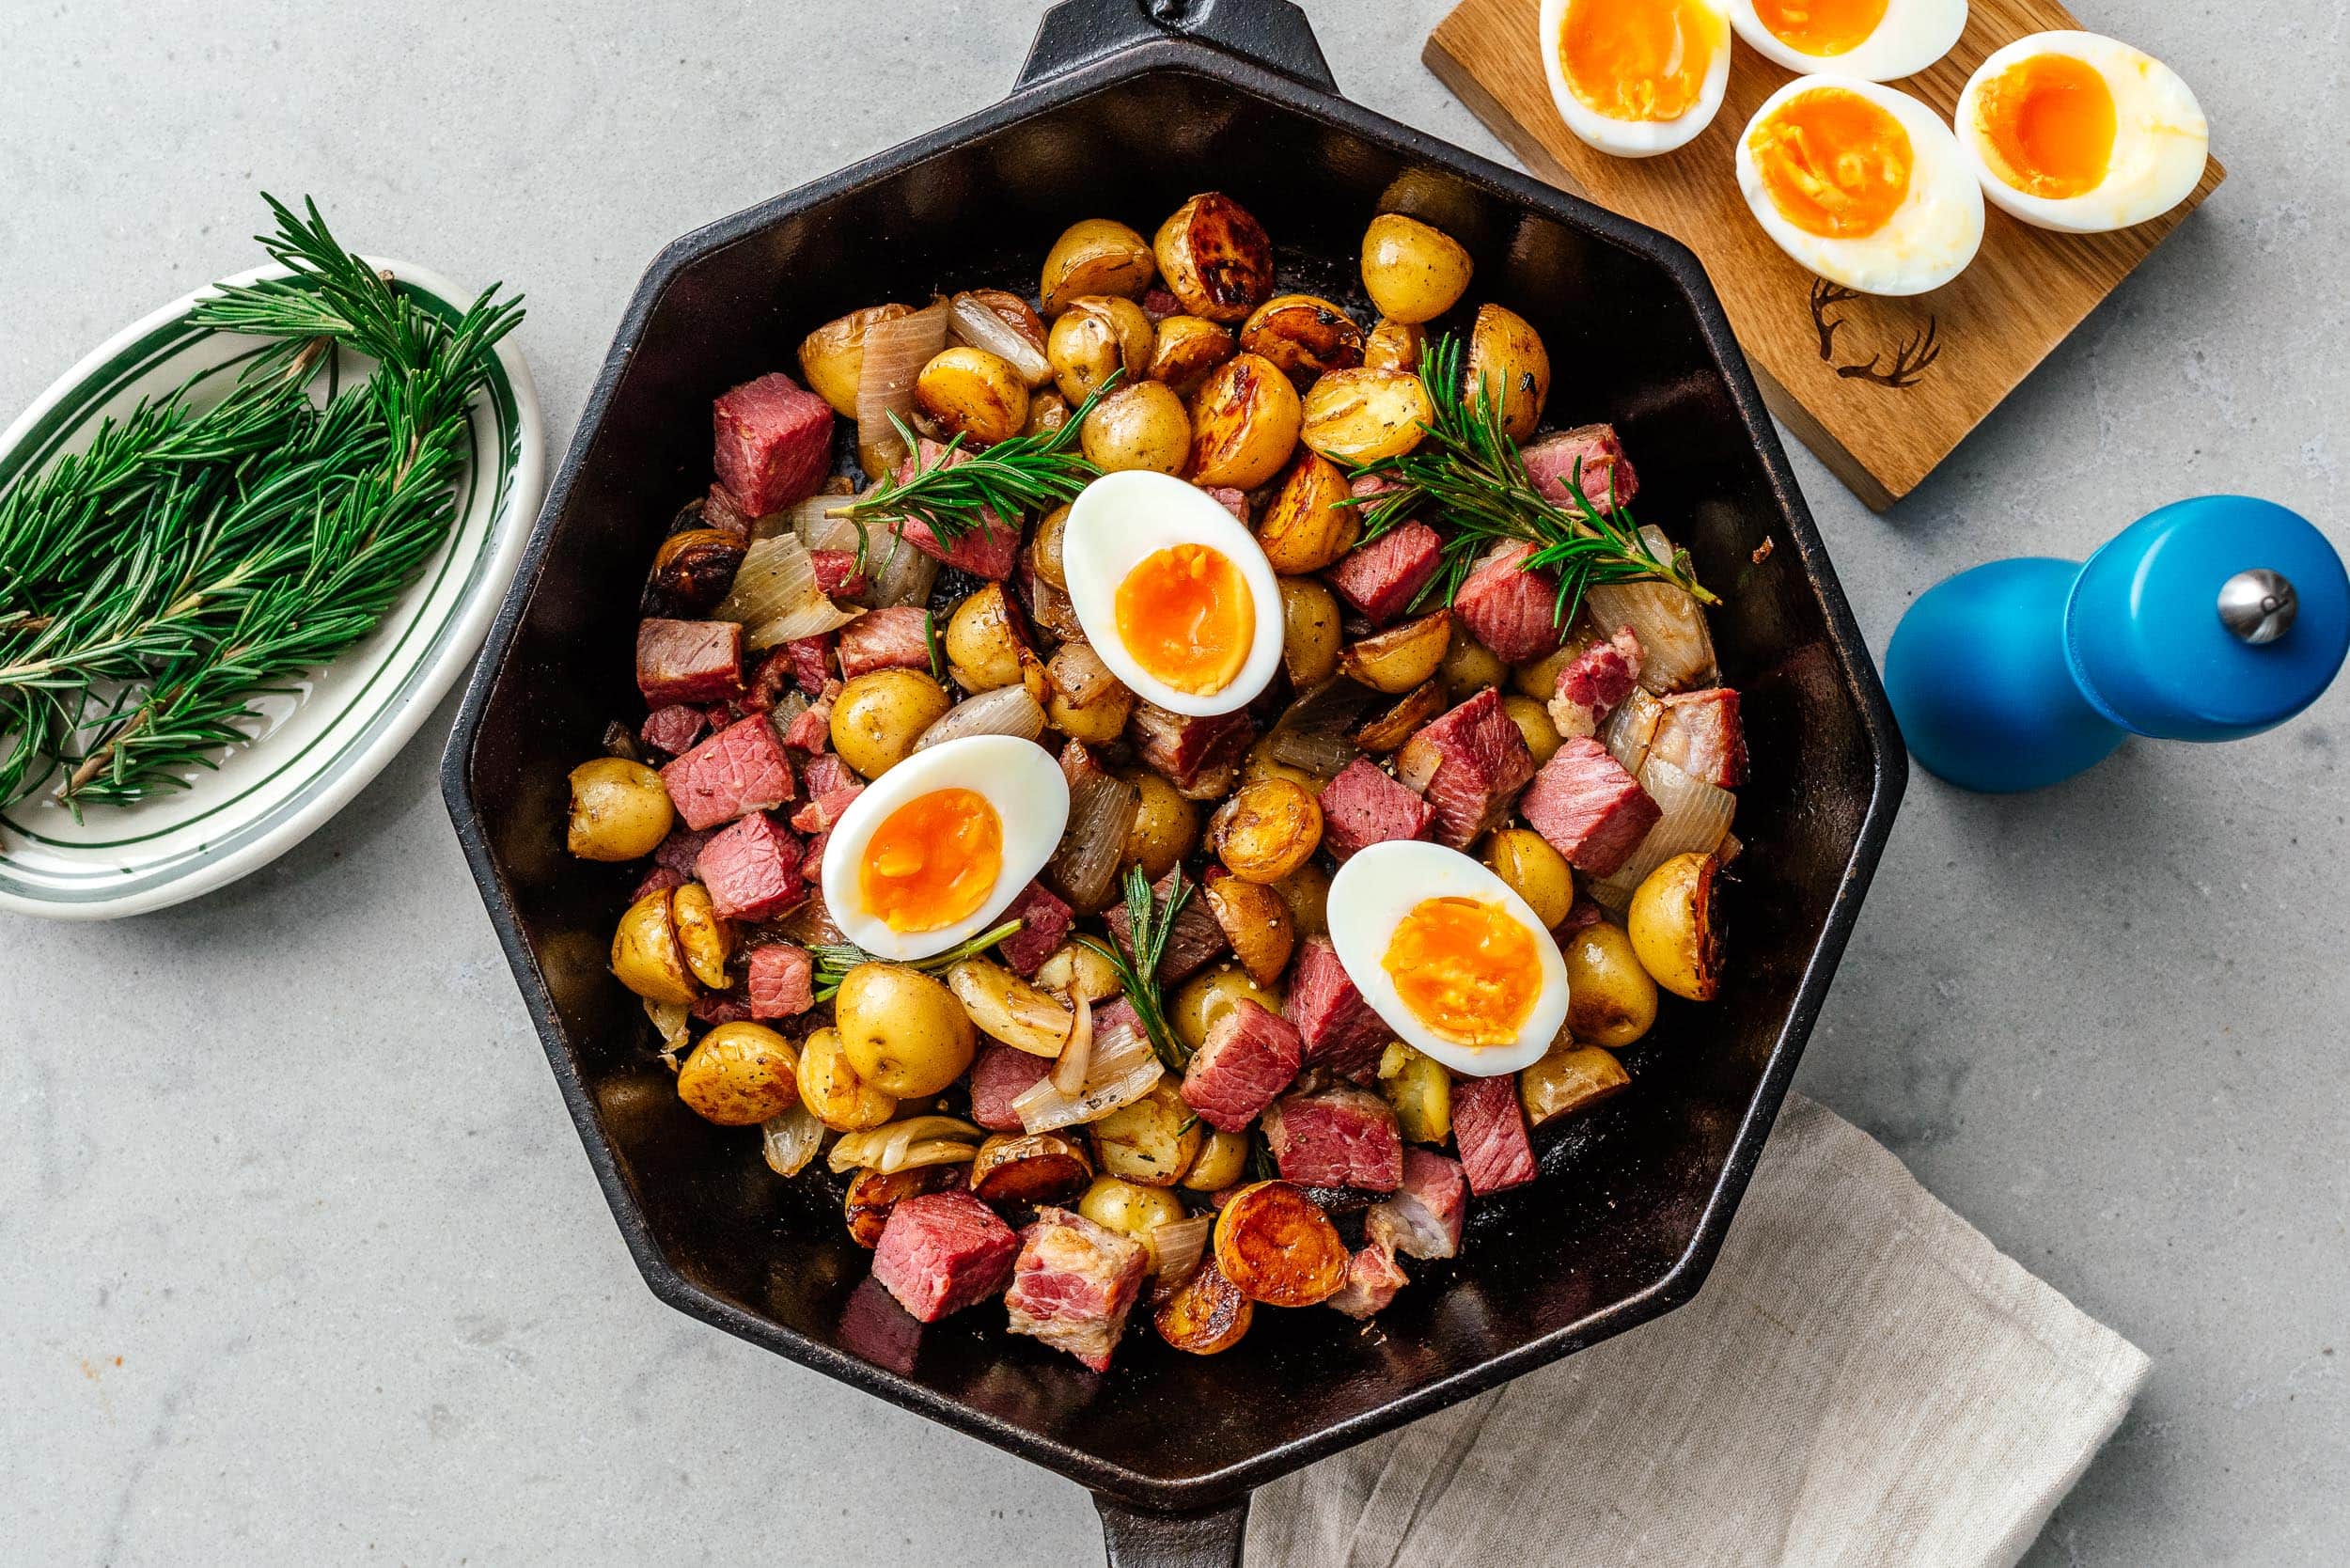
Do you have leftover corned beef and want to make the best breakfast you’ll eat this year? Corned beef hash is what you need! Give me all the juicy corned beef! I love corned beef with cabbage, corned beef sandwiches, and especially this hash. To be honest I love corned beef hash so much that I always ask Mike to make extra corned beef just to make sure hash happens. I just love crispy little nuggets of juicy beef and toasty roasty potatoes. Add a couple of jammy eggs on top and a side of toast and I’m in heaven.
How to make corned beef hash
- Prep. Chop up your shallots, corned beef, and halve some new potatoes.
- Fry. Heat up a bit of oil and add the potatoes cut side down to a large cast iron or non stick pan. Fry until golden and crisp.
- Steam. Add garlic and shallots and beef stock to the pan, bring to a simmer, cover and cook until the potatoes are creamy and cooked through.
- Crisp. Take the lid off and cook off the remaining liquid. Add the corned beef and some rosemary and cook, stirring, until hot and crisp.
- Throw an egg on it. Add eggs: make a nest and fry them in the pan, scramble them in, make sunny side up eggs in another pan, soft boil or poach, anything goes.
- Enjoy!
What is corned beef?
Before we get too deep into the hash part, maybe you’re wondering what exactly is corned beef? Corned beef is beef brisket that’s been salt-cured and pickled with spices and boiled to juicy, tender perfection. It’s called corned beef because way back in the day, giant grains of rock salt were called “corns.” Most corned beef is eaten as is with cabbage and potatoes, in sandwiches, or for breakfast as hash.Why you should make this
If by some chance you have leftover corned beef at home, you should definitely make this particular recipe - it’s my best version and we look forward to eating it every year around St. Patrick’s Day. It’s not your typical hash made with leftover potatoes that are soggy and sad. The potatoes for this hash are fluffy, salty, and extra crisp - the perfect compliment to the corned beef you lovingly made.The best hash needs the best skillet potatoes
Take the time to properly crisp up your potatoes and your hash will be taken to the next level. I know hash is thought of as a quick breakfast, but you deserve to slow down and make the best hash you can make. And that means, cooking your potatoes low and slow. One of my favorite ways of making skillet potatoes is first frying and then steaming them in the pan with stock. You get the best of both worlds: crispy brown edges and creamy deliciously savory insides that echo the beefy meatiness of the corned beef.Aromatics
Along with the potatoes, we’re going to slow braise some shallots in beef stock for some sweet caramelized shallot action as a nice counterpoint for the savoriness of the corned beef. We’re also going to increase the overall deliciousness with garlic and rosemary for added flavor. Jammy, perfectly golden yolked eggs finish off this hash.The best corned beef hash
And that’s it! It’s beautiful: the ruby red of the corned beef, the deeply caramelized crisp of the potatoes, the sweet pink of the shallots, and the jammy eggs. This corned beef hash is special. All the flavors marry into a delicious, over the top, you’re going to want to eat this again and again dish. Just seven ingredients, but it’s how you prepare them with care that really makes this dish a winner.Where to get corned beef
You can easily make your own at home! Mike makes corned beef several times a year - I look forward to it every St. Patrick’s Day. If you don’t want to make your own corned beef (it’s really easy) you can find it at most grocery stores or Costco in the meat department - they sell it both already cooked and ready-to-cook. You can also find it at your local butcher or delis, especially around St. Patrick’s Day.Canned corned beef
You can even buy canned corned beef, which is completely different than whole cuts of corned beef. Canned corned beef comes pre-finely chopped and is the kind of corned beef that most diners use for their hash.The eggs
Technically you don’t need eggs for hash - the hash part is onions, potatoes, and corned beef. That being said, eggs and hash go hand in hand like mac and cheese. You can do the eggs in your favorite way: fry them up in another pan, scramble them into the hash, or make little nests and cook them in the pan. Personally, we like soft jammy boiled eggs with ours. The creamy yolks are perfect with the salty, crispy beef and potatoes. To make jammy eggs, boil the eggs straight out of the fridge for 6 mins 30 seconds, then place in an ice bath for awhile until you're ready to use.Best sides to serve with hash
Corned Beef Hash Recipe
This homemade corned beef hash might just be the best breakfast you’ll eat this year.
- 1 lb potatoes (cubed, mini potatoes preferred)
- 2 tbsp neutral oil (eg grapeseed)
- 2 shallots (quartered)
- 4 cloves garlic (smashed)
- 1/2 cup beef broth (low/no sodium preferred)
- 1-2 sprigs fresh rosemary
- 2-3 cups corned beef (chopped)
In a large cast iron pan, heat the oil on medium heat. When hot and shimmery, add the potatoes, cut side down. Fry, without moving, on medium for 7-10 minutes depending on the potato size. When the time is up, use an offset spatula to lift the potatoes to see if they’re golden and crisp. If needed, add 1-2 minutes cooking time.
Leave the potatoes cut side down and add the shallots and garlic. Add the beef stock. Bring to a simmer, then cover and cook on medium to medium low until the potatoes are creamy, tender, and cooked through, about 10-15 minutes, depending on size - check every 5 minutes or so.
While the potatoes are cooking, cook the jammy eggs: Bring a large pot of water to a rolling boil,then turn the heat down slightly. Use a slotted spoon to gently add the eggs. Turn the heat back up to medium high and maintain a simmer for 7-8 minutes depending on your preference, adjusting the heat down, if needed. You don’t want an intense boil, just a happy little simmer. When the time is up, immediately plunge the eggs into a bowl of very cold tap water. Peel and set aside.
When the potatoes are done cooking, lift the lid - the beef stock should be mostly gone. Push the potatoes to the side and add in the chopped corned beef and the rosemary. Turn the heat up and fry, heating the corned beef through and tossing so everything sears slightly and crisps up. Season with salt and freshly ground pepper.
Serve, topped with peeled and halved jammy eggs.
Please chop your corned beef to your preferred size - I did a mix of larger and smaller cubes.
I Am... Yakisoba
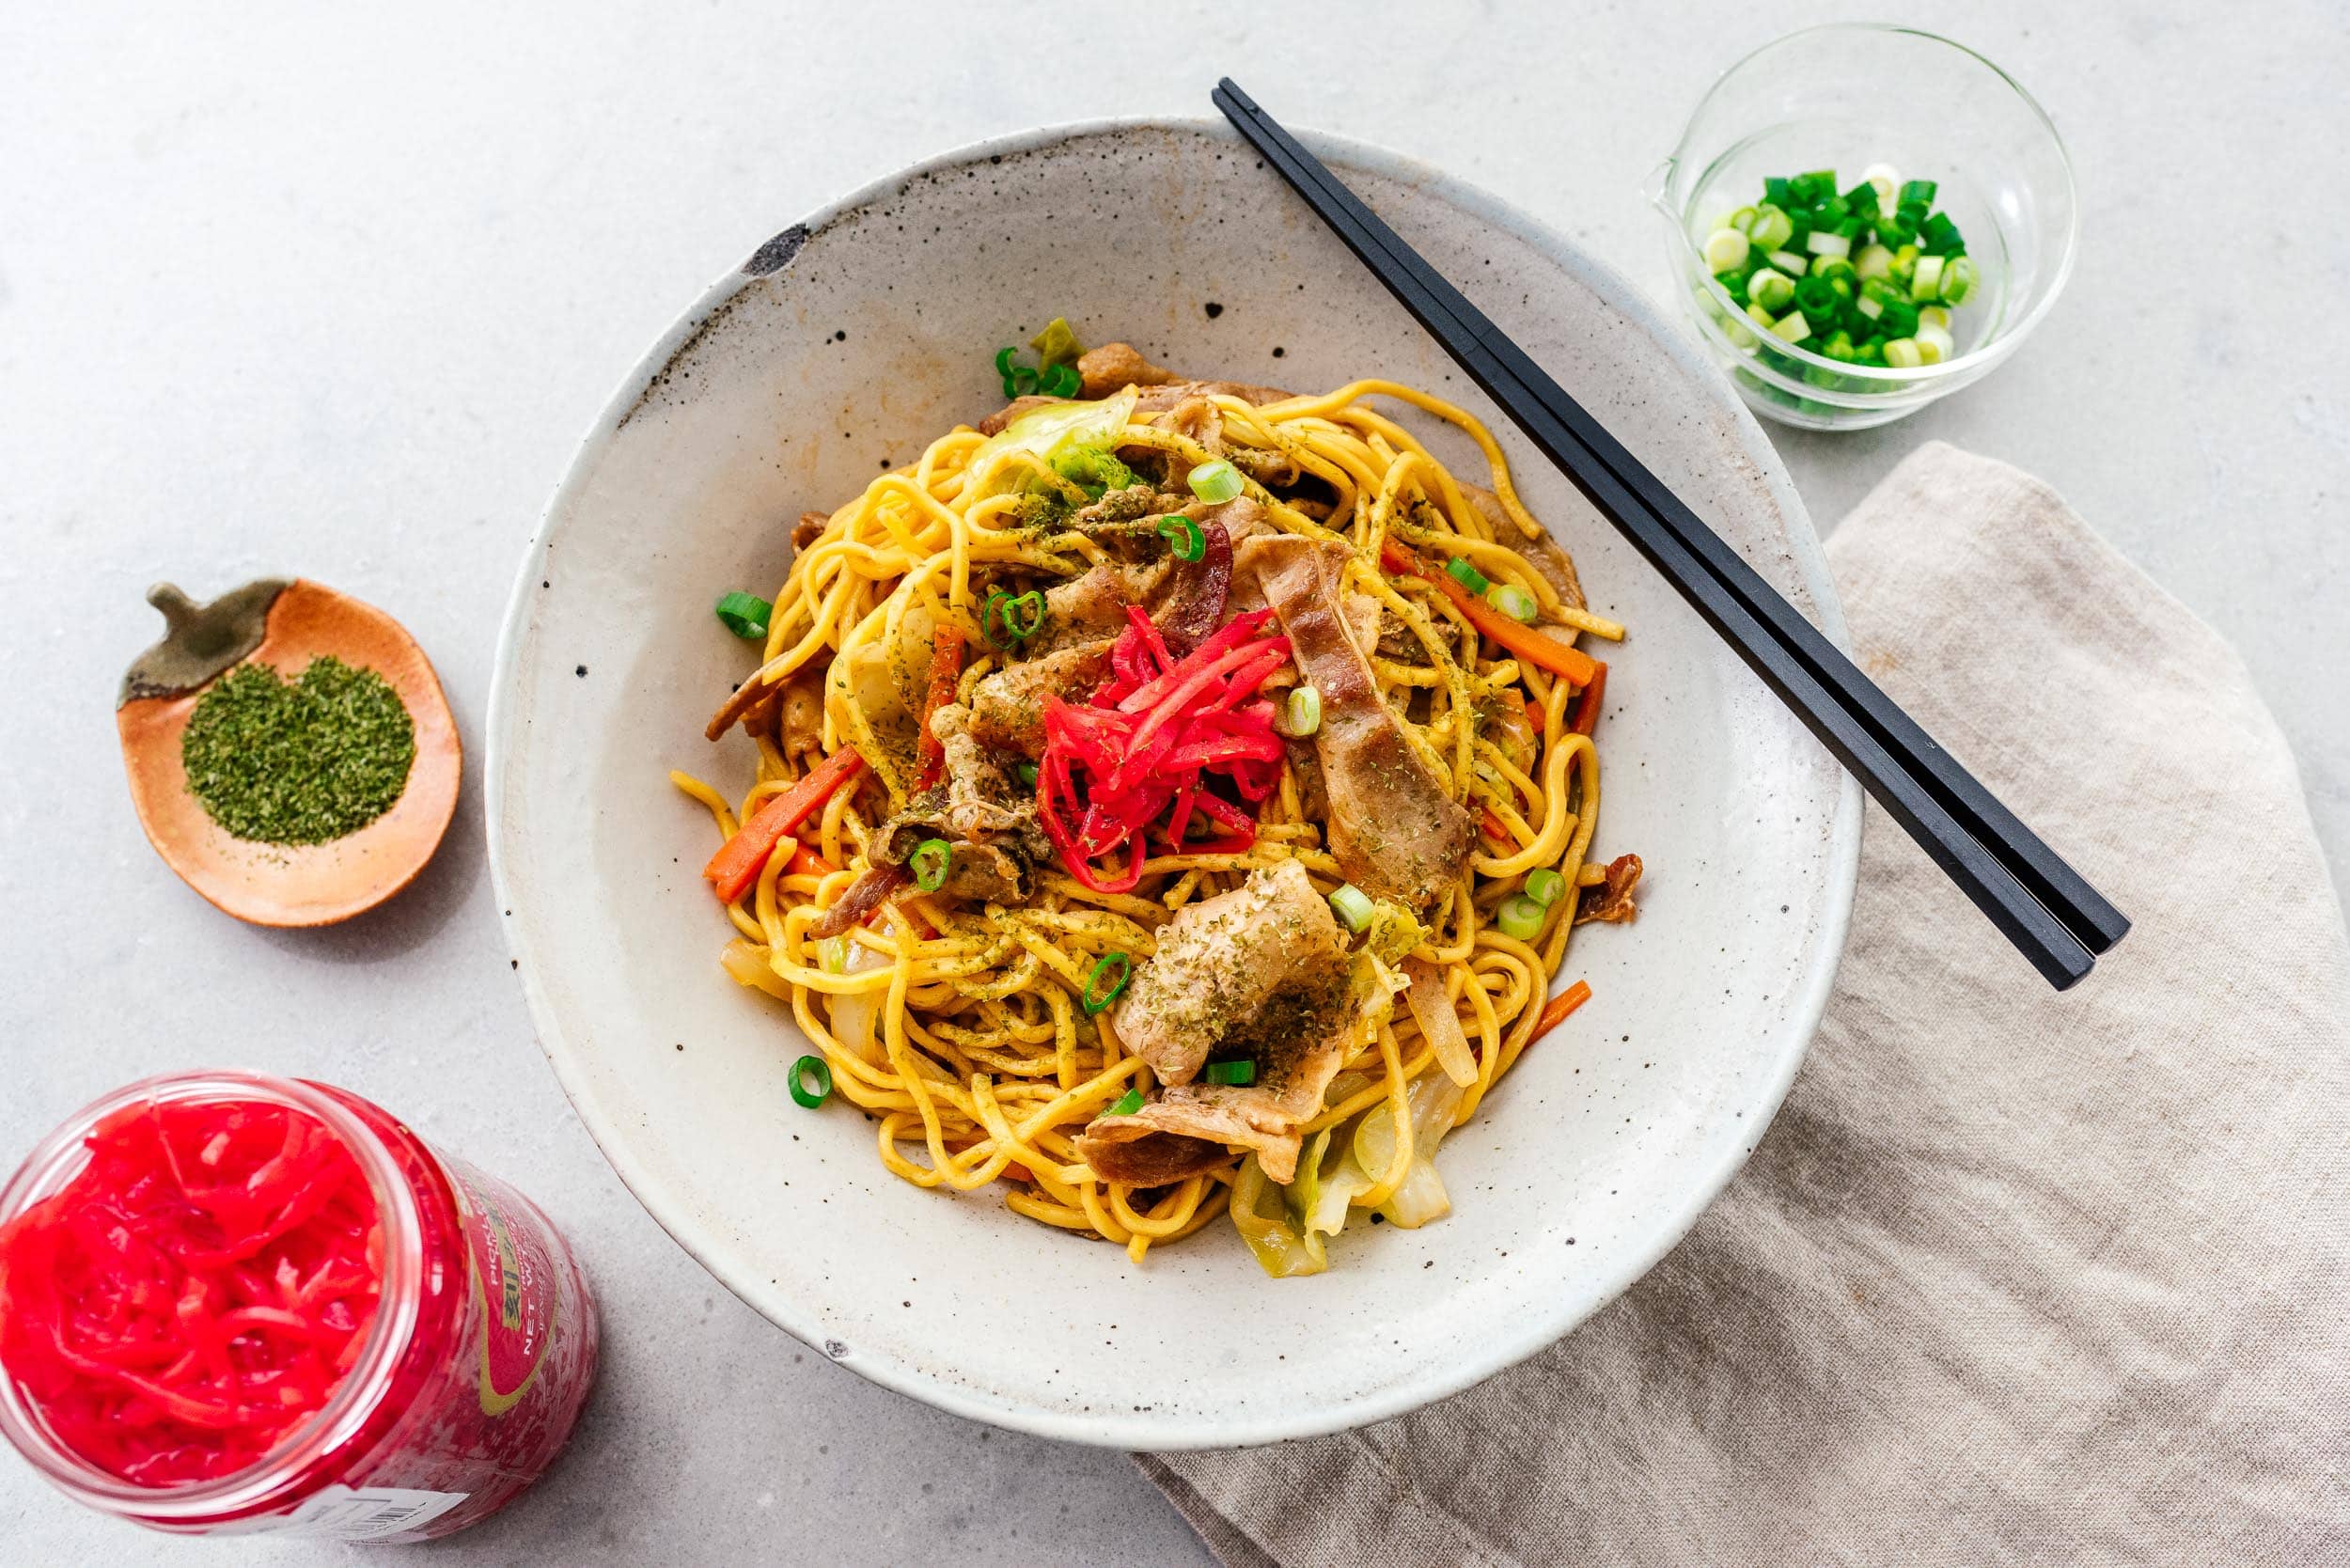
Saucy, noodle-y, and full of umami, yakisoba is a hearty, all-in-one dish that is absolutely delicious. In Japan, when you go to a festival, whether it’s in the spring, summer, fall, or winter, there will inevitably be a yakisoba stand. Neat little piles of yakisoba will be waiting on a giant grill top to be scooped up into containers and handed over to you with a pair of wooden chopsticks. For me, no Japanese festival is complete without slurping up steaming hot, delicious, umami filled yakisoba. I miss living in Japan so much it hurts. When it gets to be too much, I whip up a batch of yakisoba and Mike and I sit on our balcony and eat yakisoba in the fresh air and reminisce.
What is yakisoba?
Yakisoba, literally “fried noodles” in Japanese, is a classic noodle stir fry dish that’s one of Japan’s best known noodle dishes, next to ramen, soba, and udon. It’s a well-loved street food, both made at home and served up in restaurants. If you love fried noodle dishes, you’ll love yakisoba. Contrary to the name, yakisoba is not actually made with soba noodles. Yakisoba is a Japanese take on Chinese noodles and is typically made with precooked wheat noodles that you can find at the grocery store. They’re labeled “yakisoba noodles” at the store. Yakisoba is extremely easy to make and you can add any ingredient you heart desires. Classic is pork and cabbage, but if you’re skipping out on meat, you can easily substitute in more vegetables or add tofu as the protein. It’s the perfect quick meal and great for dinner and meal prep!How to make yakisoba
- Make the sauce. Mix together Japanese Worcester sauce, oyster sauce, ketchup, soy sauce, and a bit of sugar.
- Prep. Chop all your vegetables and slice your protein into bite sized pieces. Loosen up the noodles.
- Cook. Heat up a bit of oil and cook the protein and vegetables.
- Toss. Add the noodles and sauce and toss until the sauce coats all the noodles and everything is glossy.
- Enjoy. Top with seaweed and ginger and enjoy hot!
What kind of noodles do you use for yakisoba?
In English soba always implies buckwheat noodles but the noodles used for yakisoba are not buckwheat at all, they’re actually mushi chukamen, which means steamed Chinese style noodles (“mushi” means steamed, “chuka” means Chinese, and “men” means noodles). They’re very similar to ramen noodles because they’re made with water, flour, and kansui - an ingredient that helps with noodle texture and color. When you buy yakisoba noodles at the store, they come pre-steamed so you just quickly reheat them in sauce.What brand of yakisoba noodles?
There are two popular brands of yakisoba noodles: Myojo and Maruchan. They come steamed, coated in oil, and packed into individual servings. You can find them in the refrigerated section of most Asian grocery stores. If you can’t find yakisoba noodles, you can also use fresh ramen noodles, dried instant ramen packs without the seasoning, or chow mein noodles. They all work great!My favorite noodles for yakisoba
I like to use steamed Chinese noodles for yakisoba. The packages of yakisoba noodles from Japan are super convenient but the noodles tend to break. Since yakisoba is a take on Chinese noodles, I prefer to use Chinese cooked noodles or lo mein noodles. Essentially they are mushi chukamen, steamed Chinese noodles. You can find these in the refrigerated section of Asian grocery stores, they’re usually labelled “cooked noodles,” “oil noodles,” or “lo mein noodles.”Yakisoba sauce
Yakisoba sauce consists of Japanese Worcester sauce, oyster sauce, ketchup, soy sauce, and a bit of sugar. I usually just mix it up at home, but they sell yakisoba sauce as well, in a convenient squeeze bottle. You can find it online or in Asian grocery stores.Japanese Worcestershire sauce
Japanese Worcestershire sauce is almost like Lea and Perrins Worcestershire sauce, but made completely differently. Typically called “sosu” (ソース), Japanese Worcestershire is a sweet, savory, tangy sauce made from fruits, vegetables, sugar, and spices. It tastes vastly different from Worcestershire sauce. You can buy Japanese Worcestershire sauce online or in Asian grocery stores. The most popular sosu producer in Japan is Bull-Dog and they produce 3 main types of sauce, differing mostly on thickness. For yakisoba we need thin, or usuta sauce.Oyster sauce
Since yakisoba is a Japanese version of a Chinese dish, they use oyster sauce as a seasoning. Oyster sauce is a classic Chinese sauce that’s thick and savory with a hint of caramel sweetness and umami. You can buy it online or the Asian grocery store. It adds an extra oomph to your yakisoba.Meat
Thinly sliced pork belly is the Japanese meat of choice, but you can also use thinly sliced beef, cubed up chicken, or firm tofu. They sell thinly sliced pork belly in the frozen section at Asian grocery stores but if you’re looking for a handy substitute, you can use side pork cut into bite size pieces or even bacon if you like it a bit smokier. You can also use chicken, which is just as traditional.Vegetables
Cabbage is classic, along with onions and carrots, but you can really go wild and use any and all vegetables. Mushrooms are great and shredded kale is amazing. Just make sure to cut the vegetables into bite size pieces.Yakisoba toppings
After your noodles are hot and crisp, it’s time to serve it up and add on the toppings!- aonori - tiny dried and powdered flakes of seaweed that add saltiness and umami. You can buy it online or use crumbles of seaweed snack if you have that.
- beni shoga - pretty red strips of pickled ginger that add a sour vinegary bite and contrast the richness of the noodles. You can find this in the refrigerated section of Asian grocery stores. Sometimes you might find this called kizami shoga.
- katsuobushi/bonito flakes - add an extra hit of umami with these dried fish flakes, available online.
- Kewpie mayo - a little squiggle of Kewpie mayo on top is amazing, try it!
- fried egg - everything is buttery with a sunny side up egg.
- toasted sesame seeds - sesame seeds add a bit of crunch and nuttiness.
How to serve
Yakisoba is typically served as a main or side dish. You can serve it alongside a bunch of other dishes, such as gyoza, chicken karaage, and takoyaki for a fun Japanese feast.Tips and tricks
- Prep everything in advance. Make the sauce, loosen the noodles, slice the meat and prep the vegetables. Most of the work is prep, the actual cooking goes very quickly.
- Loosen up the noodles before you add them to the pan. Many packaged noodles come compressed when you take them out of the package. If you add them directly to the pan, you’ll end up breaking them while you’re cooking. Instead, loosen the noodles in warm water and use your hands to gently separate the strands. Make sure to drain the noodles well.
Yakisoba Recipe
Saucy, noodle-y, and full of umami.
- 2 tbsp Japanese Worcestershire sauce
- 1 tbsp oyster sauce
- 1 tbsp ketchup
- 1/2 tbsp soy sauce (Japanese preferred)
- 1 tsp sugar
- 1 tbsp neutral oil
- 3/4 lb pork belly (thinly sliced, or other protein of choice)
- 1/2 medium onion (sliced)
- 1 medium carrot (julienned)
- 4 leaves cabbage (chopped)
- 1 lb cooked yakisoba noodles (loosened, or lo mein)
- 2 stalks green onions (sliced)
- aonori (optional)
- beni shoga/pickled ginger (optional)
In a small bowl, mix together the Japanese Worcestershire sauce, oyster sauce, ketchup, soy sauce, sugar, and 2 tbsp water. Set aside.
Heat up the oil in a large nonstick pan over medium high heat. Add the pork to the pan and cook, flipping as needed until golden brown and cooked through.
Add the onions, carrots, and cabbage. Cook, stirring, until soft but not brown, 1-2 minutes.
Turn the heat to medium and add the loosened noodles into the pan along with the sauce. Toss until everything is hot and coated with sauce and glossy. Stir in the green onions.
Serve topped with aonori and beni shoga. Enjoy!
I Am... Beef Teriyaki
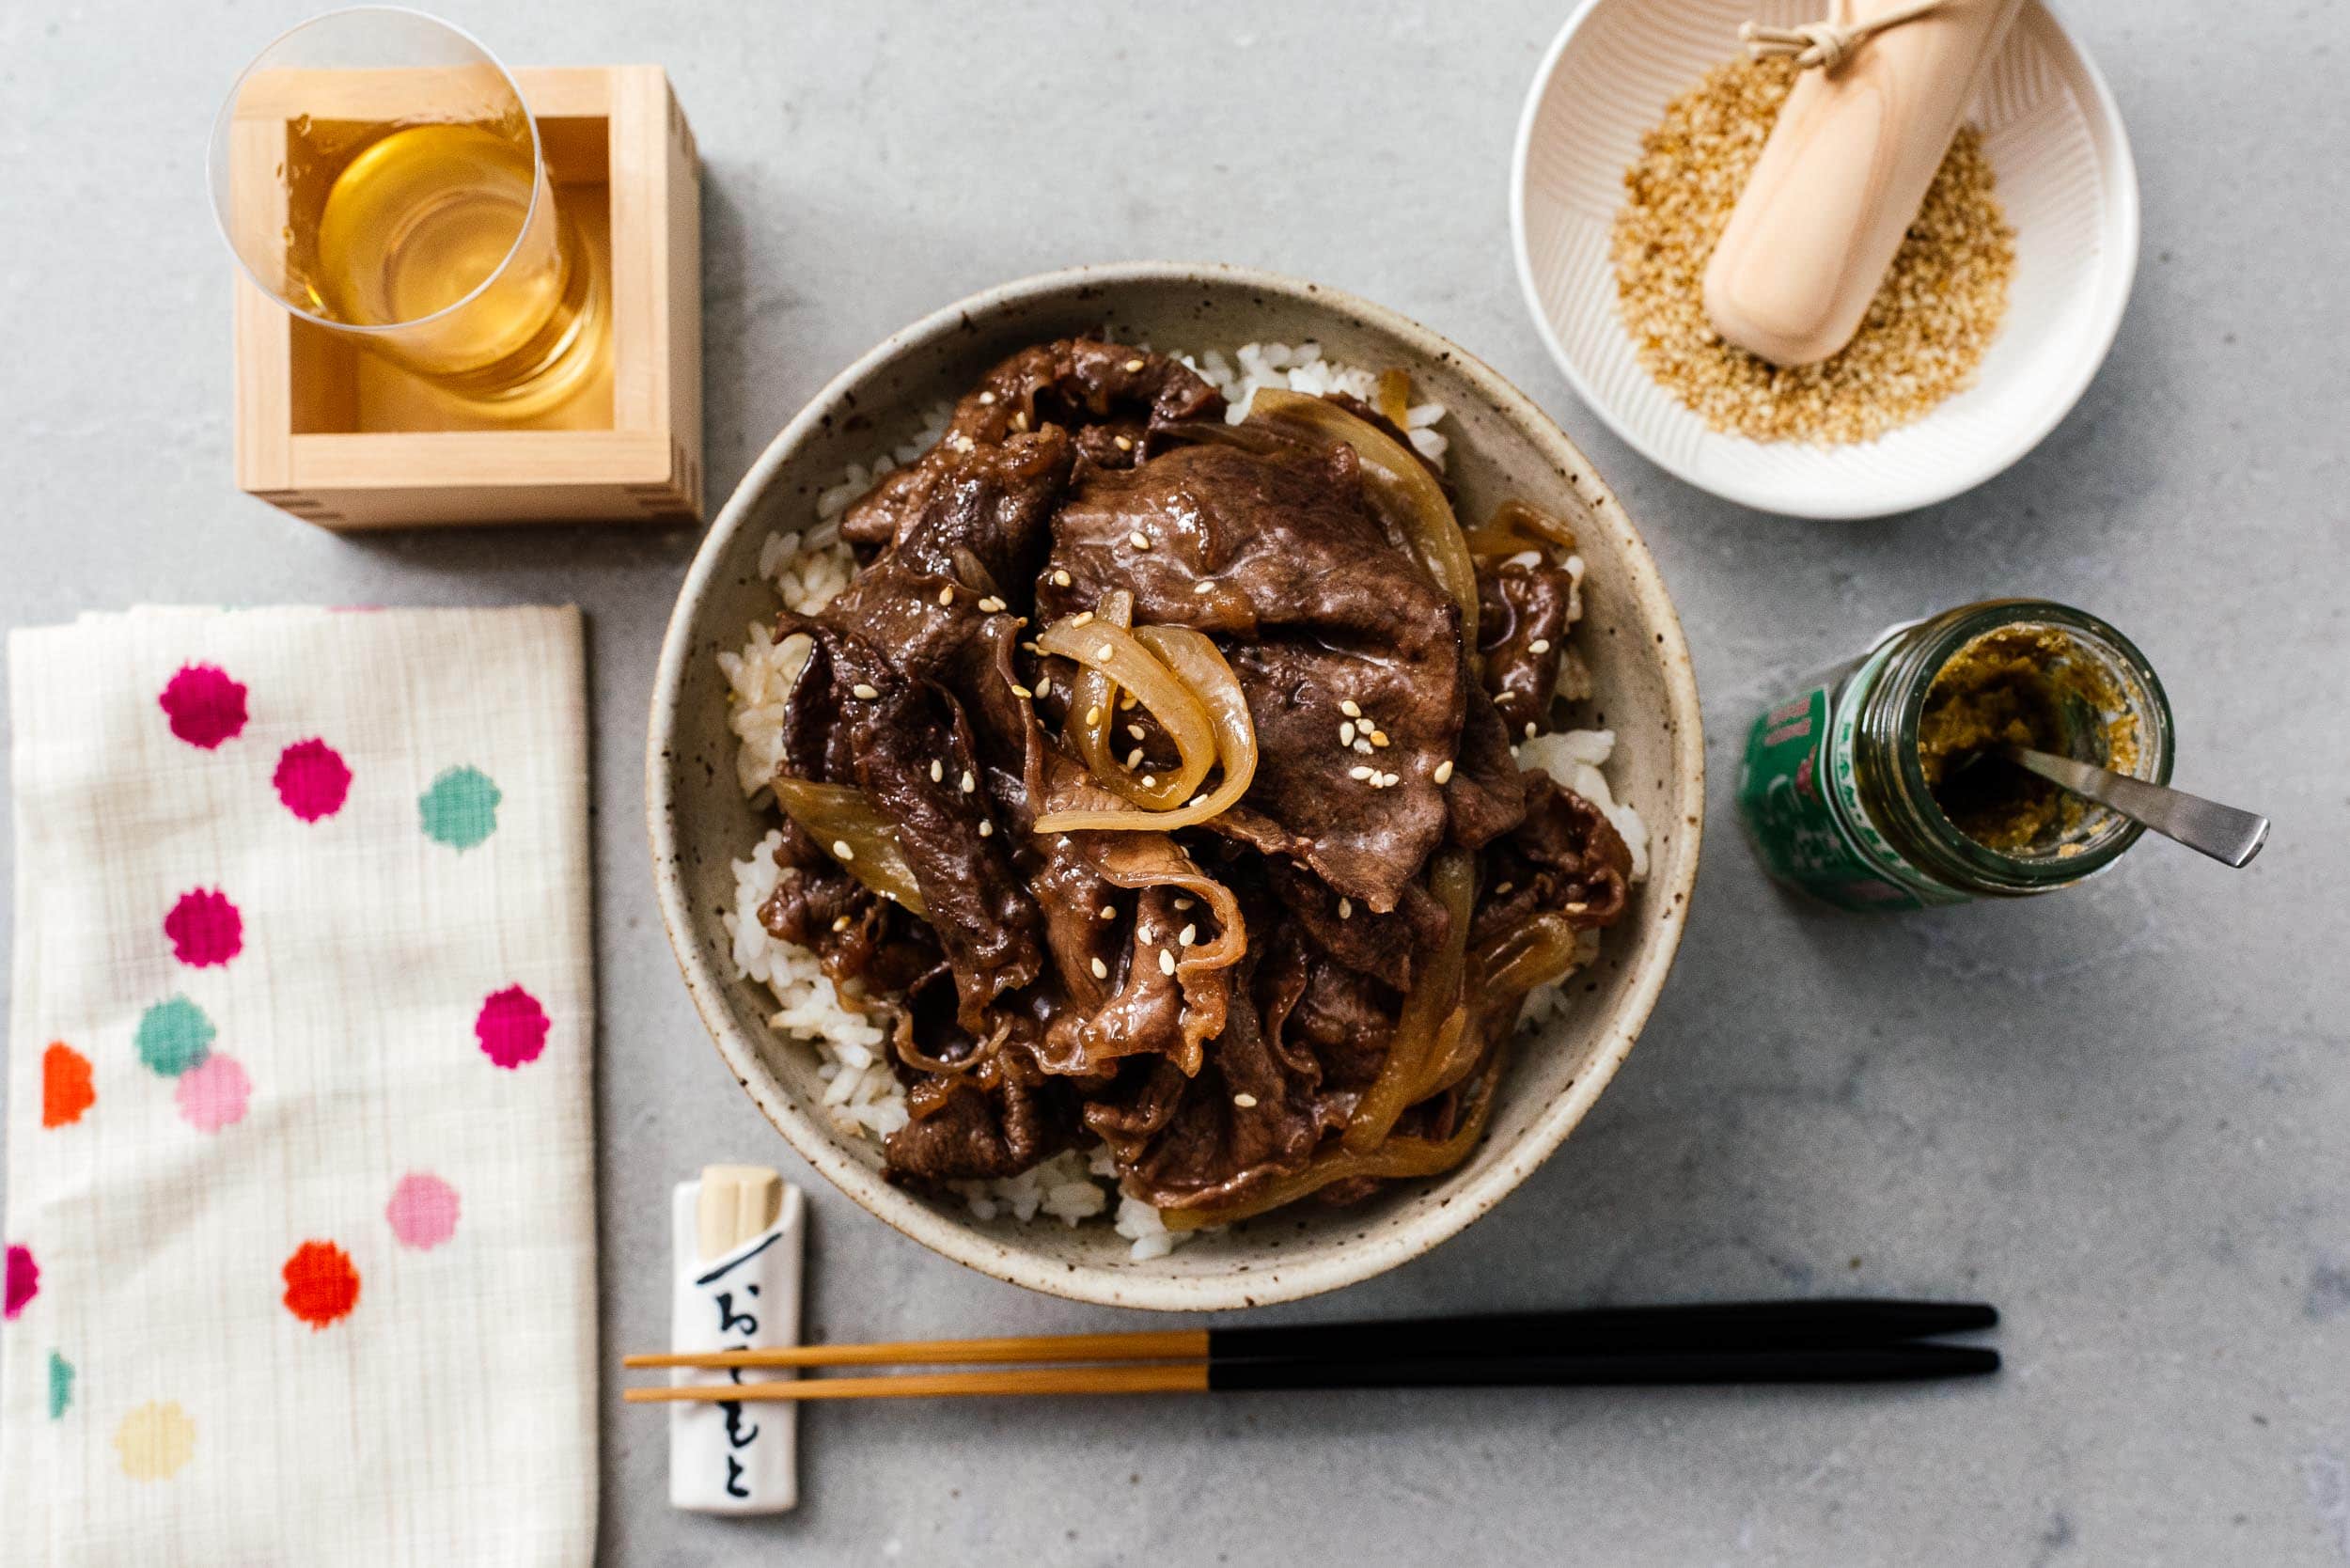
If we’re looking for a quick and easy dinner that’s super satisfying, it’s got to be beef teriyaki. It’s the ultimate Japanese comfort food! This recipe is a riff of the oh-so-delicious Japanese beef bowl known as gyudon, but with more sauce for comfort. Super tender, thinly sliced beef with onions in a sweet and tangy teriyaki sauce over rice that's a match made in heaven. And it only takes 15 minutes to make!
What is beef teriyaki?
Beef teriyaki is thinly sliced beef (or sometimes whole steaks) with a teriyaki sauce made from soy sauce, sake, mirin, and a bit of sugar. Teriyaki beef is glossy and shiny, which is why it’s called teriyaki, with teri meaning glazed and yaki meaning grilled/cooked.How to make beef teriyaki
- Mix together the sauce ingredients. Whisk together soy sauce, sake, mirin, sugar, a bit of water and cornstarch into a slurry in a bowl or liquid measuring cup.
- Cook the onions. Add a bit of oil to a pan and cook the onions, stirring, until soft but not brown.
- Cook the beef. Add the beef to the onions. You don’t need to sear it, it should be soft and tender.
- Simmer. Add the sauce to the pan and simmer until glossy and thick.
- Serve. Serve the beef teriyaki on rice and top it off with toasted sesame seeds. Enjoy!
Beef teriyaki ingredients
For teriyaki sauce you’ll need: soy sauce, sake, mirin, and sugar. Sake, mirin, and soy are three backbone ingredients of Japanese cooking.- Soy Sauce – I’m pretty sure you have a bottle of soy sauce in your pantry. It adds umami, a glorious brown sheen, and is delicious. If you can, try to use Japanese soy sauce for this dish.
- Sake – Sake is Japanese rice wine. It adds umami and a natural sweetness. Just like wine in French cooking adds an extra layer of aroma and flavor, sake is common in Japanese cooking – it’s in almost every sauce. They sell cooking sake at Asian grocery stores, or if you’re feeling flush, you can use the nice sake you have for drinking. Buy a bottle and you won’t regret it, it’ll take your Japanese cooking to another level.
- Mirin – Mirin is Japanese sweet rice wine and the other ingredient that is key in Japanese cooking. Compared to sake, it has a lower alcohol content and higher sugar content that occurs naturally from fermentation. It’s used as a seasoning and glazing agent. They sell mirin in the Asian aisle and at Asian grocery stores.
What is teriyaki?
Teriyaki is a cooking technique used in Japanese food – food is brushed with a glaze of sake, marin, soy sauce, and sugar, then either grilled or broiled. Teriyaki means glazed and grilled – teri meaning shiny/glazed and yaki meaning grilled. In Japan, traditional teriyaki isn’t as saucy as we know it in North America – it’s lightly glazed protein or vegetables. pictured: instant pot chicken teriyakiTeriyaki sauce
Teriyaki sauce is a simple Japanese sauce made from just 4 ingredients: sake, mirin, soy, and sugar. Traditionally it’s on the thinner side, but still thick enough to glaze. Classic teriyaki sauce thickens naturally because the sugars caramelize. Teriyaki sauce is incredibly easy to make at home and once you make it once, you’ll never get store bough teriyaki sauce again. You can use it with stir fries, noodles, and for beef teriyaki, of course.Teriyaki sauce substitutes
If you’re looking to substitute the ingredients for teriyaki sauce, I can’t really suggest anything that feasible tastes the same. Since there are only four ingredients in the sauce, even substituting one of them will make it not taste like teriyaki. If you absolutely had to leave one ingredient out, I would leave out the sake. Japanese soy sauce and mirin are easily available online.What kind of beef for beef teriyaki?
I used a very thinly sliced short rib that we bought at our local Asian grocery store. They sell several cuts of beef, all thinly sliced for hot pot, shabu shabu, and things like teriyaki beef or beef bowls. I love thinly sliced meat over rice, the thin slices cook up quick and are so incredibly tender. If you have an Asian grocery store near you, please check out the frozen section, you’ll find curls of thinly sliced beef, perfect for this recipe. If you don’t have an Asian grocery store nearby, you also cut a steak against the grain. Flank steak or sirloin works - any tender cut of beef is great.What to serve with beef teriyaki
I love this over simple fluffy white rice with a sprinkle of toasted sesame seeds on top. We’ll have either salad with Japanese dressing or a simple green vegetable alongside.Beef Teriyaki
Super tender, thinly sliced beef with onions in a sweet and tangy teriyaki sauce that only takes 15 minutes to make!
- 2 tbsp soy sauce (Japanese preferred)
- 2 tbsp mirin
- 2 tbsp sake
- 1 tbsp sugar
- 1 tsp cornstarch
- 1 tbsp neutral oil
- 1 small onion (sliced)
- 1 lb beef (thinly sliced, short rib preferred)
In a bowl or liquid measuring cup, whisk together the soy sauce, mirin, sake, sugar, and 2 tbsp water. Whisk in the cornstarch and set aside.
In a large, non stick frying pan, heat up the oil over medium heat. Add the onions and cook, stirring, until soft, but not browned.
Add the thinly sliced beef to the pan and cook, until just cooked through. Add the sauce to the pan and bring to a gentle simmer, letting it bubble, thicken, and reduce.
When the teriyaki sauce is glossy and coats the beef, remove from the heat and serve over fluffy white rice. Top with toasted sesame seeds and sliced green onions. Enjoy!
I Am... 2024 Eclipse Guide: everything you need to know
What is the 2024 eclipse?
On Monday, April 8th, 2024, a total solar eclipse will take place, crossing over North America, making it visible from Canada, the United States, and Mexico.What is a total solar eclipse?
A total solar eclipse occurs when the moon aligns perfectly between the sun and the Earth. The moon blocks all sunlight and a faint solar corona can been seen. Total solar eclipses happen about every 18 months, but it’s the location that’s important, because the path of totality is narrow and sometimes completely over the ocean. In 2024, we’re lucky because the path of totality is over North America.What to expect when watching the eclipse
There are four phases of a total solar eclipse and to see all stages, you need to be in the path of totality. If you’re outside the path, you’ll still see a partial eclipse with the moon covering part, but not all, of the sun.- When the eclipse starts, the moon will slowly move into place in front of the sun. It will start to get slightly darker and the sun will look like a cookie with a bite taken out of it.
- As the moon covers the entire disk of the sun, the world will go from bright and sunny to shadowy and dark in just seconds. It will feel a bit colder and any animals nearby will get really quiet, like it’s nighttime. A hush will fall. The moon will move into place and completely block out the light of the sun. Instead of the sun, you’ll see a faint ring of light. The sky will look like dusk and everything will be eerie and bright and absolutely unlike anything you’ve ever experienced before.
- After totality ends, the moon starts to move away and the sun starts to reappear, making an opposite cookie bite. Light will start to appear and you’ll start to hear animals making noises like it’s morning time.
- After the moon passes completely past the sun, the eclipse is over and you’ll be forever changed.
Where is the 2024 eclipse?
In short, the 2024 eclipse will happen over North America, first in Mexico, then in the United States, then in Canada. Think of an arc curving from the bottom South West corner of North America towards the top North East corner. The 2024 eclipse will begin over the South Pacific Ocean. The first location that will be able to experience totality (when the sun is completely covered by the moon) is the Pacific coast of Mexico at 11:07 PDT. From there, the eclipse will continue, entering the US in Texas. It will pass through Oklahoma, Arkansas, Missouri, Illinois, Kentucky, Indiana, Ohio, Pennsylvania, New York, Vermont, New Hampshire, and Maine. Tennessee and Michigan will also experience the total solar eclipse, in some small pockets. In Canada, the eclipse will enter in Southern Ontario and continue on to Quebec’s, New Brunswick, Prince Edward Island, and Cape Breton. The last place to see the eclipse will be on the Atlantic coast of Newfoundland at 5:16 NDT.When is the 2024 eclipse?
The eclipse will start at 11:07 PDT and end at 5:16 NDT (local times).Where is the 2024 path of totality?
The path of totality is a 115 mile wide path in the centre of the path of the eclipse. The closer you are to the centre of the path, the longer totality will last. Take a look at NASA to make sure you’re in the path. There’s also an interactive map developed by Xavier Jubier, where you can zoom in and see the eclipse path.Which cities will see totality for the 2024 eclipse?
- Dallas, Texas
- Idabel, Oklahoma
- Little Rock, Arkansas
- Poplar Bluff, Missouri
- Paducah, Kentucky
- Carbondale, Illinois
- Evansville, Indiana
- Cleveland, Ohio
- Erie, Pennsylvania
- Buffalo, New York
- Burlington, Vermont
- Lancaster, New Hampshire
- Caribou, Maine.
When is the path of totality?
In America, totality will start in Texas at 1:27pm CDT and end in Maine at 3:35pm EDT (local times).What is totality?
Totality is the maximum phase of a total solar eclipse, when the moon completely covers the sun. Totality can last a fraction of a second, up to 7 minutes and 31 seconds. For the 2024 eclipse, totality will last for a maximum of 4 minutes and 18 seconds, and vary in length along the eclipse path. Totality will last longest in Mexico and Texas.What equipment do you need to watch the eclipse?
To watch the eclipse, you’ll need a pair of eclipse glasses or handheld solar viewer. Your eyes can be permanently damaged by looking directly at the sun, so you need to make sure to protect yourself. NASA doesn’t have any brand recommendations for solar glasses or viewers, but they do state that whatever you use need to comply with the ISO 12312-2 international standard. This link, from the American Astronomical Society lists some reputable brands. If you're careful, you can also buy online. DO NOT look at the sun or eclipse through a camera lens, telescope, binoculars, or any other optical device. Concentrated solar rays will burn through and cause serious eye injury. During complete totality is the only safe time to remove your eclipse glasses.How to take photos of the 2024 eclipse
It's sad to say but a phone probably won't cut it, what you see below is what you can expect from most phones. You need a mirrorless or DSLR and a long lens to truly capture the eclipse, but don't focus too much on it. Just set the autofocus to manual, set the lens to infinity, and the timer to capture a photo every second or so for 4 minutes and you're good to go, the eclipse is a life changing IRL experience and you shouldn't miss it fiddling with a camera.Eclipse snacks
What is a party without snacks? An eclipse party is just the thing to do in the moments before the eclipse starts and after it ends.- Galaxy glaze Galaxy glaze ALL THE THINGS! It’s a space party and what better snacks than ones that look like space? This galaxy glaze is super easy to do and the best part is you can glaze literally anything. I like oreos but you can also do store bought donuts or cake.
- Tinned fish Have you heard? Charcuterie is out and seacuterie is in! A tinned fish party is on trend because it’s delicious, easy, and fun. Conservas, Spanish for “preserved” is hugely popular in Europe. Grab some tins, some fancy or not so fancy chips, and have a fish and chips party while you wait for the magic.
- Sushi bake Don’t knock it til you’ve tried it. You probably have never heard the words sushi and bake in the same sentence before, but it’s delicious! Creamy, savory, satisfying and perfect for parties, a tray of sushi bake is always one of the first things finished. Maybe don’t call it sushi bake if you have snobby friends. Whatever you call it, make it for your eclipse party. Maybe even cut out some eclipse shaped seaweed and throw it on top for extra festive fun.
- Wings! We have so many wings recipes on the blog because we LOVE wings. Breakout the airfryer (simply the best and easiest way to make wings and keep them coming hot-n-fresh) and then season them any which way you like.
- Korean fried chicken wings Sweet, saucy, spicy, everything you want in a wing.
- Ranch Wings These aren’t wings covered in ranch sauce - although serving ranch to dip would be a pro move - nope, they’re crispy, juicy wings tossed in ranch seasoning and they are out of this world.
- Honey Char Siu Wings Sticky, sweet, finger-licking Chinese char-siu inspired wings that are so, so good.
I Am... Spicy Chili Oil Wontons Recipe
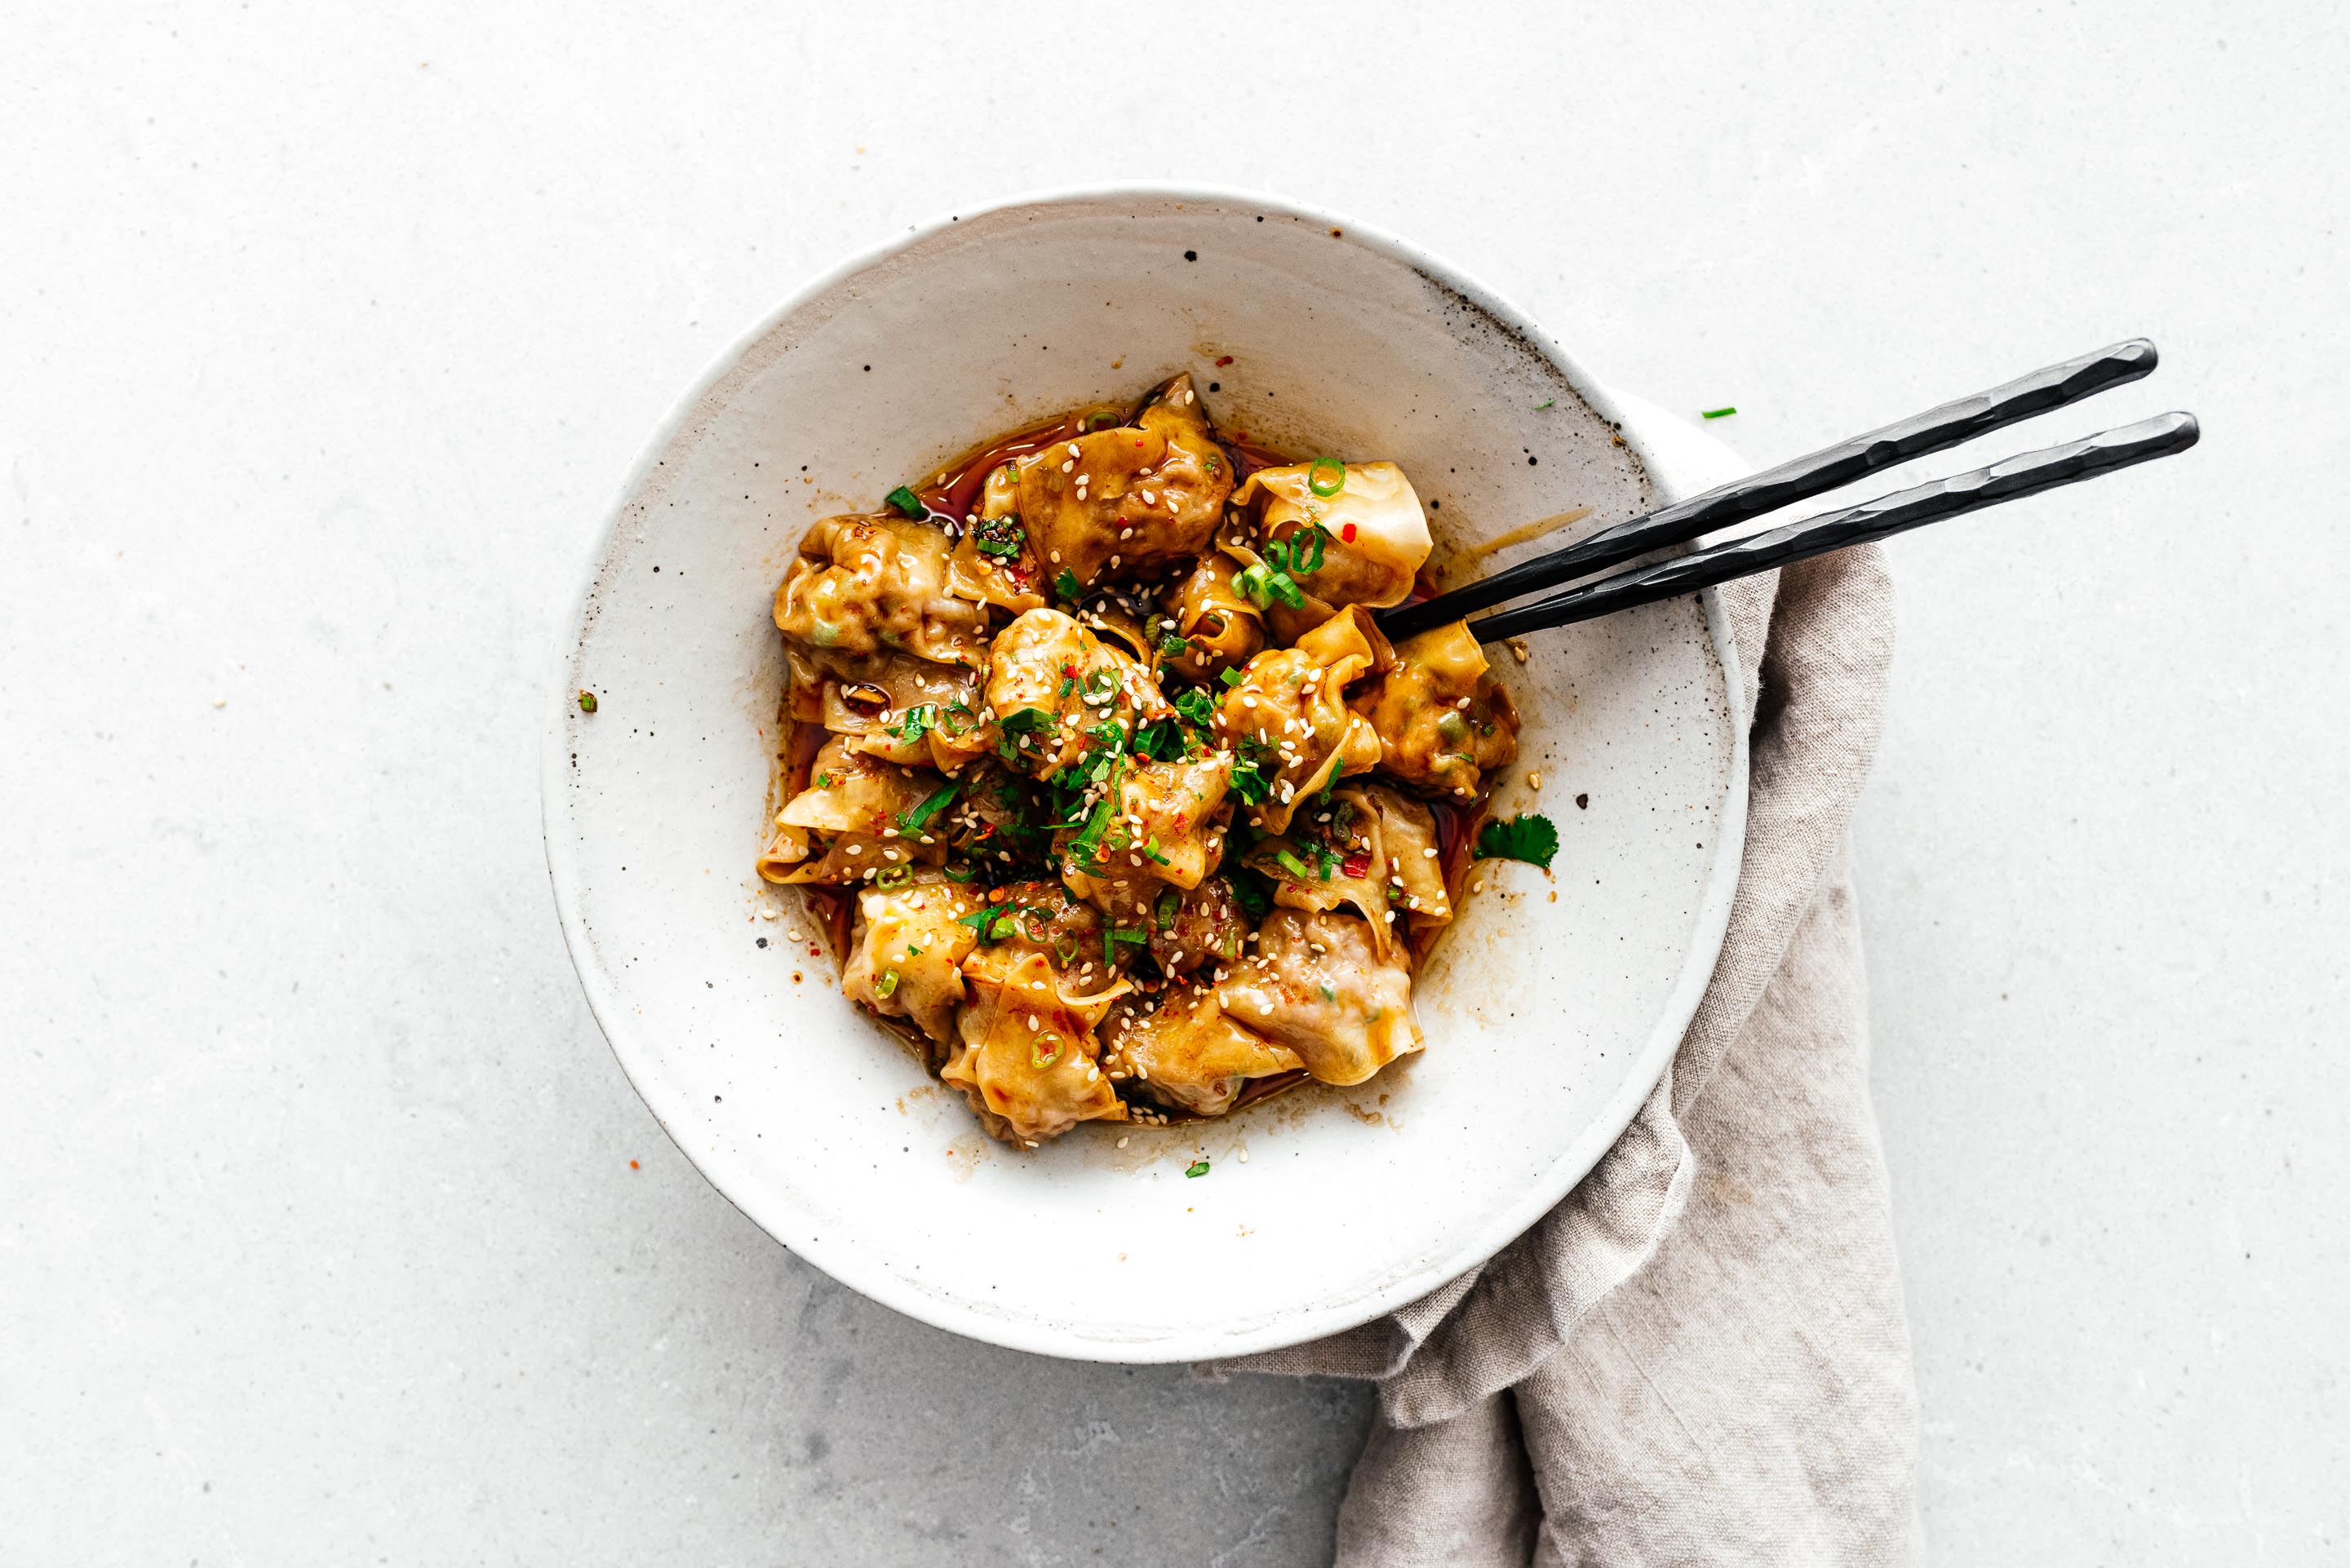
Sichuan style spicy chili oil wontons, are one of my happy foods. Silky little dumplings filled with pork and shrimp drowned in chili oil, soy, and vinegar are all good things.
Chili Oil
The key to good spicy chili oil wontons is the chili oil, so make sure you start off with a chili oil that you like. We tend to make our own (Chili Oil Wonton
But, what you've got to do –store bought or not– is eat wontons drowned in chili oil, soy, sesame, black vinegar, garlic, green onions, and cilantro. They're spicy from the chili oil, bright and tangy from the vinegar, savory from the soy, with a nice hit of freshness from the herbs. Seriously so good. And even if you're not a huge fan of spicy, give these a go, working up from a small amount of chili oil. The thing about Chinese chili oils is that they're not super spicy, so much as they're pleasantly fragrant with a hint of heat.Meal Prep Wonton
PS - This may be weird, but this totally works as a meal prep kind of thing. The wontons keep in the fridge well and reheat beautifully in the microwave. So if you wanna make yourself a double batch so you can be the envy of everyone at work, go for it! I recommend tossing it in the chili oil, then scooping them out of the oil into another container. Keep the extra chili oil on the side and add it after.Spicy Chili Oil Wontons Recipe
Pork and Shrimp Wontons
- 1/4 lb ground pork
- 1/4 lb shrimp (peeled, deveined, and chopped)
- 2 tbsp green onions (sliced)
- 2 tsp ginger (minced)
- 2 tsp soy sauce
- 2 tsp shaoxing wine
- 1/2 tsp toasted sesame oil
- 1/4 tsp salt
- 1/8 tsp white pepper
- Fresh wonton wrappers (as needed)
Spicy Chili Oil
- 2 cloves garlic
- 2 tbsp chili oil (or to taste)
- 2 tbsp soy sauce
- 2 tbsp toasted sesame oil
- 1 tbsp black vinegar
- 2 tbsp green onions (sliced)
- 1 tbsp cilantro (chopped)
In a bowl, mix together the pork, shrimp, ginger, green onions, soy, Shaoxing, sesame oil, salt, and white pepper.
Take a wonton wrapper and place 2 teaspoons of the meat filling in the middle. Dip your finger into water and lightly wet the edges of the wrapper. Bring one corner of the wrapper to the other corner to form a triangle. Fold in the other two corners, wet, and pinch to seal. Alternatively, just wet the edges of the wrapper and bring together and pinch into a small pouch. Keep the wrappers and finished wonton covered with saran wrap as you work, to keep them from drying out.
Bring a large pot of water to boil over medium high heat. While the water is coming to a boil, mix together the spicy chili oil ingredients.
When the water is at a rapid boil, add in your wonton. Stir gently so they don’t stick to the bottom of the pot. Cook for 4-6 minutes or until cooked through – cut one open to check.
Drain well and toss in the spicy chili oil. Enjoy with extra cilantro, green onions, and toasted sesame seeds if desired.
I Am... Twisted Bacon
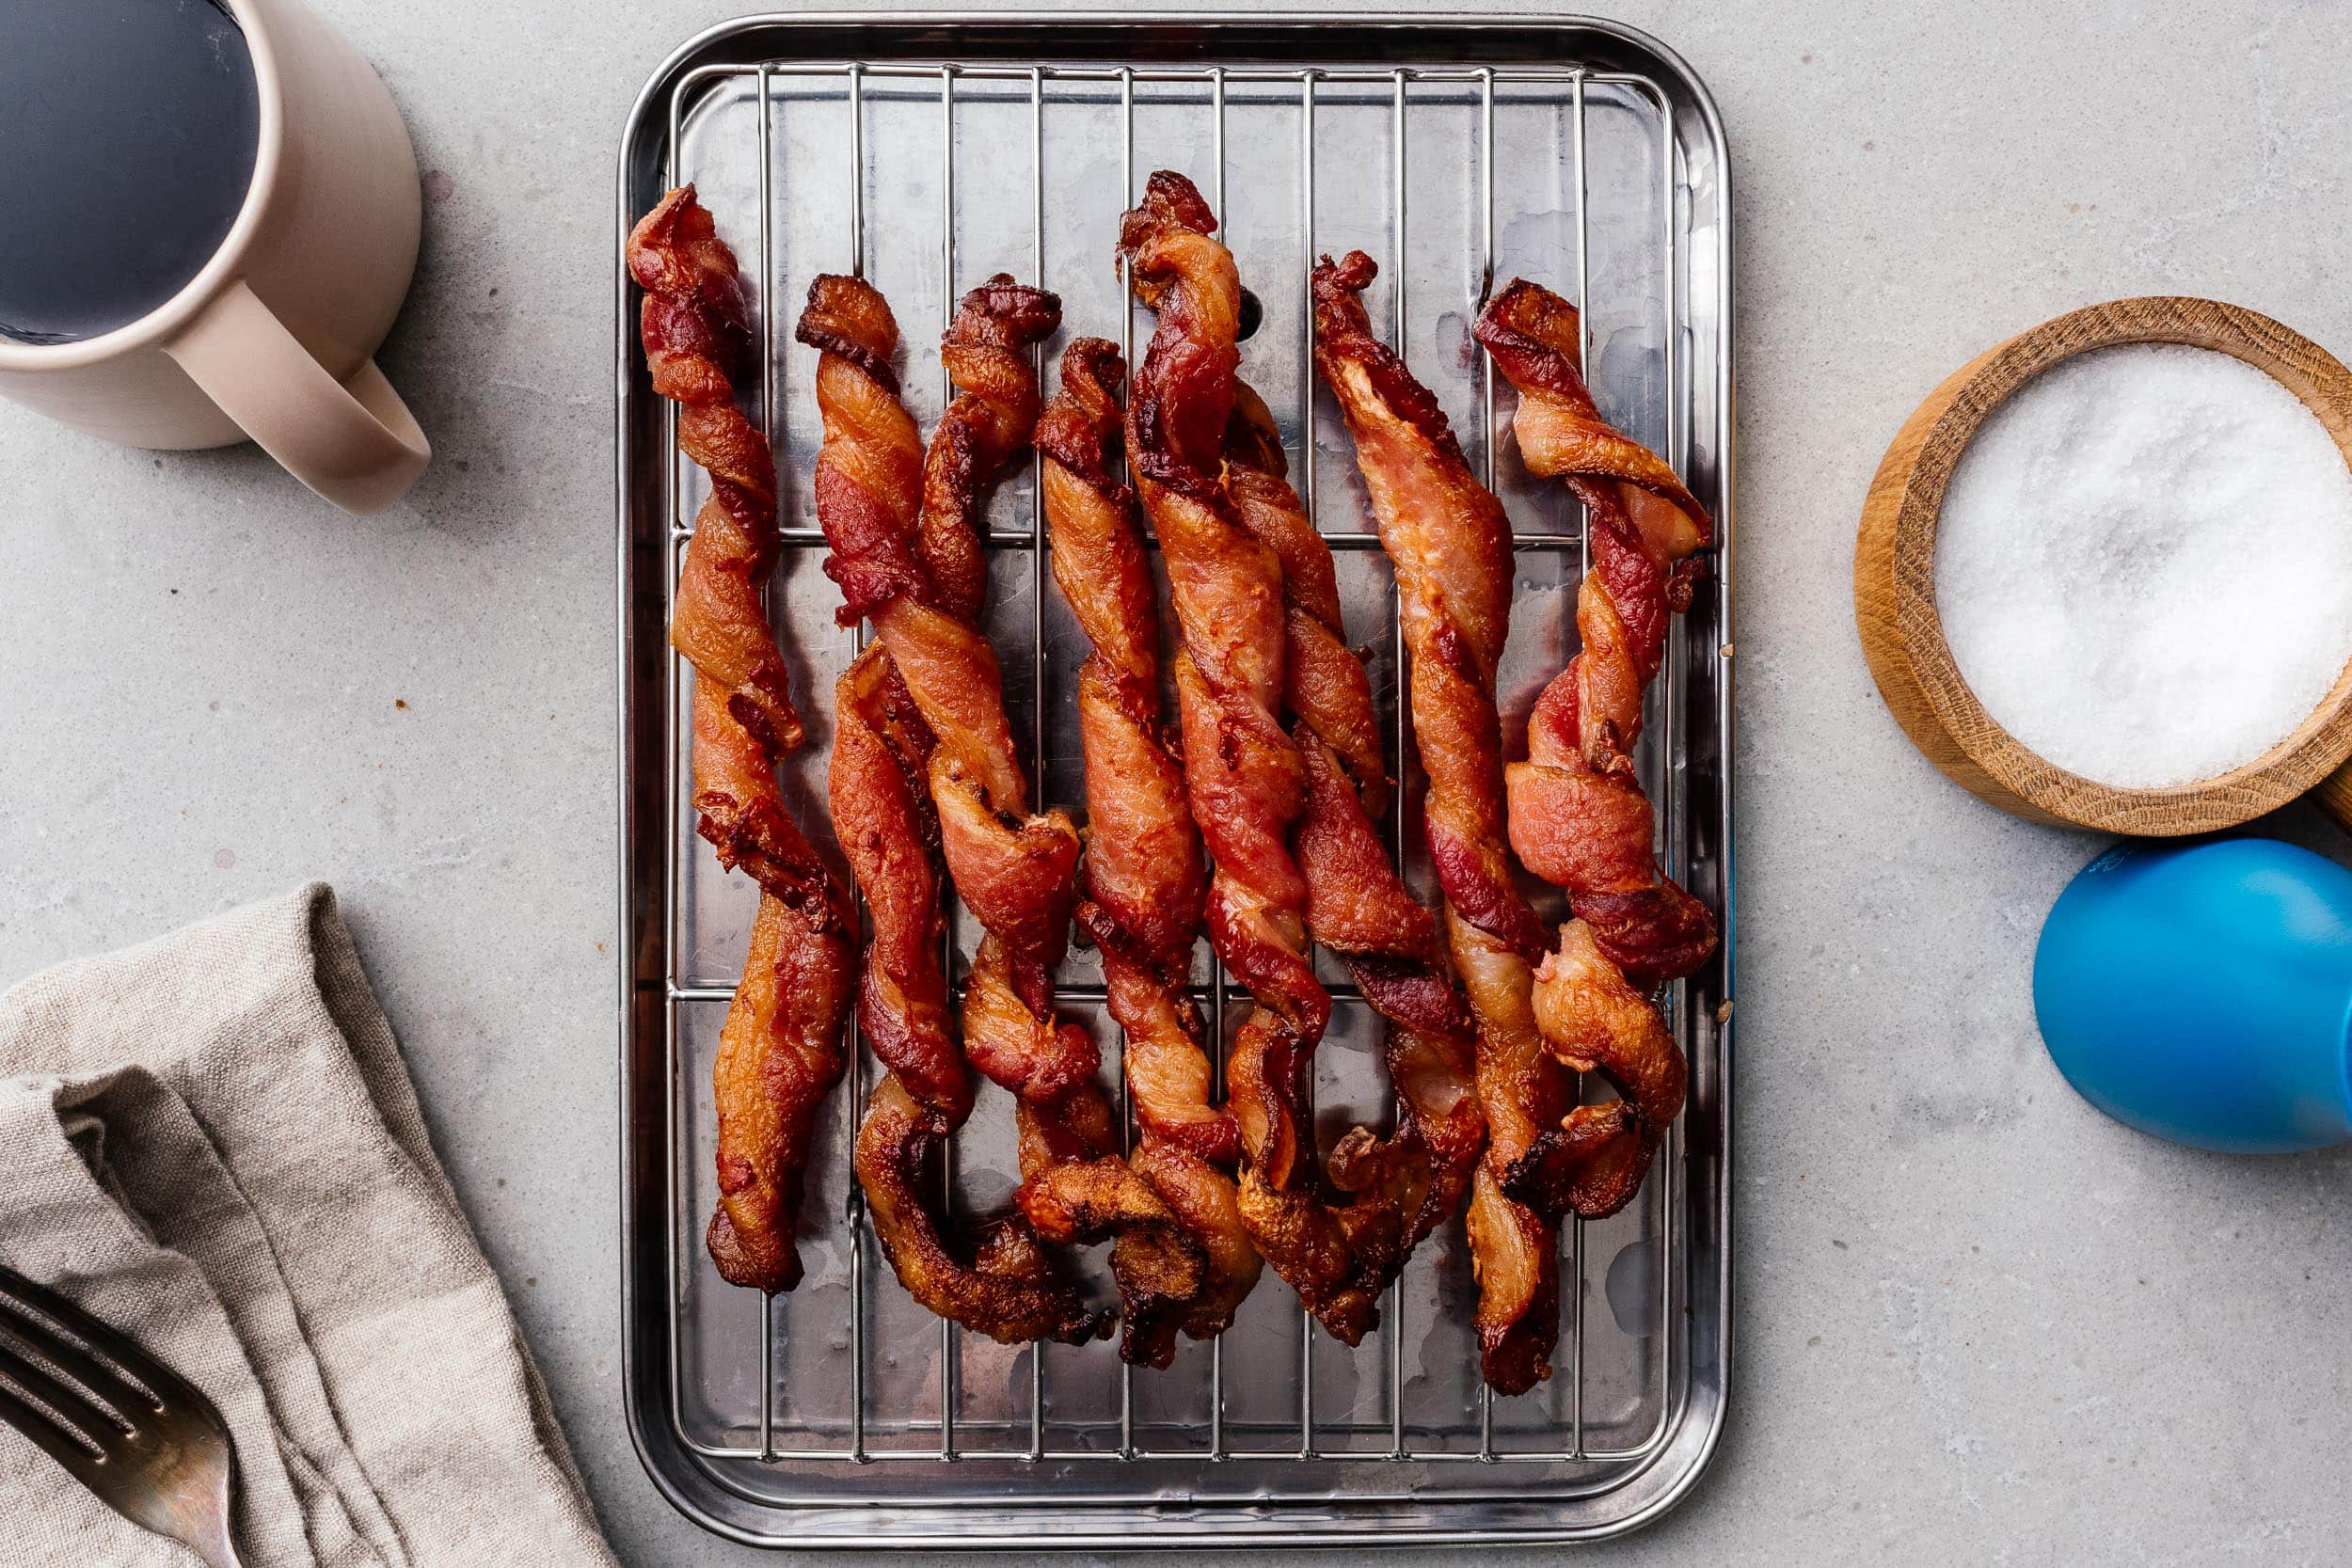
Twisted bacon is soft and crispy while somehow staying juicy. It’s a Tiktok trend and it’s super easy to make. Twisted bacon makes the perfect combination of crispy crunchy bacon and soft bacon because the twist creates a tunnel – the inside of the twist is soft and tender and the outside edges end up being crisp. Somehow eating bacon that isn’t in it’s regular form factor makes it even more delicious. It’s perfect for a keto snack – in fact the original viral hack were via @house.of.keto and @lowcarbstateofmind
How to make twisted bacon
Making twisted bacon is seriously the easiest thing ever.- Heat the oven. You’ll want a 350°F oven so heat up your oven while you’re twisting your bacon.
- Line a baking sheet. Line a rimmed baking sheet (super important, make sure it’s rimmed so the bacon fat doesn’t spill everywhere) with parchment paper. This is so the bacon doesn’t stick to the pan and it also makes it easy to clean up.
- Twist the bacon. Take a strip of bacon and hold one edge down with one hand and use your other hand to twist it up. Place it on the baking sheet and repeat.
- Bake. Pop the bacon into the oven and bake until crispy, flipping halfway.
- Enjoy. That’s it! Use a pair of tongs to remove the twists from the baking sheet onto a wire rack or paper towels to let some of the bacon fat drain off then enjoy.
Ingredients
All you need is a pack of bacon. I prefer thick cut but this will work with any bacon.How to twist bacon
Grab ahold of your bacon with your hands, hold one side and use your other hand to twist until it twists.Air fryer twisted bacon
If you have an air fryer, you can make air fryer twisted bacon. It's exactly the same steps, just preheat your air fryer, place your bacon in the air fryer basket, and bake for about 8-10 minutes. Air fried bacon is really great! Check out more tips for air fryer bacon here.Toaster oven twisted bacon
For those times when you only want a couple of bacon twists, don’t sleep on your toaster oven. Toaster ovens are perfect for making twisted bacon. They don’t take any time to preheat and they’ll give you crispy twisted bacon in no time. Twist your bacon the same as you normally would, then bake in the toaster oven at 350°F for 10 minutes, then flip and bake for another 10 minutes. It takes a little less time in the toaster oven because the element is so close to the bacon. If you need it a bit crisper, don’t be shy, just add a couple of extra minutes.Twisted turkey bacon
If you’re seeing this and thinking, can I make twisted bacon with turkey bacon, the answer is yes! Turkey bacon twists up the same as regular bacon and ends up just as crispy and juicy.Tips and tricks
- parchment paper - use parchment paper for easy clean up. You can use foil too if that’s what you have.
- rimmed baking sheet - this one is important, don’t use a flat baking sheet because you need the rim of the baking sheet to catch the bacon fat.
- you don’t need to space them out - usually when you’re making bacon you want to give them space to crisp up, with twisted bacon you can snuggle them all up next to each other.
- don’t pour bacon fat down the sink - important!! let the bacon fat solidify on the the parchment paper and save it for another use, or fold it up along with the parchment paper put it in the compost if your city does industrial composting.
Make it ahead
I often make twisted bacon for the week as meal prep. Nothing beats bacon that’s already cooked and ready to go. Just cook it, cool it, and store it in an air tight container in the fridge. To warm it up, you can do it in the microwave, on a paper towel covered with another paper towel and warm it up for 20-40 seconds. Or you can just pop it in your air fryer and heat it up at 400°F for 1-2 minutes.What to eat with twisted bacon
Variations
- candied bacon: sprinkle on some brown sugar or brush with maple syrup, it will caramelize into a sweet glaze.
- spicy bacon: sprinkle on a bit of cayenne pepper for a bit of a kick
- sweet and spicy: combine sweet and heat with brown sugar and cayenne
- peppery bacon: add a generous amount of freshly ground black pepper
- garlic bacon: sprinkle on garlic powder for a garlicky twist
Twisted Bacon
The perfect combination of crispy crunchy edges and soft bacon goodness.
- 12 oz bacon (1 package, thin cut preferred, see notes)
Heat the oven to 350°F and line a rimmed baking sheet with parchment paper. Hold one end of the bacon with one hand and use your other hand to twist each strip of bacon tightly. Lay the twisted bacon down on the prepared baking sheet.
Bake for 20 minutes then flip and bake for another 20 minutes. Let the bacon drain on a wire rack for a minute or two then enjoy!





 2015 Holiday Giveaway
 One-Pot Lemon Scallop Pea Spaghetti
 Beer Battered Onion Rings, Jalapeno Aioli
 2014 Holiday Gift Guide and a Giveaway
 Easy Gourmet Hot Wings and a Giveaway!
 The Ultimate Veggie Sandwich
 Vegan(!) Creamy Corn Soup Recipe
 Sunday Brunch: Grilled Cheese Eggs Benny