I Am... Khao Soi: 15 Min Thai Coconut Curry Chicken Noodle Soup
Khao soi is a rich and comforting Northern Thailand coconut curry chicken noodle soup that is everything. We crushed this bowl: just the right amount of spicy and creamy and full of the good stuff. The chicken is tender and hearty, the noodles chewy, the lime so bright and fresh. Ever since I bought a little package of Thai red curry paste, I've been red currying all the things. I've done red curry potatoes, red curry chickpeas, and even red curry dipping sauce for fries. I'm surprised that Mike and I aren't red from all the red curry paste we've been eating. I can't get over how good it is. And really, it's so much easier opening a package than getting out a mortar and pestle to make curry paste from scratch. Thai red curry paste is the secret to how flavorful and rich this soup is while still somehow being done in 15 minutes whether you cook it on the stovetop or in an instant pot. One taste and I bet this will be a new weeknight staple. It's that addictive. While the egg ribbons and crunchy bits are completely optional, they add a lot of textural and taste contrast too. Maybe if you're looking to do something new, give egg ribbons a try if you haven't. They're really simple but so satisfying.
What is khao soi?
Khao soi is a rich and comforting Northern Thailand coconut curry noodle soup. It’s also popular in neighboring countries Myanmar and Laos. The coconut curry soup base is creamy and packed with umami thanks to red curry paste, ginger, garlic, and fish sauce. Khao soi usually has chicken in it, but it can be found with beef as well.How to make khao soi
- Fry the aromatics and curry paste. In a medium sized pot, add a little bit of oil. When the oil is hot, add the ginger and garlic and fry, stirring occasionally. When soft, add the curry paste and fry over medium high heat, stirring, until the oils start to separate.
- Add the stock and coconut milk. Stir in the chicken stock, coconut milk, and chicken.
- Simmer. Bring everything to a simmer over medium heat for 10-15 minutes or until the chicken breast is cooked through.
- Cook the noodles. While the soup is simmering, cook the egg noodles and drain well.
- Season. Taste the soup and season with fish sauce and a touch of sugar.
- Assemble. When the chicken is done, remove from the soup and shred. Add the chicken to the bowls with the noodles and top with the soup. Finish off with lime and cilantro and enjoy!
What is red curry paste?
Red curry paste is a seasoning paste made from dried chili, garlic, lemongrass, shallots, galangal, makrut lime, coriander, and cumin. It’s the base of many Thai dishes. You can make it at home by soaking the dried chilis then pounding everything together. Or, you can buy a tub of it from the grocery store. Red curry paste is incredibly flavorful and a super helpful back pocket ingredient that can level up your cooking game. I love Aroy-D Thai red curry paste – it has a pretty simple ingredients list: chilis, garlic, lemongrass, shallots, salt, galangal, makrut lime, coriander, and cumin. Pretty much like what I would put into a curry paste if I were to be making it myself. Also incredibly popular is Mae Ploy brand.Best noodles to use
Traditionally khao soi is made with fresh chewy Chinese egg noodles. You can find these egg noodles in the refrigerated aisle in the Asian grocery store. You can also use: chow mein noodles, dry egg noodles, instant ramen noodles, fresh ramen noodles, or even just spaghetti if that’s what you have.Can I make khao soi without noodles?
You can totally make this without noodles. Technically it won’t be khao soi, but it will still be a very tasty coconut curry chicken soup. Add some root vegetables, leafy greens, or tofu to bulk it up and if you’re doing keto, use shirataki noodles for a keto khao soi.Can I cook the noodles in the soup?
Please don’t cook the noodles in the soup! Fresh egg noodles need to be cooked in a large amount of roiling boiling water to properly cook. If you’ve ever had slimy, soggy noodles, it’s probably because someone cooked them in soup. Egg noodles release a lot of starch into the water they’re cooking in so it will change the soup texture and flavor.Instant pot khao soi
Instant pot khao soi isn't actually much faster (if it is at all) but if you want the easy cleanup and no smells feature of the instant pot:- Add chicken stock, coconut milk, red curry paste, garlic, ginger, and chicken to the insert.
- Set the pressure to high and cook for 5 minutes.
- Cook and drain the egg noodles while the Instant Pot is doing its magic. Divide the noodles into deep bowls.
- Quick release when the Instant Pot is done, remove the chicken, and shred it. Divide the chicken between the bowls.
- Season the soup with fish sauce and sugar
- Assemble. Ladle the soup on top of the noodles and chicken. Top with lime wedges and cilantro, and enjoy!
Extra toppings for khao soi
The best part of khao soi are the extra toppings. So if you want a vibe, be sure to include these on the side to top your bowl:- Crispy noodles. The best part! Crunchy, crispy, nutty, rich deep fried egg noodles. This is pretty simple, just heat up a bit of oil in small pot and deep fry over medium heat until the egg noodles are crispy and brown. Drain on paper towels. You can also cut up some wonton wrappers and fry those too.
- Sliced shallots. Sharp and sweet raw spicy heat.
- Lime wedges & cilantro. A squeeze of tart acidity rounds out the flavors whlie the chopped cilantro adds freshness.
- Egg ribbons. These aren’t traditional, but I like making egg ribbons to swirl into the noodles.
- Extra chili paste. Have a little dish of prik pao (Thai chili sauce) so you can add some extra spice if needed
Dishes to serve with khao soi
Khao soi is hearty enough to be eaten on its own but what is life without variety? Here are a few dishes to serve alongside your khao soi;- Thai Sticky Rice to soak up that extra soup
- Spring Rolls for some crunch
- Larb Moo Thai Pork Salad as a "side salad"
Khao Soi
A rich and comforting Northern Thailand coconut curry noodle soup that's done in 15 minutes!
- instant pot
Khao Soi
- 2 cups chicken broth (no sodium preferred)
- 14 oz coconut milk (1 can)
- 1-2 tbsp Thai red curry paste
- 1/2 inch ginger (thinly sliced)
- 2 cloves garlic (crushed)
- 1 large chicken breast (or 2 small ones)
- 1 tbsp fish sauce (or to taste)
- 1 tbsp sugar (or to taste, brown sugar preferred)
- 2 portions egg noodles (or ramen noodles)
Optional Toppings
- 1/2 shallot (sliced)
- 2 lime wedges
- 1/4 cup cilantro (chopped)
- 1 batch egg ribbons
- 1/2 cup crispy wonton strips
In the Instant Pot insert, add the chicken stock, coconut milk, red curry paste, garlic, ginger, and chicken breast. Cook on high pressure for 5 minutes.
While the Instant Pot is doing it’s thing, slice the shallots, cut the lime, and wash the cilantro. If you’re using any extra toppings, prep them now. Cook and drain your noodles and divide them between two deep bowls.
When the Instant Pot is done, quick release the pressure. Carefully remove the chicken and shred. Add the chicken to the bowls with the noodles.
Stir the fish sauce and brown sugar into the soup. Taste the soup and adjust the seasoning with fish sauce, sugar, and curry paste if needed, then divide evenly between the two bowls. Finish with lime and cilantro and enjoy!
See the blog post for stovetop instructions.
Estimated nutrition assumes you are drinking all the soup.
I Am... Tinned Fish
Friday nights around here are Fish and Chips Fridays. Nope, not crispy battered fish and golden french fries – I’m talking about canned fish and kettle cooked chips. Are you familiar with conservas? It’s Spanish for “preserved” and it typically refers to canned fish and seafood. Not just any canned fish though – we’re talking about gorgeously glossy high quality seafood that’s sustainable, delicious, quick, and easy. Essentially, conservas is the charcuterie of the sea. Some people call it seacuterie, some people call it conservas, some people call it a tinned fish board. Really, it doesn’t matter what it’s called because it’s delicious. Mike and I were first introduced to conservas at a Spanish tapas bar. They had an entire menu of canned seafood that they cracked open and served with Spanish potato chips, hot sauce, and a couple of other accoutrements. It was such a fun eating experience. The brininess of the the fish, the tart and spicy sauce, and the crunch of the potato chips all come together into the perfect flavor explosion. After our first time, we were hooked. Fish and chips Fridays (at home) was born. Hundreds of years can’t be wrong. Spain and Portugal have a long, rich history of making and enjoying conservas. Now, canned fish is gaining popularity here in North America. There are loads of historical classic brands as well as new ones that are fresh and innovative. There’s bound to be a canned fish out there you like. Part of the fun of conservas is trying out the different varieties and comparing and contrasting.
Why tinned fish is popular
Tinned fish is delicious, that’s probably the number one reason. But that’s not why you’ve been seeing tins of fish pop up at specialty stores and in your social feeds. There are so many reasons, but these particular ones are why I think conservas is here to stay.They're accessible
Because it’s canned, you can purchase conservas online making it accessible to almost everyone. Even if you don’t live anywhere near the ocean, you can have a briny seafood adventure. Canning is the preferred method of preserving seafood in Spain and Portugal simply because it conserves the seafood at its peak, right when it’s caught.. Plus, canned fish isn’t exclusive to Spain and Portugal. Almost all countries preserve fish and seafood via canning, making it a fun way to travel without leaving home. Once you get into specially canned seafood, there’s no looking back.Personal and customizable
A conservas party is the epitome of customizable. One tin, five tins, olives or no olives, hot sauce or no hot sauce, crusty bread, crackers, kettle cooked chips; the list of what you can serve with conservas goes on and on. It’s infinite combinations. You can make multiple unique perfect bites making this a perfect snack-y meal.Deeply enjoyable
Cracking open tins of conservas and a bottle of wine (or fancy beverage) implores you to slow down and enjoy. Because you’re making tiny bites instead of eating a prepared dish, you’re considering arrangements and what tastes good with what. You’re being creative and thinking about your food instead of just eating it. It’s also a little like taking a short vacation to where your canned fish is from. Are you on the shores of Spain, near the Sea of Japan, or just off the Atlantic coast? Physically, you’re at home, but you’re eating seafood from an entirely other place. (And time, if you want to get existential about it.)Very Photogenic
Opening up cans of conservas and revealing perfect layers of filets or mussels all nestled in oil is incredibly pretty. Some cans come flecked with spices, some are simple yet satisfying in their geometry. Tins of seafood are rustic, romantic, and gorgeous. Add chips, crusty bread, crackers, olives, and little forks all on a wooden board or plate and it’s the easiest, most photogenic thing you’ve thrown together in less than 2 minutes. So much quicker than a charcuterie or cheese board.#Aesthetic
The conservas world is design strong. There are fancy tins, labels, and wrappings all covered in art or branding. True canned fish lovers collect the labels and save them. From colorful to retro, the cans, labels, jars, and everything to do with conservas is incredible. I love the typography, the illustrations, the shapes and colors of the cans. Call me a design nerd but I get the heavy breathing when I see a bunch of tiny tins with eye catching design.Super Affordable
Let’s face it, date nights are getting more and more expensive. Ditto with hosting parties. Conservas is affordable (even if you buy the pricey cans) compared to going out for a night on the town. Even if you spend $10-15 per tin of seafood, it’s still not going to add up to what you’d pay at a restaurant these days. Plus, staying in is the new going out, amirite?How to have a tinned fish date night
- Choose cans of fish. You get extra flex if you have a canned fish library with many tins of fish. You can even start your date night at a cute grocery store. Just be sure to scope out their conservas selection first before bringing your date.
- Open cans of fish.
- Uncork your wine.
- Open bag of kettle cooked chips.
- Set out olives, nuts, fruit, herbs, and hot sauce.
- Boom, done.
Where to buy tinned fish
You can get regular canned fish and seafood at your supermarket but if you’re looking for something that’s a little more specialty, check out Whole Foods, World Market, or online. Even Trader Joe’s sells decent canned sea bream, smoked sardines, trout, and mackerel. You can do a high-low comparison and see which fish you like better. Sometimes Mike and I will buy the same type fish from different brands just to see how different they are in quality and flavor.A few of our favorite brands in no particular order
Patagonia Provisions - sustainable fishing with delicious flavors, Patagonia knocks it out of the part with their conservas. We’ve never had a bad tin from them, all of them are amazing. Jose Gourmet - a modern Portuguese brand, is immediately recognizable from the boxes that feature playful illustrations. They have a large variety of seafood and flavors and all are high quality and absolutely addictive. Matiz - Spain is well known for conservas and Matiz is one of the OGs. They have interesting seafood like white anchovies, octopus, and cockles. Their classic sardines are firm, plump, and a good standard to keep in your pantry. Ortiz - the classic red, yellow, and blue can is a cult favorite. They’ve been canning since 1891 and people LOVE their tuna. They have several different lines with different types of fish. We especially like cooking with the anchovies that come in a jar. Nuri by Conservas Pinhais - This is a classic Portuguese conservas company. Nuri has been around since 1920 and the sardines are hand packed and hand labeled. They come in various flavors: sardines in tomato sauce, mackerel fillets in olive oil, sardines in spicy olive oil, and more. Pollastrini di Anzio - this Italian brand has been packing Mediterranean sardines since 1889 and their wild caught sardines are some of the best. They come in a variety of flavors, all are delicious.What kind of seafood comes in tins?
Anything seafood you can think of comes in a tins.Tuna
This isn’t the tuna of your childhood. Preserved in high quality olive oil, conservas tuna is firm, fleshy, and delicious. You can find tuna belly, ones with piquillo peppers, sun dried tomatoes, even chili crisp! High quality canned tuna is the perfect fish to ease into with conservas because it’s familiar. Pro tip, the tuna flavored oil in the can is perfect for bread dipping.Salmon
Conservas salmon comes in large, firm chunks packed in oil. It’s amazing mixed into rice a la Tiktok salmon rice bowls and also on toasts. I like the smokiness and the flavor of Fly By Jing Smoked Salmon via Fishwife.Sardines
There’s a whole world of sardines out there. They come in a variety of sizes, whole with skin on or completely skinned, deboned, and filleted. Both are good. If you’re new to conservas, you probably want to go the filet route, but if you love fish, the ones with skin and bones is where it’s at. So much calcium and omega 3s.Mackerel
One of our absolute favorite types of fish, canned or fresh. It’s milder than sardines or anchovies but packs big savory, umami punch. It has just the right amount of fat, much more than tuna, so if you’re convinced that canned fish is dry, mackerel is here to prove otherwise. If you ever have a chance, mackerel is very popular in Asia and the tinned mackerel from Japan (Ligo) is amazing with rice.Anchovies
Ah, anchovies. They have such a reputation, bad and good. They're the little fish that could. They add umami and salt to everything: pasta, toast, potatoes, steak, pizza, you name it, anchovies will jazz it up. If you’re an anchovy fan (who isn’t!?) the best way to enjoy their purity is on a crunchy kettle cooked chip (unsalted please) with a squeeze of lemon or dab of hot sauce. Pure flavor. PS - If you’re an anchovy fan, grab the Ortiz jar, they come with a cute fork and are tender, meaty, smooth, and generally amazing. PPS - get oil packed anchovies for eating, salt packed are usually for cooking. PPPS - if you find oil packed anchovies too salty go for marinated white anchovies that are pickled in vinegar.Mussels
Soft and velvety with just a bit of bite, mussels conservas are plum, firm, and delicious. They come so many ways, smoked, as escabeche, or with simple herbs. Enjoy from the tin with chips, toss them with pasta, or make a quick homemade escabeche with fresh herbs, lemon, sweet paprika, and red or white wine vinegar.Cockles & Clams
Steamed and preserved cockles and clams are tender, sweet, and full of seafood brine. You can add them to salad, use them to top off pasta, or make a quick ceviche-type dish with onions, cilantro, lime, and the canning brine.Squid
Tender and rich canned squid is amazing alongside a starch: risotto, rice, pasta, potatoes, or bread. Some conservas squid is grilled before canning, which preserves the texture and flavor even more.Others
There are way too many to list out here: trout, octopus, lobster, razor clams, scallops, snow crab, essentially any seafood you can think of, it exists. You might have to do a deep internet dive or hop a plane over to Spain or Portugal if you’re looking for the harder to find seafood. It’s my dream to go on a conservas trip one day!How many tins of conservas do you need?
For date night: Three is the perfect number. One tin per person plus one extra for fun. Three tins is more than enough for two people, especially with the accruements. For a party: If you’re making a large tinned fish platter for a party, I would go for 5-6 tins for 10 people. It’s about 1/2 tin per person when you’re serving conservas as an appetizer.What to serve with canned fish
- chips - don’t knock it til you try it! There are places that specialize in conservas and they always have chips. The crunch of the potatoes with canned fish can’t be beat. We like going for a thicker cut kettle cooked chip, preferably unsalted to let the flavor of the seafood shine through. Also good are tortilla chips and pita chips. Anything that is handheld, crunchy, and usable as a vehicle for the seafood to your mouth is amazing.
- bread - there’s a large world of bread out there and almost all breads will work well. Think: crusty sourdoughs, crackly baguettes, seeded loaves. You can go for bread in it’s natural state but toasting is a pro move, in my opinion. Don’t forget the good olive oil on the side for dipping.
- crackers - my personal favorite are sourdough discard crackers because of their phenomenal hearty crunch. Your favorite store-bought brands of crackers will do too. Grab a selection so you can mix and match and make different cracker-seafood combinations.
- rice and seaweed - a DIY onigiri (Japanese rice ball) slash hand roll platter is an amazing idea for a conservas platter. All you need are a couple of cans of fish, warm rice, Japanese pickles, roasted seaweed snacks, and furikake.
- hot sauce - Salsa Espinaler is specifically made for conservas, as you can tell from the slightly morbid but happy fish skeleton holding on to a bottle. It’s bright and tangy, vinegary with a hint of warmth. Tangy, vinegar forward hot sauces work best, like Tabasco or Crystal.
What to drink with tinned fish
Wine! Spanish or Portuguese, please, if you’re feeling fancy. You can go with white or red, it’s up to you. If you’re feeling extra fancy, you can break open a bottle of Cava (sparkling Spanish wine). Vermouth is also a good choice, with plenty of ice and a twist of lemon or orange. If you want a bit of a more casual feel, beer goes great and, if you don’t drink, I recommend a chilled unsweetened hibiscus tea. Straight hibiscus tea has hints of tannins and is refreshing and light.What if I don’t like tinned fish?
Forget those watery cans of tuna from your childhood. Imagine the freshest fish preserved at it’s height in delicious olive oil. Some tins have a handful of complementary spices and herbs to bring the flavor and some are simple. All are, ironically, fresh tasting, and delicious. Try some, you’ll like it, I promise!Bonus tips
If you want to make your date night in reminiscent of a date night out, don’t forget plating. Everything feels more luxurious and fancy when you plate it artfully. You’ll need:- A board or large plate - this large serving platter will hold all your tins while protecting your table from the inevitable oil drips. It’s a simple oval that’s cloud colored, that is, white with a little hint of grey; perfect for showing off colorful cans of conservas.
- Two small side plates - these hunter green side plates are modern and fun. I love how dark green looks with food and these have an unobtrusive matte finish
- A large bowl - These pasta bowls are perfect for housing chips, bread, or crackers.
- Glasses - you have several options here. You can go for classic wine glasses, Picardie glasses for some French cafe feels, or fancy thin water tumblers for a mix of sophistication and everyday.
- Two to three small bowls - these are for freshly cracked black pepper, olives, nuts. Basically, anything that’s small and you’re not serving a lot of. We love these small matte bowls. They come with four colors in one set making them fun and mismatched while still clearly being the same.
- Conservas forks - mini forks! If you know, you know. These little forks have just two prongs, making getting seafood out of tins a breeze. Plus they have rustic wooden handles for some farmhouse feels.
- Linen napkins - cloth is fancier than paper and it says, hey, I’m willing to do laundry for you.
Tinned Fish Date Night for 2
The best date night is the one you can put together in 5 minutes.
- 1 can tuna or salmon conservas
- 1 can sardines conservas
- 1 can mackerel conservas
- 1 package kettle cooked chips (unsalted preferred)
- 1/4 cup olives (Castelvetrano, Gordal, or Manzanilla preferred)
- 1/4 cup marcona almonds
Open the cans of conservas and place on a plate or wooden board, leaving the seafood in the tin.
Open the kettle cooked chips and place in a bowl. Place the olives and almonds in small bowls alongside the conservas.
Serve with hot sauce, fresh herbs, and fresh fruit, if desired. Enjoy with wine!
Suggestions
Herbs: dill, Italian parsley, basil, chives, mint
Fruit: grapes, stone fruit, pomegranate seeds, lemon slices
Hot sauce: Salsa Espinaler, Tabasco, Crystal
I Am... How to Make a Butter Board
If you keep hearing people talking about butter boards, here is everything you need to know! Butter boards are here to stay, especially since we’re rolling into the holiday season. Everyone’s looking for a trendy new appetizer and if you’re young (or young at heart) butter boards are sure to show up at the party.
What is a butter board?
A butter board is a wooden board (or ceramic dish) spread with butter and sprinkled with toppings such as flaky sea salt, freshly ground pepper, spices, herbs, citrus zest, edible flowers, and honey. Invented by the award-winning Portland chef, Joshua McFadden, butter boards are becoming increasingly popular. The idea is: instead of a charcuterie board, it’s a flavored butter board. They’re infinitely customizable and are a fun way of making butter a bit more tactile and interactive due to the way it’s presented. Butter boards come with bread, toast, crackers, scones, or anything that goes with butter. Think of a butter board as compound butter (butter flavored with herbs, spices, and other ingredients) but in a different form factor.How to make a butter board
- Let your butter come to room temp. Let unsalted high quality butter sit at room temp for 30 minutes, or break out a stand mixer and whip the butter so it is fluffy and light. Both are delicious. Room temp butter is more hefty and whipped butter is lighter, more delicate, and fluffy.
- Prep your plate or board. Give your board or plate a good wash. It’s important to use a board that you use for just vegetables. Or grab an new board so there aren’t any gashes in the board that butter can seep into. An alternative is a cute plate, like the bread shaped ceramic plate that we used. If you want to stick with a wooden board, you can also lay down a piece of parchment paper and build your board on that.
- Artfully smoosh. Take a spoon or offset spatula and smoosh the butter down on your board/plate. One stick of butter is enough for 4-6 people, it equals 2 tbsp or 1.3 tbsp tbsp per person.
- Top. Sprinkle on a generous amount of flaky sea salt, freshly ground coarse black pepper, and any other flavor toppings that you love. See below for topping inspiration. In the butter board pictured we went with a roasted garlic butter board: unsalted butter, flaky sea salt, toasted coarse black pepper, a whole head of roasted garlic, lemon zest, thinly sliced red onions, plenty of fresh herbs, and a drizzle of maple syrup.
- Enjoy. Serve with warm bread, toasted bread, seeded crackers, or anything that goes amazingly with butter. Place small spoons or butter knives out with the board and encourage everyone to scoop, spread, and enjoy!
Butter board ingredients
- butter - unsalted butter for the win here. Get a pretty, golden, high quality butter. At it’s core a butter board is just bread and butter so both the bread and butter need to be good quality ingredients. Kerrygold is a great readily available brand. If you have access to locally made butter that is a perfect option too.
- flaky sea salt - giant flakes of sea salt are pretty, crunchy, and just feel special. We love use Maldon sea salt, both their regular flakes and their smoked flakes. Jacobsen Salt Co. is also amazing. They have a bunch of flavored salts and their salt comes from the Pacific Northwest Ocean, which is local for us.
- pepper - freshly ground black pepper or other peppers like chili flakes add heat and warmth.
- spices - you don’t need a lot of spices to make your butter sing. Just make sure they’re fresh! Spice mixes work wonderfully and za’atar butter or everything bagel butter are both amazing.
- garlic - fresh for a spicy bite or roasted for a mellow warmth. I LOVE garlic butter and a garlic butter board is my idea of heaven.
- herbs - fresh herbs are the flavor superstars. Think: thyme, chopped rosemary, chopped parsley, basil, chives, sage, tarragon, mint, cilantro, green onions, the herb world is large and delicious.
- nuts - chopped nuts add some crunch and texture. Try: pistachios, hazelnuts, almonds, walnuts, pecans, or your favorite nut.
- sweet - a drizzle of honey, sliced fruits, fruit compotes, jams, or even maple syrup add a note of sweet to contrast the savory. Sweetness and butter work particularly well for breakfast butter boards served with pancakes or waffles.
What kind of butter for a butter board?
Go for an unsalted, high quality butter. My all time favorite butter is SMJÖR, an Icelandic butter that isn’t available anyone but in Iceland. Here at home, I love Kerrygold or the local butter that is available.Who invented butter boards?
Butter boards were first mentioned in Joshua McFadden’s James Beard award winning cookbook Six Seasons: A New Way With Vegetables. We can thank Justine Doiron via Tiktok for popularizing the butter board.Why are butter boards popular?
What can I say? I feel like everyone loves food served on boards. Charcuterie and cheese boards are a fun and interactive way of entertaining and a butter board is just a natural extension, especially if you’re going to be serving bread and butter. There are haters, but I love a good bread and butter starter and I think this idea is pretty genius. I think at this point they are a love-hate kind of thing with many people on the internet being both disgusted and delighted.How to artfully smoosh butter
The best way to artfully smoosh butter is to use the back of a spoon or a small offset spatula. If you whip your butter, you can use a silicone to create divots just like how you frost a cake. The key is to kind of make the butter look like waves. It’s easier if your butter is just the right temperature. You don’t want it too hard or too soft.12 best butter board ideas
- Honey coriander. This is Justine Doiron’s classic combo and it works: flaky sea salt, pepper, fresh mint, ground coriander, ground cardamom, fresh basil, honey, lemon zest, and edible flowers
- Figs and honey. Juicy quartered purple figs, flaky sea salt, and a generous drizzle of honey.
- Sweet and spicy. Flaky sea salt, fresh lime zest, honey, and Calabrian chili flakes.
- Garlic. Whole roasted garlic cloves along with finely grated fresh garlic, finely chopped parsley, and flaky salt.
- Lemon. Thinly sliced oven caramelized lemons, fresh lemon zest, thinly sliced lemons, honey, fresh mint, and flaky salt.
- Pistachio. Roughly chopped pistachios, flaky salt, basil, lemon zest, roasted tomatoes.
- Scallion. Oven roasted green onions, freshly sliced green onions, flaky salt.
- Everything bagel. A generous sprinkle of everything bagel spice, thinly sliced purple onions, capers.
- Gremolata. Toasted chopped pine nuts, lemon zest, finely chopped parsley, finely chopped garlic.
- Pesto. Crushed garlic, toasted chopped pine nuts, loads of fresh basil roughly chopped, and a generous sprinkling of finely grated parmesan.
- Dark chocolate. Dark chocolate shavings, flaky salt, fresh raspberries, and toasted chopped pistachios.
- Hazelnut chocolate. A mix of dark and milk chocolate shavings, toasted chopped hazelnuts, flaky salt.
How to serve a butter board
Make your butter board right before you serve it. They come together very quickly so there’s no need to prep them in advance. If you do need to prep your butter board in advance, make it, then pop it into the fridge to keep the butter cold. Pull the butter board out of the fridge and leave it at room temp for 30 minutes before serving. Place the butter board, along with dippers, small plates, small butter knives, and napkins arranged around it. That’s it! Everyone can help themselves by scoop up the flavored butter onto bread using knives or small spoons.Butter board dippers
- bread - freshly baked crusty breads such as country loaves, sourdough, or baguettes cut or torn into individual servings.
- toasted breads - warm bread and butter is one of life’s simple pleasures. Give your bread some transformative heat for toast.
- crackers - seeded crackers, cheese crackers, water crackers; sourdough crackers https://blitzdealz.info/small-batch-sourdough-crackers/ are especially delicious alongside butter boards.
- breakfast foods - scones, pancakes, waffles; sweet breakfast things go well with sweet butter boards that feature dollops of jam, fresh fruit, and herbs.
- vegetables - radishes, snap peas, any sort of crunchy vegetable that you can dip.
Are butter boards safe?
There are bunch of sites out there fear-mongering the dangers of butter boards because smushing butter into a wooden board can lead to the butter getting into the cracks where microbes can grow, especially if you’re using a board that you use to prep food. To avoid this all you need to do is do your butter board on a plate or lay down a piece of parchment paper over the board so the butter doesn’t get into the cracks. Also, instead of having everyone communally dip their bread into the butter, lay out some small butter knives or spoons so they can scoop the butter up and discourage double dipping. Alternatively, you can make cute little individual butter boards on small plates or in dipping bowls. Also, you want your butter to be spreadable and at room temp, but you don’t want to leave the board out too long because believe it or not, butter can go rancid, especially in hot and humid climates. The best thing to do is assemble your butter board right before serving.What kind of board for a butter board?
Definitely use a clean, dry wooden board that is specifically for cutting bread or vegetables. Or better yet, get a wooden board specifically for butter boards if you’re set on using a wooden board. Otherwise, I recommend using a large flat plate, which will get those butter board naysayers off your back.Better butter board tips and tricks
- Soft butter is your friend. Let your butter come to room temp for at least 30 minutes.
- Unsalted butter is better. Go for high quality unsalted butter so you can season it to your own tastes.
- Flaky sea salt and freshly coarse ground pepper are the sprinkles of the savory food.
- Herbs, seeds, nuts, and seasonings make it a party.
- Sweet and savory. Add a drizzle of honey for a bit of sweetness and gloss.
- Always provide spreading instruments. No double dipping!
- Do your butter board on a plate. It’s a lot easier to throw a plate into the dishwasher and a lot more difficult to hand wash a buttery wooden board.
How to Make a Butter Board
Butter boards are here to roll into the holiday season.
- 1 tsp freshly ground pepper (coarsely ground)
- 1 cup unsalted butter (room temp (2 sticks))
- 1 pinch flaky sea salt (approx 1 tsp, or to taste)
- 6 cloves roasted garlic
- 1 lemon ((zest only))
- 1 slice red onion
- 1 tsp maple syrup
- fresh herbs (of choice, such as thyme, parsley, or sage)
- 2 baguettes (sliced to serve, or bread of choice)
Lightly toast the freshly ground pepper in a dry pan over low heat for 30 seconds to 1 minute, stirring constantly. This will warm the peppercorns and release an immense peppery flavor. Remove the pepper from the pan so it doesn’t burn and set aside.
Place the butter in a bowl and use a silicone spatula or wooden spoon to lightly cream. The butter should be smooth and spreadable, but not at all melty.
Use the back of a spoon to smoosh and swirl the butter onto a board or plate.
Layer on the sliced red onions and sprinkle with herbs. Drizzle some maple syrup on top. Finish by sprinkling generously with flaky sea salt, lemon zest, and the toasted cracked black pepper.
Serve with warm baguettes and butter knives so everyone can scoop and spread. Enjoy!
Estimated nutrition doesn't include bread
I Am... Banana Muffins
I am a banana addict. Not the actual fruit, just banana baked goods. Banana bread, banana cake, banana cookies, and especially banana muffins. There’s just something about bananas when they get baked that makes them incredibly irresistible to me. That sweet and sticky caramelized banana flavor – I just can’t get enough! These lil banana muffins are perfect because they’re individually sized and portioned. I love popping one into my pocket before heading out on an evening walk because there’s nothing better than watching the sunset on a bench with your favorite person in the world and a banana muffin.
This is the best banana muffin you’ll ever make
But first, what is a banana muffin? Maybe you think this is a silly question, but this is the kind of thing that goes on in my head. Just what the heck is a banana muffin? Is a banana muffin banana bread in a muffin shape? Is it banana cake in a muffin shape? Just what makes a muffin a muffin? Deep existential muffin thoughts aside, for the purpose of this post, a banana muffin is a little cake, made in the shape of a muffin with a muffin wrapper that is sweet, tender, moist, and full of banana flavor. These banana muffins have an even tight crumb with a nice bouncy springiness and just a touch of stickiness. It’s not too sweet and there are massive banana tones and subtle caramel notes.The best banana muffin recipe is based off of the best banana bread recipe in the world
To be honest, this is just my favorite banana bread recipe baked into muffins. Joanne Chang’s Flour Bakery banana bread is famous for a reason. That banana bread recipe is essentially too good to touch. I did make a couple of edits though: I added a bit of baking powder for some loft and doming and I also increased the baking temperature right at the beginning. According to the internet, if you want sky high muffins, the key is to bake at a high temp so your muffins explode from the heat, then turn the oven down so you the muffins continue to bake evenly. It worked! The muffins were rounded and domed and super cute.To make the best banana muffins you need the best ingredients
This is a truly moist banana muffin and it’s perfect because you don’t need anything special to make it. It’s the perfect back pocket recipe for those times when you have a bunch of bananas languishing on your countertop. Super ripe, extra spotty and brown bananas make the best banana muffins - the more ripe, the sweeter and more moist your banana muffins will be.Here’s what you need to make banana muffins
- all purpose flour - classic all purpose flour will give you the best crumb
- baking soda and baking powder - so they puff up tall and muffin-y
- cinnamon - for a hint of warmth
- salt - to highlight the sweetness of the bananas - extra ripe please!
- eggs - try to use room temp eggs, they will fluff better making your banana bread bake up light and fluffy
- sugar - regular granulated sugar will do
- oil - oil will always give you the moistest quick breads, more on that below
- extra ripe bananas - see above picture
- sour cream - a bit of tang to complement the caramelized bananas
- vanilla - for a creamy hint of vanilla flavor
Oil vs butter
I always prefer to make my banana bread and cakes with oil and you should too! Oil makes loaf cakes and quick breads like muffins more soft and moist. Oil gives you that classic banana bread flavor that you get when you buy a slice from a coffee shop. Of course, if you like the flavor of butter, melted butter will work too. Oil has the advantage of staying liquid when cold so it gives your baked good a more soft and tender texture.How to make the best banana muffins
- Mix. Mix together the dry ingredients - all purpose flour, baking soda and powder, cinnamon, and a bit of salt in a bowl and then set it aside.
- Whip. Whip eggs and sugar together until it’s light and fluffy and pale. The eggs and sugar will almost double in volume. Drizzle in the oil and whip until emulsified.
- Mash. Mash your banana - I like to make sure my bananas are super smooth because I don’t like banana chunks in my bread. After the bananas are mashed, stir them into the egg and sugar batter, along with sour cream and vanilla until smooth.
- Stir. Stir in the flour mix, making sure everything is throughly combined.
- Bake. Divide the batter evenly amongst paper lined muffin tins and bake until fluffy and golden, cool slightly, and enjoy!
Banana muffin mix ins
I like my banana muffins classic but feel free to stir in any mix (1/2-1 cup) of the below for an over the top fully loaded banana muffin:- nuts: toasted walnuts, pecans, hazelnuts, pistachios
- dried fruits: toasted coconut, dried cherries, dried banana chips, raisins, craisins, dried blueberries
- chocolate: dark chocolate chunks, milk chocolate chunks, white chocolate chunks, chocolate chips
Banana chocolate chip muffins
Are you wondering how many chocolate chips you should use for banana chocolate chip muffins? The answer is based on preference of course, but I find that 1 cup is the perfect chocolate to banana muffin ratio. Simply mix in 1 cup of chocolate chips after you mix in the flour. If you like a chunkier chocolate, a chopped up dark chocolate bar is a pro move.Banana nut muffins
Bananas and nuts go together like PB&J! Just like chocolate, the right ratio is 1 cup of toasted chopped nuts. Classic nuts to try are walnuts and pecans. If you want something a bit different, try chopped toasted macadamia nuts, pistachios, hazelnuts, almonds, or cashews. Stir in the nuts after you stir in the flour.How long to bake banana muffins
Banana muffins take about 20-25 minute in the oven. A good way to tell when they’re done: they will be set and golden and brown on top, spring back when you lightly press down on them, and a toothpick in the middle will come out pretty clean, with just a couple of crumbs clinging to it.Banana muffin FAQ
Why are my banana muffins browning unevenly?
Your oven might have hot spots! To prevent uneven browning, make sure you rotate your muffin pans when halfway when baking. If you want to ensure perfectly baked muffins every time, get an oven thermometer to make sure your oven is at the correct temperature.Why are my banana muffins flat?
For fluffy, high, bakery-style muffin tops, there are a couple of tips!- Check your baking soda and baking powder. Baking soda will fizz in hot water and baking powder will fizz with vinegar or lemon.
- Room temp ingredients. Room temp ingredients will bake up taller and fluffier than ingredients from the fridge so make sure your eggs and other ingredients are room temp.
- Resting. Resting banana muffin batter helps it thicken up because the flour has time to absorb the liquid in the batter. The starch molecules swell up and thicken making the batter thicker.
- Fill your muffin cups almost to the top. Leave just smidgen of space at the top of your muffin cup, about 1/8-1/4 of an inch. Filling the cups up high will ensure you get a tall muffin.
- High temps. Higher temps at the beginning of baking can cause oven-spring: a high blast of heat that will create steam that will lift the batter tall and fluffy. After the muffins spring, you turn down the heat so they can continue to bake through.
How do I make my banana muffins more banana-y?
For extra banana-y muffins you need incredibly ripe, spotty, bananas. The riper they are, the more banana-flavored your muffins will be.How do I ripen bananas quickly?
To quickly ripen bananas:- Separate all the bananas. Single bananas ripen faster because they release more ethylene gas, which is the gas that ripens fruit.
- Pop the separated bananas in a brown paper bag. Use a paper bag to trap the gas to encourage the bananas to ripen even more quickly.
- Store in warm spot. Just find a nice cozy warm spot for your bananas. Fruit ripens more quickly when it’s warm.
How to mash bananas
I like to peel my bananas, place them in a wide bowl and use a potato masher to mash until the bananas are very liquid-y without any visible lumps.Why is there sour cream in banana muffins?
Sour cream is perfect in loaves and muffins! It keeps them moist and flavorful, adding a bit of tang that compliments the sweetness of bananas. If you don’t have any sour cream, you can substitute with yogurt, regular or Greek.What to serve with banana bread
Give yourself those at home cafe feels with these cafe style drinks:- fluffy dalgona coffee
- coffee jelly coffee milk
- mint mojito pour over
- matcha latte
- whipped hot chocolate
Banana Muffins
Sky high extra banana-ey banana muffins based on one of the best banana bread recipes of all time.
- 1 2/3 cup all purpose flour (210g)
- 1 tsp baking soda
- 1/2 tsp baking powder
- 1/4 tsp ground cinnamon
- 1/2 tsp kosher salt
- 1 cup sugar (plus 2 tablespoons - 230g)
- 2 large eggs (room temp)
- 1/2 cup neutral oil (such as canola oil - 100g)
- 3 1/2 bananas (very ripe, peeled and mashed, ~1.5 cups, 340g)
- 2 tbsp sour cream (or Greek yogurt)
- 1 tsp vanilla extract
With the rack in the center of the oven, preheat to 425°F. Line 16 muffin tins with papers. Sift together the flour, baking soda, cinnamon and salt in a bowl and set aside.
With a stand mixer fitted with the whip attachment, beat together the sugar and eggs on medium speed until light and fluffy, about 5 minutes. Switch to low speed and slowly drizzle in the oil, taking your time.
Add the bananas, sour cream, and vanilla, and continue to mix on low speed just until combined.
Use a rubber spatula to fold in the flour mixture until thoroughly combined. No flour streaks should be visible.
Pour the batter into the muffin tins and bake for 5 minutes at 425°F then turn the heat down to 325°F and continue to bake for 15-20 minutes.
The muffins should be golden brown on top, a toothpick will come out clean and the muffins will spring back when you gently press down. Let cool on a wire rack for 5 minutes, then remove the muffins from the pan and let cool completely on the wire rack. Enjoy!
I Am... Chicken Caesar Salad
There’s a salad place near my house that makes a killer chicken caesar salad. It’s my go-to, not-so-guilty pleasure. I love it so much. For some reason it tastes so much better than me making chicken caesar salad at home. Only thing is, it’s ridiculously expensive. Especially because I know that for the price I pay, I can probably make myself at least 4 salads. So, to save my wallet, I recreated it at home. It is glorious! Crunchy, crisp romaine lettuce, kale, grated Parmigiano Reggiano, garlicky croutons, roasted chicken breast, toasted cashews, a ramen egg, a lemon wedge for squeezing, and homemade caesar dressing. SO GOOD I’ve eaten it every day for twelve days and I’m still not sick of it.
Caesar salad
Caesar salad needs no introduction. There are fancy table side steak house caesar salads AND fast food caesar salads. For me, a caesar salad is only as good as it’s individual ingredients. The romaine lettuce should be crisp and crunchy. The dressing should be a garlicky creamy emulsified dressing with anchovies, Worcestershire, and lots of lemon. The croutons better be buttery and homemade – toasted on the outside and a little tender on the inside. A snow shower of freshly grated parm is the finishing touch.How to make chicken caesar salad
This is a labor of love. If you make every component at home it can take a long time, not going to lie - but it’s so worth it. Personally I like meal pepping individual size salads in containers with small containers of dressing on the side so I can pretend that I have my own extra fancy salad cafe. I often just make a huge one for dinner too. Here’s how you do it:- Make the ramen eggs: Medium boil some eggs, peel them, then pop them into a rich, umami filled marinade.
- Cook the chicken: While the ramen eggs are marinating, cook your chicken in the oven or air fryer.
- Make the croutons: While the chicken is doing it’s thing, toast some torn or cubed up bread in garlic butter on the stove over medium heat.
- Prep the romaine and kale: Wash and tear the romaine. Destem the kale, wash, and tear into small pieces.
- Make the dressing: Mix together lemon juice, dijon, Worcestershire, minced garlic, anchovy paste, parmesan cheese, and Kewpie mayo.
- Toast the cashews: This is an extra step that brings out the oils and nuttiness in cashews. Toast cashews in a dry pan over low heat, shaking occasionally.
- Assemble the salad: In a large bowl (the largest one you have) combine the romaine, kale, chicken, and croutons and toss with the dressing to taste. Top with the ramen egg, a fresh shaving of parm, the toasted cashews, and a lemon wedge for squeezing.
Shortcut chicken caesar salad
If you’re on a time crunch you can totally make this salad with already made ingredients and it’ll still be incredible. It’s the combination of romaine and kale plus the jammy egg and cashews that make it amazing. Here’s how to do it, shortcut style: In a big bowl toss together the romaine, kale, chicken, and croutons with dressing to taste. Top with salted cashews, and a jammy egg. Serve with a lemon wedge and plenty of extra parm shaved on top.Ingredients
- Roasted chicken breast - Chicken breast is best in salad. It’s pretty, it goes well, and it tastes good, especially when you cook it right. You can go with rotisserie chicken or your favorite cooking method. I favor air frying because chicken breasts come out juicy and perfectly cooked every time.
- Romaine lettuce - You’ve got to have romaine if you’re having caesar salad. It’s the crispest lettuce and it’s non-negotiable.
- Kale - The kale in this salad adds a bit more earthy, green flavor.
- Parmigiano Reggiano - Get the good stuff and you won’t need a lot of it. It’s full of umami cheesiness.
- Garlicky croutons - Little bites of garlic bread in salad, genius!
- Toasted cashews - Toast your own cashews if you have the time, they taste insanely good, even if you’re toasting already roasted cashews.
- Ramen egg - A ramen egg add saltiness, umami, and extra protein in a pretty little package.
- Caesar dressing - This dressing is what makes caesar salad caesar salad. Full of salty, umami forward ingredients, it’s garlicky, rich, and addictive. My secret ingredient is Kewpie mayo, which makes it richer and so much more delicious.
- Lemon wedge - The fresh squeeze of a lemon wedge right before you eat is *chefs kiss!*
Caesar dressing
I like this Caesar dressing because it uses mayonnaise instead of eggs which means I can meal prep a big batch and keep it around without worrying. The secret ingredient is Kewpie mayo which adds richness and so much flavor. It makes a about 1 and a half cups of dressing. In a bowl, whisk together 2 tbsp freshly squeezed lemon juice, 2 tsp Dijon mustard, 1 tsp Worcestershire, 2 cloves of minced garlic, and 1 tsp anchovy paste. Stir in a scant cup of Kewpie mayo and 1/2 cup finely grated Parmigiano Reggiano. Taste and season with salt and pepper.Easiest roast chicken
You can use your favorite method to cook chicken, or even use store bought rotisserie. I find that the easiest thing to do is air fry it. It’s juicy every time. Toss some chicken breasts in a bowl with a bit of oil, garlic powder, and salt and pepper. Air fry for 12-15 minutes at 400°F or until the juices run clear. Let rest then slice for the salad.Homemade garlicky croutons
My favorite way to make croutons is with fresh bread. They end up being little cubes of garlic bread, crunchy on the outside and soft on the inside.- Rip or cut up some bread into crouton size pieces. I like ripping so there are craggily bits of contrast.
- Heat a generous amount of oil and butter in a skillet over medium.
- Stir in 1 clove of garlic as well as the bread and toss everything to coat.
- Cook until the bread is crusty, golden, and crisp, stirring occasionally.
- Remove from the heat and snack but save some for the salad.
Ramen egg
You don't need it, but a jammy ramen egg with it’s salty umami coated outsides is the perfect extra bite of protein in this salad. It elevates it from just a caesar salad to a Fancy Salad, capitals needed. The best part is that ramen eggs are meal prep worthy and perfect for snacking on. Boil some eggs until jammy then peel and soak in 3/4 cup instant dashi (supermarket, high end, or just chicken stock), 1/4 cup soy sauce, 1/4 cup sake, 1/4 cup mirin, and 1 tbsp sugar for 1 hour or up to over night. After they’ve soaked, remove them from the marinade and store them in an air-tight container in the fridge for up to 4 days. You can save the marinade in an airtight container too.That’s it!
There are a lot of steps, but you’re worth it. No sad desk salad for you. Speaking of sad desk salads, my favorite way to eat caesar salad is undressed. I like to poke ever single component on my fork then dip it into the dressing so everything stays crisp and the right amount of dressing is on every bite. How about you? Please tell me you’ll try this salad. I know it’s an investment but it will definitely be the best caesar salad you’ll ever make!Chicken Caesar Salad
The best chicken caesar salad with a lot of moving parts but you're worth it!
- 2 boneless skinless chicken breasts
- 2 tbsp oil (divided)
- 1 tsp garlic powder
- 3 slices bread (brioche preferred)
- 2 tbsp butter
- 2 tbsp freshly squeezed lemon juice
- 2 tsp dijon mustard
- 1 tsp Worcestershire sauce
- 1 tsp anchovy paste
- 2 cloves garlic (minced)
- 1 cup kewpie mayo
- 1/2 cup Parmigiano Reggiano cheese (finely grated)
- 2 heads lettuce (washed and chopped, romaine preferred, )
- 1 bunch kale (trimmed, washed, and chopped)
Cook the chicken: Toss the chicken in a bit of oil and 1 tsp garlic powder. Season with salt and pepper and air fry for 12-15 minutes at 400°F or until the juices run clear. Remove from the air fryer and let rest.
Make the croutons: While the chicken is cooking, rip or cut the bread into cubes. Melt the butter in a pan over medium heat with a touch of oil and add 1 clove minced garlic and the bread and and toss everything to coat. Cook until the bread is crusty, golden, and crisp, stirring occasionally. Remove from the heat and set aside.
Make the dressing: Mix together the lemon juice, dijon, Worcestershire, minced garlic, anchovy paste, parmesan cheese, and Kewpie mayo. Taste and season with salt and pepper.
Assemble the salad: In a large bowl (the largest one you have) combine the romaine, kale, chicken, and croutons and toss with the dressing to taste. If desired, top with the ramen egg, a fresh shaving of parm, the toasted cashews, and a lemon wedge for squeezing.
Optional toppings but highly recommended:
Ramen Eggs
- 4 eggs
- 3/4 cup dashi
- 1/4 cup soy sauce
- 1/4 cup sake
- 1/4 cup mirin
- 1 tbsp sugar
Bring a pot of water to a rolling boil. Turn the heat down to medium high and lower in the eggs, straight from the fridge and cook for 7 minutes. Remove the eggs and immediately plunge into an ice bath to cool. Meanwhile, stir together the dashi, soy sauce, sake, mirin, and sugar in a container that can hold the eggs. When cool enough to handle, peel and place in the marinade. Cover and place in the fridge for 1 hour or up to overnight.
Cashews
- 1/2 cup roughly chopped roasted cashews
Toast the cashews in a dry pan over medium heat, shaking, until warmed through and smell nutty and toasted. Remove from the pan and let cool.
I Am... General Tso’s Chicken
I love orange chicken, sweet and sour pork, honey garlic anything and especially General Tso's chicken. It's tangy, sweet, crispy, and good.
What is General Tso’s Chicken
General Tso’s chicken is crispy, deep-fried chicken tossed in a sweet and tart sticky sauce that has just a bit of spice. Its origins are murky at best and no one is quite sure who created it, but everyone agrees that General Tso’s chicken is named after Zuo Zongtang, a military leader from the Qing dynasty who had most definitely not tasted the chicken that’s named after him. What we do know is that General Tso’s chicken is uniquely Chinese-American and incredibly delicious.How to make General Tso's Chicken
This is one of the easiest Chinese dishes you'll ever make:- Marinate: In a large bowl, whisk together the ingredients for the chicken coating until light and frothy. Toss in the chicken pieces and let sit at room temperature.
- Batter: Place 1 cup of cornstarch in a bowl. Spoon out 2 tablespoons of the chicken coating and whisk into the cornstarch to form small clumps. These will add extra crispy bits to your chicken. Working in batches: throughly coat several pieces of chicken in the cornstarch, and shake off the excess.
- Fry: Fry these however you like! See the sections below on air fryer vs oven baked vs deep fry. Deep fry will always produce the best results, but more often than not, we grab the air fryer for its ease and healthiness.
- Sauce: Once all of your chicken is done and resting in the oven, make the sauce. Add the sauce ingredients and cook, stirring, until the sauce comes to a boil and starts to thicken. Remove from heat, then add the chicken.
- Enjoy: Toss throughly to coat and enjoy immediately.
Ingredients for General Tso’s Chicken
Most of the ingredients for General Tso’s chicken are fairly pedestrian items you’ll find in your pantry/fridge: chicken thighs, egg whites, soy sauce, corn starch, sugar, white vinegar, garlic, and ginger. There are a couple of ingredients that you might not have on hand but will make your General Tso’s chicken taste just like take out:Shaoxing wine
Shaoxing wine is the secret ingredient that makes Chinese food taste like Chinese food. You might think it’s MSG that you’re tasting, but that can’t-quite-put-your-finger-on-it flavor is actually Shaoxing wine: it’s lightly sweet, nutty, earthy, and complex. It’s definitely worth it to get a bottle! Read more about Shaoxing wine here.White pepper
White pepper doesn’t taste like black pepper at all. It’s delicate and floral, with a hint of heat. White pepper is brighter and sharper, which is surprising because white pepper is exactly the same berry as black pepper. They’re both grown on the same pepper plant, but white pepper is black pepper with the outer layers soaked off. White pepper is essential in Chinese cooking, adding a earthy, floral heat. Unlike with black pepper, where you should always buy whole peppercorns, it's best to get ground white pepper because its higher moisture makes it a little harder to grind.Toasted sesame oil
Toasted sesame oil is pretty common these days and for good reason. It adds a huge amount of toasty nutty aromatic flavor. Toasted sesame oil is made from toasted sesame seeds and our favorite is Kadoya, which comes in that iconic yellow topped bottle.Chinese chili flakes
Chinese chili flakes might not be as common as the ubiquitous red pepper flakes that you see in shakers at Italian restaurants, but I feel like they are starting to become more and more popular. These flakes are bright red and have hardly any seeds, which are made from whole toasted, fried Sichuan peppers. They're nutty and toasty with a bright red color and just the right amount of heat. They are my absolute favorite chili flakes of all time.Deep Fried vs Air Fried vs Oven Baked
This recipe will work all three ways: deep fried, air fried, or oven baked. If you have the time, deep fried is going to be your best bet, but air frying and oven baking is less work and healthier too! If you’re air-frying or oven baking, you’ll need to spray the egg white-cornstarch coated chicken with some oil. We use a simple oil mister bottle that we fill with grapeseed oil; you can also use cooking spray. Make sure there’s a good coating of oil on the chicken so it browns evenly, otherwise the chicken won’t be as golden as deep frying.Air fryer General Tso's chicken
Lightly oil or use cooking spray on the air fryer basket. Place the coated pieces of chicken in the basket, with at least 1/4” of space in between pieces. Lightly spray the tops of the chicken with cooking spray. Cook at 400°F for 5 minutes, then flip and lightly spray with extra cooking spray. Cook for 5 more minutes at 400°F. If your pieces of chicken are large, you might need an extra minute or two. Let the chicken cool for 5 minutes, then air fry for an extra 5 minutes at 400°F to crisp it up. Add to the sauce and toss to coat. If you don't have cooking spray, you can toss the chicken with oil before the cornstarch, it'll be a little oilier but it will still work.Oven baked General Tso's chicken
Heat the oven to 450°F. Generously oil or use cooking spray to fully coat a wire rack in a foil lined baking sheet. Place the coated pieces of chicken on the rack, with at least 1/4” of space in between pieces. Lightly spray the tops of the chicken with oil or cooking spray if you have it. Bake for 20 minutes, then flip, lightly coat with extra oil/cooking spray and bake for an extra 5 minutes. The pieces of chicken should be golden brown, crispy, and cooked through. Add to the pan with the sauce and toss to coat.What should I do with the extra egg yolks?
This recipe uses a classic Chinese deep fry coating that only uses egg whites, which leaves you with a couple of extra egg yolks. You can:- Use them as a topping for mazemen
- Pop them into budae jjigae/Korean army stew
- Make fresh pasta
- Make a bowl of mushroom risotto extra cozy by stirring in an extra yolk
- Use them to make the BEST Japanese cheesecake
What to serve with General Tso’s Chicken
- Fluffy White Rice or Instant Pot Brown Rice
- Awesome Vegetable Lo Mein
- Fried Rice!
- Pork Potstickers
- Egg Drop Soup
General Tso’s Chicken Recipe
Better than takeout: crispy, tangy, sweet, and absolutely addictive.
Chicken Coating
- 2 egg whites (preferably from large eggs)
- 1 tbsp soy sauce
- 1 tbsp Shaoxing wine
- 1 tbsp cornstarch
- 1/4 tsp salt
- 1/4 tsp white pepper
Chicken
- 1 lb boneless skinless chicken thighs (cubed into 1" pieces)
- 1 cup cornstarch
General Tso's Sauce
- 1 tbsp Shaoxing wine
- 1 tbsp cornstarch
- 1/2 cup chicken stock (no sodium preferred)
- 2 tbsp soy sauce
- 2 tbsp sugar
- 1 tbsp vinegar (white preferred)
- 1 tsp toasted sesame oil
- 1 tbsp ginger (minced)
- 4 cloves garlic (minced)
- 1/4 tsp chili flakes (Chinese preferred, optional)
In a large bowl, whisk together the ingredients for the chicken coating until light and frothy. Toss in the chicken pieces and let sit at room temperature. Set up a cooling rack over a baking sheet lined with paper towels and heat up 1-2 inches of oil in a high-sided, heavy bottomed pot over medium high heat until oil reaches 350°F. Preheat your oven to its lowest setting.
While the oil is heating up, place 1 cup of cornstarch in a bowl. Spoon out 2 tablespoons of the chicken coating and whisk into the cornstarch to form small clumps. These will add extra crispy bits to your chicken. Working in batches: throughly coat several pieces of chicken in the cornstarch, shake off the excess, then gently add the chicken to the hot oil. Deep fry each batch until golden brown and crispy (about 5-6 minutes) flipping as needed. Drain the chicken on your prepared rack and keep warm in the oven.
Once all of your chicken is done and resting in the oven, make the sauce: whisk together 1 tablespoon of Shaoxing wine with 1 tablespoon of cornstarch until smooth, then whisk in the chicken stock, soy sauce, sugar, vinegar, and toasted sesame oil. In a large skillet, heat up a bit of oil over medium heat and stir fry the garlic, ginger, and chili (if using) until soft but not brown, 2-3 minutes. Add the sauce ingredients and cook, stirring, until the sauce comes to a boil and starts to thicken.
Remove from heat, then add the chicken and toss. Toss throughly to coat and enjoy immediately.
I Am... Best Meatball Sub Recipe
Do you know how they say that a way into a person’s heart is through their stomach? I whole-heartedly believe this because I’m pretty convinced that Mike married me because of this meatball sub. I mean, who doesn’t love tender, juicy homemade meatballs that have been braised in a tangy-sweet tomato gravy tucked into a butter toasted bun with lots of melty cheese?!
What makes a good meatball sub?
Good meatball subs have big, soft, tender, juicy meatballs. I feel like meatball subs shouldn’t have meatballs that have been crisped up or browned in any way. The meatballs should just about fall apart the instant they hit your lips. The sauce should permeate and cling to the surface of the balls and they should be good enough to eat on their own but even better when put into a saucy, cheesy sandwich.The absolute best way to make meatball subs
Here’s how I like to build my sandwiches:- Choose great bread. You can go with whatever bread you love. We used baguettes here because this is a love story about meatball subs and baguettes. Cut the bread in half lengthwise.
- Butter the bread. This is absolutely necessary because the buttery bread with the tomato sauce is heaven. Bonus points if you use garlic butter! You don’t need to toast the bread on it’s own because it’s going to get a little toasty in the oven while the cheese melts.
- Sauce your bread. After the butter, you need to sauce your bread. Some people don’t put sauce on the bottom of their subs, but I feel like you need that sauciness.
- Cheese and meatball and cheese. Top the sauce off with shaved parmesan because cheese then with some extra saucy meatballs. On top of that you need a cozy blanket of low moisture mozzarella cheese and a shower of more parmesan.
- Melt. The other side of your sandwich should get some extra sauce too. Everything is popped into the oven until the cheese gets gooey and delicious. Close it up and you’re in meatball sub heaven!
The magic comes in when you make the meatballs from scratch:
- Soak some bread in milk. Milk-soaked bread make for the tenderest most juicy meatballs out there.
- Mix everything up, but gently. Gently does it. Mix up the meat, bread, eggs, garlic, parmesan, flat leaf parsley, salt and pepper.
- Shape. Make you balls according to the size bread you’re planning on using. Don’t pack them too much.
- Braise. Add the meatballs directly to the tomato sauce and gently braise until they’re cooked through. Now they’re ready for their bread bed!
What toppings go on a meatball sub?
I keep it classic with melty mozzarella cheese and sauce but you can go for onions, peppers, mushrooms, provolone, pepperoncini, jalapeños, parsley, sky’s the limit!What kind of bread for a meatball sub?
You can use any long bread you like. We went with a baguette for these photos because of my love for baguettes but sometimes I like a soft and squishy roll like a submarine sandwich roll or hoagie roll. We’ve even made these with hot dog buns. Sliders and pull apart buns work too! -xoxo StephMeatball Sub
Super tender and tasty meatballs braised in a tomato-y sauce topped off with melty cheese in a toasty baguette.
Meatballs
- 3 cups bread (cut into small cubes)
- 1 cup milk
- 1 lb ground beef
- 3 eggs
- 3 cloves garlic
- 3/4 cups Parmigiano Reggiano cheese (grated)
- 2 tbsp fresh flat leaf parsley (finely chopped)
- 1/2 tsp kosher salt
- 1/2 tsp freshly ground pepper
- 4-5 cups basic tomato sauce (or your favorite tomato sauce)
For the subs
- 1 french demi baguette (or bread of choice)
- 4 meatballs (and sauce)
- 2-4 slices low moisture fresh mozzarella cheese
- Parmigiano Reggiano cheese (grated, to serve)
Heat the oven to 400°F. In a large skillet or saucepan with a lid, heat up your tomato sauce over medium low heat.
Place the bread cubes in a bowl and cover with milk, tossing so that all the cubes are saturated. After 1-2 minutes the bread should be soggy and wet. Using your hands, squeeze out as much milk as possible. Use your fingertips to break up the bread into very small breadcrumbs.
In a large bowl, mix together the bread, ground beef, eggs, garlic, parmesan, flat leaf parsley, salt, and freshly ground pepper. You want to mix everything so that it’s homogenous, but loose – don’t work the meatball mixture too much.
By this time your sauce should be simmering with several bubbles breaking the surface. Form large meatballs (I made 7 big ones) and drop them directly into the sauce. Simmer in the sauce, partially covered, over medium heat, flipping occasionally. Simmer gently until cooked through, about 25-30 minutes.
Cut the baguette in half so you’ll have two sandwiches, then cut lengthwise. Top both sides of the baguette with a generous amount of sauce and a bit of grated parmesan. Place the meatballs on the bottom baguette and top with slices of mozzarella and some more parmesan.
Bake until the cheese is gooey and melted. Place the top half of the sandwich on top of the meatballs and enjoy!
There will be extra meatballs leftover.
Meatballs inspired by Mario Batali.
I Am... Chinese Broccoli aka Gai Lan
One of my favorite vegetables is gai lan aka Chinese broccoli. As a Chinese person it’s essentially an everyday vegetable. Most home style Chinese meals consist of two or three dishes served with rice and almost always one of the vegetables dishes will inevitably be gai lan. It’s most often stir fried with garlic or quickly blanched and served with oyster sauce. Like broccoli it’s incredibly versatile and hearty – you can basically substitute it anywhere you have broccoli or kale.
What is Chinese broccoli
Gai lan, kai lan, Chinese broccoli, or Chinese kale, is a leafy green vegetable with thickish stems and small florets. It belongs to the cabbage group and tastes kind of like broccoli. If you’ve had broccolini, it’s very similar because broccolini is a hybrid between broccoli and gai lan. Gai lan is truly one of the most popular Chinese vegetable dishes.How to choose gai lan
There are two types of gai lan: regular and baby. Regular gai lan is larger, older, and a bit more tough. Baby gai lan is more tender and young. Sometimes you’ll see baby gai lan called mini gai lan or gai lan junior. I almost always choose to buy baby gai lan when I see it because it tends to be more tender and tasty than regular. Gai lan doesn’t have a season as it’s available all year round, which is probably why it’s so popular. Gai lan is available at all Asian grocery stores and sometimes even at regular ones. When picking out bunches of gai lan, look for stalks that are a deep green without an abundance of yellow leaves or flowers (gai lan starts to flower when it’s old). Old gai lan is super bitter and tough but the good news is it’s really easy to tell which stalks are old and which are young. Take a look at the bottom of the stalks. If they’re thick, dry and crusty, they’re too old. The stalk should go from green on the edges to creamy and translucent near the middle. If it’s solid white, it’s going to be tough and stringy. Open flowers are also a sign that the stalks are past their prime. A note on the flower buds: you can eat them! They’re perfectly edible, especially if they’re small and tight. If they haven’t flowered and opened yet the gai lan will still be tender and crisp.How to prepare gai lan
It’s super easy to prepare gai lan, all you need to do is wash and trim. Give it a good soak and wash, then trim the stems. That’s it!How to cook Chinese broccoli
There are two basic ways to cook gai lan: stir fried and blanched. Typically stir fried gai lan is made with a clear garlic sauce and blanched is served with oyster sauce.Chinese broccoli with garlic sauce
- Make the sauce: In a small bowl, whisk together some soy sauce, corn starch, chicken stock (or water), toasted sesame oil, and shaoxing wine.
- Stir fry the garlic and ginger: Heat a bit of oil in a wok or large pan over medium heat. Add garlic and ginger and cook, stirring, until soft but not brown.
- Cook the gai lan: Add the gai lan to the pan and cook for 2-4 minutes, stirring occasionally, until bright green and tender.
- Sauce it up: Add the prepared sauce to the pan and cook, until the sauce thickens a bit. Remove from the pan and enjoy!
Chinese broccoli with oyster sauce
- Make the sauce: In a small pan, add a bit of oil and cook the garlic and ginger until soft but not brown. Stir in oyster sauce, Shaoxing wine, and toasted sesame oil. Remove from the heat and set it aside.
- Cook the gai lan: Bring a large pot of water to a boil. Add a drizzle of oil and a pinch of salt to the pot. Add the gailan and cook for 2-4 minutes, until bright green and tender.
- Serve: Drain well and serve with the sauce drizzled on top.
What is oyster sauce?
Oyster sauce is a thick savory sauce with a hint of caramel sweetness and umami. It can be found in the Asian aisle of any grocery store. If you see the Lee Kum Kee bottle with the two people in boats, go for that one. It’s the premium oyster sauce which lists oysters as its first ingredient, unlike the one with the red panda label which has oysters listed further down the list.Chinese broccoli FAQ
Can you eat gai lan raw?
You can, but it’s commonly eaten cooked. Just like broccoli, raw gai lan is a personal preference. And just like broccoli, gai lan is best cooked lightly so it is tender crisp.Can you eat the leaves and flowers?
Yes, you can eat both! The leaves cook slightly faster than the stalks. If your gai lan stalks are super thick, you might want to trim the leaves from the stalks and cook the stalks first then add the leaves at the end.How do you store gai lan?
If it’s uncooked, keep it in the fridge in the crisper. Cooked gai lan can be keep, tightly covered for up to 3 days.What flavors taste best with gai lan?
Asian flavors work really well: oyster sauce, soy sauce, garlic, ginger, scallions, toasted sesame.What can I use Chinese broccoli in?
You can use it in stir fries, soups and stews, pastas, fried rice, and as a side. It’s a very versatile vegetable.What to serve with Chinese broccoli
Make a home style Chinese feast!Chinese Broccoli Recipe
How to make perfect Chinese broccoli aka gai lan two ways
- 1 lb gai lan (trimmed, aka Chinese broccoli)
- 1 tbsp neutral oil
- 2 cloves garlic (minced)
- 2 tsp ginger (grated)
Garlic sauce
- 1/3 cup chicken stock (low sodium preferred, or stock of choice)
- 2 tsp soy sauce
- 1 tsp cornstarch
- 1 tsp Shaoxing wine (optional but highly recommended)
- 1 tsp toasted sesame oil
Oyster sauce
- 2 tsp oyster sauce
- 1 tsp Shaoxing wine (optional but highly recommended)
- 1 tsp toasted sesame oil
Stir Fried Gai Lan with Garlic Sauce
In a small bowl, whisk together the chicken stock (or water or vegetable sauce), soy sauce, corn starch, Shaoxing wine, and toasted sesame oil. Set aside.
In a wok or large pan, heat up the oil over medium heat. Add the garlic and ginger and cook, stirring, until soft but not brown.
Turn the heat up to medium high and add the gai lan to the pan and cook, stirring occasionally, until the gai lan is bright green and tender-crisp, about 2-4 minutes depending on size.
Add the prepared sauce to the pan and let it come to a simmer and reduce slightly.
Blanched Gai Lan with Oyster Sauce
Bring a large pot of water to a boil. While the water is coming to a boil, make the sauce: In a small pot, heat up half of the oil over medium heat. Add the garlic and ginger and cook, stirring, until soft but not brown. Stir in oyster sauce, Shaoxing wine, and toasted sesame oil. Remove from the heat and set it aside.
Add the remaining oil to the boiling water as well as a pinch of salt. Add the gai lan and cook, until bright green and tender-crisp, about 2-4 minutes, depending on size. Drain well.
Serve the gai lan with the oyster sauce drizzled on top.
The oyster sauce version contains 100mg more sodium and 1g more carb(sugar) per serving than shown, otherwise estimated nutrition is the same for both versions.
I Am... Thai Basil Chicken
If you’re looking for a super flavorful quick and easy dinner, this Thai basil chicken stir fry is for you I LOVE Thai basil chicken. It gets my heart rate going not only because it’s perfectly spicy but also because it’s delicious. This is a super easy stir fry that is an incredible taste payoff for minimal prep. Goodbye delivery and hello home cooked meal!
What is Thai basil chicken?
Thai basil chicken is a super popular Thai stir-fry dish that’s eaten both at home, in restaurants, and from street food stalls. The main ingredients are chicken, Thai basil, garlic, Thai chilis, and sauce. Sometimes it’s served up with a crispy fried egg. It’s one of our go-tos when we’re craving Thai food.How to Make Thai Basil Chicken Stir Fry
1. Prep all of the ingredients: make the sauce by mixing together oyster sauce, soy sauce, dark soy sauce, and sugar in a small bowl. Mince the garlic (a garlic press is your friend!), chop the chilies, wash and dry the basil, and cut your chicken pieces up into even chunks. 2. Fry the aromatics: heat up some oil a wok or frying pan then very briefly lightly fry the garlic and chilis. 3. Fry the chicken: add the chicken and cook, stirring until golden and cooked. 4. Sauce: stir in the sauce and reduce. 5. Basil: take the pan off the heat and mix in the basil. Enjoy! Faster than getting your delivery order, am I right?!What You Need to Make Thai Basil Chicken
Sugar, oil, garlic, chicken thighs – you can sub chicken breast too but chicken thighs are juicier and more flavorful. Oyster Sauce Oyster sauce is a thick and flavorful brown sauce that can be found in the Asian aisle of any grocery store. If you see the Lee Kum Kee bottle with the two people in boats, go for that one. It’s the premium oyster sauce which lists oysters as its first ingredient, unlike the one with the red panda label which has oysters listed further down the list. Dark Soy Sauce You need both soy sauce and dark soy sauce for this dish - regular soy sauce adds salt and umami soy flavor; the dark adds a hint of caramel and color. If you don’t have dark soy sauce at home, you can skip out on it – your stir fry just won’t be as dark and glossy brown – but you should also give it a try. You can buy dark soy sauce easily online, and it will take your Asian/Chinese food to the next level. Once you buy a bottle, you can also use it for: Soy Sauce Chow Mein, Zha Jiang Mian, and Taiwanese 3 Cup Chicken. Thai Chilies Thai red chilies are very, very spicy. Frying them mellows out the spice a little, but if you’re not a spice fiend, seed your chillies (use gloves!) or decrease the amount. Thai Basil The correct kind of basil to use for pad krapow gai is Thai holy basil. It can be incredibly difficult to buy outside of Thailand so the best sub you can use is regular Thai basil. Thai basil has a very slight licorice/fennel flavor to it that is super distinct. They sell Thai basil at most Asian grocery stores but if you can’t find it, you can sub regular sweet basil instead.Ground chicken vs chicken thighs vs chicken breasts
You’ll see Thai basil chicken made with ground chicken or cut up pieces of chicken thighs or breasts. In Thailand, the meat is cut up quite small, which is why you see minced/ground chicken as the most used protein for Thai basil chicken in North America. I’ve made it with both and it’s really about what you prefer. If you don’t want to break out your knife to chop your chicken, using ground chicken is not just acceptable, pretty much standard everywhere including Thailand. And if you like your chopped chicken in larger or smaller pieces, that’s alright too! I tend to like my chicken pieces on the heartier side and Mike likes ground chicken so we make it both ways.What to eat it with
This recipe makes just enough sauce to coat the chicken plus a little extra for spooning on to your fluffy white rice. It’s a pretty flavorful (and by that I mean salty) so don’t be tempted to up the sauce amounts, it will be enough! Speaking of sauce, this is meant to be eaten with fluffy white rice! The sauce and chicken go perfectly with the blank canvas rice provides. Of course if you want you can have it over your grain of choice or even noodles. Add some cucumbers for a bit of freshness and crunch or a crispy fried egg for some extra savory goodness. Like all stir-fries, once you get going, it goes fast, so be sure to have all your ingredients prepped and sauces measured out before you even turn on the heat.Is it spicy?
Yes, traditionally it is, but it doesn’t have to be. If you aren’t a spice head, feel free to decrease the chili amount, de-seed the chilis, or leave them out entirely. chicken and rice forever, xoxo stephThai Basil Chicken Recipe
This quick and easy Thai classic is an incredible taste payoff for minimal work.
- 2 tsp oyster sauce
- 1 tsp soy sauce
- 1 tsp dark soy sauce
- 1 tsp sugar
- 1 tbsp oil
- 5 cloves garlic (minced)
- 3-4 Thai bird’s eye chili (deseeded and finely chopped, see note)
- 1/2 lb boneless skinless chicken thighs (cut into 1 inch chunks)
- 20-30 leaves Thai basil
- crispy fried egg (if desired)
- rice (to serve)
In a small bowl, mix together 2 tablespoons of water with the oyster sauce, soy sauce, dark soy sauce, and sugar.
Heat the oil in a wok or frying pan over medium high heat. When hot and shimmery, add the garlic and chili, stirring, for about 10-30 seconds – you don’t want them to burn or brown.
Add in the chicken and cook, tossing, until golden brown and cooked through.
Add the sauce and cook until the sauce reduces slightly and coats the chicken.
Remove the pan from the heat and stir in the basil.
Enjoy immediately with fluffy white rice and a crispy egg, if desired.
Estimated nutrition does not include rice or egg.
I Am... Mint Snowman Marshmallows
I think snowman marshmallows might be my favorite ever marshmallows. Especially if they’re mint flavored and homemade. These mint snowman marshmallows are so incredibly festive and cute; they never fail to get me into the holiday mood. If you’ve never had homemade marshmallows and you’re a fan of marshmallows in general, you need to make marshmallows from scratch. They’re like a whole other species: super soft, fluffy and plush. They just melt in your mouth. Honestly, I think clouds probably taste like super puffy marshmallows. Homemade marshmallows probably seem a bit intimidating, but they’re actually pretty simple. The only caveat is that you need a stand mixer because the marshmallow mixture is whipped for over 20 minutes and it gets super thick and fluffy which will basically make your arm fall off if you try to do it by hand.
How to make homemade marshmallows
- Prep your pan. Butter and use powdered sugar to lightly dust a pan or glass baking dish.
- Bloom the gelatin. Add the gelatin to some cold water in the bowl of your stand mixer and let sit/bloom.
- Heat up sugar, corn syrup, and water to 240°-245°F, the firm ball candy stage. If you have a candy thermometer, clip it into your pan, making sure the bulb isn’t touching the base, otherwise it’ll get a false reading.
- Slowly add the hot sugar to the gelatin in the bowl of the stand mixer. Then whip until fluffy and marshmallow-y.
- After you have marshmallow fluff, it’s time to spread it in the pan and let it cure until firm.
- After that, you can cut it out and decorate it. You did it, you made marshmallows!
Marshmallow ingredients
- Sugar - regular granulated white sugar is the bulk of this recipe
- Corn syrup - this helps prevent the sugar from crystallizing and keeps your marshmallows super soft
- Gelatin - gelatin is what’s going to set the marshmallows
- Mint extract - these guys are mint marshmallows and a little bit of mint extract is what gives them that coolminty flavor. These marshmallows are amazing in hot chocolate! If you’re not a fan of mint, feel free to use the extract of your choice
Do I need a stand mixer to make homemade marshmallows?
Unfortunately, yes. The hot sugar and gelatin mixture takes about 20 minutes to whip up on high and the fluffier it gets, the stickier and more difficult it is to whip. Our current mixer is the KitchenAid Artisan Mini and it's awesome, but sold out everywhere as of this writing. There are some available on amazon still, although refurbished.Why make snowman marshmallows
- You love projects and you’re tired of making sourdough
- You’ve never made candy before - this is a great first candy to make!
- You love marshmallows and these are pure melt in your mouth fluffiness
- You want to see little snowman faces melting away in your hot chocolate
What if i don’t have time to make homemade marshmallows?
You can make these snowmen with store bought marshmallows!- Cut jumbo marshmallows in half with a pair of scissors.
- Dip the sticky sides into icing sugar, then shake off the excess.
- Decorate with melted orange candy melts noses and melted dark chocolate eyes and mouths.
How to store homemade marshmallows
There’s no denying it, these guys have a lot of sugar in them. But, because they’re most all all sugar, they keep for a really long time. Make sure they’re in an air tight container and keep them at room temp - they’ll stay soft and squishy for up to 3 weeks. I hope you have a chance to make these little guys! They are so worth it as a pick-me up on a random winter afternoon. Their little faces melting will definitely make you squee with the cuteness.More fun holiday projects
- Super Simple Cut-Out Gingerbread Cookies
- Mini Gingerbread Houses
- Pull Apart Christmas Bread
- Peppermint Bark Crepe Cake Recipe
- Peppermint Bark Cookies
- Festive Caramel Corn and Rice Krispie Mix
- Small Batch Cookies – 1 Egg to 4 Cookies: Snickerdoodle, Chocolate Chip, Sugar, and Ginger
- Dark Chocolatey Drizzled Flaky Sea Salt Kettle Corn
- Gingerbread Corgi Cookies
Mint Snowman Marshmallows
- stand mixer
- 1 tbsp gelatin (1 envelope)
- 1 cup sugar
- 2 tbsp corn syrup
- 1 pinch salt
- 1/4 tsp mint extract
- 1/2 cup powdered sugar
- 1/4 cup candy melts (orange)
- 1/4 cup dark chocolate (chopped)
Prep
Bloom the gelatin: In the bowl of your stand mixer, pour in 1/4 cup of cold water. Sprinkle the gelatin on top and mix to moisten.
Pan: lightly butter an 8x8 inch pan, then dust with icing sugar. If desired, line with parchment paper.
Tools: Lightly butter a spatula and an offset spatula.
Marshmallows
In a pot, mix together the sugar, corn syrup and 1/4 cup water. Stir until the sugar is incorporated and wet, then bring to a gentle boil over medium high heat, swirling occasionally to distribute the heat. Heat until the mixture reaches 240°-245°F. When the sugar mix comes to temp, remove it from the heat and let the bubbles subside. Sprinkle in a bit of salt and add the mint extract to the gelatin. Carefully pour the sugar into the bowl of the stand mixer.
With the whisk attachment, turn the stand mixer to low and beat for 2 minutes. Increase the speed to high and whip until the marshmallows double to triple in size and are fluffy and white, about 10-15 minutes.
When the marshmallows are full and white and fluffy, use your buttered spatula to help pour them into the prepared 8x8 pan. Smooth out with the buttered offset spatula and lightly dust the tops with powdered sugar. Let cure in the pan for 3-6 hours.
Remove the marshmallows from the pan and place on an icing sugar dusting cutting board. Lightly butter a 1 inch round cutter and cut out snowmen heads.
Dust with powdered sugar and use melted orange candy melts and dark chocolate to pipe on eyes, mouths, and noses. Let set then enjoy as is or in hot chocolate!
Storage: Store in an air tight container at room temp for up to 3 weeks.
Estimated nutrition assumes you're not consuming all the candy melts and dark chocolate, only enough to make the snowman faces.
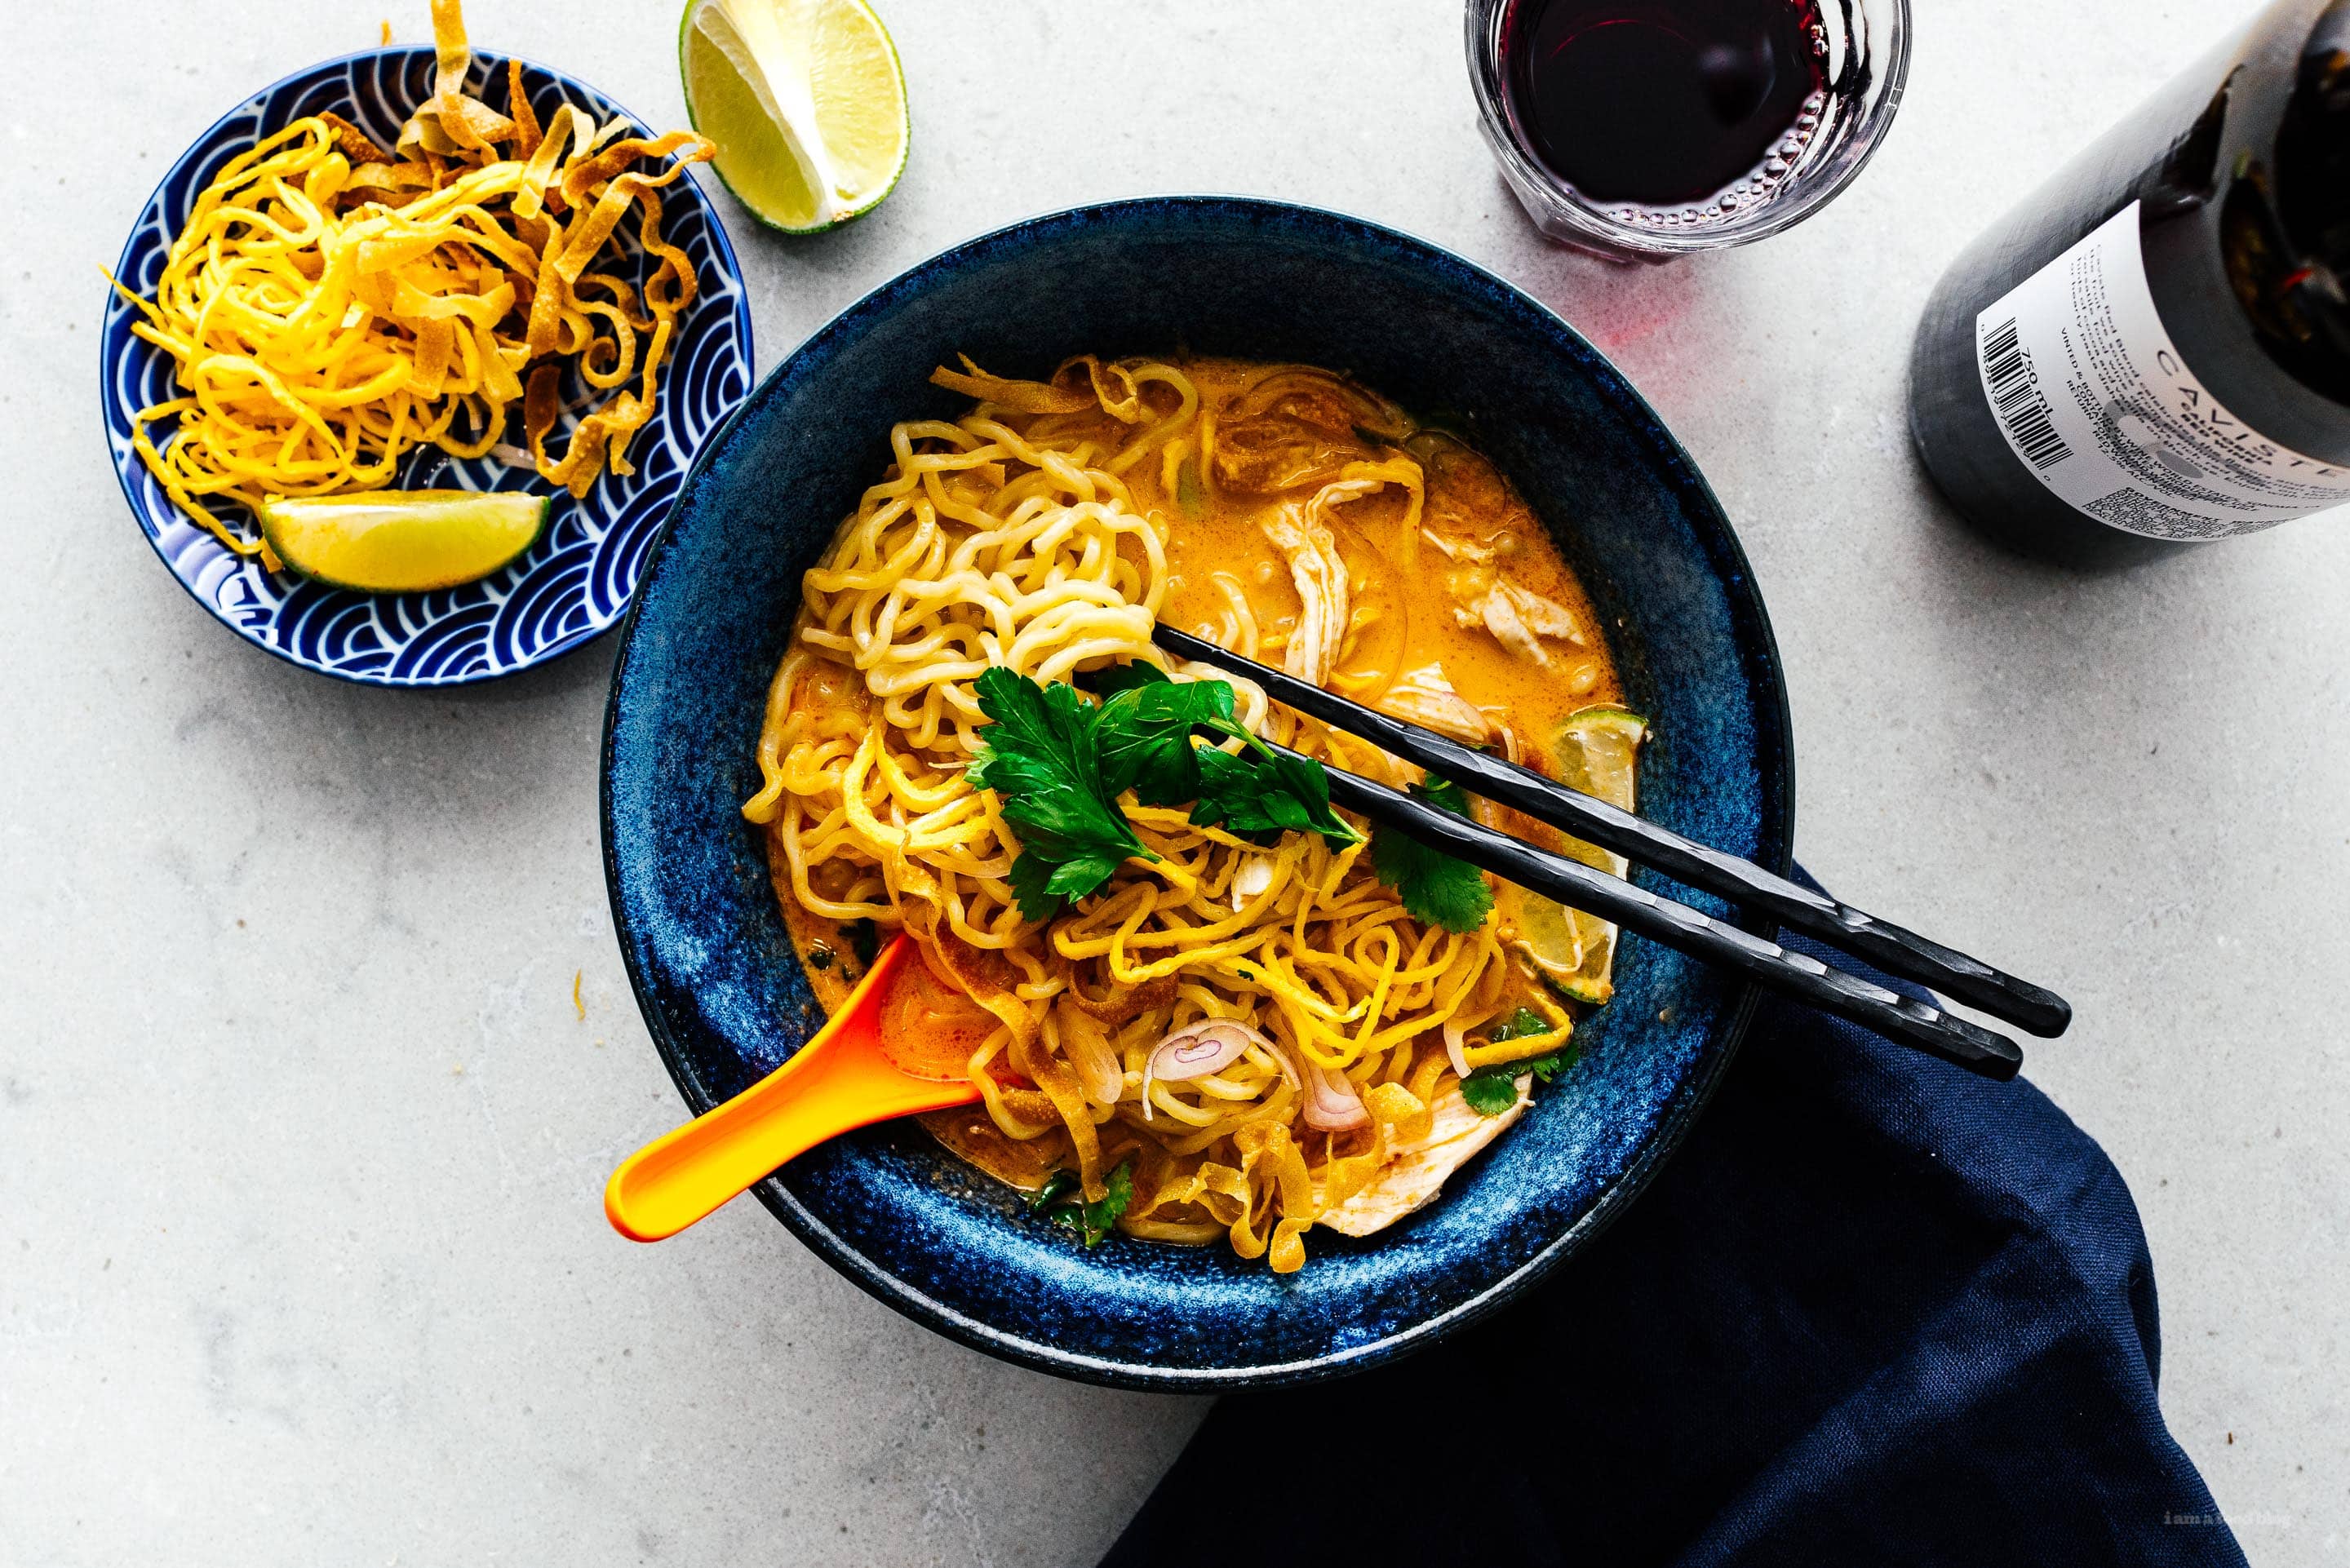
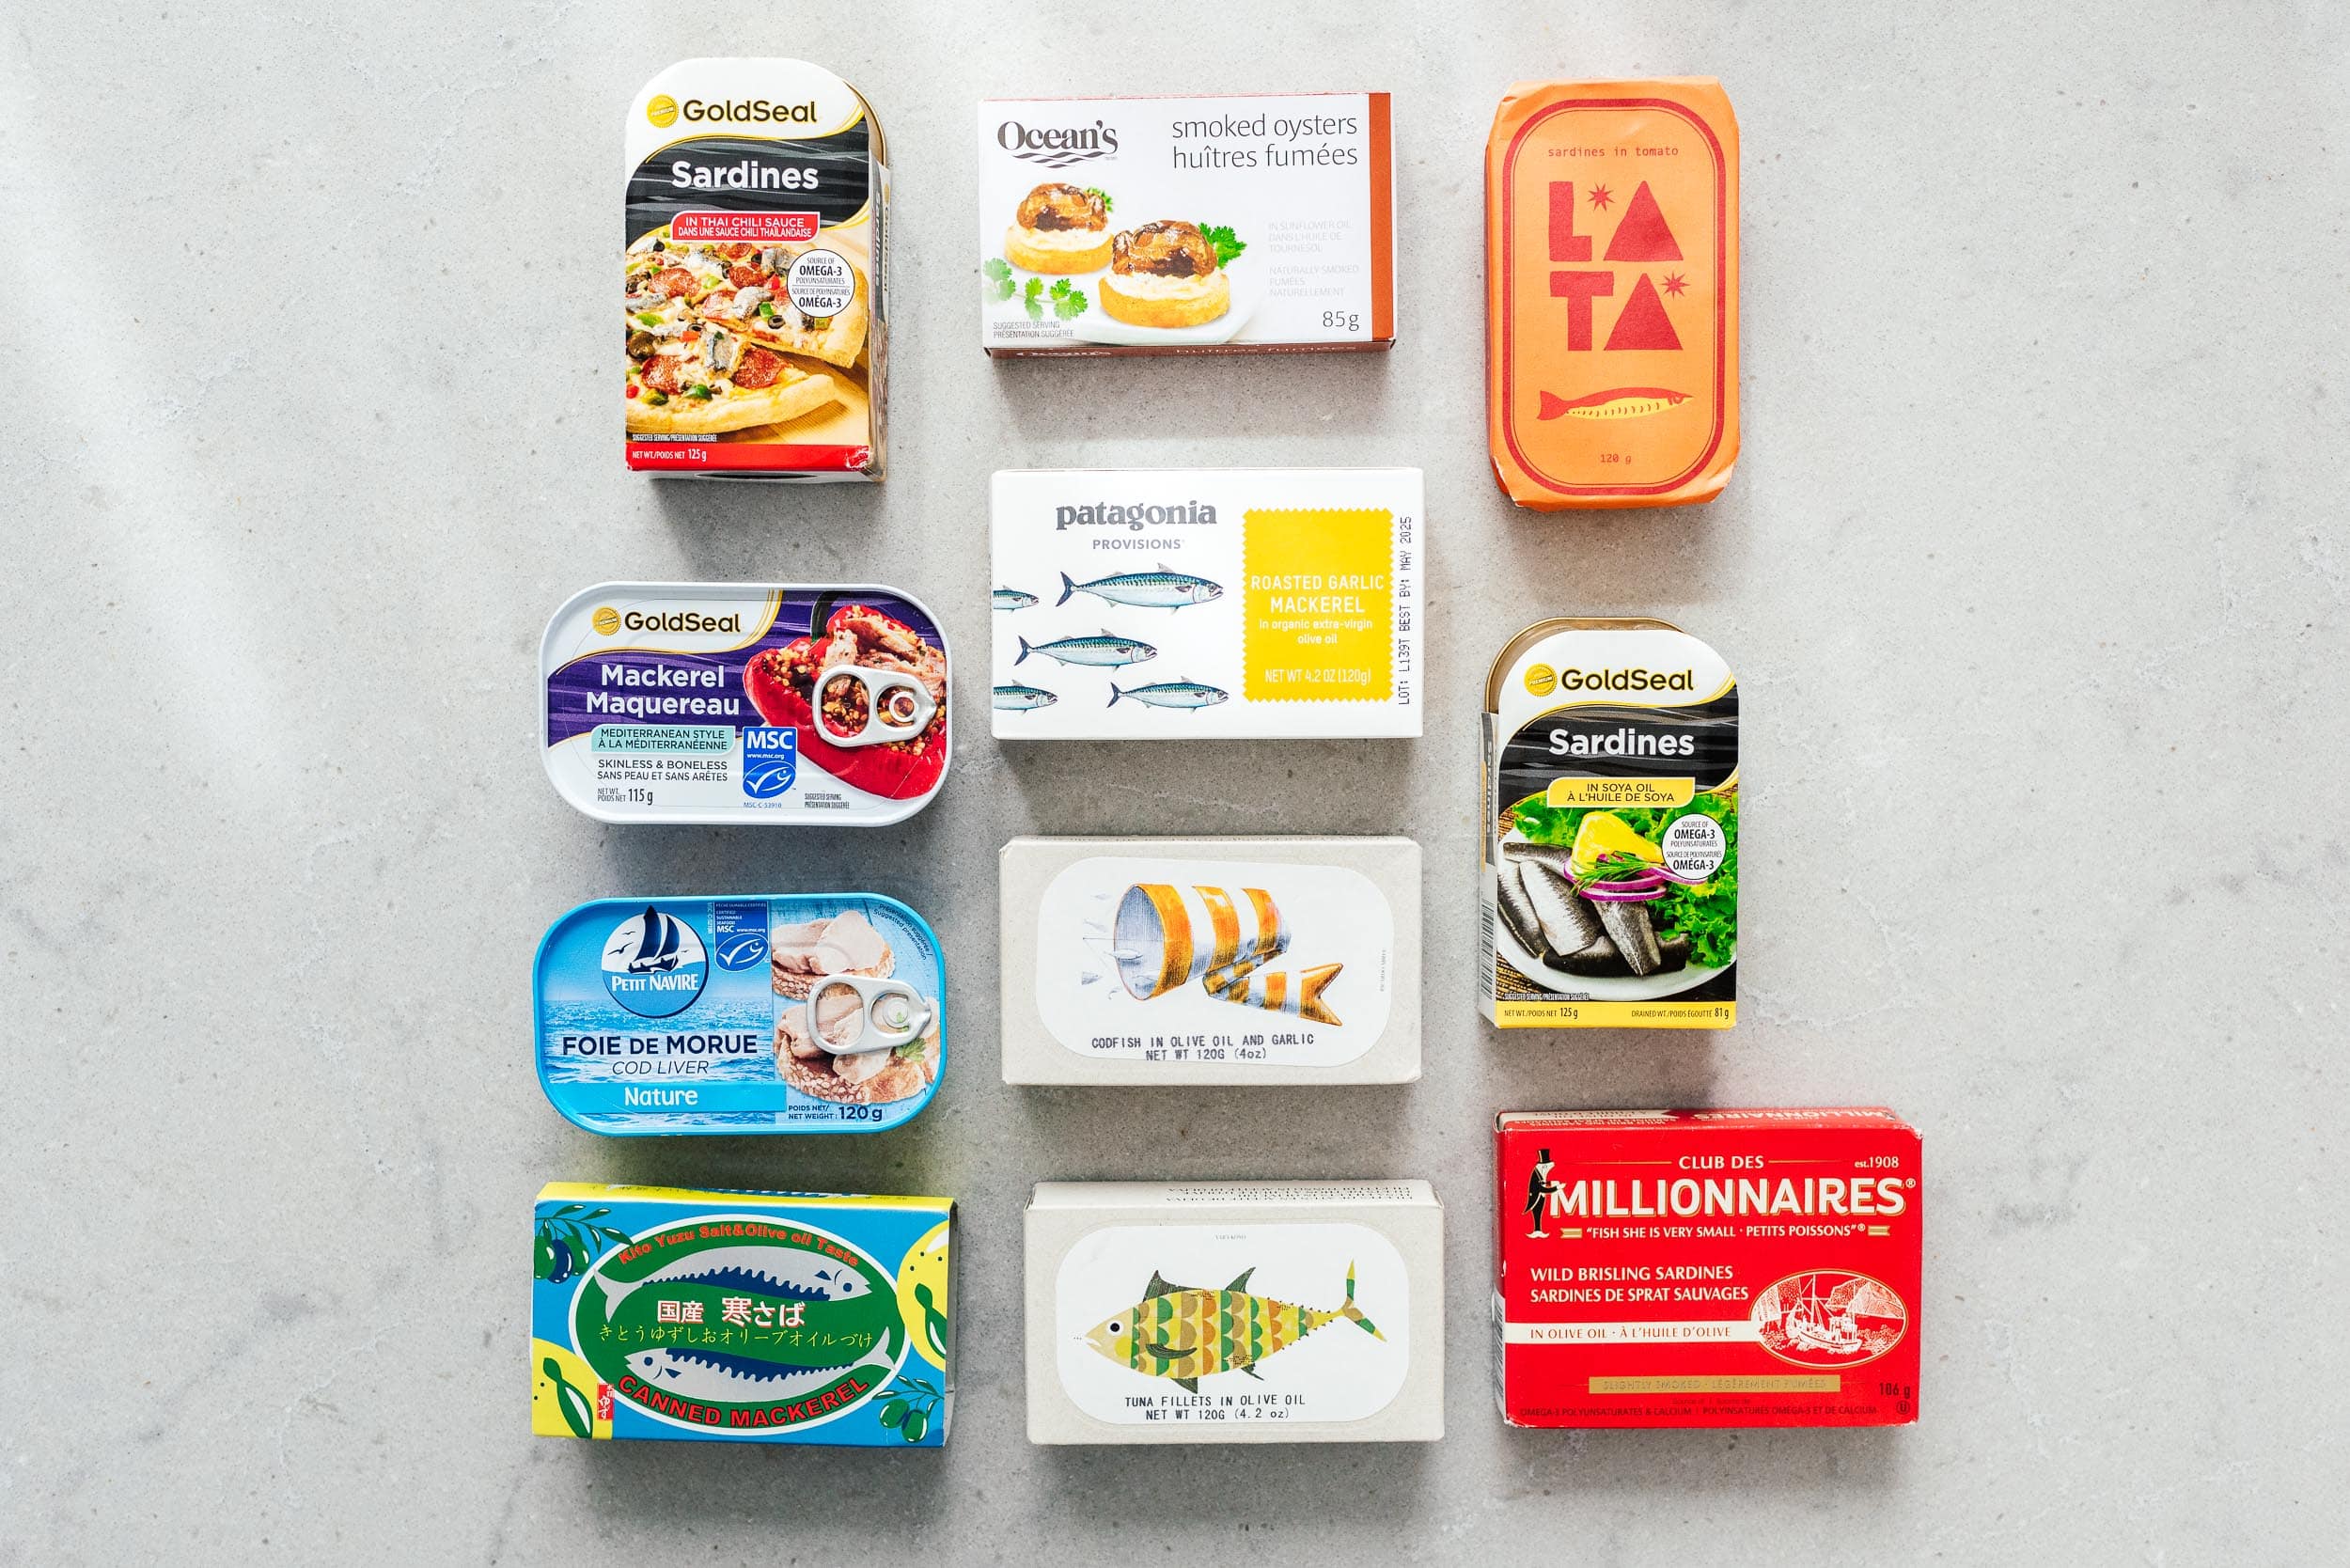
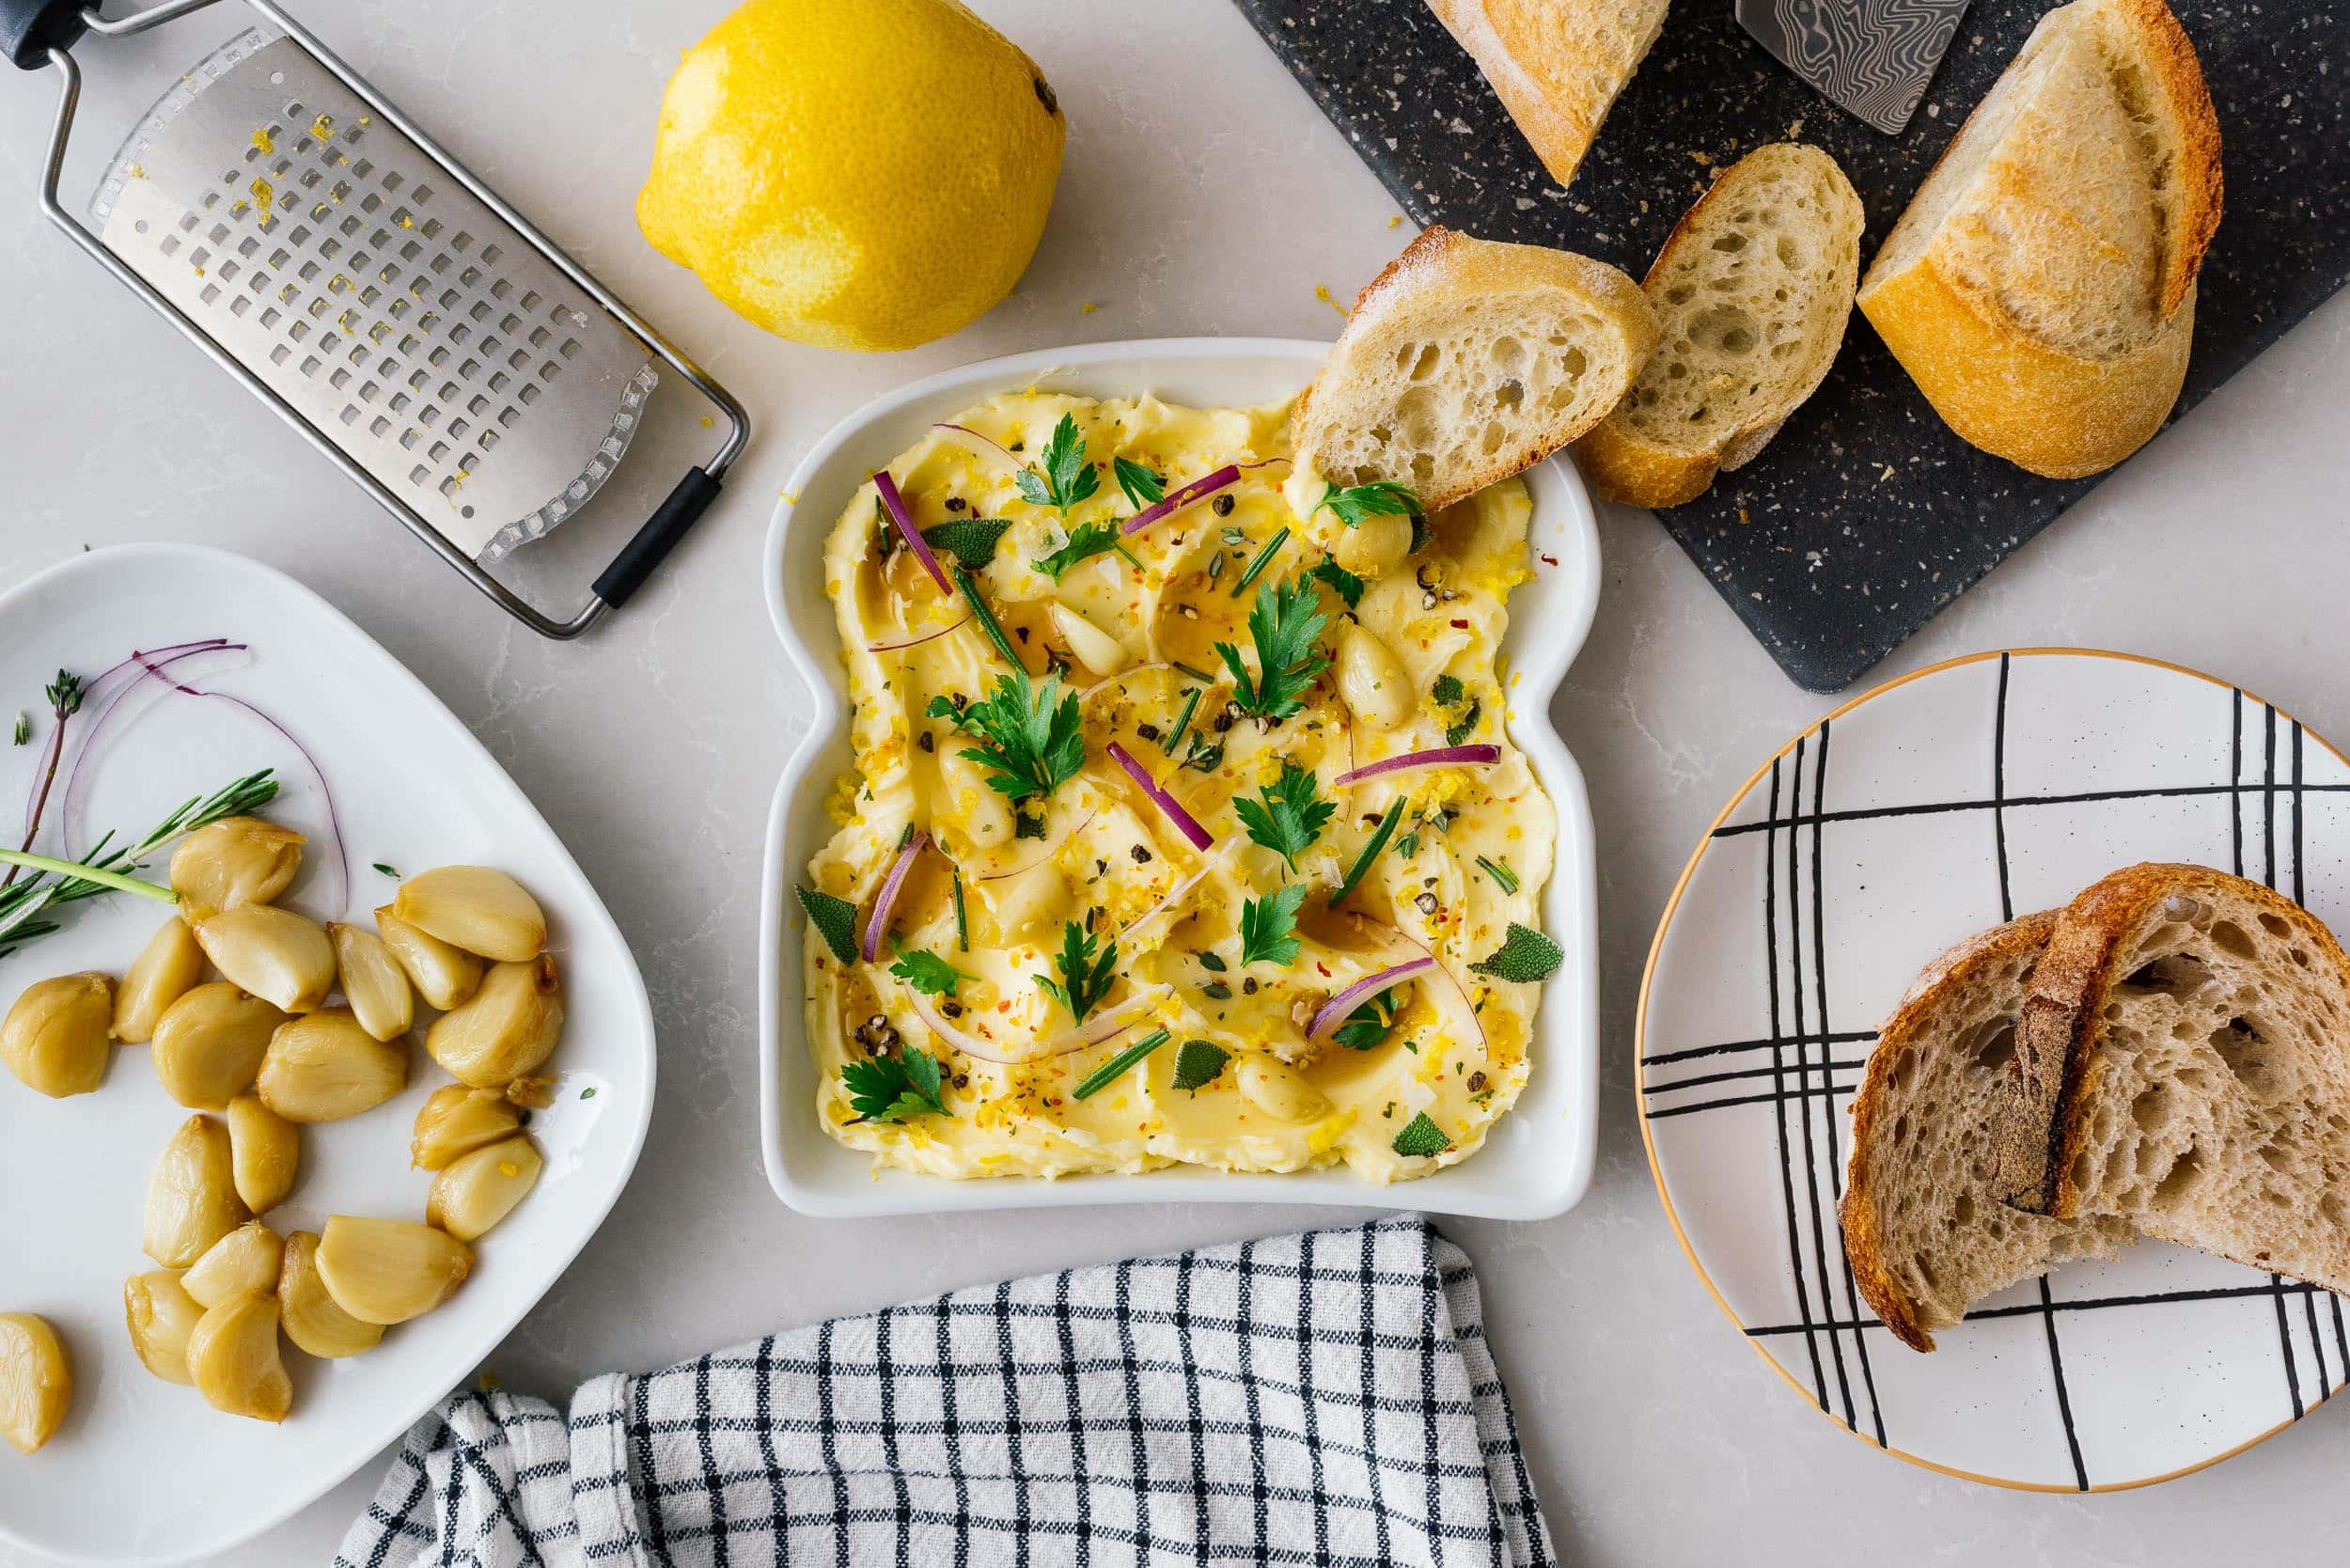

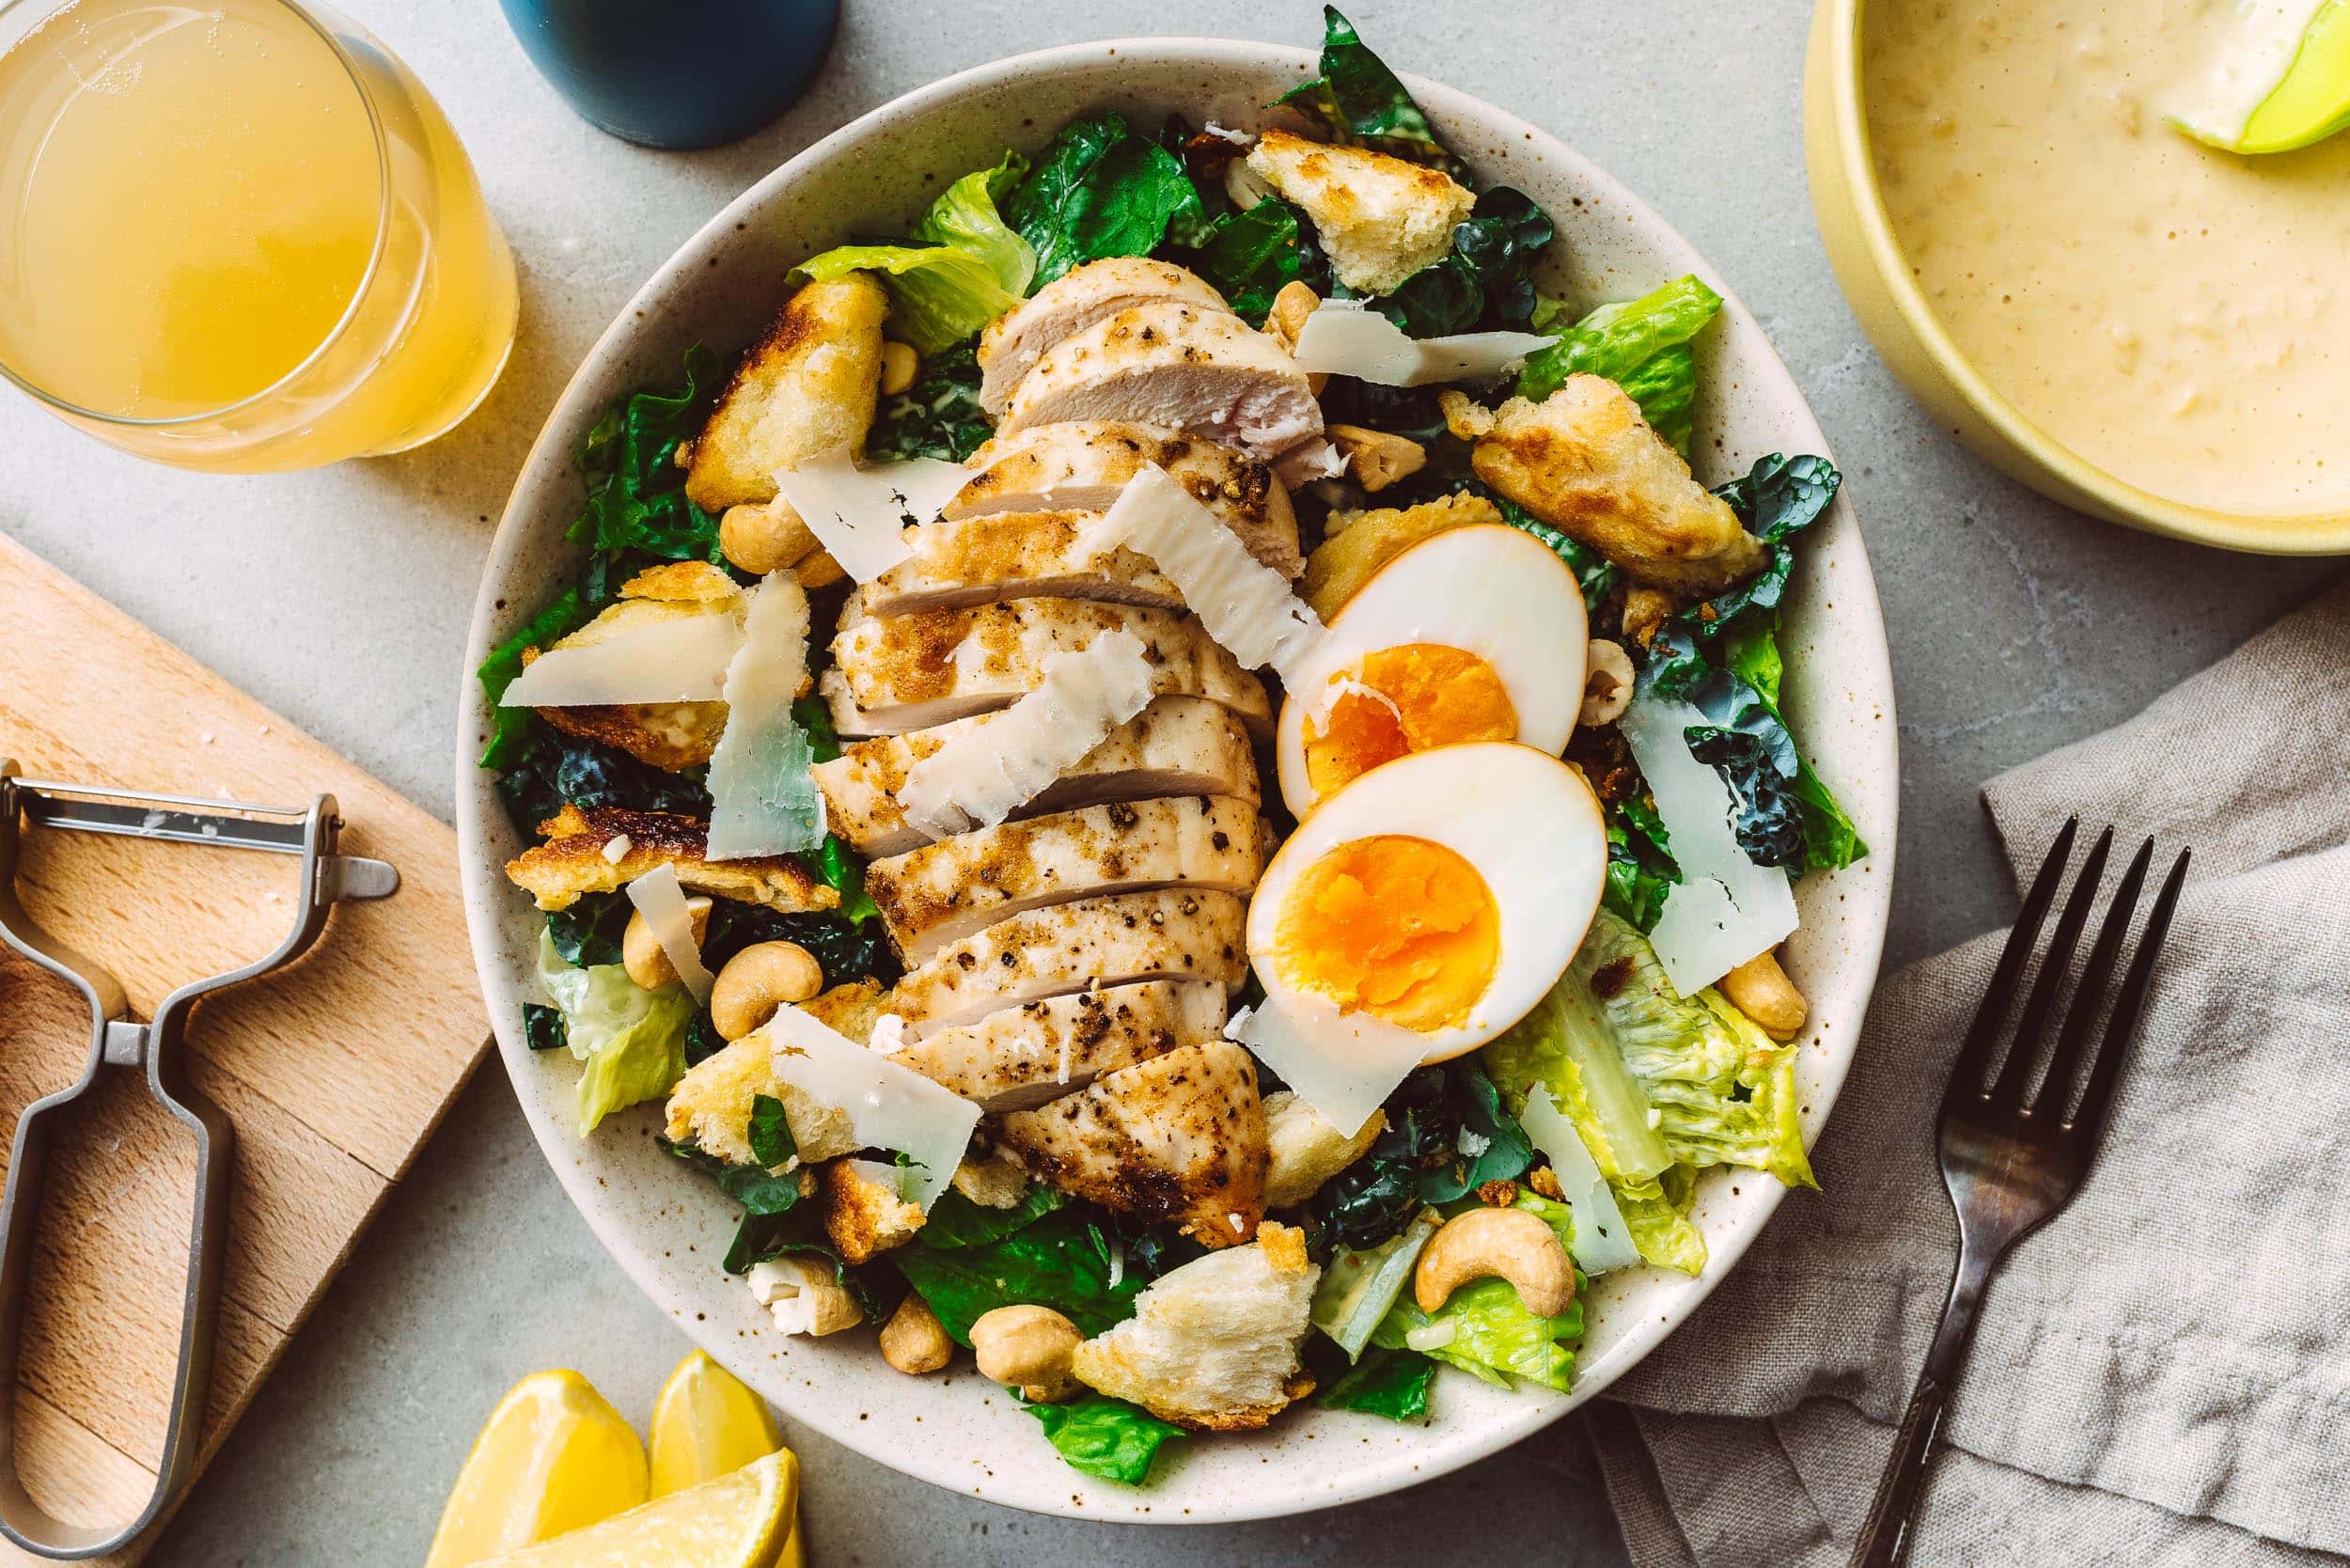
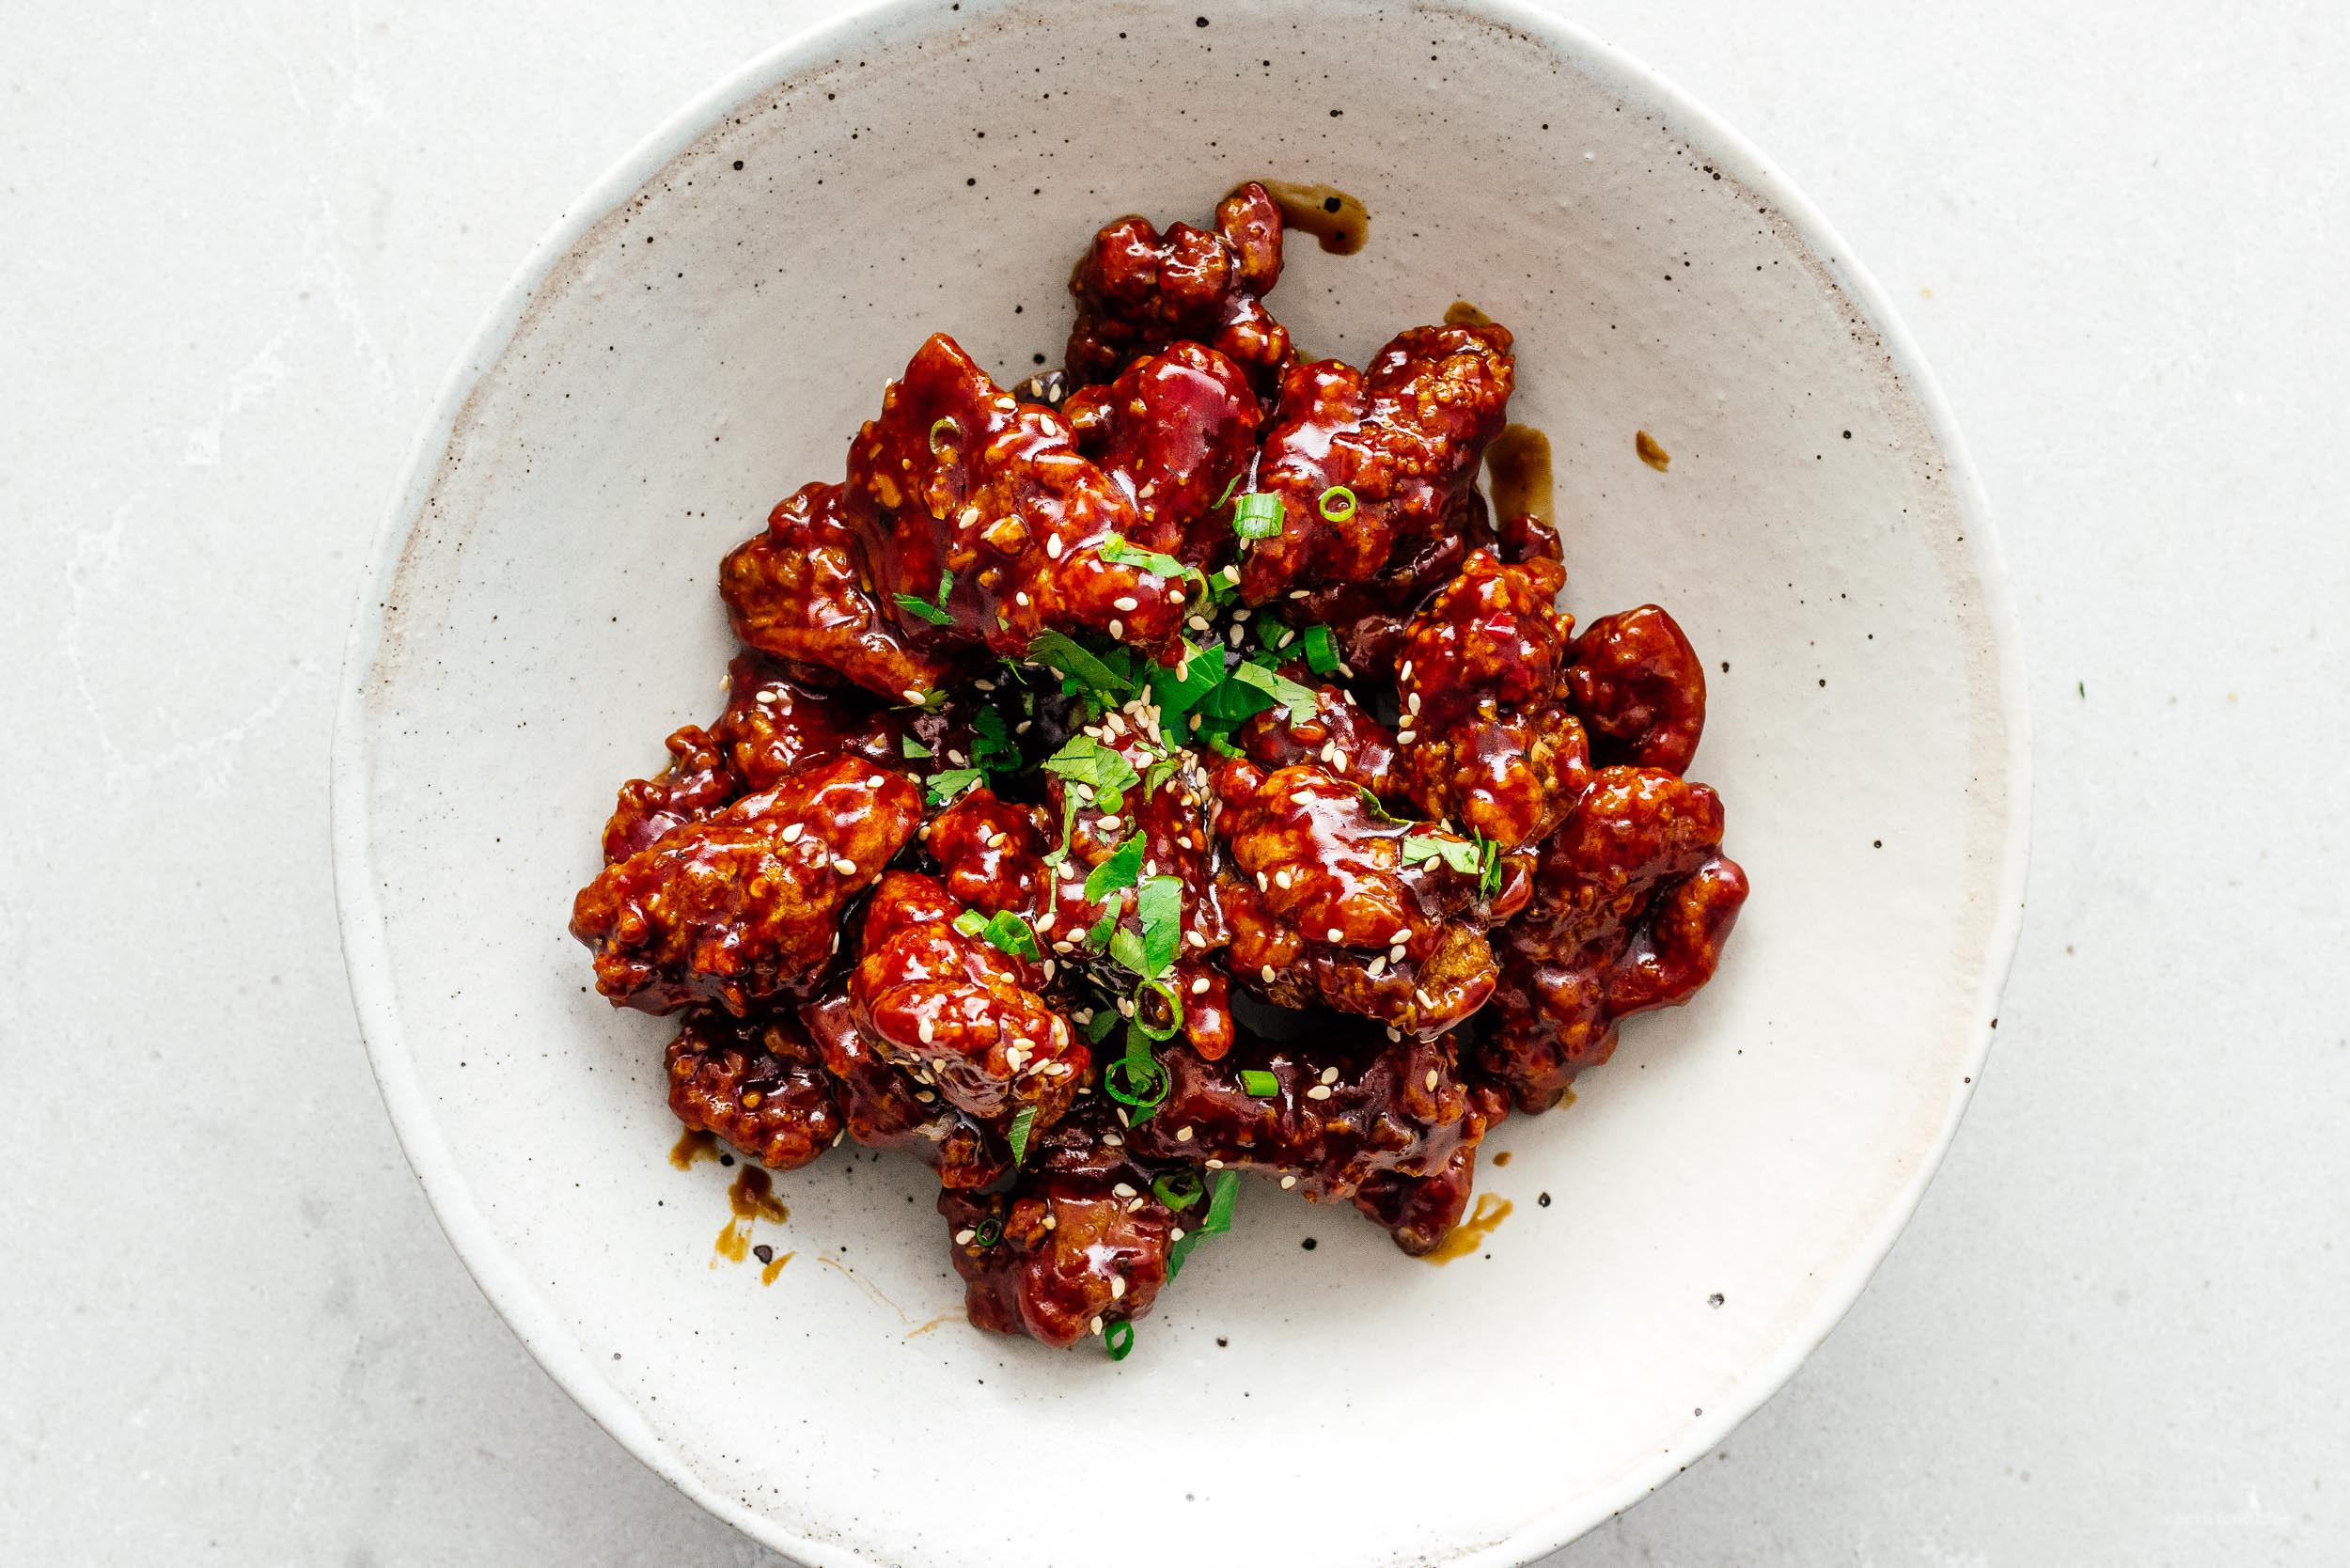
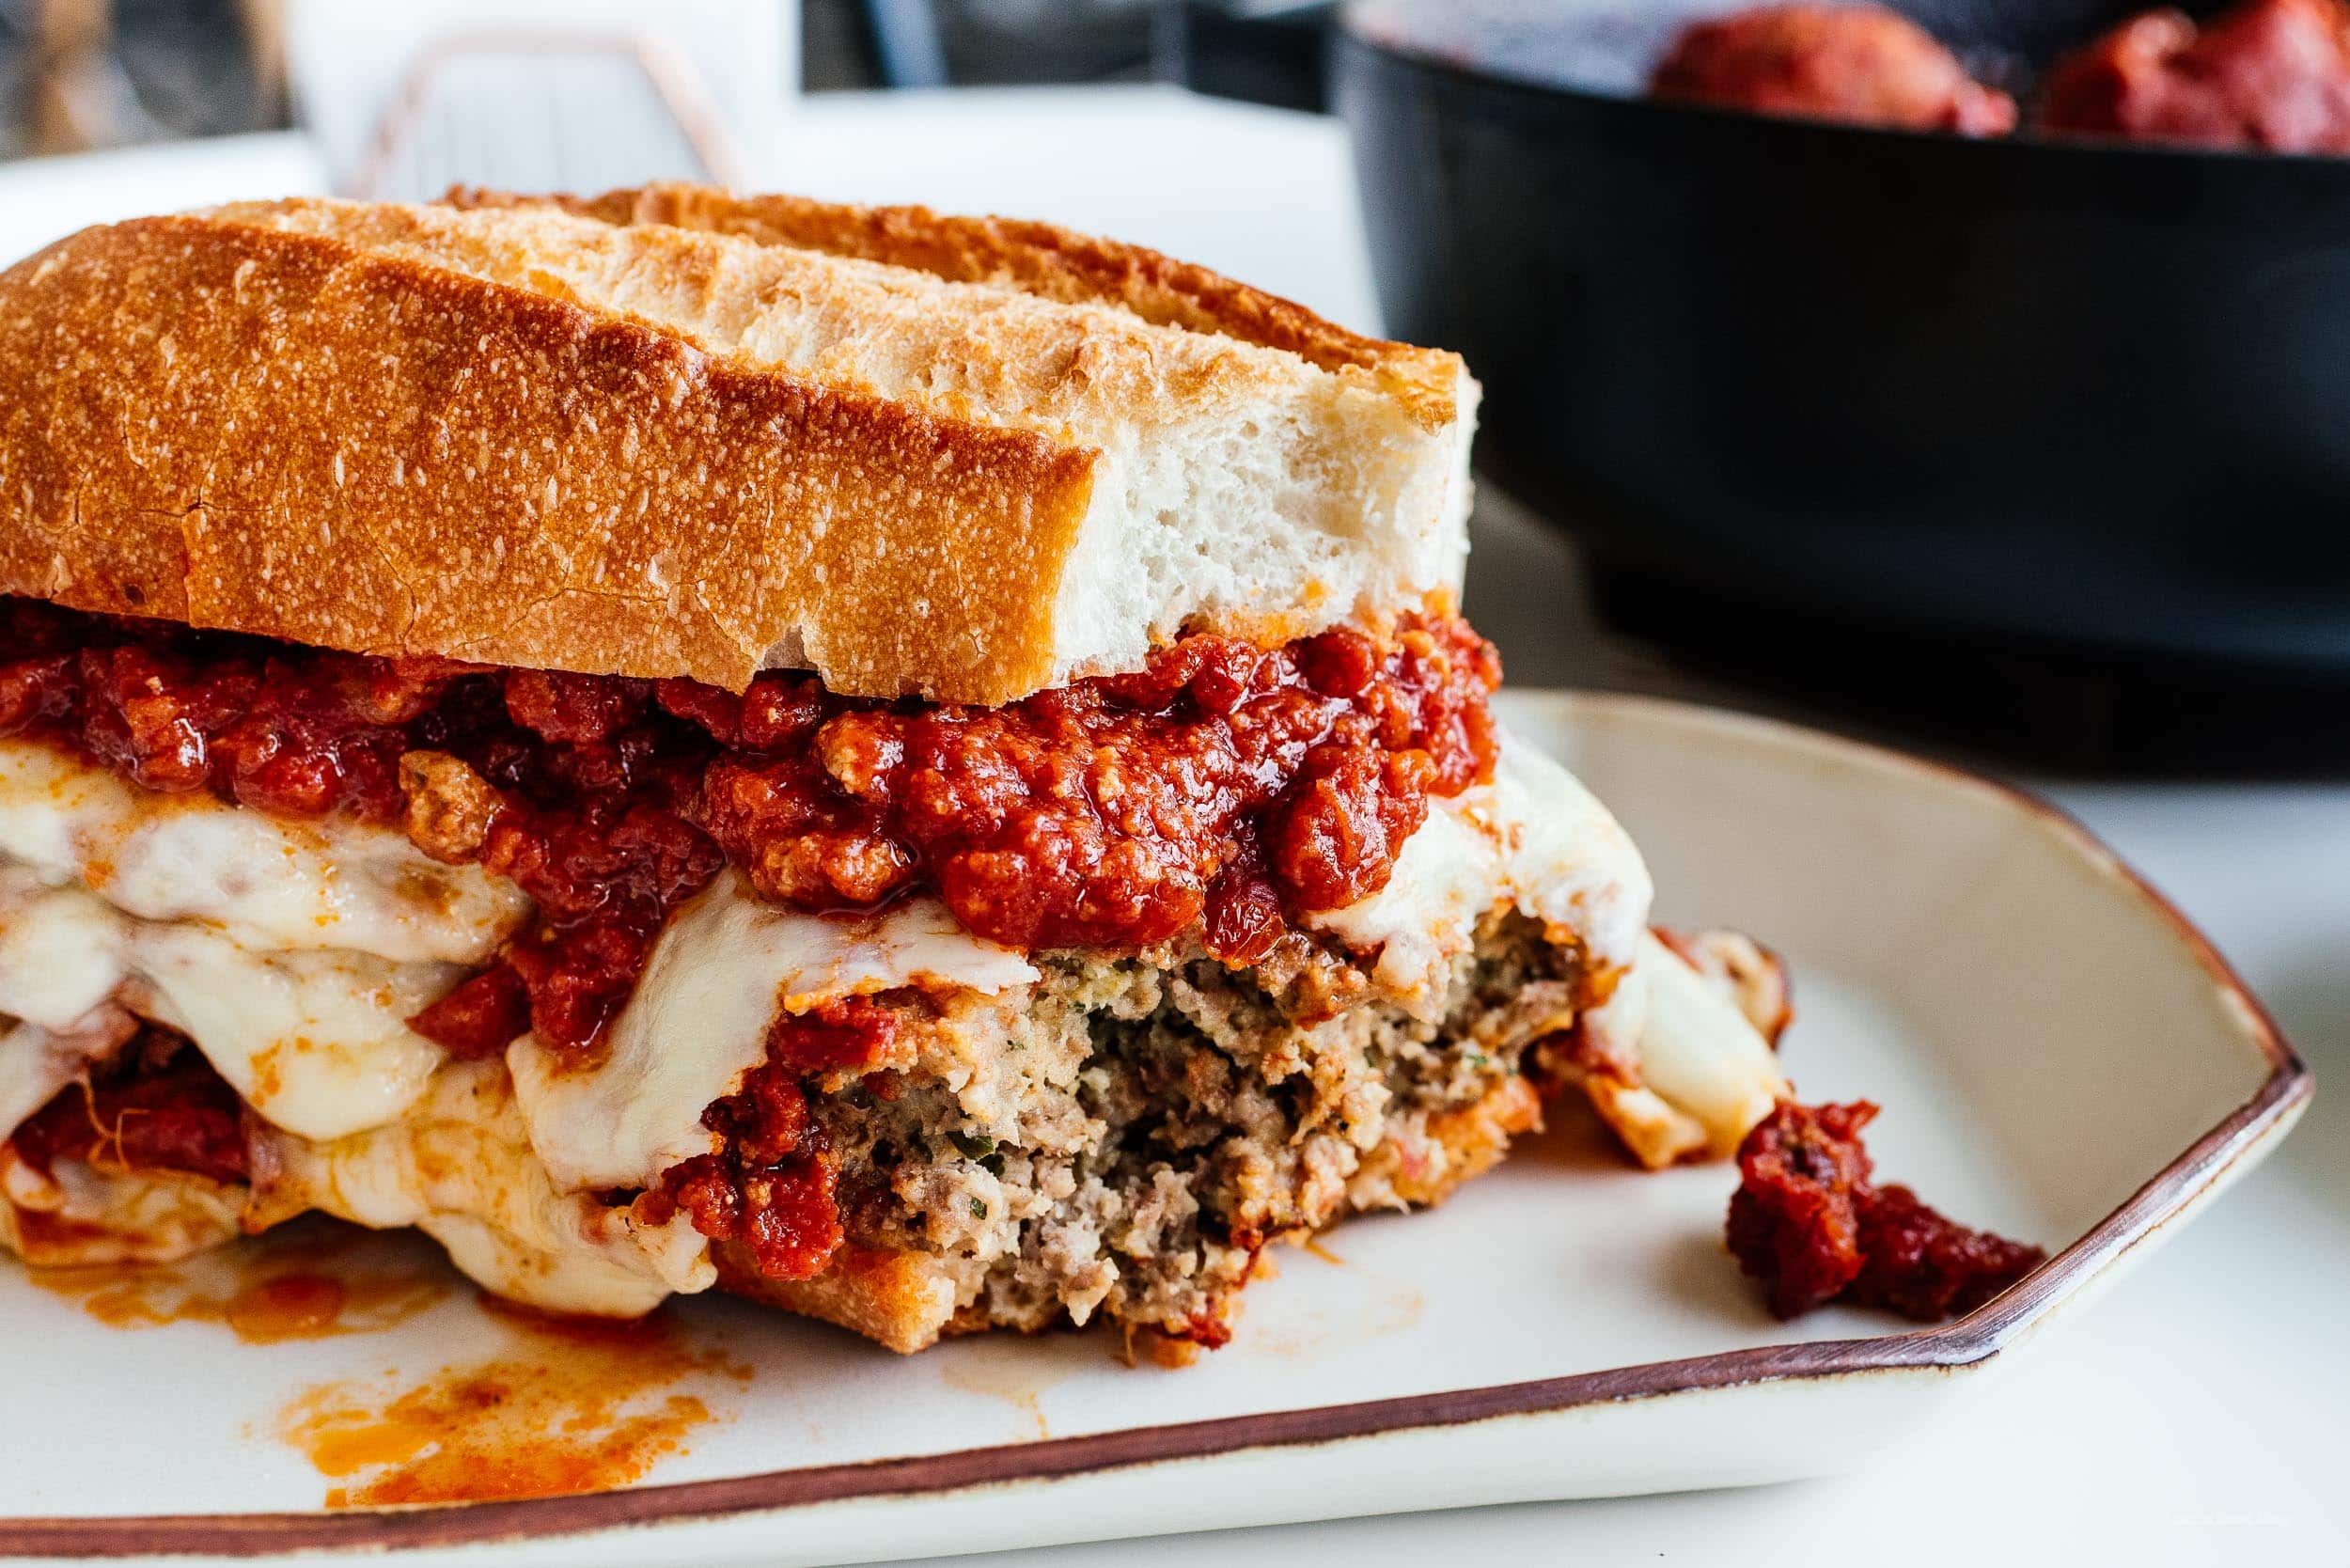
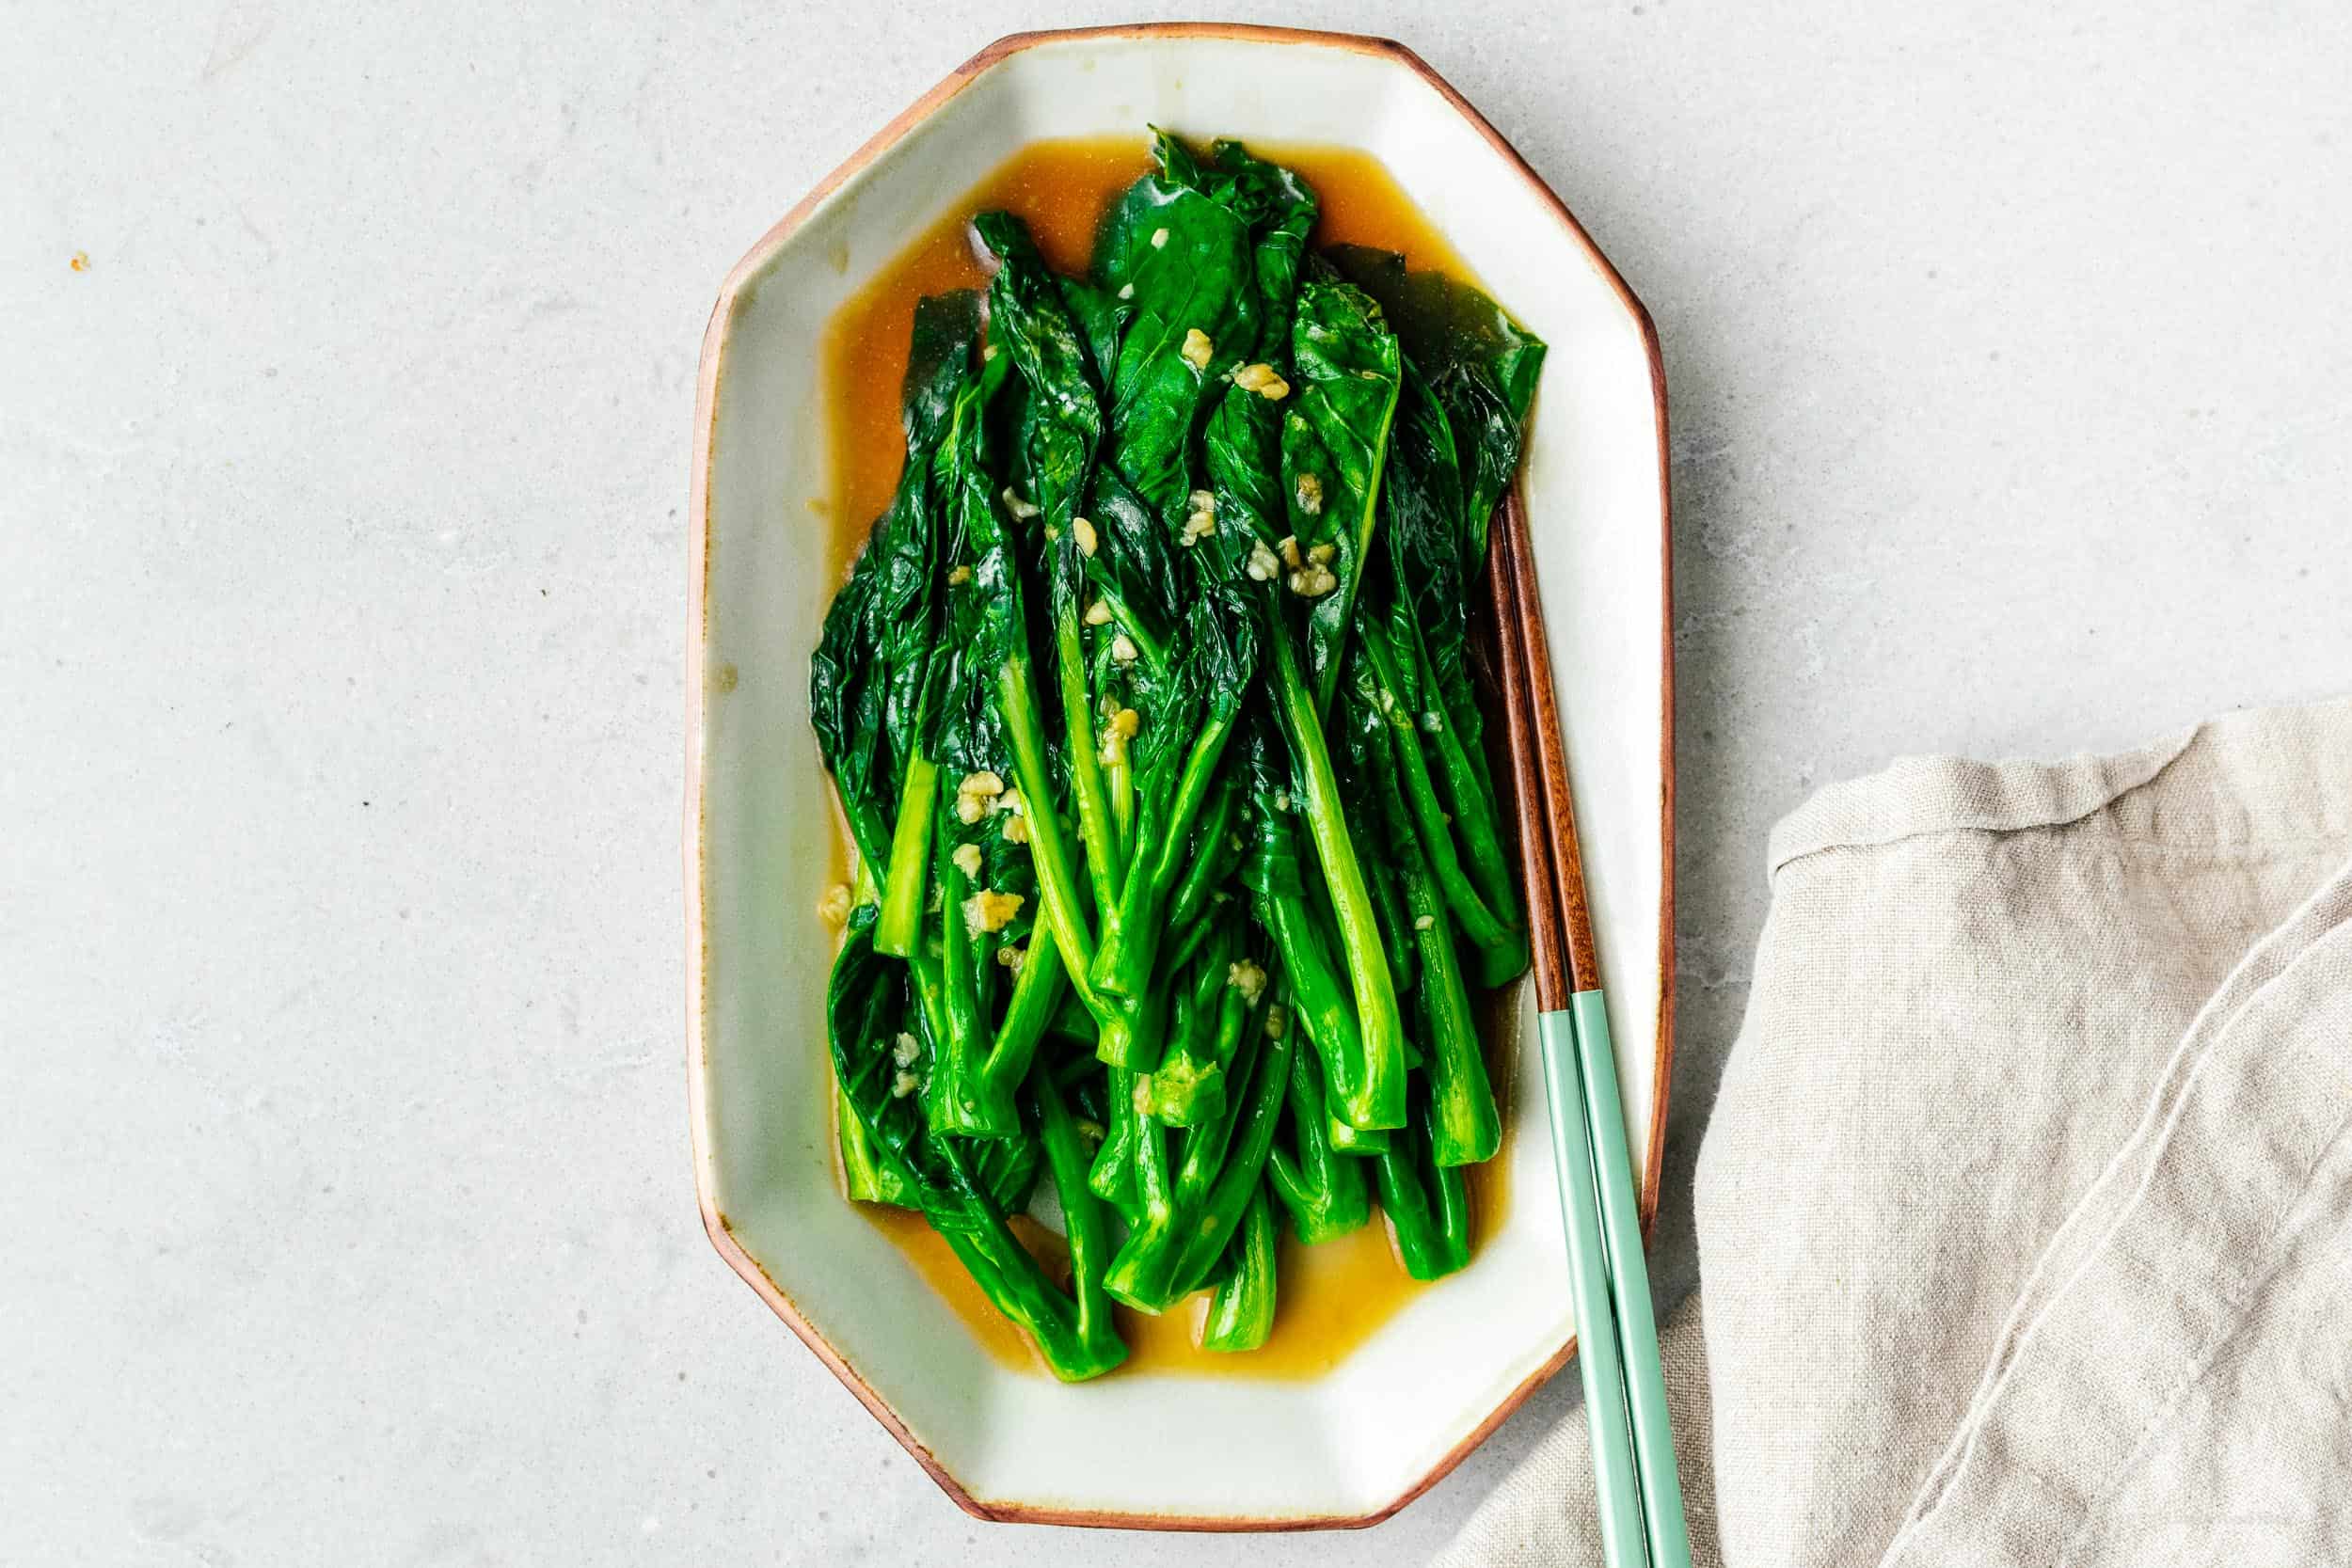
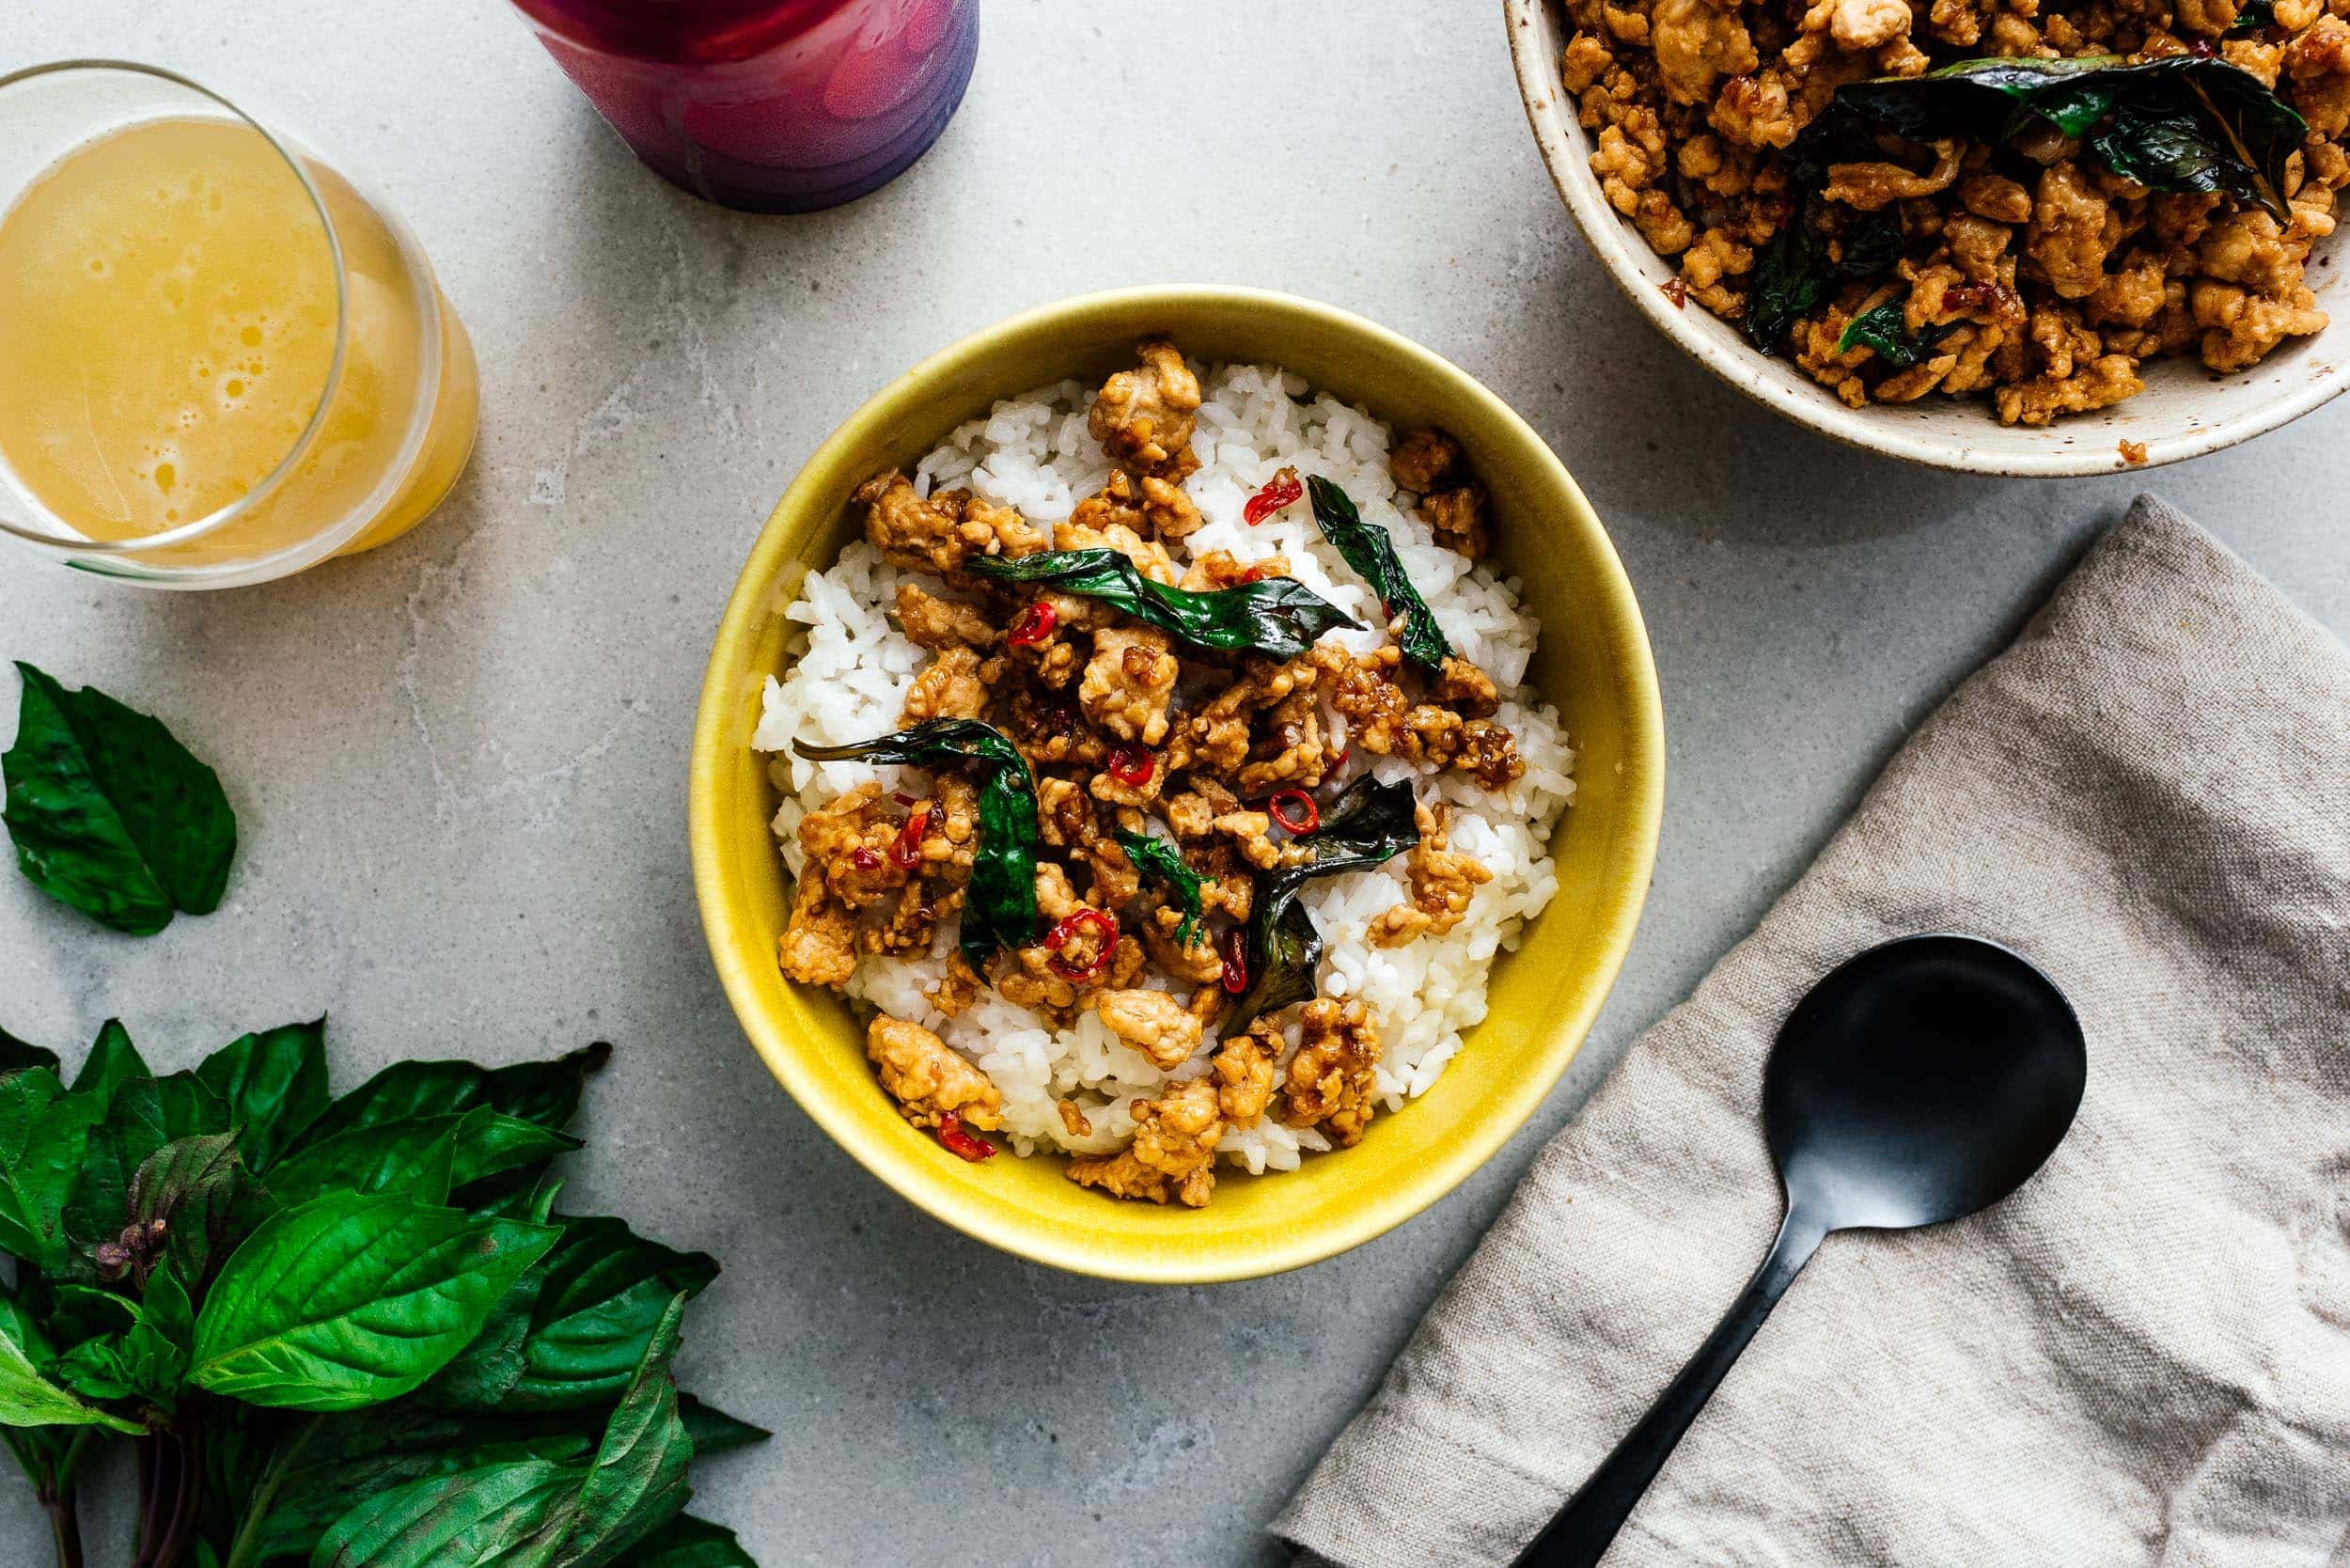
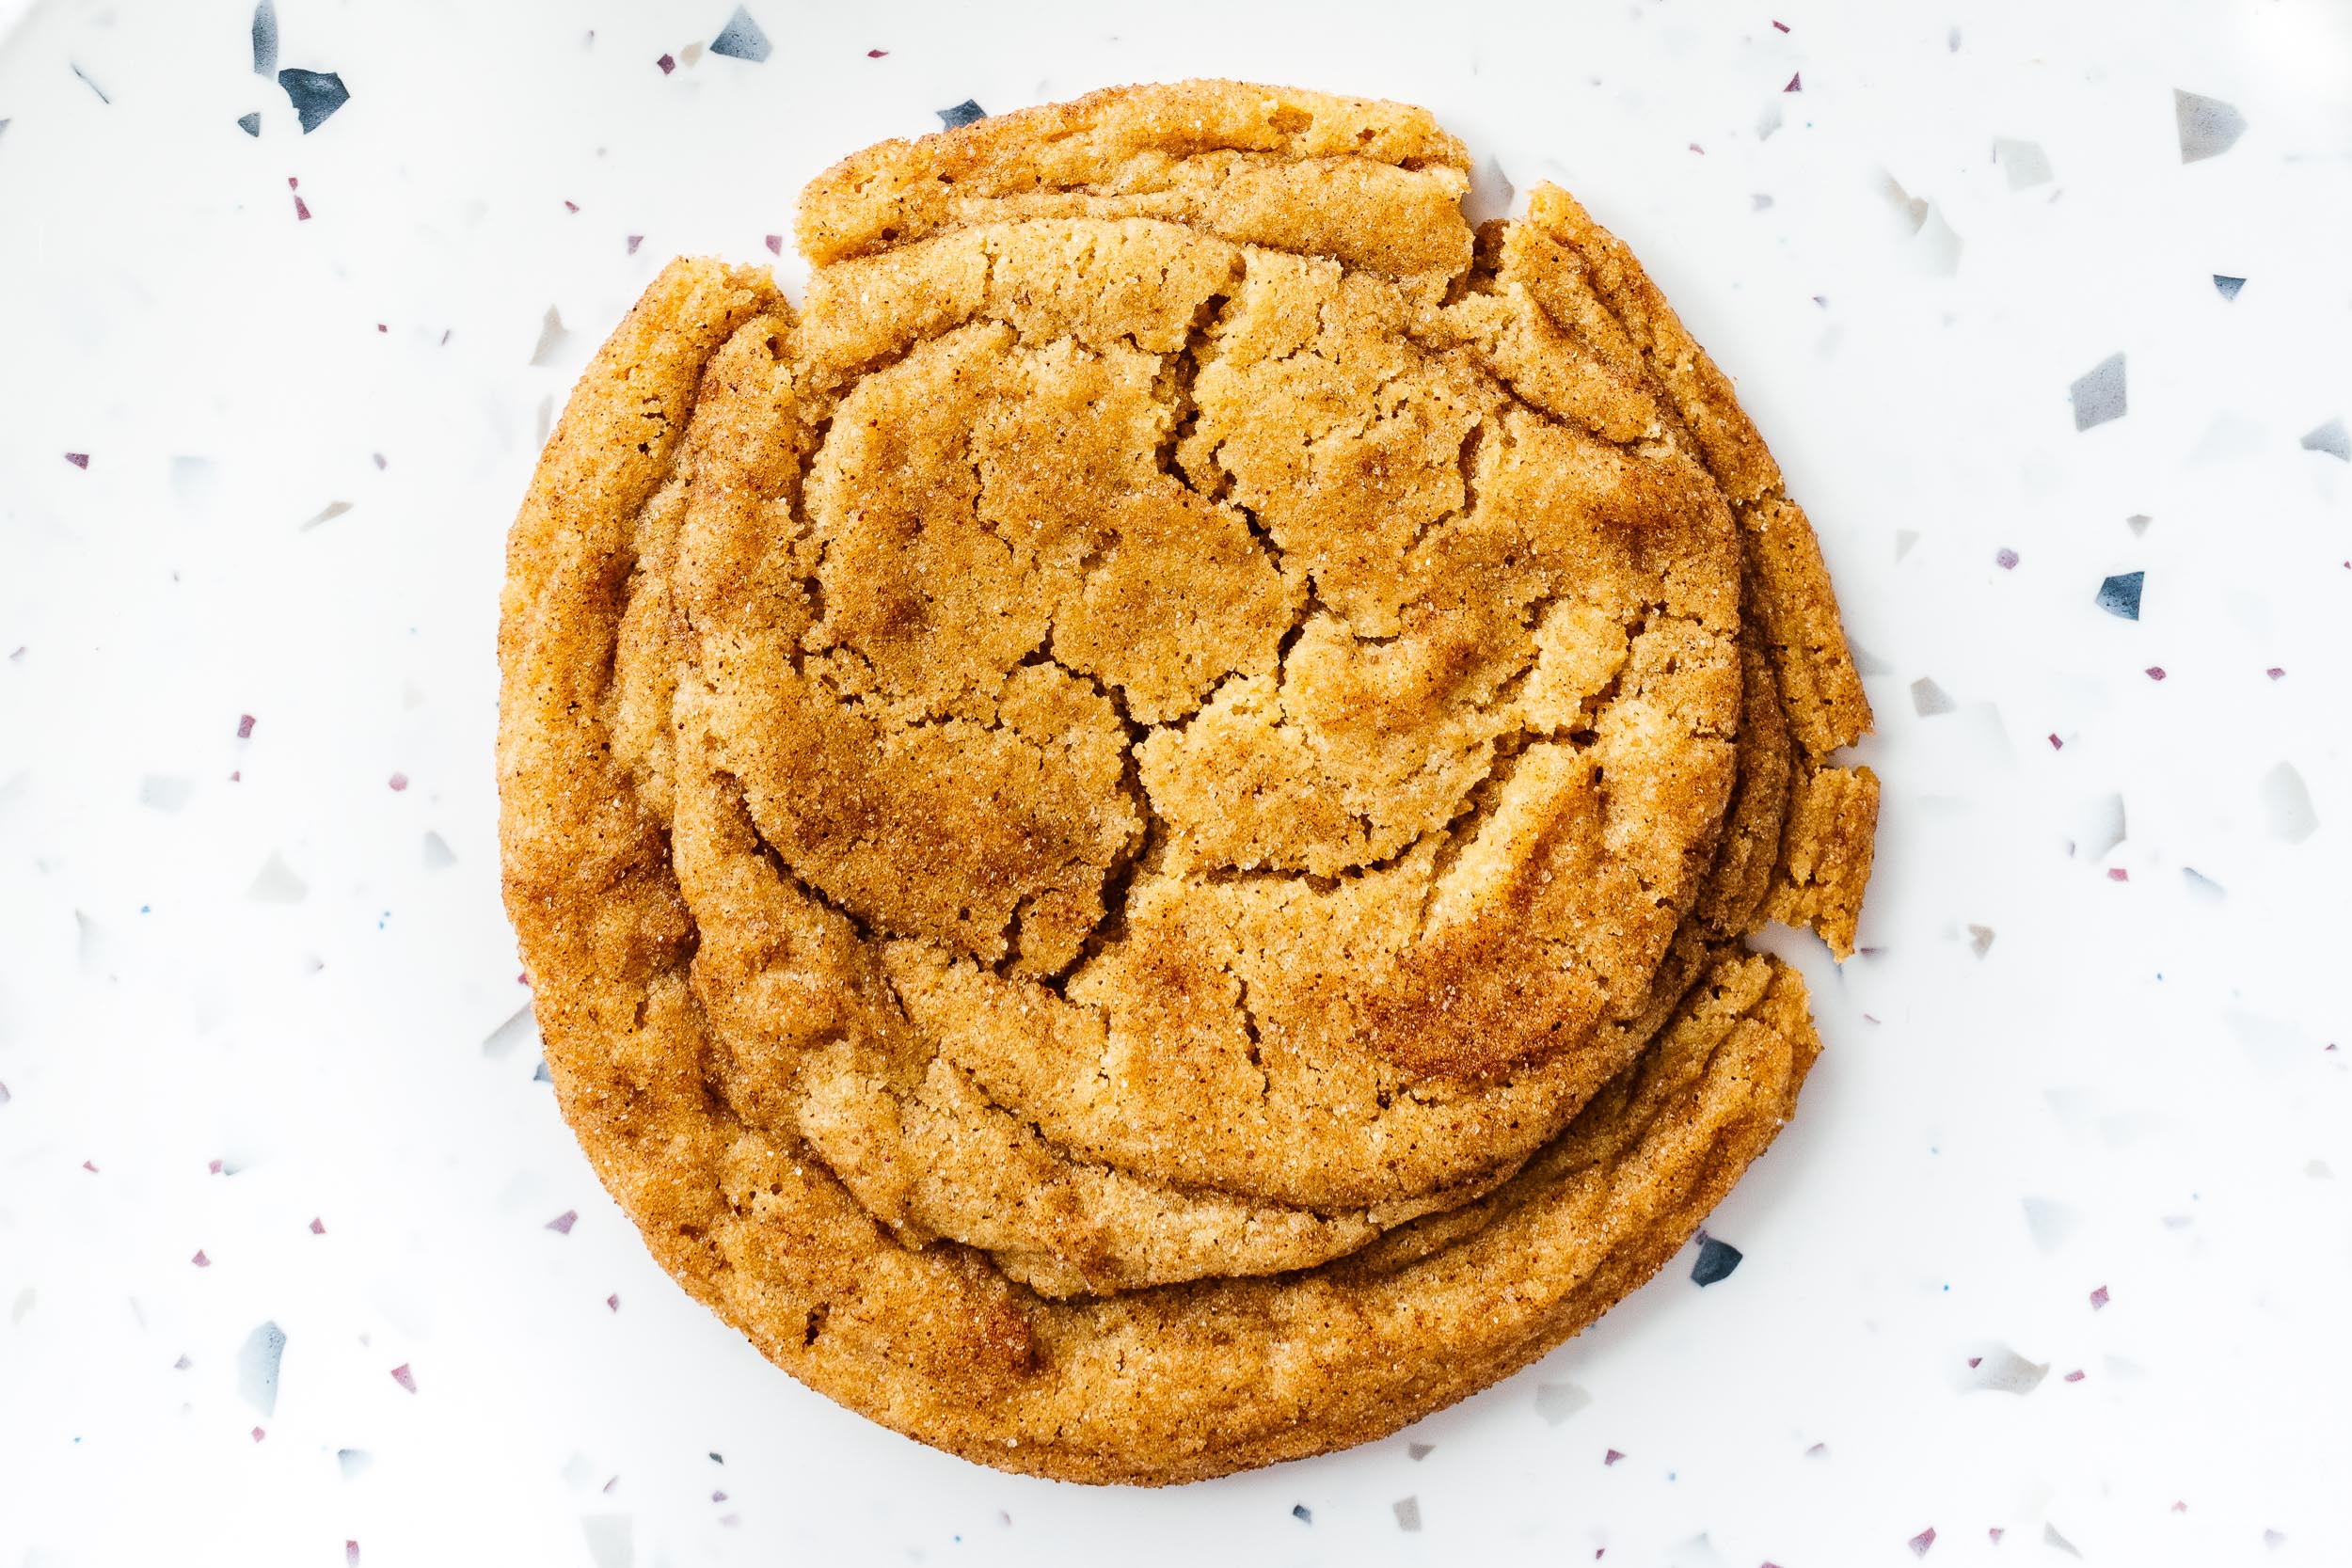


 2015 Holiday Giveaway
 One-Pot Lemon Scallop Pea Spaghetti
 Beer Battered Onion Rings, Jalapeno Aioli
 2014 Holiday Gift Guide and a Giveaway
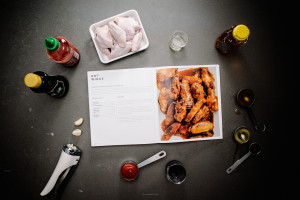 Easy Gourmet Hot Wings and a Giveaway!
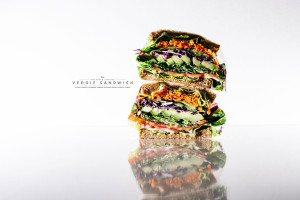 The Ultimate Veggie Sandwich
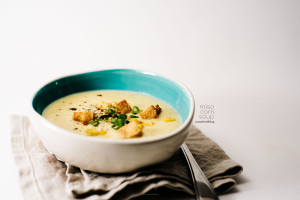 Vegan(!) Creamy Corn Soup Recipe
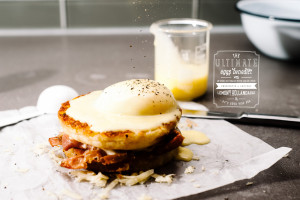 Sunday Brunch: Grilled Cheese Eggs Benny