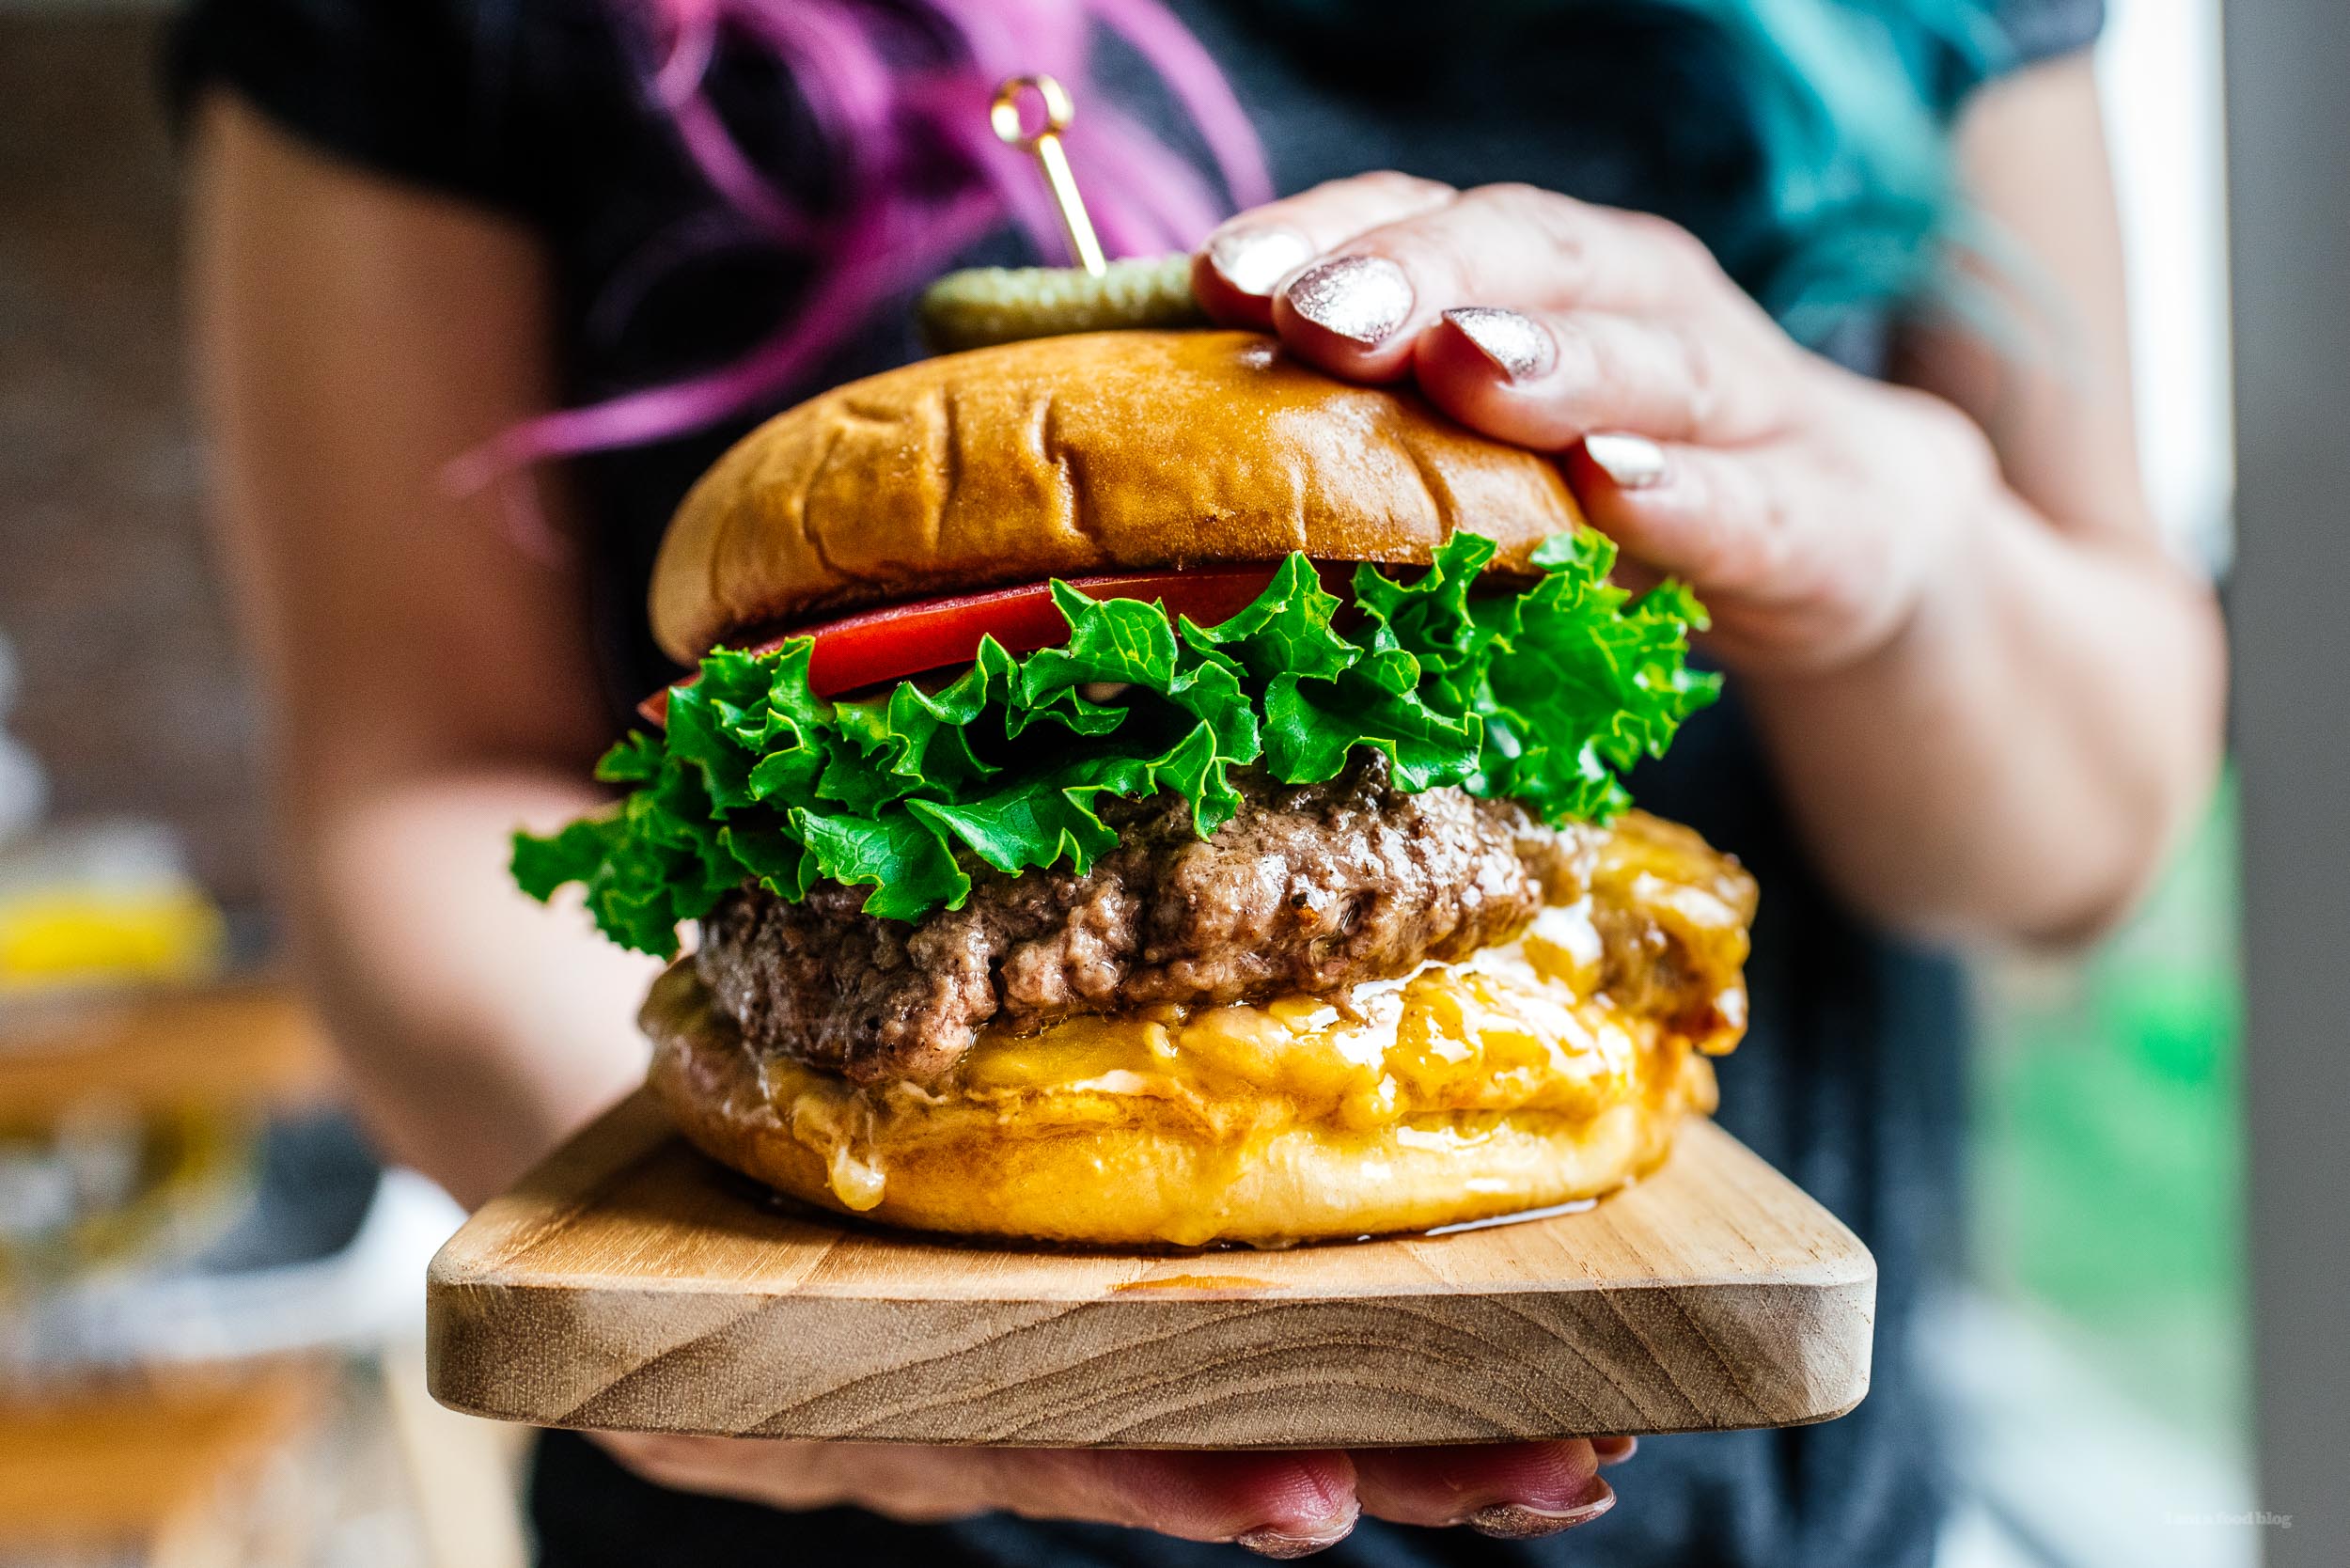
I Am... The Juicy Lucy Burger
It's burger season! Time to break out the grill or cast iron pan, if that's what you make your burgers in, and get your burger on. If you're doing burgers I hope you get a chance to make a Juicy Lucy. I first heard about the infamous Juicy Lucy a couple of years ago. I was headed to Minneapolis for a quick trip and before I flew out, Mike did a quick search on what kind of foods Minneapolis is known for. The thing that came up again and again was a Juicy Lucy. According to lore, Juicy Lucys (Lucies?) were invented in the city in the 50s in two different bars independently of each other. I think there's some sort of Juicy Lucy rivalry going on between the two, but regardless, they both make a burger where the cheese is inside the patty instead of on top. The cheese makes everything extra juicy, thus Juicy Lucy. Of course, after Mike discovered Juicy Lucys, I got really excited. I mean, a burger with the cheese inside the patty? I could just imagine how gooey and melty and cheese pull friendly it was going to be. We watched a bunch of YouTube videos on them – the most notably weird one being of Richard Blais making a Juicy Lucy where the cheese wasn't even melted. That led us down a Richard Blais YouTube hole. Did you know he calls his fans "Blaisians?!" Shudder. Anyway, the most important part of a Juicy Lucy is the molten cheese core. To get that you have to cook your burger on the stove to get that nice seared crust, then finish it in the oven so that the cheese gets extra melty. I think I put a bit too much cheese in mine though because the cheese started to ooze out a bit. I'm not complaining though because the patty ended up with a cheese crust and crusty, crispy cheese is always a good thing. Happy burger-ing! Hope you get some Juicy Lucys soon. PS - I never did get a chance to try a Juicy Lucy in Minneapolis. Have you ever had one? We'll have to go back one day!
What is a Juicy Lucy?
A Juicy Lucy is a cheeseburger where the cheese is inside the patty instead of melted on top! Juicy Lucys have a melted oozy core of cheese. They were invented in Minneapolis, but it’s debatable who invented them first. There are two dive bars that claim to be the original inventor of Juicy Lucys: Matt’s Bar and 5-8 Club. Juicy Lucys are delicious, especially if you love melted cheese.Juicy Lucy ingredients
- Ground beef. Use a nice ground beef - go for grass fed, organic if you can. The better the quality of beef the better your burger will taste
- Cheese. You can use any melty cheese you want. I went with cheddar because I love the flavor, but traditionally it’s made with American cheese for a creamy, super smooth, liquid molten melt.
- Seasonings. I kept it simple with salt and freshly ground pepper but you can also season your burger patty with garlic powder, onion powder, a bit of paprika, and a pinch of cayenne.
- Burger buns. I love super squishy burger buns and I love them toasted with butter. If I’m buying buns, we’ll go for a brioche-type bun or a potato bun. Of course you can go all out and make your own buns too.
- Burger sauce. Again, we kept it simple with the classics: mayo, ketchup, and mustard. You can also go for a jalapeño burger sauce or a copycat Shake Shack sauce or copycat In-N-Out spread
- Burger toppings. These are entirely up to you! I never say no to lettuce or tomato on a burger and Mike loves a good pickle. You could also do some onions, either raw or caramelized. Sky’s the limit.
What kind of cheese should I use for a Juicy Lucy?
You should use the cheese you love! If you want to do as the Minnesotans do, use American cheese – it’s the meatiest of the melty cheese. You can also use cheddar, pepper jack, blue cheese, mozzarella, fontina, gruyere, provolone, or even a mini brie!Grilled or pan-fried Juicy Lucy?
You can either grill or pan-fry your Juicy Lucy. We’ve done both and usually I prefer pan-fried because I love the crust it gets.How to make a Juicy Lucy
- Make the patties. Stuff your burger patties with ALL the cheese.
- Cook the patties. Cook up your burgers anyway you like, we prefer pan fried but you can grill them too. Let the patties rest while you toast the buns.
- Toast the buns. Toasted buttered buns are essential to a good burger.
- Assemble. Spread on your condiments of choice, place the Juicy Lucy patty on then top with burger toppings of your choice and the top of the burger. Enjoy but be careful, the cheese is hot!
How to put the cheese in the center of a Juicy Lucy
The molten core might seem like a mystery, but it’s really easy to put cheese inside the middle of a burger patty.- Form. Take a portion of ground beef and then divide it into 2 patties, one a bit smaller than the other. Form them, one slightly bigger than the other, with a little indent in the middle.
- Fill. Put a bunch of cheese in the middle of the indent of the slightly larger patty then top it off with the slightly smaller patty.
- Seal. Pinch the patties shut, sealing in the cheese. Done!
Juicy Lucy
Meet the Juicy Lucy, the ultimate cheeseburger with the cheese inside the patty.
- 1/4 lb ground beef (chuck preferred)
- 1/4 cup shredded cheese (cheddar preferred)
- salt and freshly ground pepper
- 1 burger bun (see notes)
- 1 leaf green leaf lettuce (torn)
- 1 slice tomato
- pickles (if desired)
- condiments (if desired)
Divide the beef into roughly 1/3 and 2/3 portions. Shape the 2/3 portion into a burger shape with an indent in the middle. Try to make the burger slightly bigger than your bun as it will shrink while cooking. Put the cheese in the center of the larger patty.
Top with the remaining beef and shape compactly into a burger patty. Season both sides with salt and pepper.
Heat a cast iron pan over medium-high. Butter and toast your buns, then set aside.
Add the burger, and fry for 3-4 minutes on each side, until charred and a crust starts to form.
Spread ketchup, mayo, and mustard, to taste, on the bottom bun. Top with the burger, lettuce, tomato, and the top bun. Enjoy immediately!
Burger buns are one of the most important and overlooked component of any burger. We prefer Martin's potato rolls, every time.
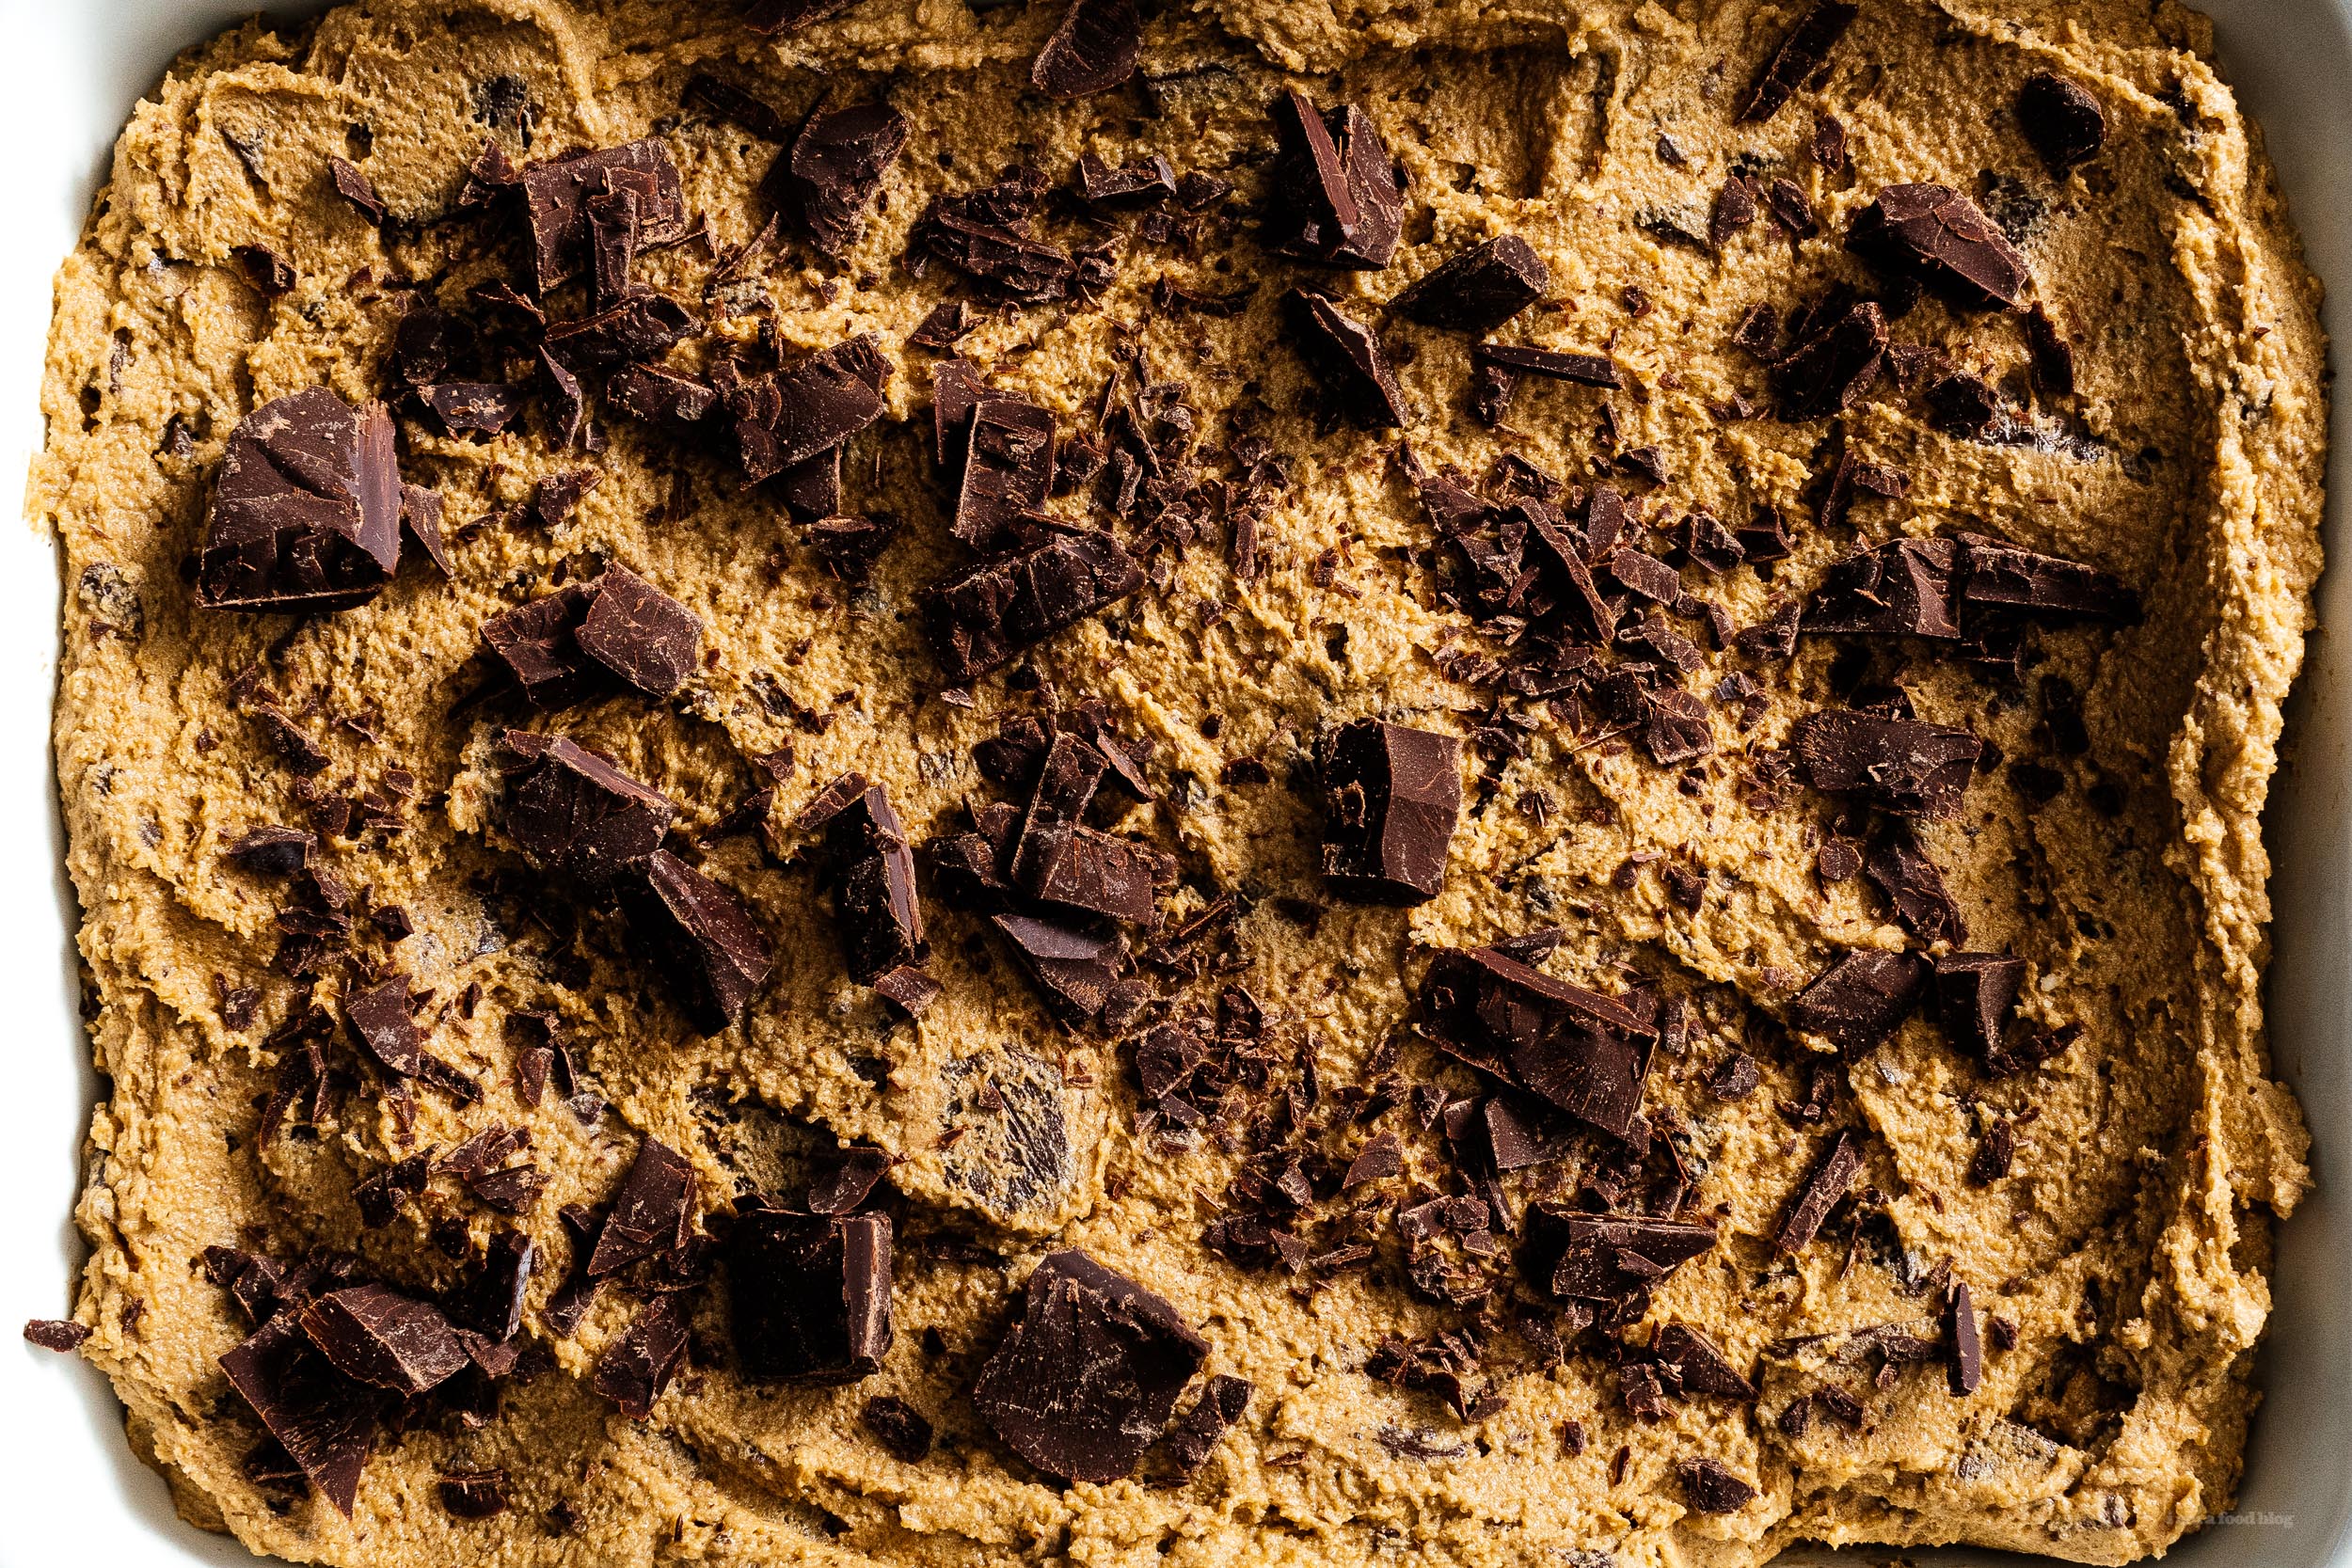
I Am... Edible Cookie Dough
Do you love raw cookie dough? This edible cookie dough recipe is safe to eat and tastes just like the chocolate chip cookie dough in Ben & Jerry’s chocolate chip cookie dough ice cream! Is there anything better than eating edible cookie dough, straight from the bowl? I think not! It’s a guilty pleasure of mine and one that I don’t indulge in nearly enough. I am changing that immediately because I’ve discovered the best recipe for edible cookie dough and now I can live out my childhood fantasy of straight up eating raw cookie dough with a spoon. What is it about cookie dough? I love a good chocolate chip cookie – I mean, I really love chocolate chip cookies so it’s no surprise that I love chocolate chip cookie dough. Warm cookies are heaven but sometimes I just want to nibble on a ball of cookie dough. Last fall, Mike and I went leaf peeping in Vermont. It was our first time there and the leaves did not disappoint. It was fall heaven. We did all the fall things: went to a pumpkin patch, had hot apple cider donuts, and went to the Ben and Jerry’s Factory tour! The fall leaves were gorgeous but I think the highlight for me was the ice cream. I can pretty much demolish a pint of Half-Baked in one go. The best thing about it are the little nuggets of chocolate chip cookie dough, of course! So good. This isn’t sponsored by the way, I just really love Ben and Jerry’s. Anyway, the chocolate chip cookie dough is so popular that they released a recipe for it! I am here to say that this edible cookie dough tastes just like Ben & Jerry’s chocolate chip cookie dough! If you freeze them they are bang on - so snackable and so good.
Why cookie dough?
Did you ever sneak a bit of cookie dough when you were a kid because you just couldn’t wait? It was the best, am I right? Unfortunately, raw cookie dough isn’t the safest due to the raw eggs and flour, so edible cookie dough is here to save the day and cure our cravings.What is edible cookie dough?
This edible cookie dough recipe has (almost) everything regular chocolate chip cookies have, minus eggs so you can snack on it straight from the bowl. It tastes just like regular chocolate chip cookie dough thanks to the butter, brown sugar, vanilla, and chocolate.Is raw dough safe to eat?
Regular raw cookie dough isn’t safe to eat because raw eggs and uncooked flour have a high likelihood of containing salmonella and e.coli. So, it’s eggless cookie dough and heating up flour to the rescue. This edible cookie dough is 100% safe to eat.How to heat up flour so it’s safe
Heat treating flour is what we’re going to do to make it safe to eat. The easiest way is to microwave it. Just pop it in a microwave safe bowl and heat it on high in 30 second intervals, stirring in between. When the flour reaches 165°F throughout the flour, it’s safe to eat. If you don’t have an instant read thermometer, it’ll take about 1 minute and 15 seconds. If you want to use the oven, spread the flour out on a rimmed baking pan and bake in a 300°F oven for two minutes at a time, stirring in between, until it reaches 165F. Be sure to let the flour cool completely before using it in the dough.How to make edible cookie dough
- Heat. First we start off by heating the flour so it’s safe to eat raw. The easiest way is to microwave it until it reaches a safe temperature. Once it’s safe, let the flour cool completely.
- Beat. Beat together the butter and sugar until super creamy, then beat in the cream, vanilla, and salt.
- Mix. Mix in the flour then fold in the chocolate. It’s ready to eat, no baking or waiting required!
Edible cookie dough ingredients
- Flour. If you’re going to make cookies, you need flour. We’ll use all purpose and heat it up, essentially pasteurizing it.
- Butter. Butter is what gives edible cookie dough that creamy buttery flavor. Go for unsalted so you can control how much salt is in your dough.
- Brown sugar. Brown sugar is a key flavor in chocolate chip cookies: deep, sweet, caramelized notes are what we’re going for.
- Heavy cream. The heavy cream adds just the right amount of richness and moisture for our edible cookie dough to come together.
- Vanilla. Chocolate chip cookies aren’t chocolate chip cookies without vanilla.
- Salt. Just a pinch of salt to balance out the sweet and bring everything together.
- Chocolate. The most important part! You can use chocolate chips but I like to cut up good quality semi sweet chocolate because I love the way chunks look in cookie dough. I chopped up some of a block of Callebaut semi sweet chocolate: when you chop it you get small flakes of chocolate and bigger chunks, giving the cookie dough more textural contrast. You can also chop up a bar of dark Trader Joe’s chocolate or use your favorite chocolate chips, mini size or regular. No matter what chocolate you choose, make sure you use chocolate that you like eating because the flavor really shines through. You could even go wild and chop up your favorite chocolate candy bar!
How long does this last?
Keep it in an airtight container in the fridge for up to 1 week or pop it in the freezer for up to 6 months.Can I bake edible cookie dough?
You could but you won’t end up with cookies. There are no eggs and no leveners so they’ll be flat and tough. If you want to bake regular chocolate chip cookies, please make my all time favorite brown butter chocolate chip cookie recipe.What to do with edible cookie dough
- eat it, just like that - this is my favorite, especially when it’s still a little cold out of the fridge!
- use it as a topping for ice cream
- blend it into a milkshake then top the milkshake off with extra bits of cookie dough
- dip it in chocolate for cookie dough truffles
- spread it onto brownies for a brownie cookie dough mash-up
- let it get a bit soft at room temp and use it as a dip with pretzels or graham crackers
Edible cookie dough for one
If you want to make a tiny batch, change the number in the “Serves” section of the recipe card. That way you can easily make edible cookie dough for one or two. Or you know, you can just make the whole recipe for yourself, I won’t judge!Edible Cookie Dough Recipe
Delicious and easy edible cookie dough with no egg or raw flour so it's safe for you and your family to eat as much as your heart desires!
- 1 cup all purpose flour
- 1/2 cup unsalted butter ((1 stick), at room temperature)
- 1 cup brown sugar (lightly packed)
- 2 tbsp heavy cream
- 1 tsp vanilla extract
- 1/4 tsp kosher salt (see notes)
- 1/2 cup chocolate chips (or chocolate chunks)
Heat treat the flour by placing it in a microwave safe bowl and microwaving on high in 30 second intervals, stirring in between. Make sure the flour reaches 165°F throughout, about 1 minute to 1 minute 30 seconds. Stir and let cool completely.
While the flour is cooling, use a stand mixer or hand mixer to beat together the butter and brown sugar until very light and fluffy.
Stir in the cream, vanilla, and salt, mixing well, then stir in the cooled flour.
Fold in the chocolate chips/chunks.
Use a small cookie scoop (or a spoon) to scoop up into little nuggets of edible cookie dough goodness. Enjoy immediately or store covered in the fridge or freezer.
Inspired by Ben & Jerry's
Note: 1/4 tsp of salt was enough for us but if you prefer your food on the more seasoned side, double to 1/2 tsp salt.
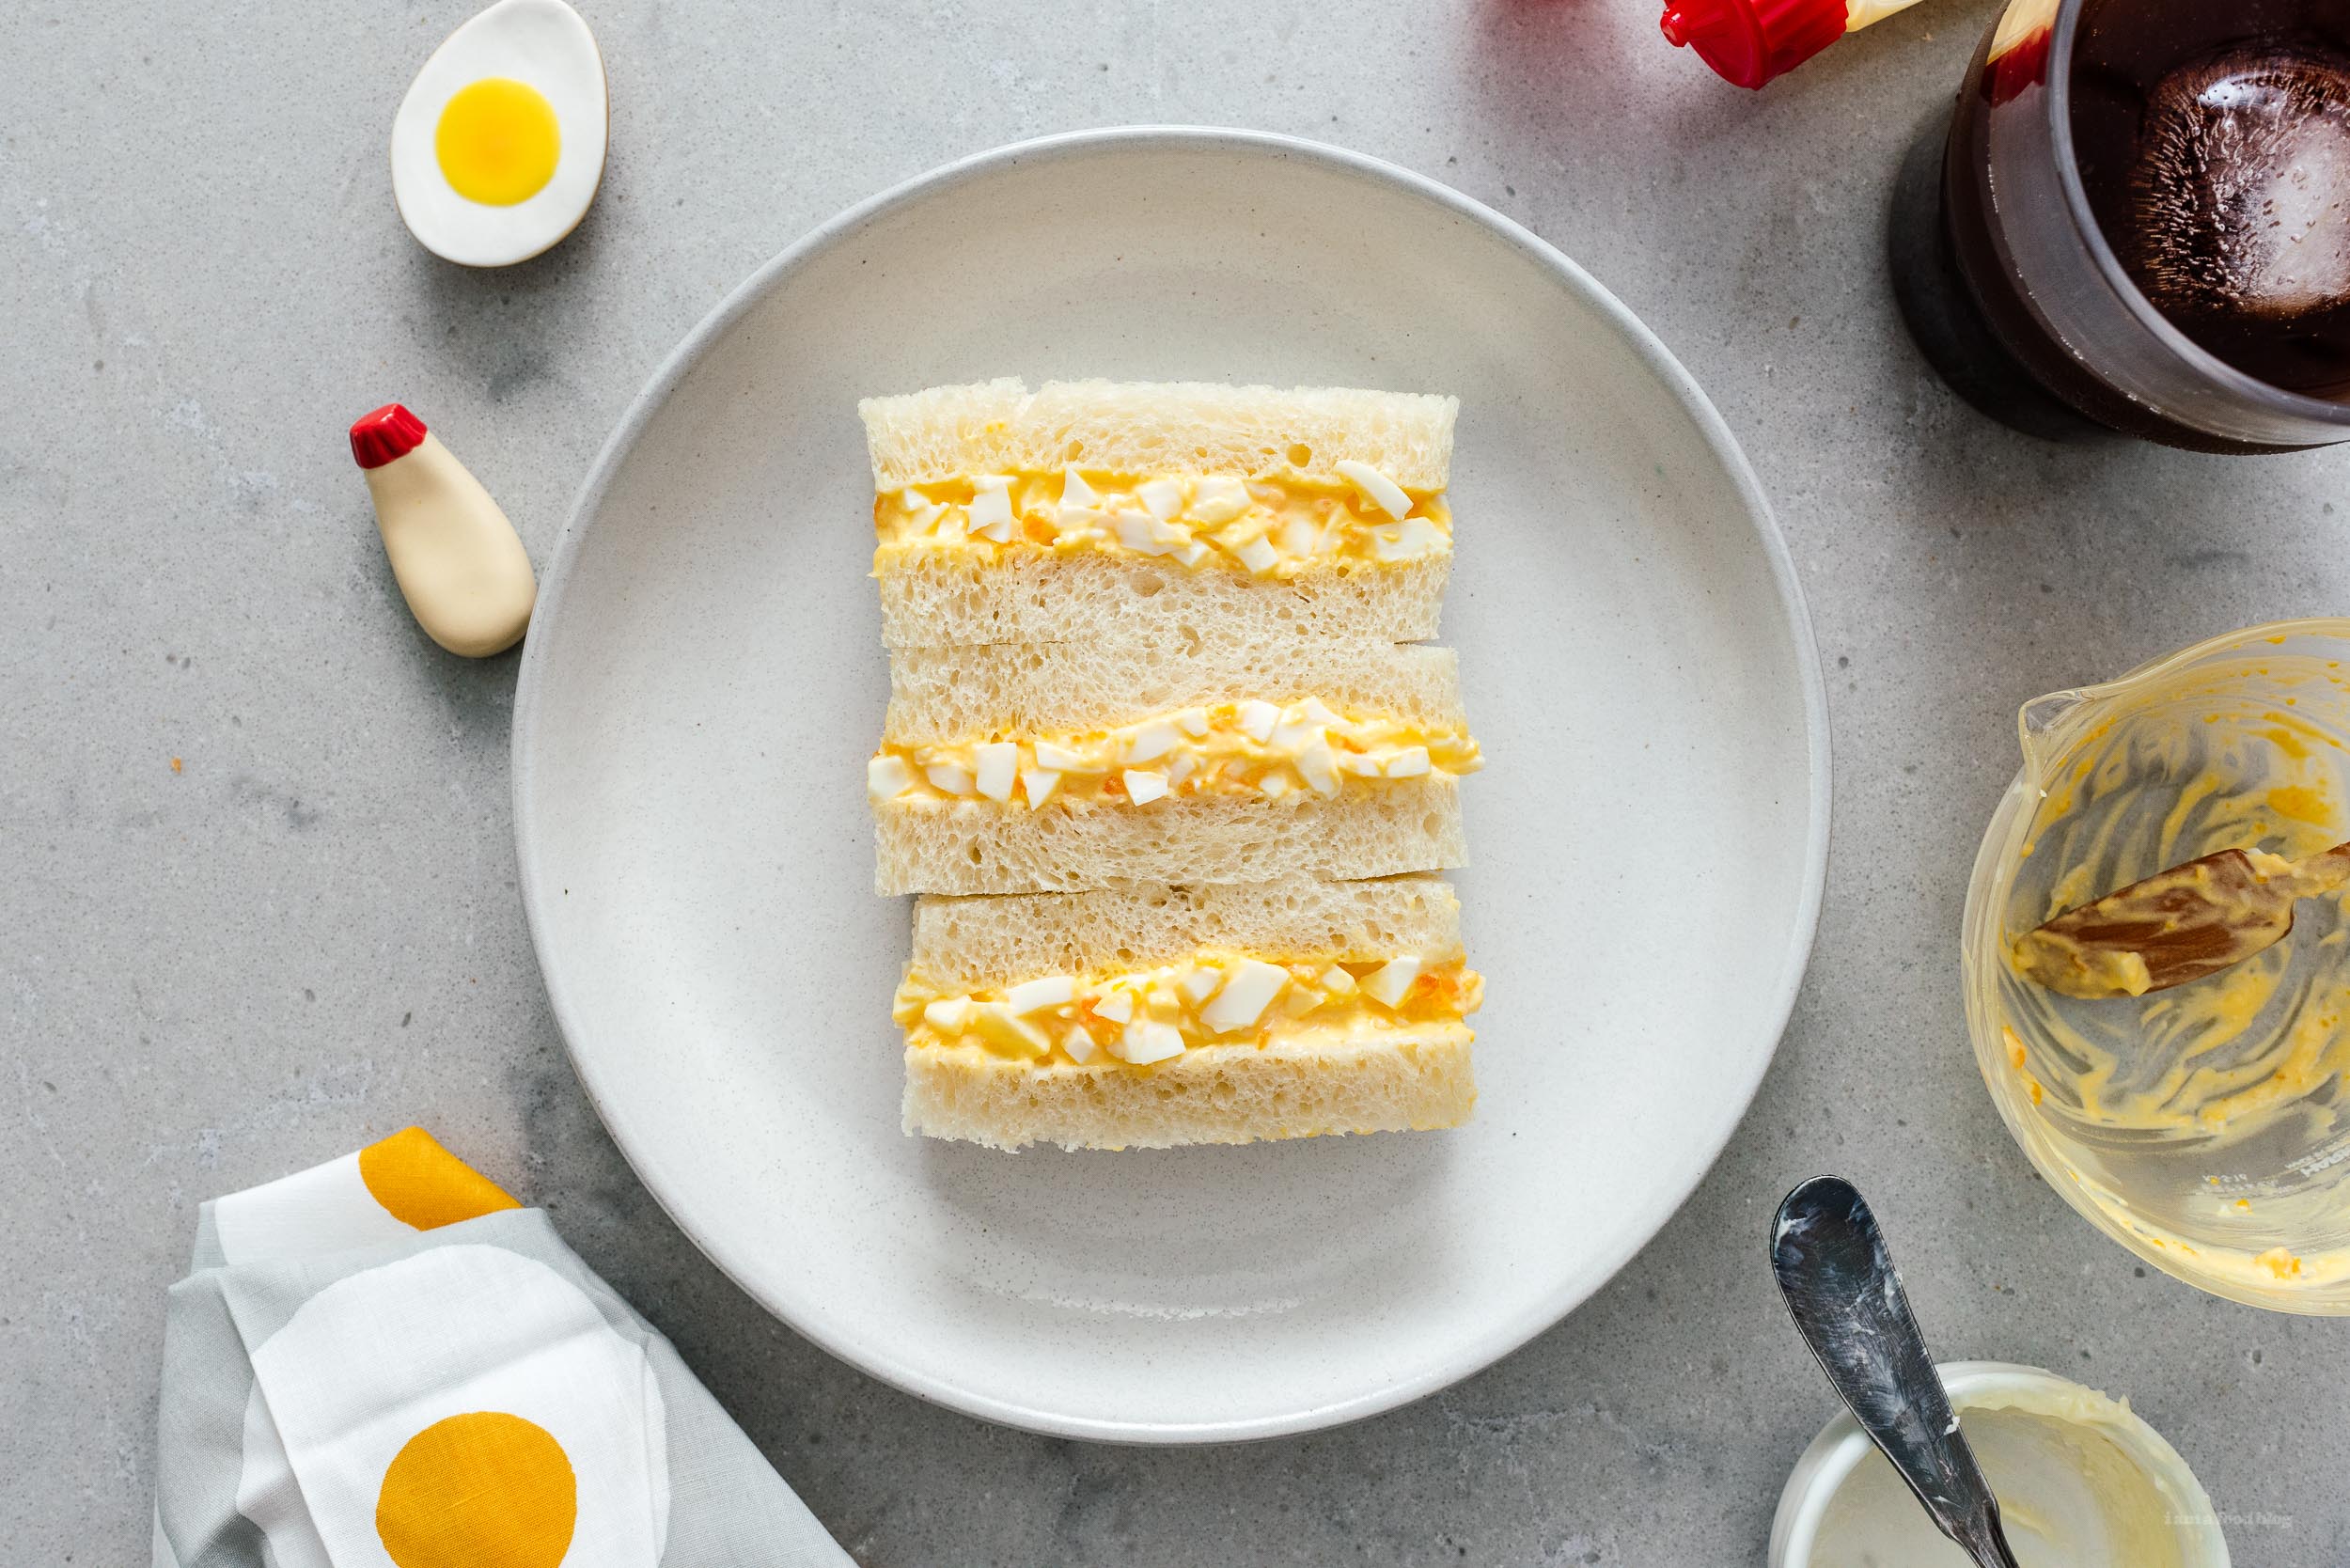
I Am... Japanese Egg Sandwich
A Japanese egg sandwich, also called tamago sando, is a classic Japanese sandwich: egg salad tucked between two fluffy slices of milk bread. You’ll find them in convenience stores across Japan and now in your very own home. The egg salad filling is rich and creamy and the bread is a fluffy pillowy hug!
What is a Japanese egg sandwich?
A Japanese egg sandwich is a take on an egg salad sandwich. Hard boiled eggs are mixed with Japanese kewpie mayo and put between two soft slices of bread, usually Japanese milk bread or shokupan. Egg sandwiches are super popular in Japan. They sell them almost everywhere: at grocery stores, convenience stores, bakeries – basically anywhere you would think you would buy a snack or quick lunch, egg salad sandwiches are there. They’re kind of prevalent in pop culture too: Anthony Bourdain was a huge fan of Lawson’s egg salad sandos and David Chang still says it’s one of the first thing he eats when he touches down in Tokyo.What kind of bread for egg salad sandwiches?
The best bread for a Japanese egg salad sandwich is milk bread. You can make your own milk bread or you can go to an Asian grocery store to pick up a loaf. Usually, I like to use a square loaf, also known as a pullman loaf, so when I trim the crusts off – which is essential – you don’t lose as much bread. If you don’t have access to milk bread, go for the softest, fluffiest white bread you can find. You can also use brioche or standard sandwich bread.Japanese egg salad sandwich ingredients:
- Milk bread. You need bread for sandwiches, but if you want to eat just the filling by the spoonful, I wouldn’t judge.
- Eggs. Get the best eggs you can, since this is a recipe that has so few ingredients.
- Kewpie mayonnaise. Kewpie is essential, more on that below.
- Cream. You need just a bit of cream to pull everything together. If you’ve had egg sandwiches in Japan, you know how creamy their egg salads are.
- Salt. Just enough salt to bring out the natural flavor of the eggs.
- Sugar. There’s just a hint of sweetness in tamago sando to balance out all the umami.
- Butter. Sandwiches that don’t have buttered bread are a travesty. Plus if you’ve ever taken apart a sandwich from Lawson, 7-11, or FamilyMart, you’ll notice a tell tale slick of butter.
What is Kewpie mayo?
One of the key ingredients for a good Japanese egg salad sandwich is kewpie mayo. Kewpie mayo is Japan’s favorite mayonnaise and salad dressing brand and you’ll pretty much find it in every Japanese household. It’s rich, yet light, and incredibly delicious. Kewpie mayo is so beloved in Japan that they even had specialty kewpie mayo cafes to celebrate all things kewpie. You can find it, in its signature squeeze bottle with a red flip top at most grocery stores these days, in the Asian aisle. The mayo itself is a bit more golden that your standard mayo and much more creamy and luxurious. Kewpie mayo is made with just egg yolks – as opposed to regular mayo which is made with whole eggs – and rice vinegar for a hint of sweetness. It’s absolutely addictive.What can I make with Kewpie mayonnaise?
Kewpie mayonnaise is a major condiment used in a lot of Japanese dishes. If you have a bottle on hand, here are some things you can use it for:- ebi mayo/crispy shrimp with a spicy dressing
- California roll avocado toast
- takoyaki
- Japanese potato salad
- chicken karaage
- miso tuna salad
- California roll nachos
- okonomiyaki burger
How to make a Japanese egg salad sandwich
- Boil the eggs. Start off by cooking your eggs. You’ll need 2 large eggs, hard boiled.
- Make the filling. Once the eggs are cooked, cooled, and shelled, it’s time to make the filling. Cut the cooked eggs in half and pop out the yolks, kind of like how you would if you were making deviled eggs. Mix the yolks with kewpie mayo, a touch of cream (or milk), salt to taste, and just a hint of sugar. Dice the whites then mix into the yolks.
- Butter the bread. Lightly butter the bread, all the way to the edges.
- Fill the sandwich. Spread the filling generously onto one slice of bread then top with the other buttered slice of bread.
- Slice. Use a very sharp knife or a bread knife to trim off the crusts (chef’s treat!) then cut the sandwich on a diagonal or into even thirds. Enjoy!
If you’re on a Japanese sandwich kick, please check out these other Japanese sandwiches right here:
- Japanese fruit sandwich: strawberry sando
- LA’s Kombi egg salad sandwich
- Japanese crispy chicken sandwich: chicken katsu sando
- Japanese crispy pork sandwich: tonkatsu sando
Japanese Egg Salad Sandwich Recipe - たまごサンド
A Japanese egg sandwich, also called tamago sando, is a classic Japanese sandwich: egg salad tucked between two fluffy slices of milk bread.
- 2 large eggs
- 2 tbsp kewpie mayo
- 1 tsp milk (or cream)
- 1/4 tsp kosher salt
- 1/4 tsp sugar
- 2 slices shokupan
- butter (room temp)
Remove the eggs from the fridge as you bring a medium pot of water to a boil. Prepare an ice bath with a large bowl of cold water and ice. Bring the water to rolling boil, then add eggs in, with a slotted spoon. Maintain a simmer for 10 minutes.
Plunge the eggs into the ice bath to cool them down. Peel the eggs: Gently tap the wide end of the egg on the countertop, then flip around and tap the pointed end. Gently roll the egg and peel, under running water, if needed.
Cut the eggs in half and separate the whites from the yolks. Dice the whites.
Place the yolks in a bowl and use a fork to mash together with the mayonnaise, cream, salt, and sugar until smooth.
Gently mix in the diced whites.
Butter the slices of bread then add the filling, all the way to the edges on one slice of bread.
Top with the other slice and press down gently. Trim the crusts and slice in half on a diagonal or perpendicularly into thirds. Enjoy!
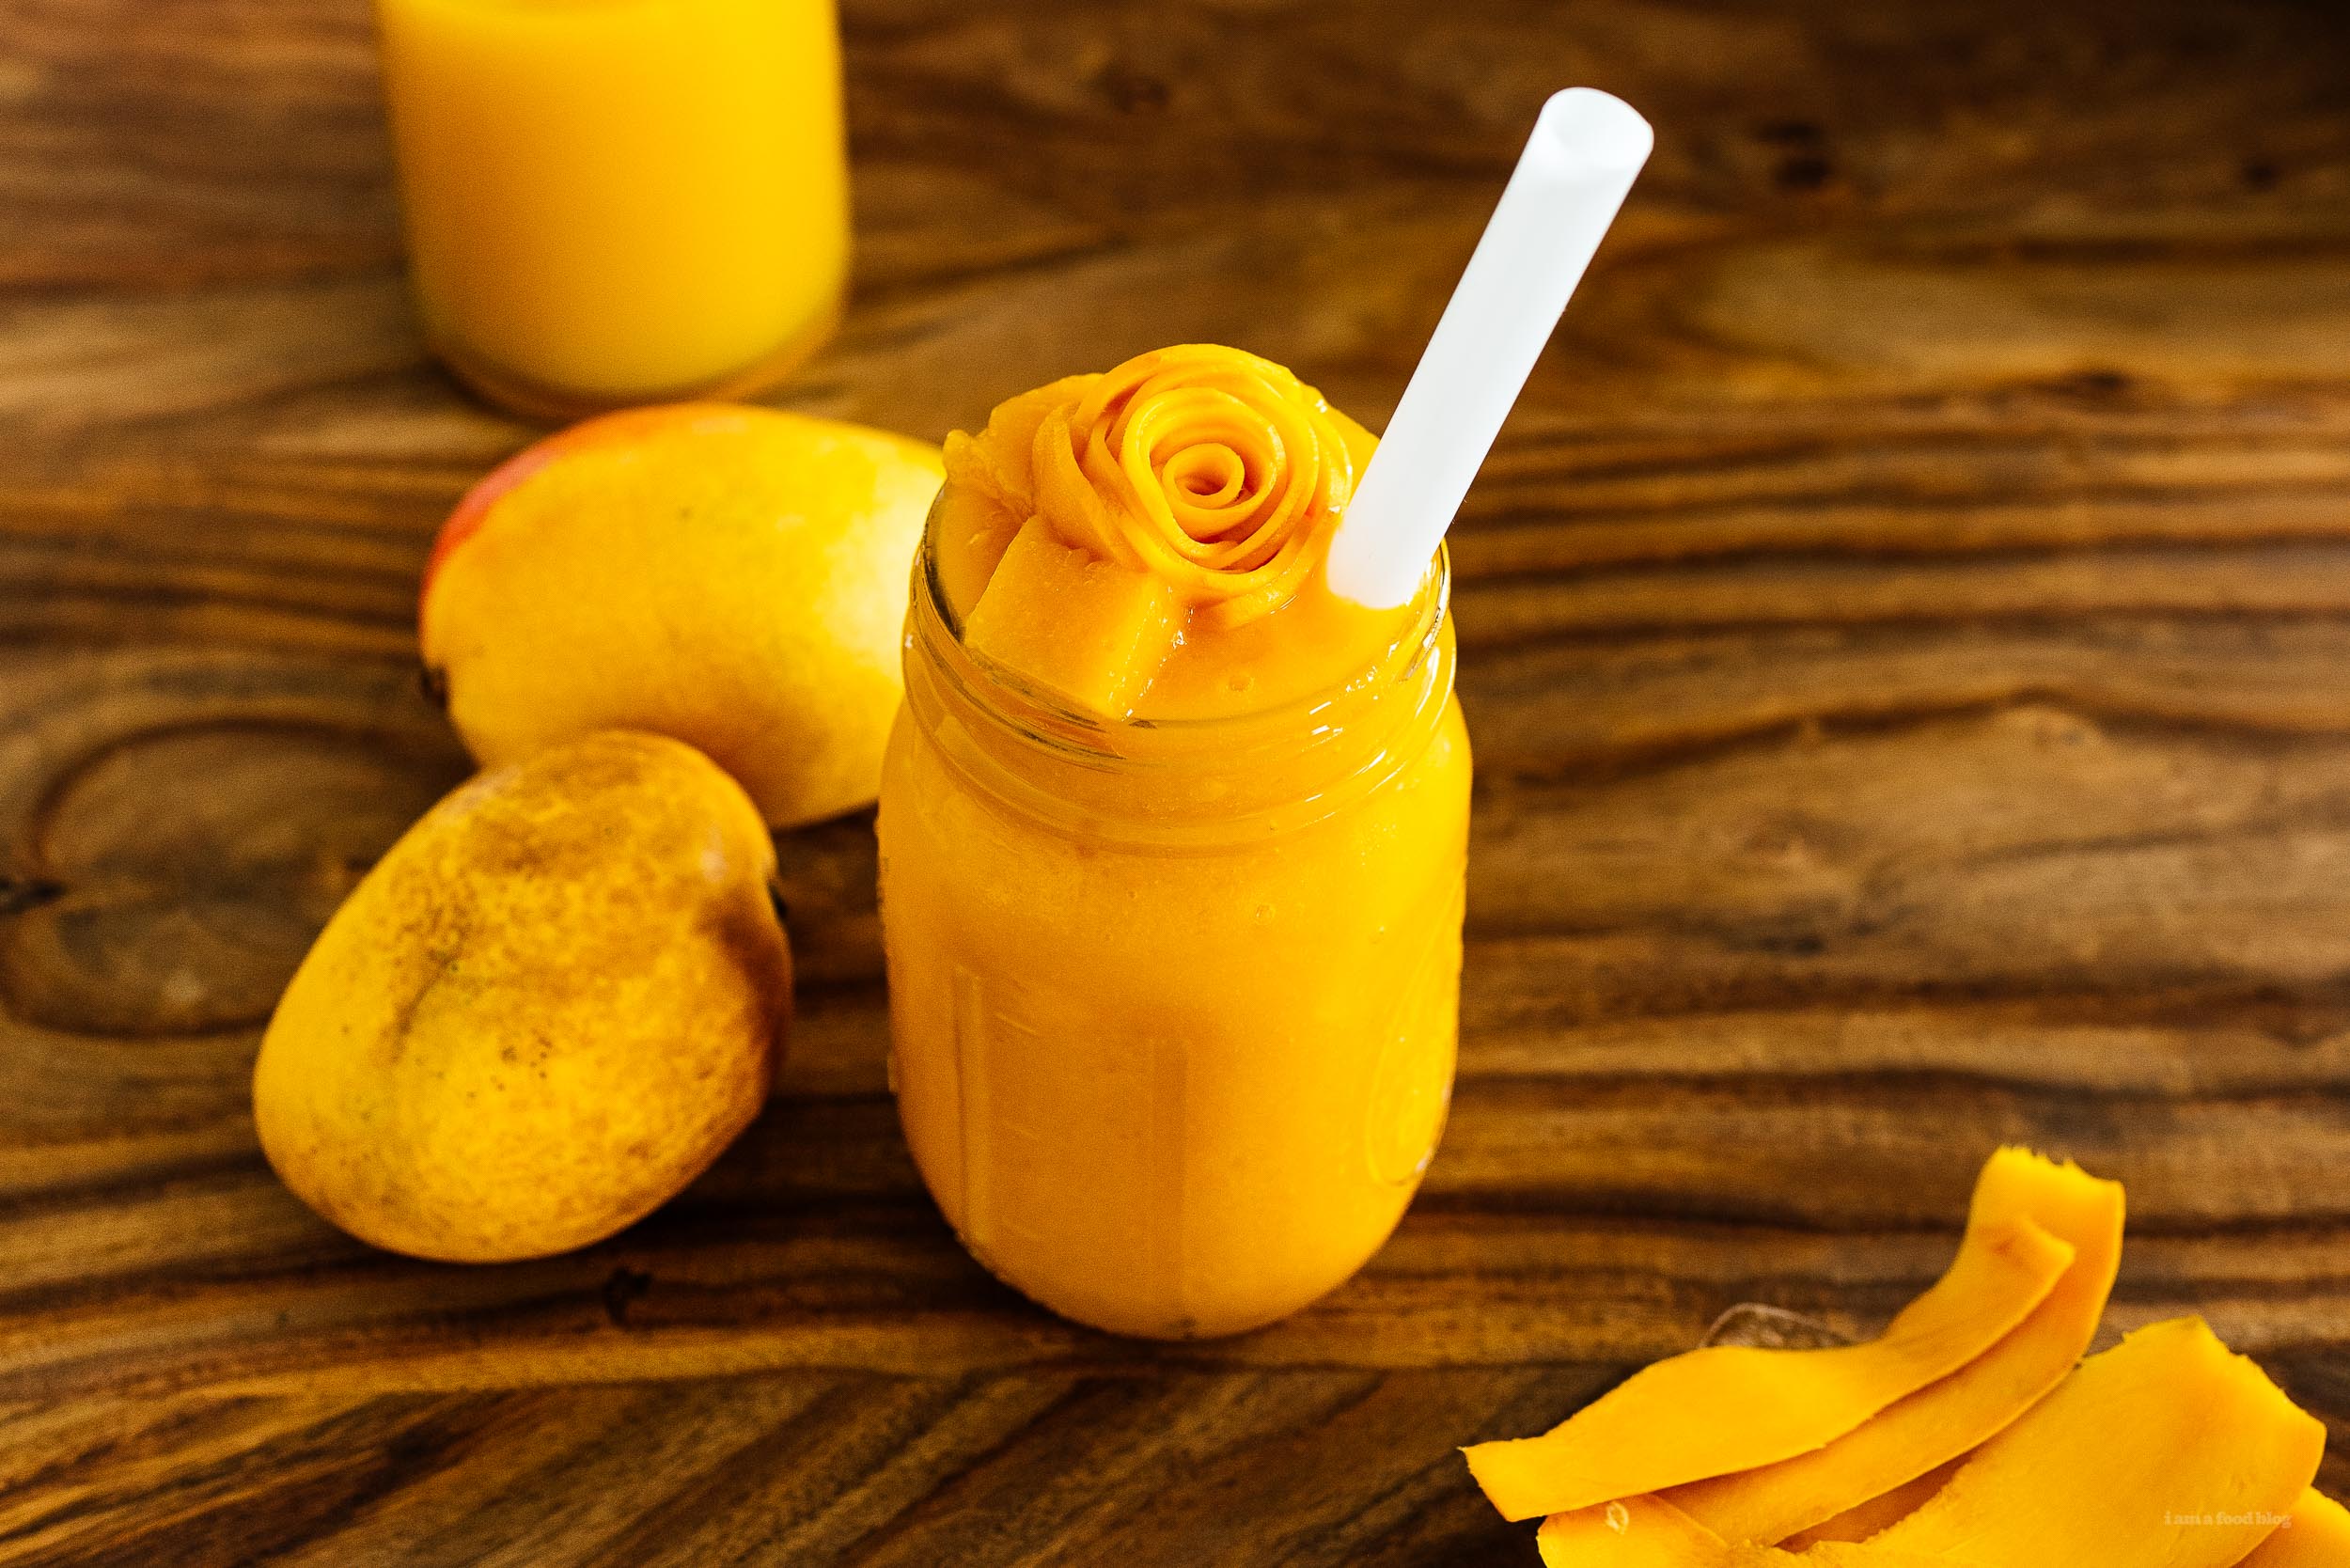
I Am... Mango Smoothie
One of my all time favorite fruits ever is mango. Mangos are so sweet, so juicy, so tropical, and just insanely delicious. I’ve gone days where I’ve had dinner that consists of me just eating mangos. Yup, straight up just eating cold cubes of sweet, juicy mangos. Eating mangoes reminds me of Asia, in the best possible way. I remember eating so many mango sticky rice desserts in Thailand (I should really make mango sticky rice on the blog!) and being straight up obsessed with the mango smoothie from Hui Lau Shan in Hong Kong. Have you guys heard of Hui Lau Shan? They’re an HK staple, a chain of dessert shops that specialize in mango drinks and desserts. They’re incredibly beloved and they have stores all over the world, even in LA! They have the cutest mango mascot and the best mango drinks. Trust me, a mango drink is incredibly refreshing in the hot and humid heat (and all other weather too).
Mango is life
There are over 500 varieties of mangos out there. World famous Alphonso mangos are often said to be the best of the best, but they have a very small season and aren’t really readily available outside of India, at least unless you’re willing to pay absurd prices. For me, the most readily available and best mango in North America is the Carabao mango. It’s bright orange, super sweet, not too fiberous, has a small pit, and is super juicy – run down your arms juicy.How to cut a mango
There are so many ways to peel and cut a mango! Here are two that I do:-
The vegetable peeler
You can peel a mango using a vegetable peeler. Just peel it the way you would a carrot. After that, lay the mango out on the cutting board, tall-ways. Carefully use a knife to cut off half of the mango, positioning your knife off center to avoid the pit in the middle. Repeat on the other side and then carefully use a pairing knife to trim off any extra mango from the pit. Dice up the mango as desired. -
The hedgehog method
The other way to peel is the hedgehog method: hold the mango on a cutting board, tall-ways. Use a knife and cut off a lobe of mango, positioning your knife off center to avoid the pit. Repeat on the other side. Take the mango and use a pairing knife to cut a grid into the mango halves, being careful not to cut through the skin. Flip the mango so that the cubes are poking out then carefully slice off the cubes. Or you could use a spoon to scoop everything out.
So you want a ripe mango?
When choosing a mango, color doesn’t really matter. What you’re looking for is a firm skin that has just the tiniest bit of give, like when a peach or avocado is ripe. Take a sniff: if it smells super fragrant and sweet, it’s ready for you.Mango calories
Even though a mango tastes great, it's also really low in calories. One average mango only has 202 calories!The HK style mango smoothie
I love Hui Lau Shan so much that I’ve taken to making a Mango Mania Hui Lau Shan copycat drink. The Hui Lau Shan A1 is my absolute favorite: mango & mango jelly in mango juice. That’s triple mango. Luckily, mangos are pretty much a staple at the grocery store in summer because I’ve been buying them up like mad. This mango smoothie is everything a mango smoothie wants to be. Icy and sweet and juicy with soft and squishy mango jelly cubes and fresh mango. Seriously so refreshing. It takes a little time and foresight, but I promise you, it’s worth it.Frozen Mango
The recipe calls for frozen mango cubes, which are available everywhere, even online! I find that fresh ones are almost always sweeter, so I peel, cube, and freeze fresh mangos specifically for this smoothie. It takes about 4 hours in our freezer, so you can do it just before you make the jelly and have it all ready at the same time. Don't forget to save some fresh mango for garnish though!Mango juice & mango puree
What’s the difference between mango juice and mango puree? It’s simply a question of thickness. Mango juice is usually thinner and mango puree is more thick. I tend to buy mango juice and make mango puree. Nowadays mango juice is pretty much available at most grocery stores. They usually label it as mango nectar. If I see it, I get 100% Pure mango juice nectar by Phillippine brand because it’s essentially mango, sugar, and some citric acids as a stabilizers. Other good choices: SunTropics in the fridge section, Goya, and Jumex. The key is to go for a juice that is pure mango, not a juice blend. I like to make my own mango puree by blending up fresh mangos. Simply peel and dice your mangos then pop them in the blender or food processor and blend until smooth. You shouldn’t need to any liquid to your blender or food processor because mangos are pretty juicy on their own. You could go out and buy mango puree - they sell it as a speciality item, frozen in some speciality food stores, but it’s a lot easier to make your own.Do you love ALL the mango things??
- Easy 7 Ingredient Mango Pineapple Habanero Hot Wings
- Hello Spring! Crispy Coconut Waffles with Mango
Mango Smoothie
How to make a mango smoothie just like they do in HKG.
Mango Jelly
- 1.5 tsp gelatin
- 1/4 cup mango juice
- 1/4 cup hot water
- 1/2 cup mango puree
- 1 tbsp sugar (optional)
Mango Smoothie
- 3.5 cups frozen mango chunks (see note)
- 1 cup mango juice
- 2 cups ice (6oz)
- 1/2 cup fresh mango cubes
Make the mango jelly: sprinkle the gelatin on the mango juice and let bloom for 3-5 minutes then stir in the hot water. When the gelatin is dissolved, stir in the sugar, if using, then the mango puree. Pour into a small rectangular dish or container and let set, about 4 hours. When set, cut into small cubes.
Make the mango smoothie: Blend the frozen mango cubes with the juice and ice until smooth.
Assemble: Add some mango jelly to the bottom of a glass, then top with the mango smoothie and some fresh mango cubes. Enjoy immediately!
You can use store-bought frozen mango chunks as well but I find that fresh ones are almost always sweeter, so I peel, cube, and freeze fresh mangos specifically for this smoothie.

I Am... How to Make Japanese Pudding aka Purin
I love Japanese purin. It goes by many names: flan, pudding, crème caramel, Hokkaido milk pudding, Japanese custard, egg pudding, flan de leche, caramel flan – no matter what you call it, it’s delicious. Creamy, smooth, thick, firm-yet-soft, and literally covered in caramel, purin is the perfect dessert. I love cutting into purin - there’s something so satisfying about spooning out that first bite. Plus it’s so pretty! The contrast between the deep, dark caramel and the pale yellow of the custard just speaks to me. Purin is incredibly popular in Japan – read my super long article here – but if you’re craving purin, why not make it at home?
What is purin?
Purin is a Japanese take on crème caramel, also known as flan, caramel custard, egg pudding, or caramel pudding. Essentially it’s a gently cooked custard dessert made from eggs, milk, and sugar, with a layer of clear caramel sauce on top. It’s creamy and sweet, with a hint of caramelization from the caramel. It originated in Europe – specifically Spain, France, Italy, and Portugal, but now it’s pretty much made and enjoyed all over the world.There are two kinds of Japanese purin:
- Baked/steamed - This is the classic retro Japanese purin that you’ll find in most cafes. It’s smooth and creamy, on the slightly firmer side, but still has a bit of jiggle. Sometimes it’s called yaki-purin (baked pudding) or mushi-purin (steamed pudding).
- Gelatin/no bake - This is made with gelatin, it’s smooth and wobbly, kind of like the texture of jello. The super popular store-bought purin called Pucchin Purin by Glico is made with gelatin.
The perfect Japanese purin
The perfect purin, to me, is smooth and creamy custard with just the right amount of sweetness and a hint of vanilla. The caramel needs to be on the bittersweet side so it contrasts and compliments the custard. It should keep it’s shape on your tongue until you sink into it, then it should dissolve into a velvety smooth melty bite.What does Japanese purin taste like?
There are so many Japanese purins out there, from home made, to store-bought, to cafe, and high-end versions. They all taste delicious, varying between firm and soft, extra sweet to just sweet enough, with different levels of bitterness from the caramel. If you’ve had crème brûlée before, purin tastes like the custard part of crème brûlée. It also tastes kind of like a firmer, more set vanilla pudding.Ingredients for Japanese Purin
Purin is incredibly simple and it’s so amazing that something so delicious can come from just 4 ingredients!- Sugar. We’re going to use granulated white sugar both for the layer caramel that self-sauces the custard, and the custard itself.
- Eggs. This recipes needs two large eggs and one extra egg yolk. The extra egg yolk adds another dimension of richness and depth and also makes the custard a beautiful yellow. If you use just whole eggs, your custard will be more pale and also more jiggly. Make sure you use the best eggs you can because part of the deliciousness of purin is the purity of the ingredients.
- Milk. Whole fat milk is your friend here. You want it to be rich and creamy.
- Vanilla. Vanilla is key to adding that hint of baked goods essence and a sweet aroma that hits your nose even before you taste the purin. If you have whole vanilla beans, you can add those in for a beautiful vanilla bean flecked purin.
How to Make Japanese Purin
- Make the caramel. Making caramel is easy, it’s just sugar and a bit of water heated slowly over a medium flame until the sugar starts to dissolve and caramelize. At first the sugar will turn liquid and have lots of tiny bubbles that will slowly turn brown on the edges of the pan, the center of the pan will still be clear. Swirl your pan gently to incorporate the caramelized sugar with the uncaramelized sugar. After your sugar bubbles away for a bit the bubbles will become larger and everything will be more and more caramelized and brown. I like my caramel on the darker side because I like the contrast of bittersweet with sweet but take your caramel off the heat when you see the color you like. Immediately add in a bit of hot water – but be careful because the caramel will sputter and splash – and swirl to combine. This extra bit of water thins out the caramel so that when you tip the purin out onto a plate, it will be a thin caramel glaze.
- Pour the caramel. When the caramel is done, immediately pour it into your pudding molds or ramekins. Swirl to coat the bottoms evenly. Set aside.
- Make the custard. In another pot, heat the milk and remaining sugar over medium low heat, stirring every so often, making sure the sugar dissolves. You don’t want the cream to come to a boil, just heat it enough to dissolve the sugar.
- Combine the eggs and milk. Whisk the eggs and egg yolk well so that there are no bits of egg white left then slowly add the warm milk, whisking as you go. Strain and pour the custard into the prepared pudding molds/ramekins.
- Bake. It’s time to bake! The purin are going to bake in a warm water bath, aka a bain marie, in a low the oven. The bain marie makes the heat nice and even and moist, helping the custard bake slowly and evenly.
- Chill. This is probably the hardest part but these purin need to chill so they set up perfectly. Chill them overnight so they set – the texture is best when cold.
- Flip. This is probably the most nerve wracking part of making purin: getting it out of the mold. You want to use a knife to loosen the edges and break the suction of the custard against the mold. Once you’ve broken the seal, flip it over on to a plate (bonus points if you have a retro pudding dish) and shake to release!
How to steam custard/crème caramel/purin
If you don’t have an oven or don’t want to turn the oven on, you can steam the purin as well. Add about 2 inches of water to a deep skillet and bring to a boil. When the water is boiling, turn the heat to low and place your purin cups (cover the tops with foil) in the pan, then put the lid on the pan to steam for 10 minutes. Turn the heat off but leave the lid on for an additional 10 minutes. Remove from the pan, and let cool on a wire rack before chilling completely.Instant Pot custard/crème caramel/purin
Yes! You can use an Instant Pot or pressure cooker to make purin. Just add 1 cup of cold water to the insert and place the steamer rack in. Carefully place the foil covered ramekins/molds on the rack. Set the Instant Pot on to high pressure for 12 minutes then do a natural release. Carefully remove the purin and let cool at room temp before chilling completely.Can I make custard/purin without milk?
Yes! You can use alternate milk products like soy, almond, oat, rice, hazelnut, any of the alternate milks will work but you will get a different flavor – the purin won’t be as rich as if you use full fat milk.Can I make custard/purin without sugar?
You’ll need a sugar alternate to make custard/flan/purin without sugar. I’ve heard that sugar substitutes like erythritol and swerve work, but I haven’t tried them.Can I make custard/purin without eggs?
Unfortunately you’re going to need eggs for this recipe because eggs are the main component of custard. They’re what sets and gives purin that smooth texture.How to eat Japanese purin
I love serving purin with the classic dollop of softly whipped cream and a cherry on top because it evokes those home cafe feels. A cup of pour over black coffee on the side completes the whole cottagecore experience!Why you should make Japanese purin
- You’ve been to Japan and are addicted to purin like me and wish you could fly back just to eat purin but in the time of Covid are left with a purin shaped hole in your soul
- You like flan or crème caramel or custard and want to try something new
- You watch anime and are always curious why everyone talks about purin
- You’re a fan of the super cute Sanrio character Pompompurin
- You live the home cafe life and need purin to make your home cafe complete
- You think purin is super cute and retro and you want to know if it tastes good too
Japanese Purin Recipe
This japanese take on crème caramel/flan will blow your mind.
Caramel
- 1/4 cup sugar
- 1 tbsp water (room temp)
- 1 tbsp water (hot)
Pudding
- 1 cup whole milk (full fat)
- 1/4 cup sugar
- 2 large eggs
- 1 egg yolk
- 1 tsp vanilla
Serve with
- whipped cream
- fresh cherries
Heat the oven to 300°F. Bring a pot of water to a simmer - you’ll need this for the water bath. Have 2 heat proof ramekins/pudding molds (at least 1 cup) ready for the caramel as well as an oven safe baking dish that can hold both puddings.
Make The Caramel
In a small sauce pan, add 1/4 cup sugar and 1 tablespoon water without stirring together. Heat over medium high heat until the sugar starts to dissolve on its own and caramelize. Let bubble until it turns a beautiful amber. Swirl the pot if needed to fully incorporate the sugar. When a deep brown, remove the heat from the pan and very carefully add in 1 tablespoon of water. The caramel will hiss and sputter, so watch out! Swirl to combine.
Immediately pour the caramel into the ramekins/pudding molds, as equally as possible. Swirl to spread across the bottom of the pudding molds. Set aside.
Make The Pudding
In another small sauce pan, heat up the milk and 1/4 cup of sugar over medium-low heat while stirring, until the sugar is dissolved, without letting the mixture come up to a boil. Remove from the heat when the sugar is dissolved.
Lightly beat the eggs with the vanilla in a medium bowl, being sure to fully incorporate the whites with the yolks. Slowly whisk in 1/4 of the warm cream into the eggs, incorporating fully. Continue to add the cream slowly. Strain the mixture into another bowl or liquid measuring cup.
Pour the custard into the ramekins/pudding molds then cover the tops with aluminum foil. Place in the baking dish and add the simmering water, about 1/2 up the side of the ramekins/pudding molds. Place in the preheated oven and bake for 40-45 minutes. Jiggle the puddings slightly to see if they are done. They should be slightly wobbly but not liquid.
Remove from the oven and carefully remove the ramekins from the baking dish and let cool on a wire rack for 1 hour then chill for minimum 4 hours or overnight.
To serve, run a butter knife or offset spatula around the edge and flip out onto a serving dish. Top with softly whipped cream and a cherry, if desired. Enjoy!
If you want to make smaller purin, just divide the mix between 4 smaller ramekins. Decrease the bake time by 5 minutes.

I Am... Doubanjiang: the Sichuan spicy bean paste of your stir fry dreams
There are lots of ingredients that only work once mixed, heated, and otherwise incorporated into tons of other things, and there are those ingredients that you can just spoon out of a jar and fry it with some chicken or kale and it tastes like you've slaved in a kitchen all day. That's doubanjiang. One of my go-to meals when I need something quick and deeply satisfying is mapo tofu (full disclosure: minus the tofu, just pork please), and the secret to amazing mapo tofu is doubanjiang. Like a great mustard, a great doubanjiang is a thing of beauty: perfectly spicy, seasoned just right so you don't have to do much more than heat it up, and so incredible tasting you'll never believe a simple ingredient just changed your life, for the better.
What is doubanjiang?
Doubanjiang is a beloved Chinese fermented spicy bean paste that's called the soul of Sichuan cooking. It adds a deep layer of umami-filled mala (spicy tongue numbingness) to authentic Sichuan dishes that's irreplaceable. If you've had good, like really good, Sichuan food that you can never seem to replicate at home, this might be one reason why.How do you pronounce doubanjiang properly?
Dough-ban-jang with the stress on the first syllable.What does doubanjiang taste like?
Doubanjiang tastes slightly sweet, pretty spicy, pretty salty, and very umami forward. It doesn't taste much like beans at all. It's similar to a spicy oyster sauce, or, if you can imagine it, a completely unfishy anchovy paste.How to cook with doubanjiang?
Doubanjiang often comes as actual beans that you can see, so usually you want to chop it up into a fine paste, and typically fry it too. You can use it as-is as a sauce to flavor stir fries, toss it with vegetables, pasta, or use it as a glaze for meats too. We also like to mix it up with beef or chicken stock to make great, easy stews with it.How do I pick out the best doubanjiang?
When shopping, you want to look for the Pixian (an area in China) variety if you can. It’s kind of like how, if you can, you want to buy champagne from the Champagne region in France. Doubanjiang has different grades based on how long it's been fermented for, and the top grade (3 years) can be hard to find outside of China, but if you come across it, buy it for sure!Is doubanjiang worth it?
Doubanjiang is 100% worth it. Not only just to lend an authentic taste, flavor, and spiciness to Sichuan food you make at home, but it can also be used for plenty of other things that you want to give an oomph to: Taiwanese beef noodle soup, pasta sauces, oven baked chicken thighs, the options are endless.Where can I buy doubanjiang?
You can usually find doubanjiang near the sauces at your local Asian grocery store, usually in the same aisle you'll find oyster sauce, fermented greens and pickles, or spices. You're not likely to find it at your local Krogers, at least in my experience. You can also find a pretty decent brand of doubanjiang on Amazon.How to subsitute doubanjiang?
You can't really replicate the taste of doubanjiang with anything else, but there are ways to get around that. Lee Kum Kee also sells a serviceable easier to find Cantonese style doubanjiang that they call Toban Djan or chilli bean sauce. In a pinch, you can also mix up a 50/50 mix of red miso and chili flakes (ideally Chinese chili flakes). Some people say that sambal oelek (a southeast asian chili paste) or gochujang (a similarly fermented Korean soybean paste) tastes like doubanjiang to them, but I'm skeptical of this one. However, if you really want to make a recipe that calls for doubanjiang and there is none to be had, gochujang is much closer than sambal oelek–and probably easier to find these days too.How do I store doubanjiang and how long does doubanjiang last for?
Doubanjiang comes preserved and fermented, so you don't need to worry much about it going bad, you'll definitely use it up before the government mandated use by date printed on the package. If it smells sour or grows fur, that's when to throw it away, but otherwise, it'll last forever. Usually, doubanjiang comes in pouches, so we like to transfer it to a nice jar, labelled and dated (optional). Store it in the fridge after opening it.Best recipes with doubanjiang
Doubanjiang Substitute
This isn't close to the real thing, but in a pinch, it works great!
- 1 tbsp red miso
- 1 tbsp chili flakes (chinese preferred)
Optionally chop up your chili flakes, then mix together with red miso until a paste is formed.
I Am... 7 Amazing Hatch chile recipes
If you live anywhere near the southwest, you'll see signs everywhere right about now proclaiming that Hatch season is here, it's now or next year! We don't talk a lot about specific ingredients on this site because we want our recipes to be accessible, but there are some that just need to be experienced. Due to my love of all things New Mexico, I buy a giant box of Hatch chiles every year and try my best to finish them before they go bad. Traditionally people freeze them, but not me, I just try to eat the whole 25lb apple (chile) box worth in under the two weeks the peppers typically last for.
Our best Hatch chile recipes
If you're thinking about buying a box this year, or already have, these are some of our best Hatch chile recipes. Pro tip: if you're lucky enough to live in the southwest, look for roasting days at your local grocery stores and if not, a lot of chile farms in New Mexico will ship boxes to you.Easy 4 Ingredient Hatch Chile Salsa Verde
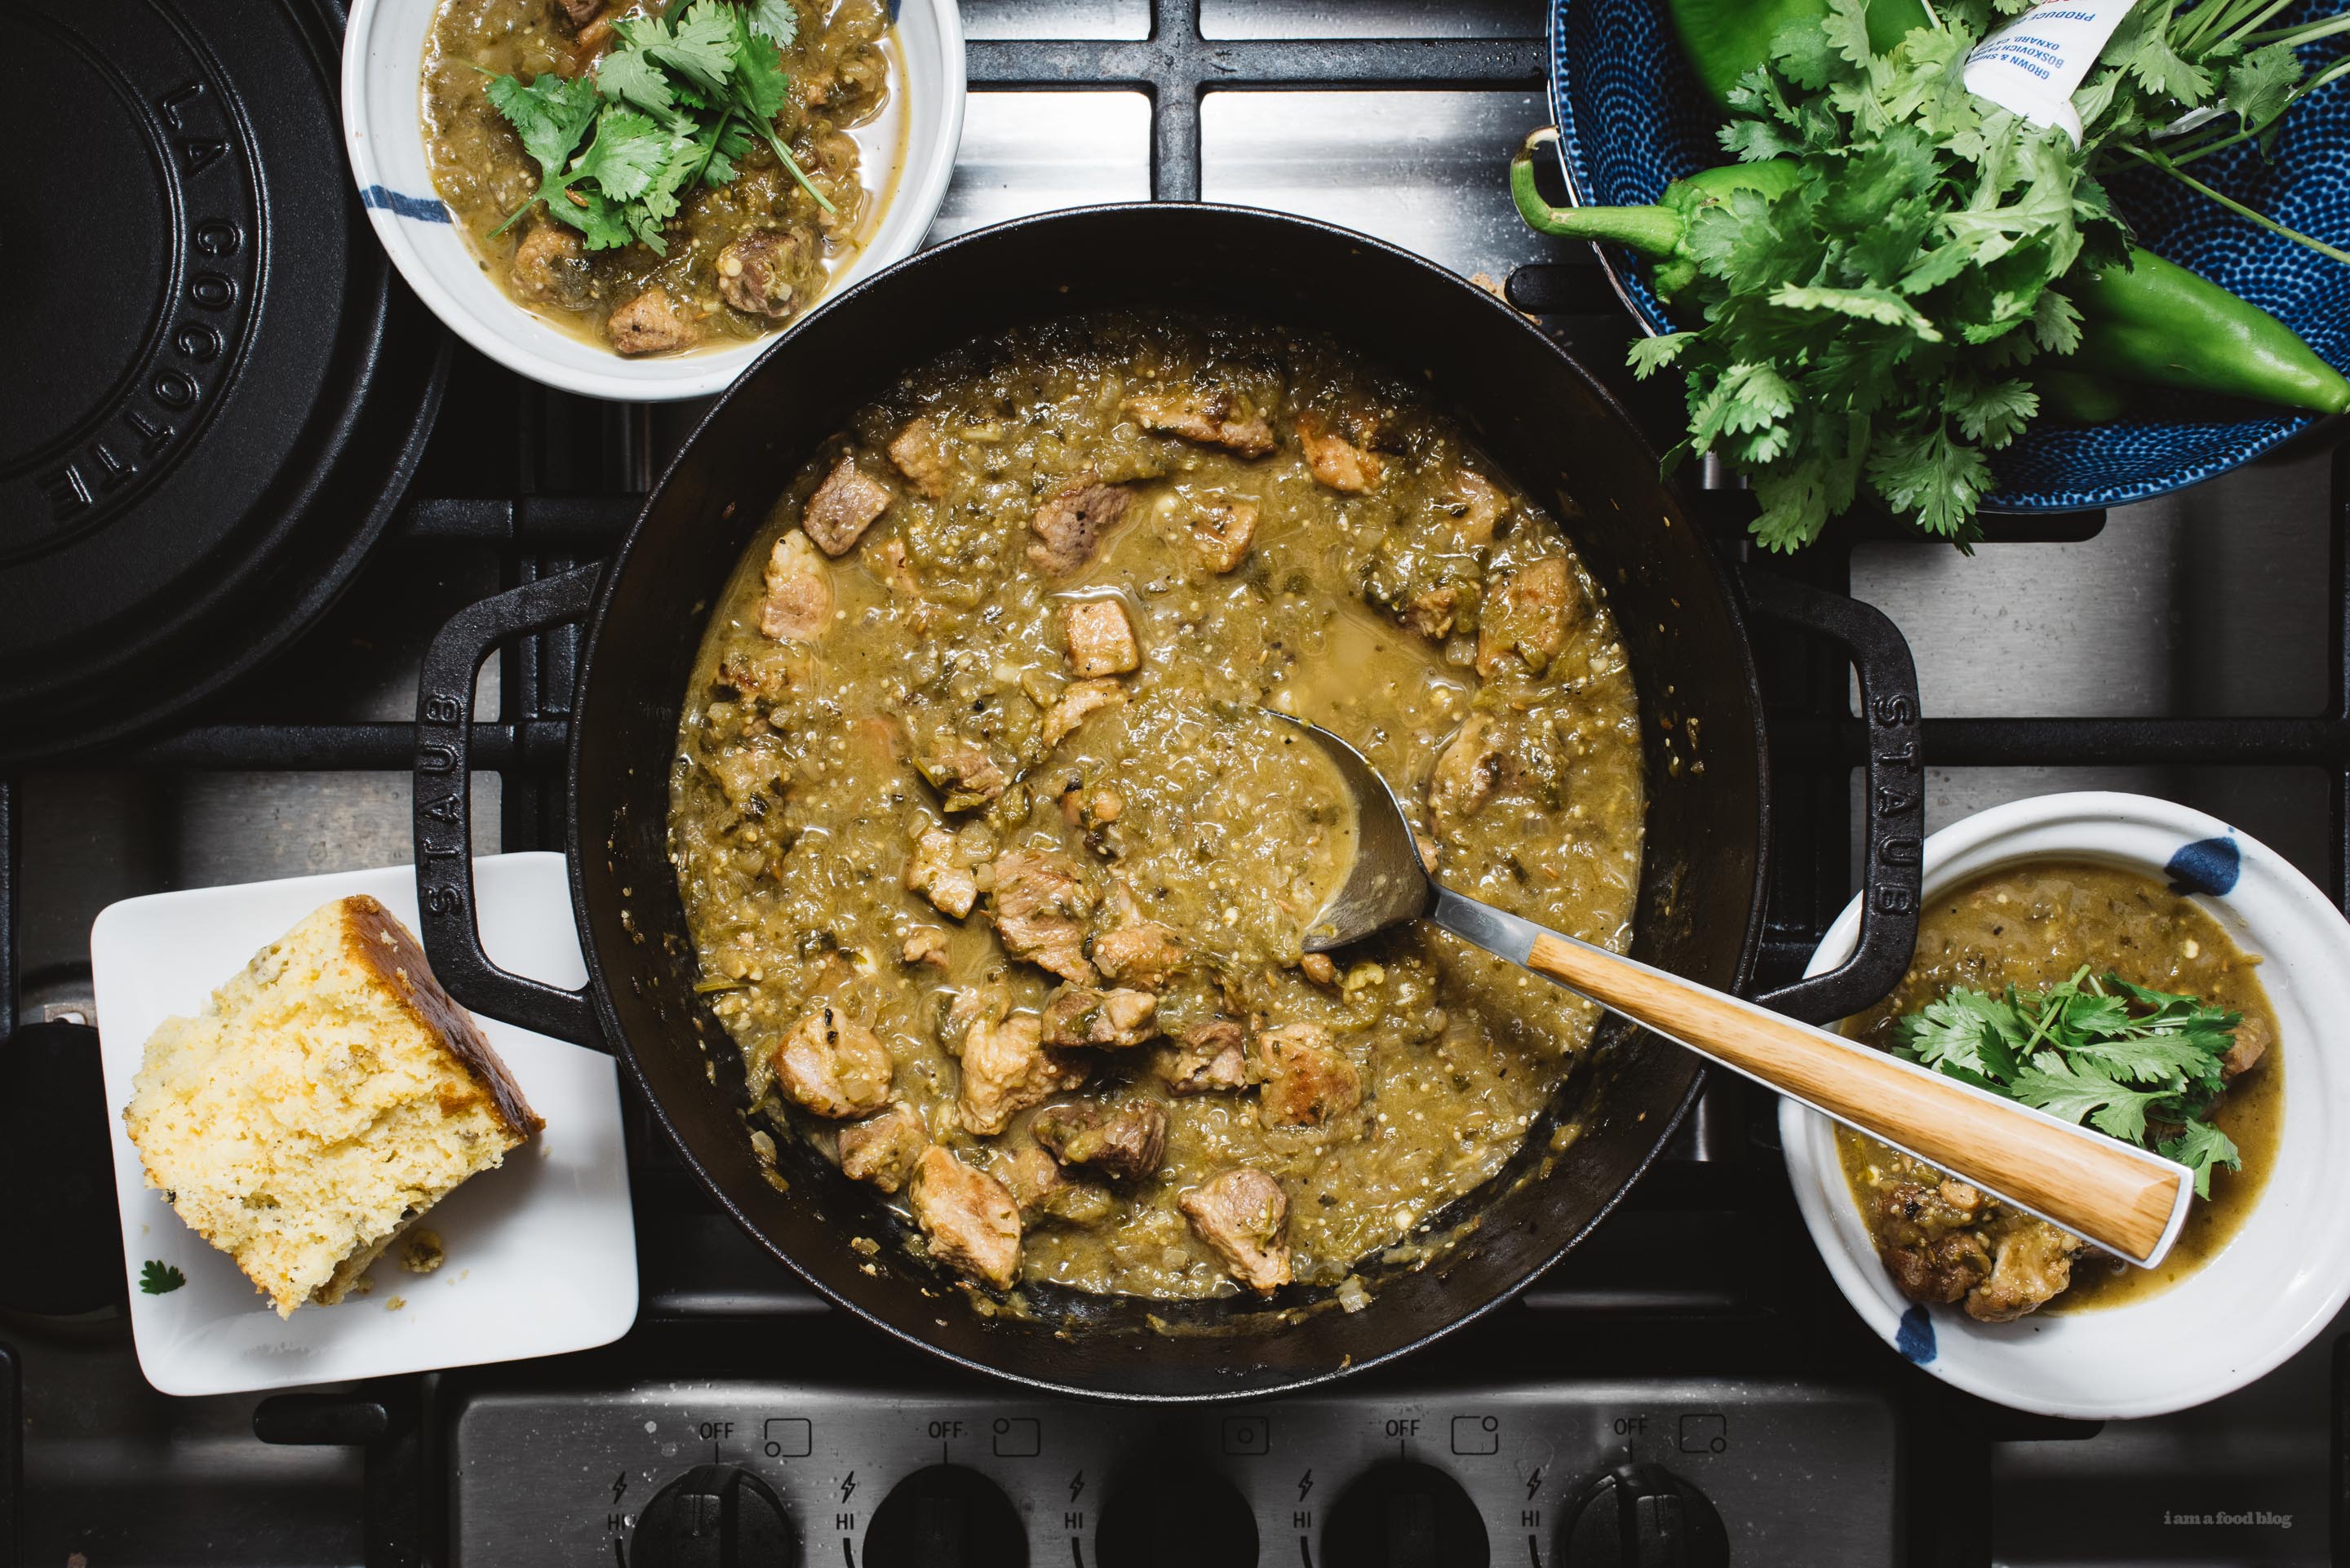
This smoky spicy salsa verde makes everything better.[wprm-recipe-roundup-item id="32764"]Slow Cooker Green Chili Hatch Chile Verde
Some say this classic New Mexico staple is the best pork stew ever, in any cuisine, and I agree. This is the perfect gateway drug to all things green chile.[wprm-recipe-roundup-item id="32857"]Easy Oven-Baked Hatch Green Chile Salsa Verde Hot Honey Chicken Thighs
You won't believe how good hot honey chicken is when it's spiked with hatch. Super easy, very healthy, this is the oven baked chicken of my summer dreams.[wprm-recipe-roundup-item id="32862"]Green Chile Cheeseburger Fried Rice
Cheeseburger fried rice is one of the best things in the world, and green chile cheeseburgers are the best cheeseburgers, QED: maybe the best fried rice in the world?[wprm-recipe-roundup-item id="29144"]Creamy Green Chile Mac and Cheese
If you love spicy jalapeno mac and cheese (and who doesn't?) this is the same idea, taken 5 levels up.[wprm-recipe-roundup-item id="29059"]Double Green Chile Cheeseburger
The smoky spicy peppers enhance the cheesiness of this cheeseburger in an unexplainable way. You kind of have to taste it to believe it, but green chile cheeseburger is widely considered the best cheeseburger on the planet for a reason.[wprm-recipe-roundup-item id="28935"]Hatch Green Chile Wontons 2 ways
These are wonton wrapped little balls of smoky spicy heaven. Who doesn't love wontons, especially both deep fried and in soup?[wprm-recipe-roundup-item id="29176"]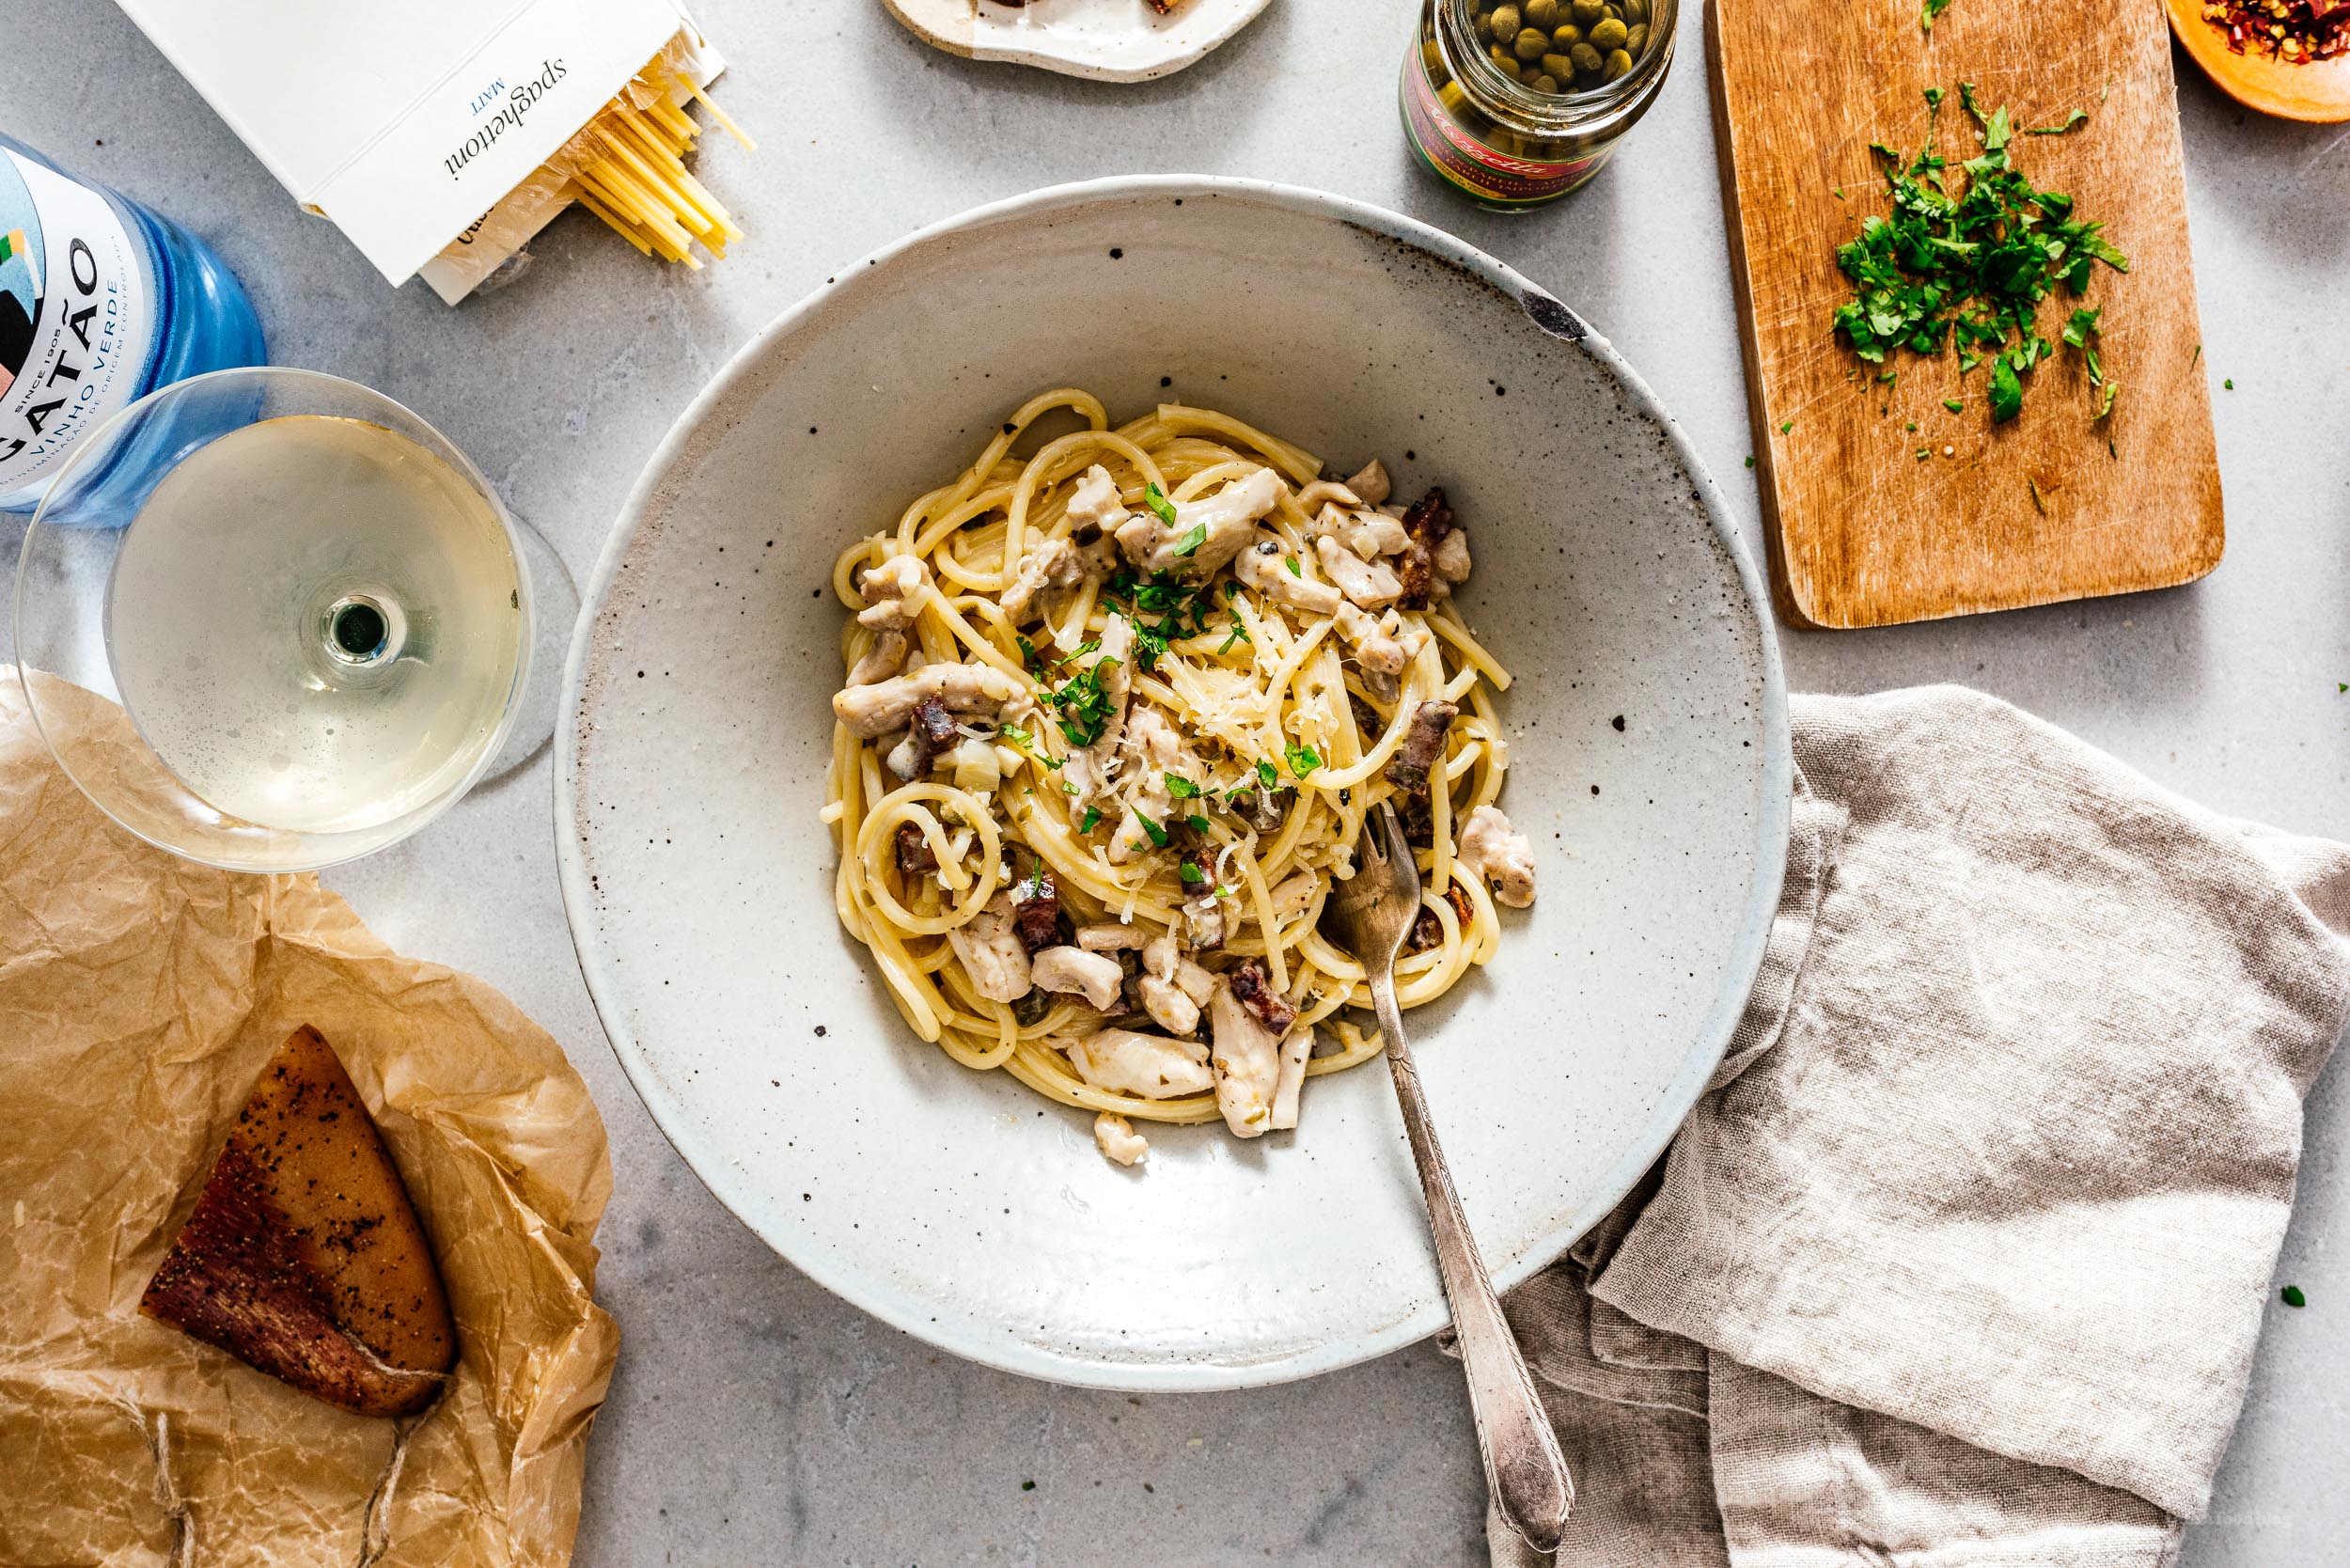
I Am... The Creamiest Creamy Chicken and Bacon Pasta Recipe
This is creamy chicken and bacon pasta done right. It’s creamy, cheesy, umami forward, and best of all, extremely chicken-y. Chicken gets a bad rap as a trashy pasta ingredient that it doesn’t deserve. Years of bad microwave chicken fettuccine alfredo has done a number to chicken’s reputation as a good pasta pairing, but I think chicken is, hands down, the most perfect partner for any cream-based pasta because of how silky smooth properly cooked chicken is. This is one of my favorite dishes to make when I’m cooking for myself (or Steph). The combination of crispy guanciale, poppy capers, and soft silky chicken make this a truly perfect pasta. I did this post as a beginner's guide to making any pasta, so feel free to skip the sections you already know about.
Why creamy chicken pasta?
Creamy chicken pasta is satisfying soul food. But more importantly, it’s much cheaper and faster compared to the 16 hour braises of any red meat ragu, yet is just as delicious. I’m a big believer in doing 10% of the work for 90% of the maximum return. This pasta is equally perfect for weeknight dinners or high stakes dinner parties. I truly feel like no one with a soul can disagree that creamy chicken pasta, done right, is a universal comfort food, no matter which culture or economic circumstance you grew up in.It’s one of the fastest pastas to make.
You can have this whole dish done faster than the time it takes to cook the pasta. I recommend people who are not expert cooks make the sauce first, then cook the pasta after, so that you’re not rushing to have it done by the time your pasta is ready to go. If you’re good at multitasking though, everything can be ready in 15 minutes or less, even including prep. Those 15 minutes are why I’m not a fan of one pot pasta recipes, which are rarely done in under 30. Sure, you save yourself washing one relatively clean pot - that was only filled with water, pasta, and salt - but it takes double the time compared to going with two pots.It could be the best chicken pasta you’ve ever tried
This dish is built from the same basic techniques that most authentic Italian places build their pastas from, just with the exotic meats (looking at you, wild boar everything) swapped out for chicken. That means that, at its core, you’re eating an ultimately authentic, properly made pasta, easy and unfussy. The secret to getting this pasta super creamy is not searing the chicken. I know, you’re thinking “but Mike, you’re an idiot, what about maillard reactions and texture and stuff, this is a total mistake and you don’t know how to cook”. While that's probably true, I’m saying: all of that stuff doesn’t matter in this case. The crispy rendered guanciale gets you all the crunch and crust you crave. The chicken, gently poached in garlicky infused white wine and cream, stays silky smooth and almost somehow tastes creamier than the cream sauce itself. It's extreme cream.Ingredients for creamy chicken pasta
- High quality pasta. Splurge on some good bronze extruded pasta. The price difference between high quality and low quality pasta is usually just a couple of dollars, but the quality difference is huge. Look for something with a sandy texture to it.
- Garlic. There’s a lot of garlic in this recipe. Over the years I’ve found that the expensive $1 garlic from USA tastes far better than the $1 for 3 pack from China, but that’s just me.
- Guanciale. The guanciale may be harder to find. Most likely you’ll need to look in an Italian deli to find it; I’ve never seen it at a supermarket deli, but it's worth looking for. You can sub with pancetta if you need to. More on guanciale below.
- Chicken thighs. Boneless skinless is the name of the game here. Because it’s a pasta sauce, and because I wanted it to cook fast, yet gently, I cut it into very thin 1” x 1/4” strips. Many people ask if you can switch out for breasts, and yes, you can, but the window for properly cooking breast is lower than with thighs, and if you over cook it, the chicken will be dry and not very tasty.
- Cheese. You need a good quality aged cheese. These can be found at most higher end grocery stores, and most krogers have an excellent cheese section now through their purchase of Murray’s Cheese. My go-to cheeses for pasta are parmigiano reggiano or pecorino toscana. As long as it’s aged and meltable though, you’re good. For this recipe, I went with a 10 month aged Kaasaggio Robusto Gouda. KRG is a little bit legendary in the cheese world, and I highly recommend you try some (although, I actually prefer their originale gouda).
- Capers. Capers add a bright little pop of happiness to this recipe, along with a whole lot of complexity. More on capers below.
- Cream. You need to use full fat cream for this recipe. Because milk won’t reduce into a sauce, you’ll probably end up with something resembling soup. If you are lactose intolerant, low sodium chicken stock is a good sub. I personally haven’t tried this recipe with milk alternatives.
- White Wine. I almost always choose whites for sauces. You can sub out the wine for low sodium chicken broth if you need to be alcohol free for health reasons because burning off the alcohol is a myth. Don't skip it otherwise though: alcohol has been proven to enhance other flavors, which is why vodka sauce works so well.
How to make creamy chicken pasta
If you have all your ingredients prepared, you can make the sauce in the time it takes for your pasta to cook. If you’re not a comfortable cook or you are making a really fast pasta shape, you might want to fill a pot with water, add salt, and hold it just below a boil while you make the sauce, then make your pasta afterwards. That way, it’s a slow, relaxing, wine filled cooking experience instead of a frantic ultra-multitasking-never-a-moment-to-rest experience.- Render your guanciale. Chop the guanciale up into 1/4” strips, then drizzle a little olive oil into a pan. Turn the burner up to high, and when the guanciale starts sizzling, turn the heat down to low and render for 2-3 minutes. Flip each piece over after a minute or two (if you’re feeling lazy, just give it a stir instead).
- Add your aromatics. Add your minced garlic and rinsed, chopped capers to the pan once the guanciale has become translucent. Give them a stir every so often so they don’t burn. Cook for 1-2 minutes.
- Add the chicken and wine. Add both at the same time, unlike with many other recipes. Turn the heat up to med-high and reduce the wine by half, while flipping the chicken to ensure even cooking.
- Add the cream. Reduce the cream by half.
- Add the cheese and black pepper. Finally, turn the heat down to low (or take the pan off the heat entirely if you are going to hold the sauce) and add the grated cheese and black pepper. Whisk for a minute or so to make sure everything is emulsified, taste and adjust seasoning if needed, then your sauce is ready for its pasta date.
How to sauce pasta
Saucing pasta properly is one of the most important parts of making good pasta, and is usually the difference between great pasta and sloppy bad pasta. To properly sauce pasta:- Cook the pasta to 1 minute before the time indicated on the package. The package time is a very good indication of al dente these days. You don’t need to taste it or throw it against the wall. If you prefer your pasta on the harder side (I do) cook it to 2-3 minutes before the time on the package.
- Reserve 1/2 cup of pasta water and drain the pasta into a colander or better yet, use a pasta scoop, and transfer the pasta directly into your sauce.
- Finish cooking the pasta in the sauce for a final minute. I prefer a nonstick skillet for this step. If it starts to look a little dry and not as creamy, add pasta water, 1-2 tablespoons at a time. Use silicone coated tongs or spatulas to gently toss the noodles as they cook, and you have perfectly sauced pasta!
What is guanciale?
Guanciale is the only ingredient that might be hard to find. If you’ve never had guanciale, it’s a sweet cured pork cheek that you can probably find locally made in most major cities. I’m sure I’ll get some grief from some Italians for saying this, but you can use it anytime the base of your pasta calls for any form of cured pork. One cheek keeps me and Steph in pasta for months, and costs less than $10 at our local charcuterie. The equivalent amount of pancetta/proscuitto would be 10x that much. It’s so worth it to seek it out. Guanciale doubles as the best bacon ever too, in cubed form. It almost never goes bad, and you can even use it for breakfast. When rendered properly, it’s crispy and crunchy on the outside and soft on the inside. It tastes a little sweet, not overly salty, and extremely bacon-y.Guanciale vs Pancetta vs Prosciutto vs Bacon
So what is the difference between guanciale, pancetta, proscuitto, and bacon then? The simplest answer is that bacon is smoked, which is awesome but not always a desireable taste for other dishes as the smoke overpowers any other flavors. When I was younger I used to make carbonara with bacon, and it mainly tasted like bacon.- Guanciale (originally from Umbria and Lazio) is pork cheek that’s been cured with mainly salt, sugar and pepper. At 90% fat with a sugar cure, it’s the fattiest and sweetest of the big 3.
- Pancetta is pork belly that’s been cured in the same way as guanciale, minus the sugar. It’s - ironically - a little less fatty, a little less sweet, and less dry. Pancetta, due to cost and popularity, tends to be widely made and sold everywhere.
- Proscuitto are those iconic legs of ham you see hanging in Italy (and elsewhere in the Mediterranean), cured in much the same way as pancetta, except for an extended drying process that ages the meat and produces amazing flavors. It’s the most expensive, driest, and its subtlety is lost when you’re talking about making pasta sauces. It’s great on its own as a starter, though.
The best substitute for guanciale
I always want people to give guanciale a try. It’s the least known of the big 3 Italian cured meats and that’s a shame, since you can even get it online these days. But, if it’s expensive where you live or impossible to find, pancetta is the best subsitute for guanciale. Most of the time I try to get pancetta in the deli department (vs prepacked) and ask for them to cut it into 1/4-1/2” slices for me, which I then cube at home.How do you cook with capers
When Steph and I first started dating we (as all couples do) introduced each other to our foods. She introduced me to tonkatsu and Japanese curry, and I introduced her to good mustard and olives and dim sum for 2. I also introduced her to capers, which she hated before me. It turned out that she just never had them done properly. If you've never used capers before, you should rinse your capers and squeeze them dry before cooking to mellow out the taste a bit. They taste a bit like raw onion + garlic, with a little pickley briny funk. Once you’ve cooked with them though, you’ll see why they are a classic secret ingredient in many sauces and braises. They add just the right pop to brighten up any dishes, but most especially rich creamy ones. They aren’t even a secret ingredient per se, restaurants (and home cooks) just leave them out of the description because so many people are wrongly turned off by them. But they are a tiny, incomparable little pop of brightness in a sea of rich sauces. If your capers have little white spots on them, that's ok. Those are intense flavor molecules.What to substitute for capers
Capers are available almost everywhere, so the only reason to substitute them is if you really don’t like the taste. Like with Steph though, that’s probably because you haven’t had them properly prepared. But if you need to sub them in this recipe, I would go for green olives, which are like capers-lite, without the bite, and personally, I would add a teaspoon of lemon juice as well.Tips & tricks for the best pasta
- Take your time to reduce the wine and cream. Even if your pasta is already done, it can wait while you reduce. Reducing the wine properly is the difference between a complex tasting sauce, and a sauce that tastes like wine. Reducing the cream properly is the difference between a milky soup and an actual sauce.
- Reduce the wine and cream separately. You might be tempted to just throw all the liquids in together and reduce them at the same time, but the wine will never reduce properly if you do that and your sauce will end up tasting a lot like wine.
- Salt your pasta water. Salting your pasta water infuses the pasta with salt and brings out the taste of the wheat. I don't think the pasta water has to be as salty as the Meditteranean (and who has tasted that, anyway?) but if your pasta tastes plain, it's because the pasta water wasn't salty enough.
- Don’t rinse your pasta. The starches on the cooked pasta allow sauce to cling to the noodles and forms a stronger, more robust sauce. If your homecooked pastas always seem a little wetter than the ones you get at restaurants and the sauce slides off, this is usually the reason why.
- Finish in the sauce. Cook the pasta one minute before al dente and toss it in the sauce for that final minute before serving. Plain pasta with the sauce ladled on top firmly belongs in the 90s.
- Prepare the sauce in advance. If you’re preparing for a larger group or dinner party, you can make and hold the sauce in advance. Then it’s just a matter of how many nonstick skillets you own. Add about 1/4 cup of sauce (plus chicken and bacon) to each portion of pasta.
- Make some extra guanciale to snack on. For real, I do this every time. Just drain the little cubes of rendered guanciale onto some paper towels and you have tiny crunchy pops of heaven.
What to serve with creamy chicken pasta?
If you want to make an occasion out of this, you can serve this creamy chicken pasta up with some antipasti. Our favorites include: sourdough with good olive oil, focaccia, garlic knots, charcuterie at home, burrata and kale, or this awesome peach, melon, and burrata salad. And of course, I had to do it up as an old school classic creamy chicken penne, complete with dried parsley flakes. -Living la vida fideo MikeThe Creamiest Creamy Chicken and Bacon Pasta Recipe
- 7 oz pasta (I used spaghettoni)
- 1 tbsp olive oil
- 2 oz guanciale (chopped)
- 4 garlic cloves (minced)
- 2 tbsp capers (rinsed, squeezed, and chopped)
- 2 chicken thighs (cubed)
- 1/2 cup white wine
- 1/2 cup cream
- 1 oz high quality aged cheese (such as parmesan)
- 1 tbsp freshly ground pepper
Bring a large pot of salted water to the boil. Cook your pasta according to package directions minus one minute.
Heat the olive oil and guanciale in a large skillet over medium heat for 2-3 minutes until the fat renders.
Add the garlic and capers. Cook, stirring occasionally, for 1-2 minutes.
Add the chicken and wine. Bring the heat up to medium high and cook until the wine is reduced by half, 2-3 minutes, flipping the chicken to ensure even cooking.
Add the cream. Reduce the cream by half, stirring occassionally to form an emulsified, glossy sauce, 2-3 minutes.
Reduce heat to low or remove from heat, then add cheese and black pepper. Whisk until cheese is melted, 1 minute. Taste and add salt as needed.
Reserve 1/2 cup pasta water, then drain the pasta and add to the pan. Turn the heat up to medium high and gently toss pasta for 1 minute or until every strand or piece of pasta is properly coated. Add pasta water, 1 tablespoon at a time, if needed.
Serve immediately, with extra grated cheese on top
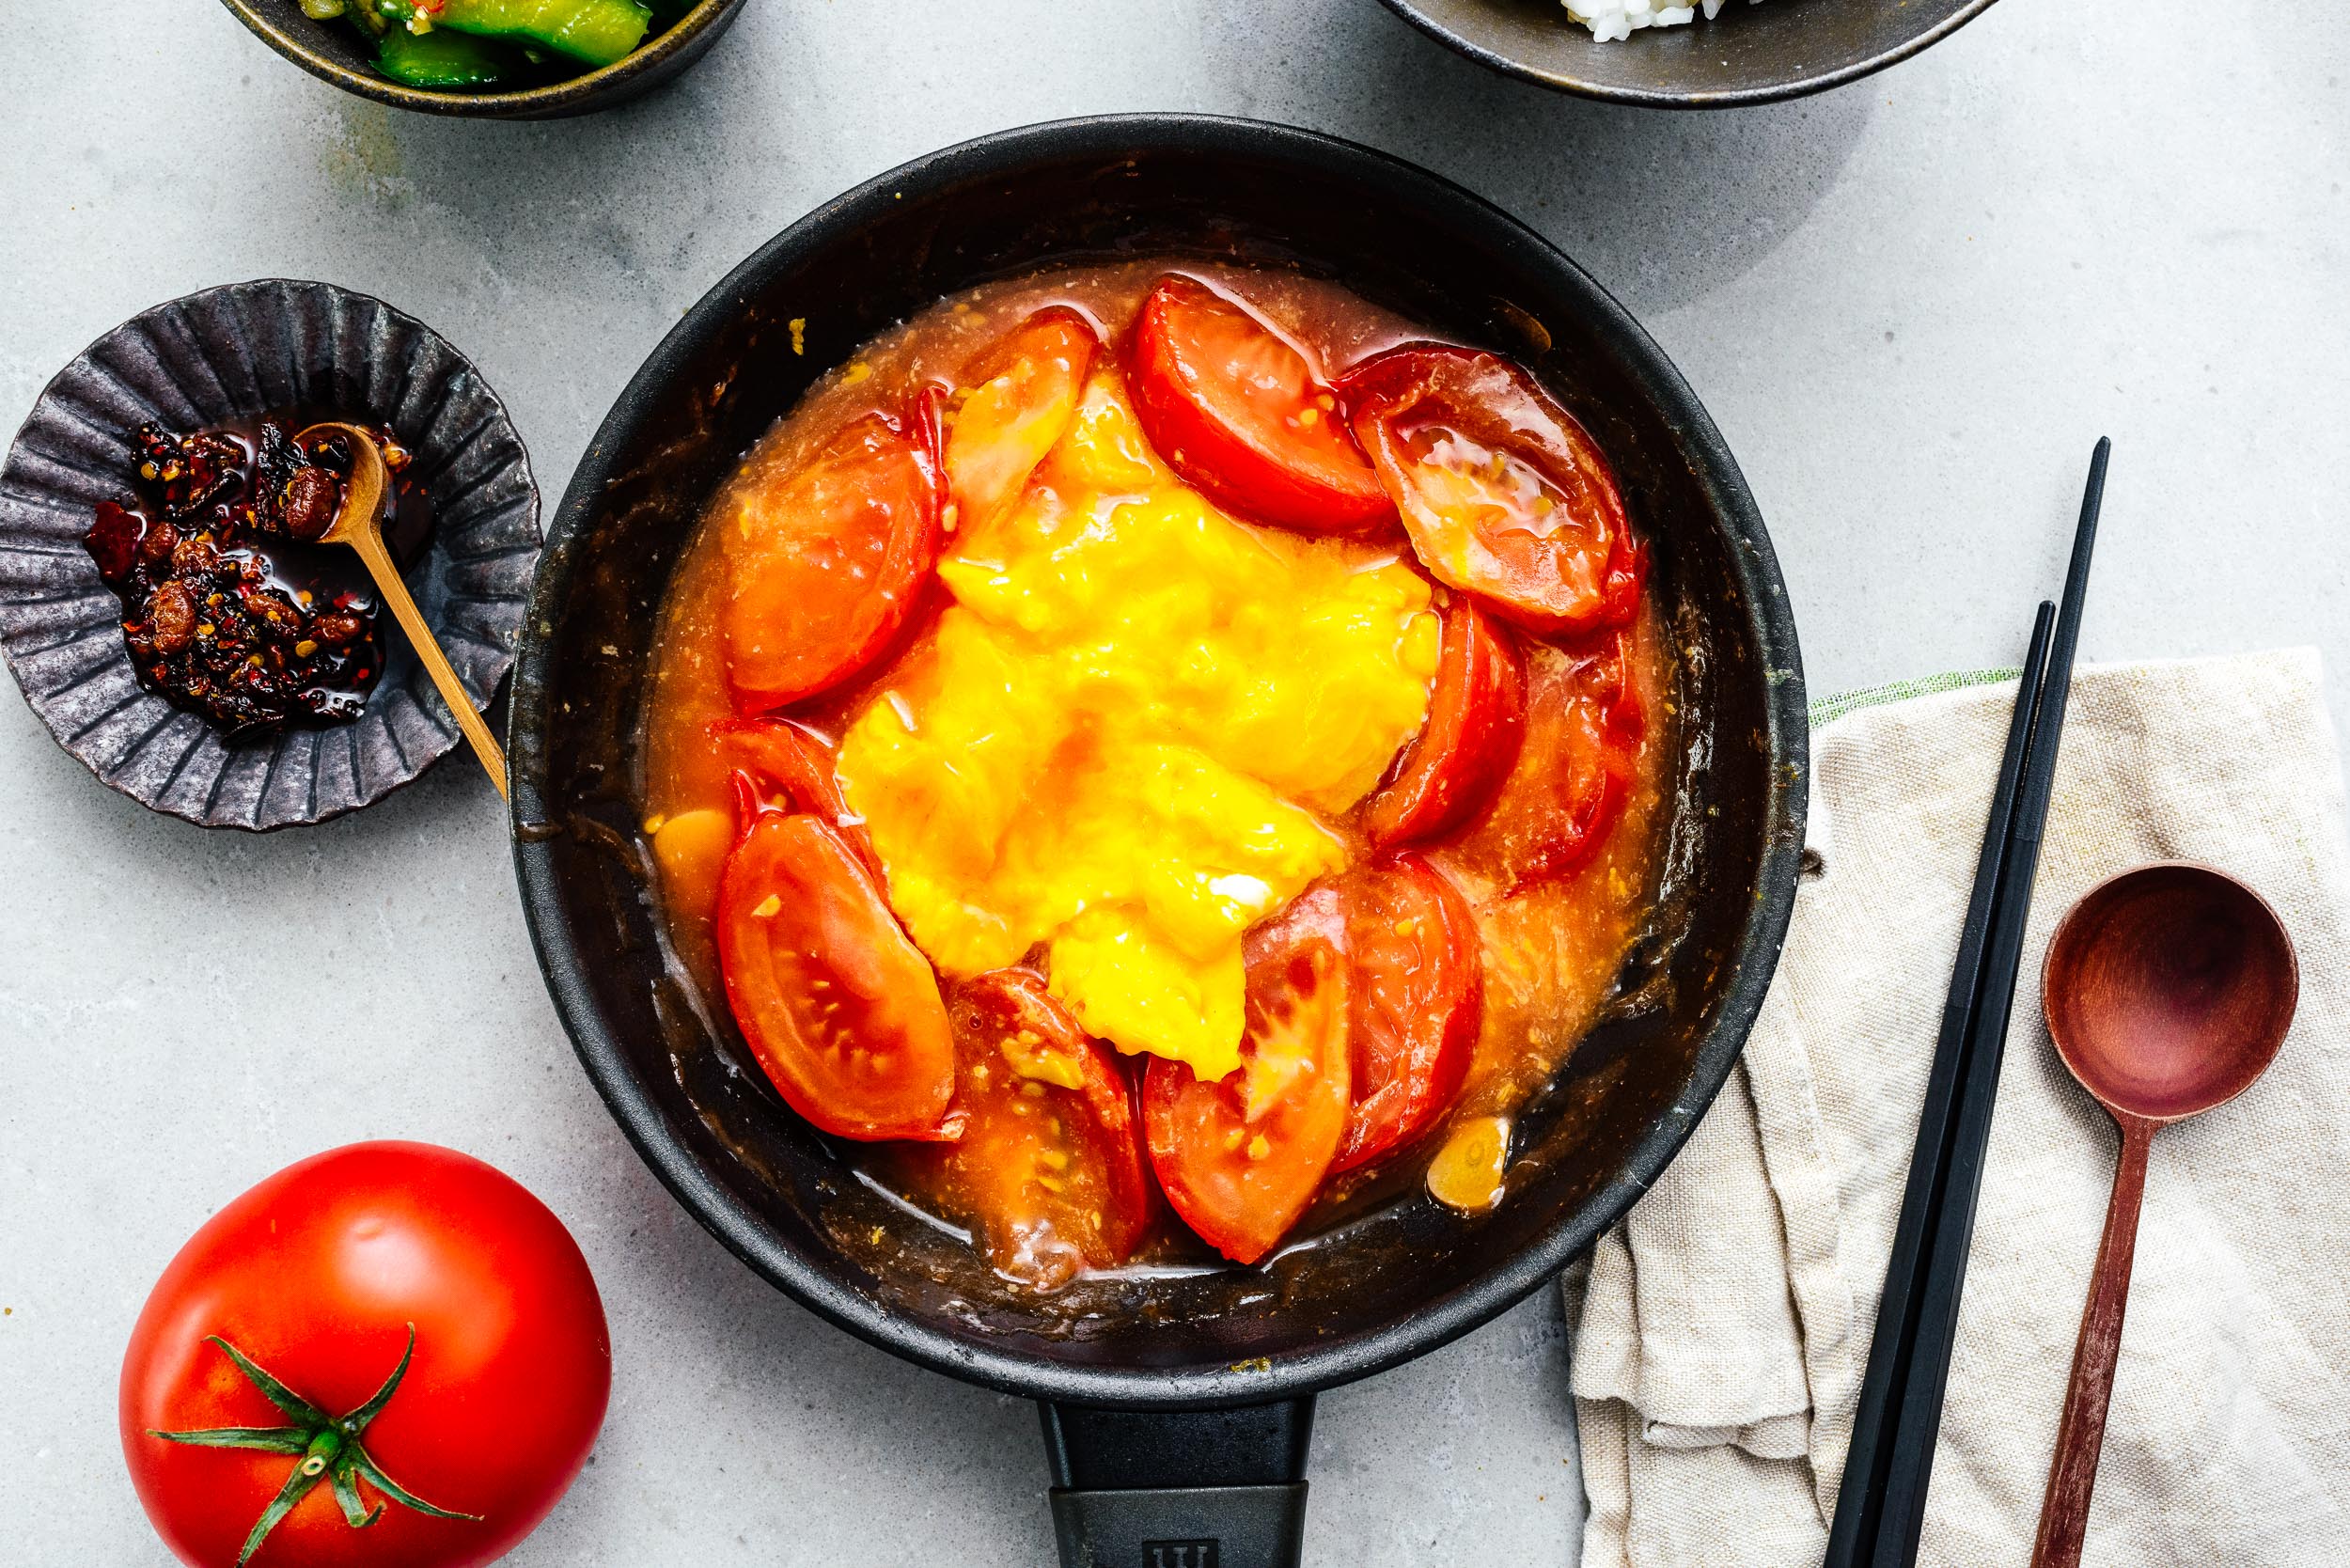
I Am... Classic Chinese Tomato Egg Stir Fry
Do you have a childhood favorite dish? Something that brought you comfort and you would eat no matter what? For me, that was tomato and eggs (fan qie chao dan/番茄炒蛋). Stir fried tomatoes and eggs are a super home style comforting meal (jia chang cai) found both at home and also at casual home-style restaurants. It’s a super simple combination of flavors, but there’s something about the sweet sauciness of the tomatoes and the savoriness of the eggs that is a perfect pair. Because it’s so simple – literally just stir-fried eggs with tomatoes – it’s one of those dishes that is on repeat. It comes together in less than 15 minutes, even if you’re not experienced in the kitchen and the pay off is unbeatable. Part of the appeal is definitely convenience and part of it is wistful cultural nostalgia. Along with rice and instant noodles, stir-fried tomatoes and eggs is probably one of the most quoted Chinese comfort foods. If you’ve had stir-fried eggs and tomatoes before before, as the kids say, if you know, you know. If you haven’t, welcome to the world of rich and creamy scrambled eggs, tangy with sweet and saucy tomatoes. It’s so satisfying.
What is stir fried tomato and eggs/fan qui chao dan/番茄炒蛋?
Stir fried tomatoes and eggs is a common home-style Chinese food dish that’s enjoyed both at home and at restaurants. It’s especially popular in school canteens in China. Essentially eggs are scrambled into large curds and stir fried with sliced tomatoes. The tomatoes cook out into a jammy sweet and savory sauce which combines with the eggs for the ultimate comfort food dish.What do you eat tomatoes and eggs with?
Most of the time tomatoes and eggs are eating on top a huge pile of steaming hot, fluffy white rice. The sauce stirs into the grains of rice and everything is combined into a super saucy rice bowl. But, tomatoes and eggs as a combination are so popular that there are a ton of other ways people eat tomatoes and eggs too. I’ve had them in dumplings, in soup, with noodles, with bread. The list can go on and on. To lots of Chinese people, tomato and eggs are the perfect combination, much like how a huge chunk of America considers peanut butter and jelly the ultimate food combination.What goes in stir fried tomatoes and eggs?
Just like peanut butter and jelly, there are a million different ways to make tomatoes and eggs. Because it’s a homestyle dish, everyone makes it differently. At it’s core, it’s tomatoes and eggs but people also add in garlic, ginger, shaoxing wine, vinegar, toasted sesame oil, ketchup, tomato paste, green onions, sugar, onions, white pepper…really there’s no right or wrong way to make tomatoes and eggs. Personally, I keep it pretty simple with eggs, tomatoes, a bit of sugar, ketchup (this is what really makes my tomato and eggs good!), and a bit of a cornstarch slurry to make everything extra glossy and saucy. Not everyone likes their tomato eggs saucy but I really like the extra silky luxuriousness that comes from a cornstarch thickened sauce.How to make stir fried tomatoes and eggs
1. Lightly beat your eggs. In a small bowl or liquid measuring cup, lightly beat your eggs with a pinch of salt, then set aside. The salt helps break down the structure of your eggs which will make them fluffy and tender because the salt helps breakdown proteins. The eggs become more liquid-y and viscous. Plus your eggs will be seasoned and we want everything to be nice and seasoned. 2. Prep your tomatoes and garlic. I like to keep my garlic in slices but of course you can mince if you want to. This is a personal preference, so do as you do. As for the tomatoes, if I’m going all out, I will remove the skins (see below) but most of the time, I just cut them into six wedges. I like using romas or tomatoes on the vine. Basically any super red and juicy tomato will do. 3. Get all your other ingredients ready. Make sure you have your measuring spoons out – if you don’t mind washing extra dishes and want to feel like you’re on a cooking show, you can even pre-measure everything out into little dishes – as well as your oil and sugar. Make a cornstarch slurry by whisking up your cornstarch with a bit of cold water. 4. Gently cook the eggs. It’s time to cook the eggs. Give the eggs another whisk then heat up a touch of oil in a non-stick pan. Cook the eggs over medium high heat being careful not to move them around too much. You want nice big curds. Use a silicone spatula to move the eggs from the edge of the pan into the middle, pushing them when you see that they have started to set. When the eggs are done but still soft, scoop them out into a bowl and set aside.What can I serve tomatoes and eggs with?
Classically served with fluffy white rice but you can of course serve it with fried rice too if you’re extra like that. Or maybe even toast!Tips and Tricks for the best Tomatoes and Eggs Stir Fry
- Peel the tomatoes. This is an extra step that most people don’t do but if you want a super soft and smooth tomato egg dish, you’ll peel your tomatoes because tomato skins are tough and fiberous. Make a tiny x in the bottom of the tomato, blanch and quickly toss into an ice bath and the skins just come right off. - Make sure you don’t overcook your eggs. Rubbery eggs don’t taste good. This is your chance to show off your soft scramble technique. Also, be sure to try to keep the curds nice and large, you don’t want your dish to be huge pieces of tomatoes and broken up egg bits. - On the other side of the equation, don’t undercook your tomatoes. You want the juices to come out and the sugars to caramelize into a delicious jammy sauce. Hard, under cooked tomatoes in this dish is a travesty. If you can, be sure you’re using summertime sweet tomatoes. If it’s the middle of winter, just be sure to cook your tomatoes down enough. I hope you try this dish! It really is one of my favorites and I hope it’ll be one of your backpocket favorites too. It’s not impressive and it’s not the prettiest to look at, but it’s homey and comforting and good. tomatoes and eggs, xoxo steph PS - If you love egg dishes, please try this soft scramble tamagoyaki with rice, jammy eggs with yogurt, crispy fried eggs, or coddled eggs.Classic Chinese Tomato Egg Stir Fry 番茄炒蛋
- 3 eggs (lightly beaten)
- salt (to taste)
- neutral oil
- 3 roma tomatoes (sliced)
- 2 cloves garlic (sliced)
- 1 tsp sugar
- 1 tbsp ketchup or tomato paste (optional)
- 1 tsp cornstarch
Lightly whisk the eggs with a pinch of salt. In a non-stick frying pan, heat up a bit of oil over medium high heat. Add the eggs, using a rubber spatula to stir occasionally so the eggs cook slowly and evenly, pushing every so often so you end up with large curds, about 2-3 minutes. Remove from the heat into a bowl and set aside.
Add a bit more oil to the pan and add the tomatoes and garlic and cook over medium heat until the tomatoes start to cook and caramelize, pushing down on the tomatoes to release their juices. Stir in the sugar and ketchup.
When the tomatoes are juicy and bubbling, turn the heat down and let the tomatoes reduce a bit.
While the sauce is reducing, whisk the cornstarch into 1/4 cup water then add to the pan. Stir in and the sauce come to a bubbling simmer to thicken slightly.
Add the eggs back into the pan briefly and then enjoy on fluffy white rice.
For a bit of extra oomp, whisk in 1/2 tsp shaoxing wine with the eggs and finish with a drizzle of toasted sesame oil.
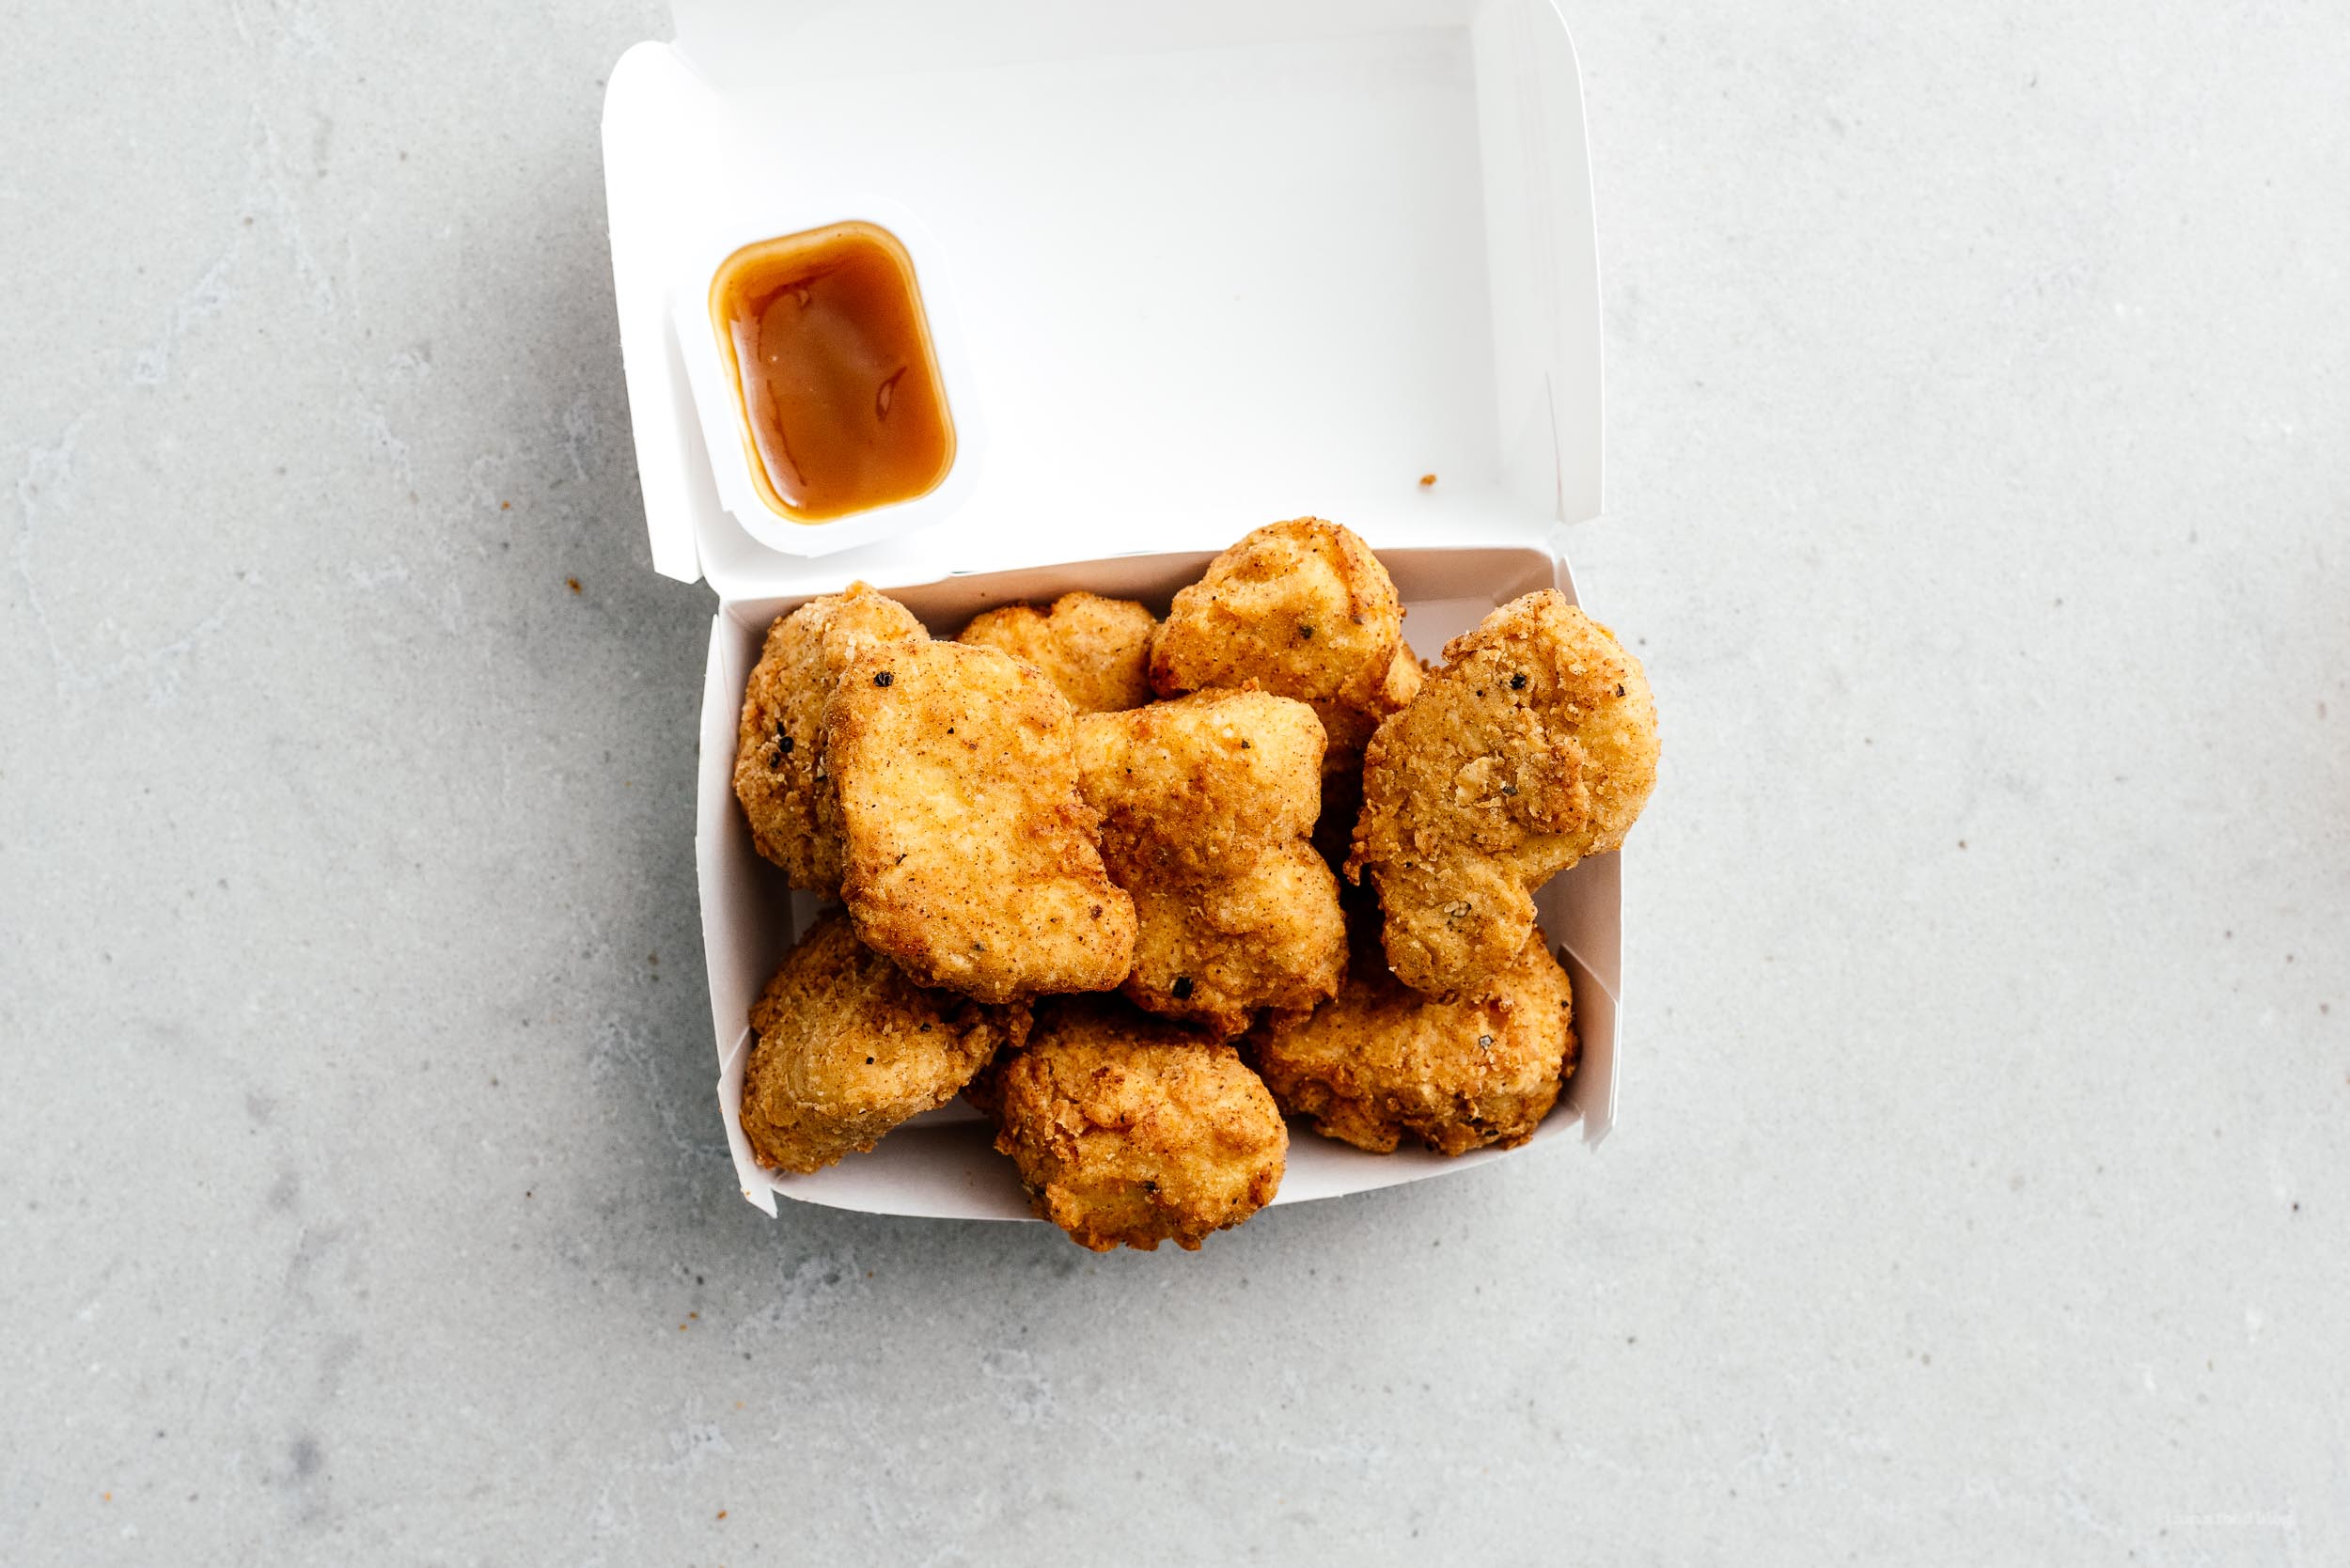
I Am... Tofu Fried Tofu Vegan Chicken Nugget Recipe
If you’re one of those people who think tofu just isn’t for you, these supremely savory, catastrophically crunchy, jaw droppingly juicy chicken fried tofu nuggets inspired by NYC’s Superiority Burger will change your mind forever. I’m a lover of tofu. I love it in all it’s forms: plain with just a drizzle of soy, in a ruby red mapo sauce, crispy with a sweet and savory miso glaze, and even in wonton. Tofu to me, is undeniably a good thing: high in protein, plant based, and incredibly tasty. But, I get it, some people don’t appreciate tofu. They think it’s bland or has a weird texture. I’m here to tell you tofu doesn’t have to be bland! It has texture! I’m here to give you tofu fried tofu nuggets! Because a life without tofu isn’t a life worth living. I’ve had many, many versions of crispy fried tofus and while I love them all, this chicken fried tofu (more on what that means exactly later!) is one of the best nuggets I’ve had, chicken or not. Extra firm tofu is given a golden crust then brined in spices so it soaks in flavor like a sponge. After the brine, a heavenly homemade mix of 11 herbs and spices (JK there aren’t 11) are mixed into flour to give it the same crunch as you find on classic fried chicken. If you like nuggets, these nuggets will satisfy you to no end, pinky swear.
What is tofu fried tofu?
Tofu fried tofu is kind of a misnomer. I think it stems from “chicken fried,” like how everything that is battered in buttermilk and coated in flour is considered “chicken fried.” But since there’s not buttermilk in this recipe – it’s completely vegan – the internet started calling battered tofu “tofu fried tofu.” Or maybe that’s just me? Anyway, this tofu is inspired by Superiority Burger’s crispy fried tofu sandwich which has been named as one of NYC’s best chicken sandwiches even though there’s no chicken in it. For this tofu fried tofu we’re going to do a three step process: brown, brine, then deep-fry. Browning the tofu gives it an extra crust and stability. It also pulls out some moisture which we’re going to add back in by brining. The brining will inject salt, garlic, and onion-y flavors all through the tofu, making it incredibly savory and juicy. After the brine, the tofu nuggets get double dunked into a seasoned flour. It sounds like a lot, but it’s not and really, it’s so worth it.The best kind of tofu for tofu fried tofu
Tofus are categories by texture/consistency which is determined by water content. The more water, the softer and silkier the tofu. Tofu comes in silken/soft, regular, firm, and extra firm. The best kind of tofu for this kind of preparation is extra firm. It comes packaged in plastic, without any extra water. It holds its shape well but you can also crumble it. You can find it at all Asian grocery stores and even Trader Joe’s sells it. I like to use a local tofu maker’s firm tofu variety.How to make tofu fried tofu nuggets
1. Shape: cut the tofu up into nugget shapes (I went with the classic ones - the boot, the tombstone, and the oval). If you want your nuggets to look more organic, use your fingers to crumble the edges. Pat the nuggets dry. 2. Sear: give the tofu a nice golden brown sear in some hot oil. I like to use cast-iron or a non-stick pan for this step. 3. Soak: brine the tofu in a salt-sugar mix with garlic and onion powder for extra flavorful juiciness INSIDE the tofu. 4. Coat: set up a dredging station with two bowls, one filled with the seasoned flour mix and another one with water mixed with a bit of vegan mayonnaise or mustard. The mayo/mustard gives a bit of flavorful body and mimics buttermilk so you’ll get a nice coating of crunchiness on each nugget. Pat your nuggets dry then dip into the mayo-mustard, then seasoned flour. Double dunk for max crunch. 5. Fry: Time to fry! Heat up at least 2 inches of oil in a heavy bottomed pot and make sure it reaches 360-375°F. You want a moderately high temp to quickly fry the tofu. When it’s brown and crunchy, remove it from the pan and let it drain on a wire rack.The best sides to serve with tofu nuggets
Personally we just devoured these nuggets as is with a side of homemade sweet-n-sour sauce (recipe coming soon) but if you have the deep fryer out and you want to be a little crazy, you can make Heston Blumenthal’s insanely crunchy two day affair triple cooked chips. If you want something a little less time consuming but just as good, you can go with air fryer fries. I also LOVE LOVE this perfect picnic potato salad, these crispy stovetop roasted red potatoes, these crispy oven roasted potatoes, and these insanely delicious potatoes with burrata. Obviously I think potatoes go with nuggets :) I hope you give these a try especially if you love tofu and even if you don’t. They’ll blow your mind. tofu forever! xoxo stephTofu Fried Tofu Vegan Chicken Nuggets Recipe
- 14 oz Extra firm tofu
- High heat oil for deep frying (such as grapeseed)
Brine
- 1 tsp garlic powder
- 1 tsp onion powder
- 1 tsp sugar
- 1 tsp salt
- 1 tsp freshly ground pepper
Coating
- 1/4 cup mayo (see notes)
- 1/2 cup all purpose flour
- 1/2 tsp smoked paprika
- 1/2 tsp ground cayenne pepper
- 1/2 tsp onion powder
- 1/2 tsp garlic powder
- 1/2 tsp salt
- 1/2 tsp freshly ground pepper
- 1/4 tsp baking powder
Prep the marinated tofu: line a cutting board or baking sheet with paper towels or clean kitchen towels. Cut the tofu into 2 inch by 1 inch slabs, 1/2 inch thick. If desired, crumble the edges so they look more like nuggets. Lay out in a single layer on the prepped baking sheet and cover with towels. Gently press to extract some moisture.
Heat up 2 tablespoons of oil in a large non-stick or cast iron skillet over high heat until shimmery. Sear the tofu, until it forms a golden brown crust, flipping once, 4-5 minutes per side. Remove and drain on a rack.
Make the brine: in a large bowl, combine 1.5 cups water with the garlic powder, onion powder, sugar, pepper, and salt. Add the seared tofu to the brine and let marinate for minimum 1 hour and up to overnight.
Prep the fried tofu: In a shallow bowl, mix the mayonnaise or mustard with 1/4 cup water until smooth. In another shallow bowl, whisk together the flour, spices, salt, pepper, and baking powder. Remove the tofu from the brine and pat dry. Dip the tofu in the mustard mixture, turning until coated, then dip into the flour. Dip back into the mustard, then the flour, so each nugget is twice coated.
In a dutch oven, heat 2 inches of oil over medium high heat and prepare a wire rack on a baking sheet. When the oil reaches 350°F carefully lower the battered tofu into the hot oil and fry, flipping as needed, until golden brown, about 3-4 minutes. Transfer to the wire rack.
Enjoy hot with sauces!
inspired by Superiority Burger via their cookbook
You can sub vegan mayonnaise, vegan yogurt, or mustard in the coating. You want something that’s a bit thick so that the flour can cling to the tofu. I used a half-half mix of mayonnaise and mustard.
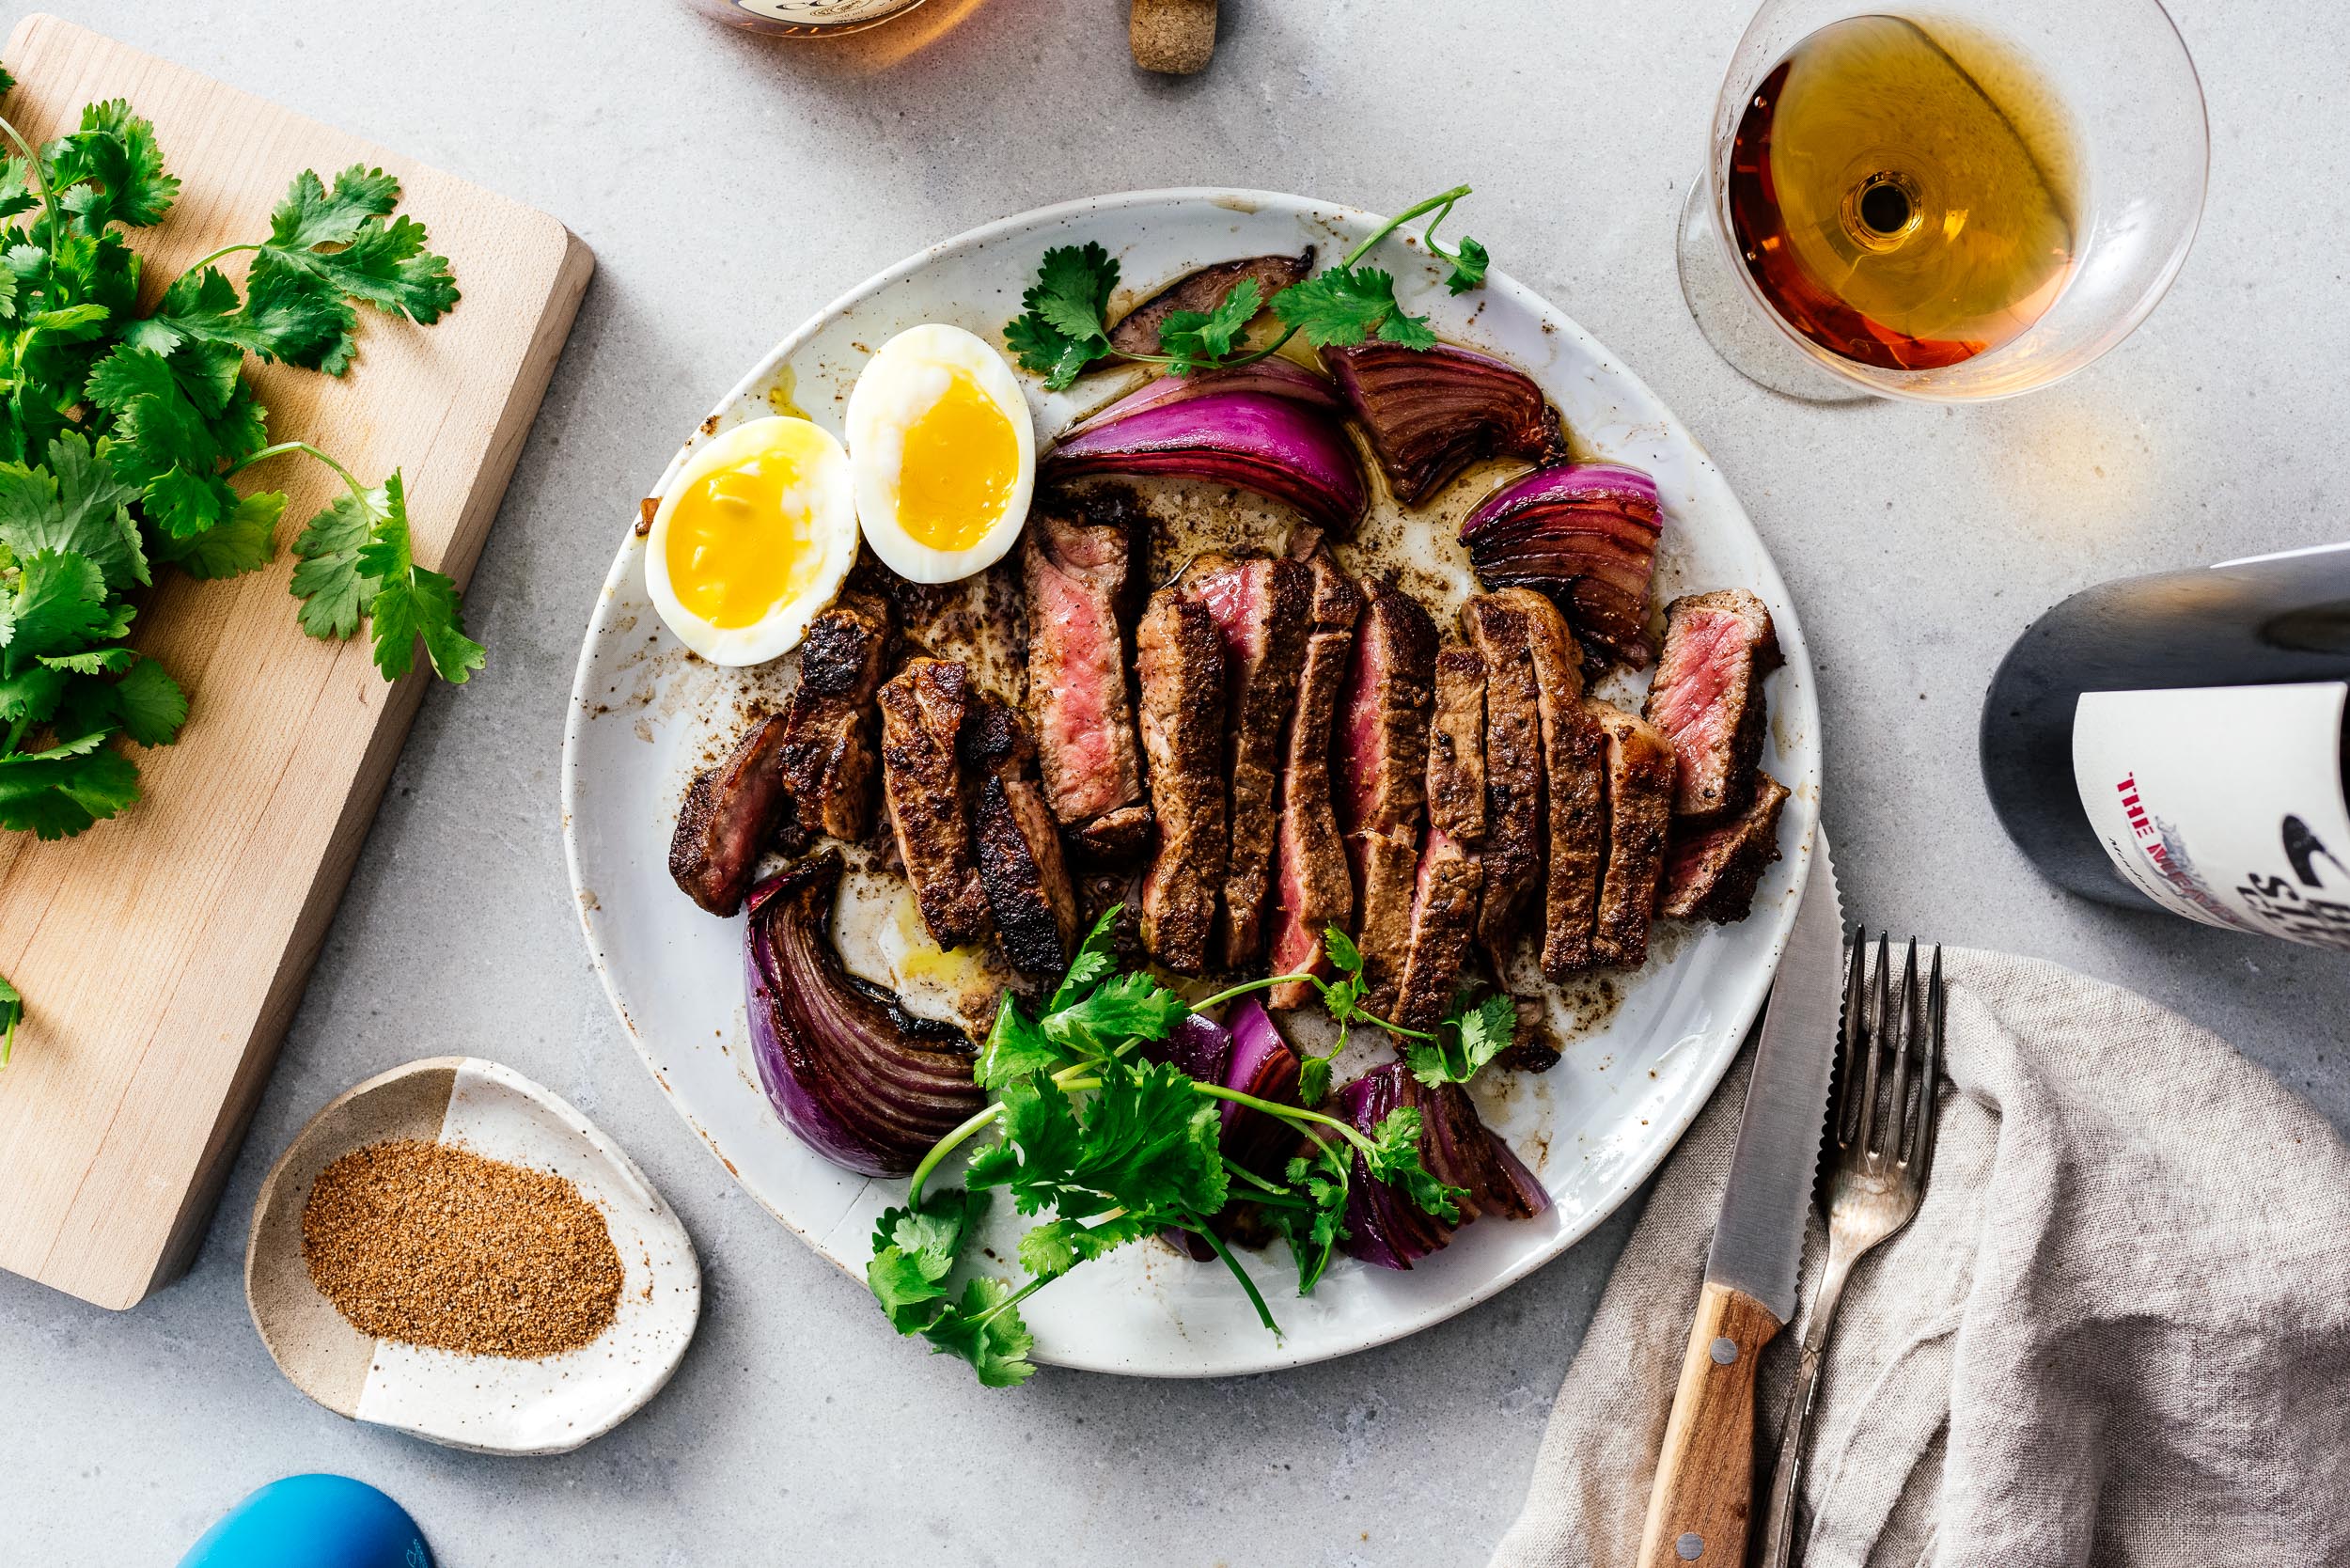
I Am... The Best Cajun Butter Steak Recipe
If you’re one of those people who think steaks should only be seasoned with salt and pepper, this deliciously juicy, incredibly flavorful cajun butter steak recipe based off of Smith & Wollensky’s Cajun Rib Steak will change your mind forever. I used to think that adding anything but salt and pepper to a high dollar, high quality cut of beef was basically wasting it, but as I got older I quickly saw the error of my ways. After all, steak frites is my favorite food in the whole world, and who serves steak frites without at least a good herb butter? Not to mention chimichurri, that famous sauce from le relais l’entrecôte, or classic peppercorn sauce? A life without seasoning is a pretty boring one. This cajun butter steak is one of the best I’ve tried. The homemade cajun spices add just the right amount of heat and savoriness without tasting like those bad cajun wings at the pub (although there’s a time and a place for those). It’s both dry rubbed and marinated in oil for up to two days to pull out water and replace it with pure flavor. If you are a salt and pepper evangelist, one bite of this steak will change your mind, I promise.
What is the cajun rib steak
The steak preparation I’m using for this cajun butter steak recipe is based off of the cajun rib steak, one of the signature dishes at Smith & Wollensky, an old money-looking steakhouse chain created, ironically, by the guy who created TGI Fridays. Don’t let the questionable heritage fool you though, the original location got a glowing two star review from Ruth Reichl. The recipe was recently released and shared far and wide as part of a fundraiser for NYC restaurants. Once I saw it, I couldn’t help but try it out. The cajun spice rub helps create a blackened version of that prized thick crispy crust that everyone tries to get at home, while the long two day cajun-based marinade imparts natural complimentary smoky flavors to the meat. It’s so good that you don’t really need the cajun butter peppercorn sauce, although it's delicious and really recommended. It definitely adds a nice hit of heat. Eventually - I’ve made this a lot of times now - I even stopped adding salt, thus in this recipe both are now optional steps.The best cut of beef for steak
This is a New York-based recipe, so it’s only natural that you should use a New York strip, and that’s what I did. Another option (and my go-to answer whenever someone asks me what's the best steak) is a thick cut ribeye. Honestly though, the marinade makes this so tender that you can use anything, and I wouldn’t go any more expensive than strip. The first steak I tried it with was a cheap sirloin, and it tasted amazing.What’s the best way to cook steak
You can cook this steak any way you like and it partially depends on the thickness of the steak you have, how much you’ve tempered it (let it sit out of the fridge), and your preferred doneness. While you can grill it, if you want to make the optional peppercorn sauce (which is really good), you'll need to use a skillet. This recipe is written for rare/medium rare for steaks under 1.5”. For steaks over 1.5” thick or other donenesses, you can reverse sear, sous vide, or sear, then finish in a 350ºF oven until your steak hits your desired temp. If you are a steak-pro, you already know all this, and if you aren’t, I highly recommend getting a good thermometer, like an instant read thermocouple style meat thermometer. It takes all the guesswork out and gives you perfect steak every time.Steak doneness temperatures
For a quick and easy reference, when we have dinner parties in our house, our steaks are roughly done at: Rare: 125ºF Medium rare: 135ºF Medium: 145ºF Medium well: 155ºF Well done: ?♂️How to make cajun rib steak
1. Toast your spices: combine all the spices together and toast them over a low heat until they are fragrant. 2. Dry rub: rub each steak generously the toasted spices (about 1.5 tablespoons each), then place in the refrigerator uncovered for one hour to dry out. 3. Marinate: while the steaks are resting, combine the ingredients for the marinade in a container just large enough to fit your steaks. Add the steaks when they are ready, then cover with extra oil. Marinate for between 6 hours and 2 days; try to get as close to the 2 day mark as you can though, the longer the better. 4. Sear your aromatics: aka cook your onions. Heat up a large cast iron skillet with 1 tablespoon of high heat oil until it’s just about smoking. Add the onion wedges and cook for 2 minutes per side, or until charred. Turn them with a flipper or tongs and cook the other side, then remove and set aside. 5. Sear your steaks: Season your steaks if you know you like your food on the saltier side. I prefer to season with flaky sea salt at the table for this sort of thing. Cook the steaks roughly 3 minutes per side for rare or 4 minutes per side for medium rare. Rest the steaks while you make the cajun butter peppercorn sauce. If you are doing these in batches, turn your oven to warming or proofing mode (no higher than 80ºF) to keep the steaks warm. Let the skillet come back to temp in between steaks. 6. Make the sauce: While the steaks are resting, make the cajun butter peppercorn sauce by reducing the cognac, then whisking in the butter, cream, and 1 tablespoon each of freshly cracked black pepper and cajun spice mix.Do you really have to marinate it for two days?
Not really, but I tested one after one day and while it was good, it didn't have that deep level of flavor that the two day one had. Besides, if you are going to use a whole onion and two cups of oil, not to mention some nice steaks, you might as well go all the way. I even covered and saved the marinade in the fridge to reuse a second time and it was still ok.The best sides to serve with steak
Personally, I love this steak with just the onions in the recipe, but if you want to go all out (and I mean all-out), you can make Heston Blumenthal's crazy good and just plain crazy two day triple cooked chips. For something a little easier, we have air fryer fries, instant pot mashed potatoes, or for a little surf and turf, a really nice lobster risotto. I really hope you give this a try, I'd never considered cajun as a steak flavor before and it's totally blown my mind how good it is. -MikeThe Best Cajun Butter Steak Recipe with Cajun Butter Peppercorn Sauce
- 2 10oz steak of choice (ideally New York Strip)
- 1 red purple onion (cut into wedges)
Cajun Spice Mix
- 2 tsp cayenne pepper
- 2 tsp chili powder
- 2 tsp garlic powder
- 2 tsp ground black pepper
- 2 tsp ground white pepper
- 2 tsp onion powder
- 2 tsp smoked paprika
- 1 tsp ground cumin
Steak Marinade
- 2 cups neutral oil (such as canola, plus extra if needed)
- 1 medium onion (finely chopped)
- 1/4 cup vinegar (I used apple cider vinegar)
- 1 tbsp brown sugar
- 1 tsp salt
- 1 tbsp cajun spice mix (from above)
Optional Cajun Butter Peppercorn Sauce
- 2 tbsp cognac
- 2 tbsp unsalted butter
- 2 tbsp heavy cream
- 1 tbsp cajun spice mix (from above)
- 1 tbsp freshly cracked black pepper
Make and toast the cajun mix by combining all the spices together and toasting over a low flame until fragrant, 2-3 minutes.
Rub each steak generously with about 1.5 tablespoons of the cajun mix per steak, then chill in the refrigerator uncovered for one hour.
While the steaks are chilling, combine the ingredients for the marinade in a container just large enough to fit your steaks. Add the steaks when ready, then cover with extra oil if needed. Marinate for between 6 hours and up to two days - longer is better.
Heat up a large cast iron skillet with 1 tablespoon of high heat oil (not olive) until it’s just about smoking. Add the onion wedges and cook for 2 minutes per side, or until charred. Turn them with a flipper or tongs and cook the other side, then remove and set aside.
Optionally season your steaks with salt. Add the steaks and cook roughly 3 minutes per side for rare or 4 minutes per side for medium rare. Rest the steaks while you make the cajun butter peppercorn sauce. If you are doing these in batches, turn your oven to warming/proofing mode (or just with the light on - no higher than 80ºF) to keep the steaks warm. Let the skillet come back to temp in between steaks.
If you are making the cajun butter peppercorn sauce, reduce the heat to low and add cognac to the pan. Let reduce while stirring with a wooden spoon or silicone spatula to deglaze, then add butter, cream, cracked peppercorns, and cajun spice mix. The resulting sauce will be a little grainy and not creamy like French peppercorn sauces, but delicious and spicy.
Slice steaks and enjoy immediately.
Note: you can change the serving size to reflect the number of steaks you have.
Loosely based on Smith & Wollensky's Cajun Rib Steak recipe.
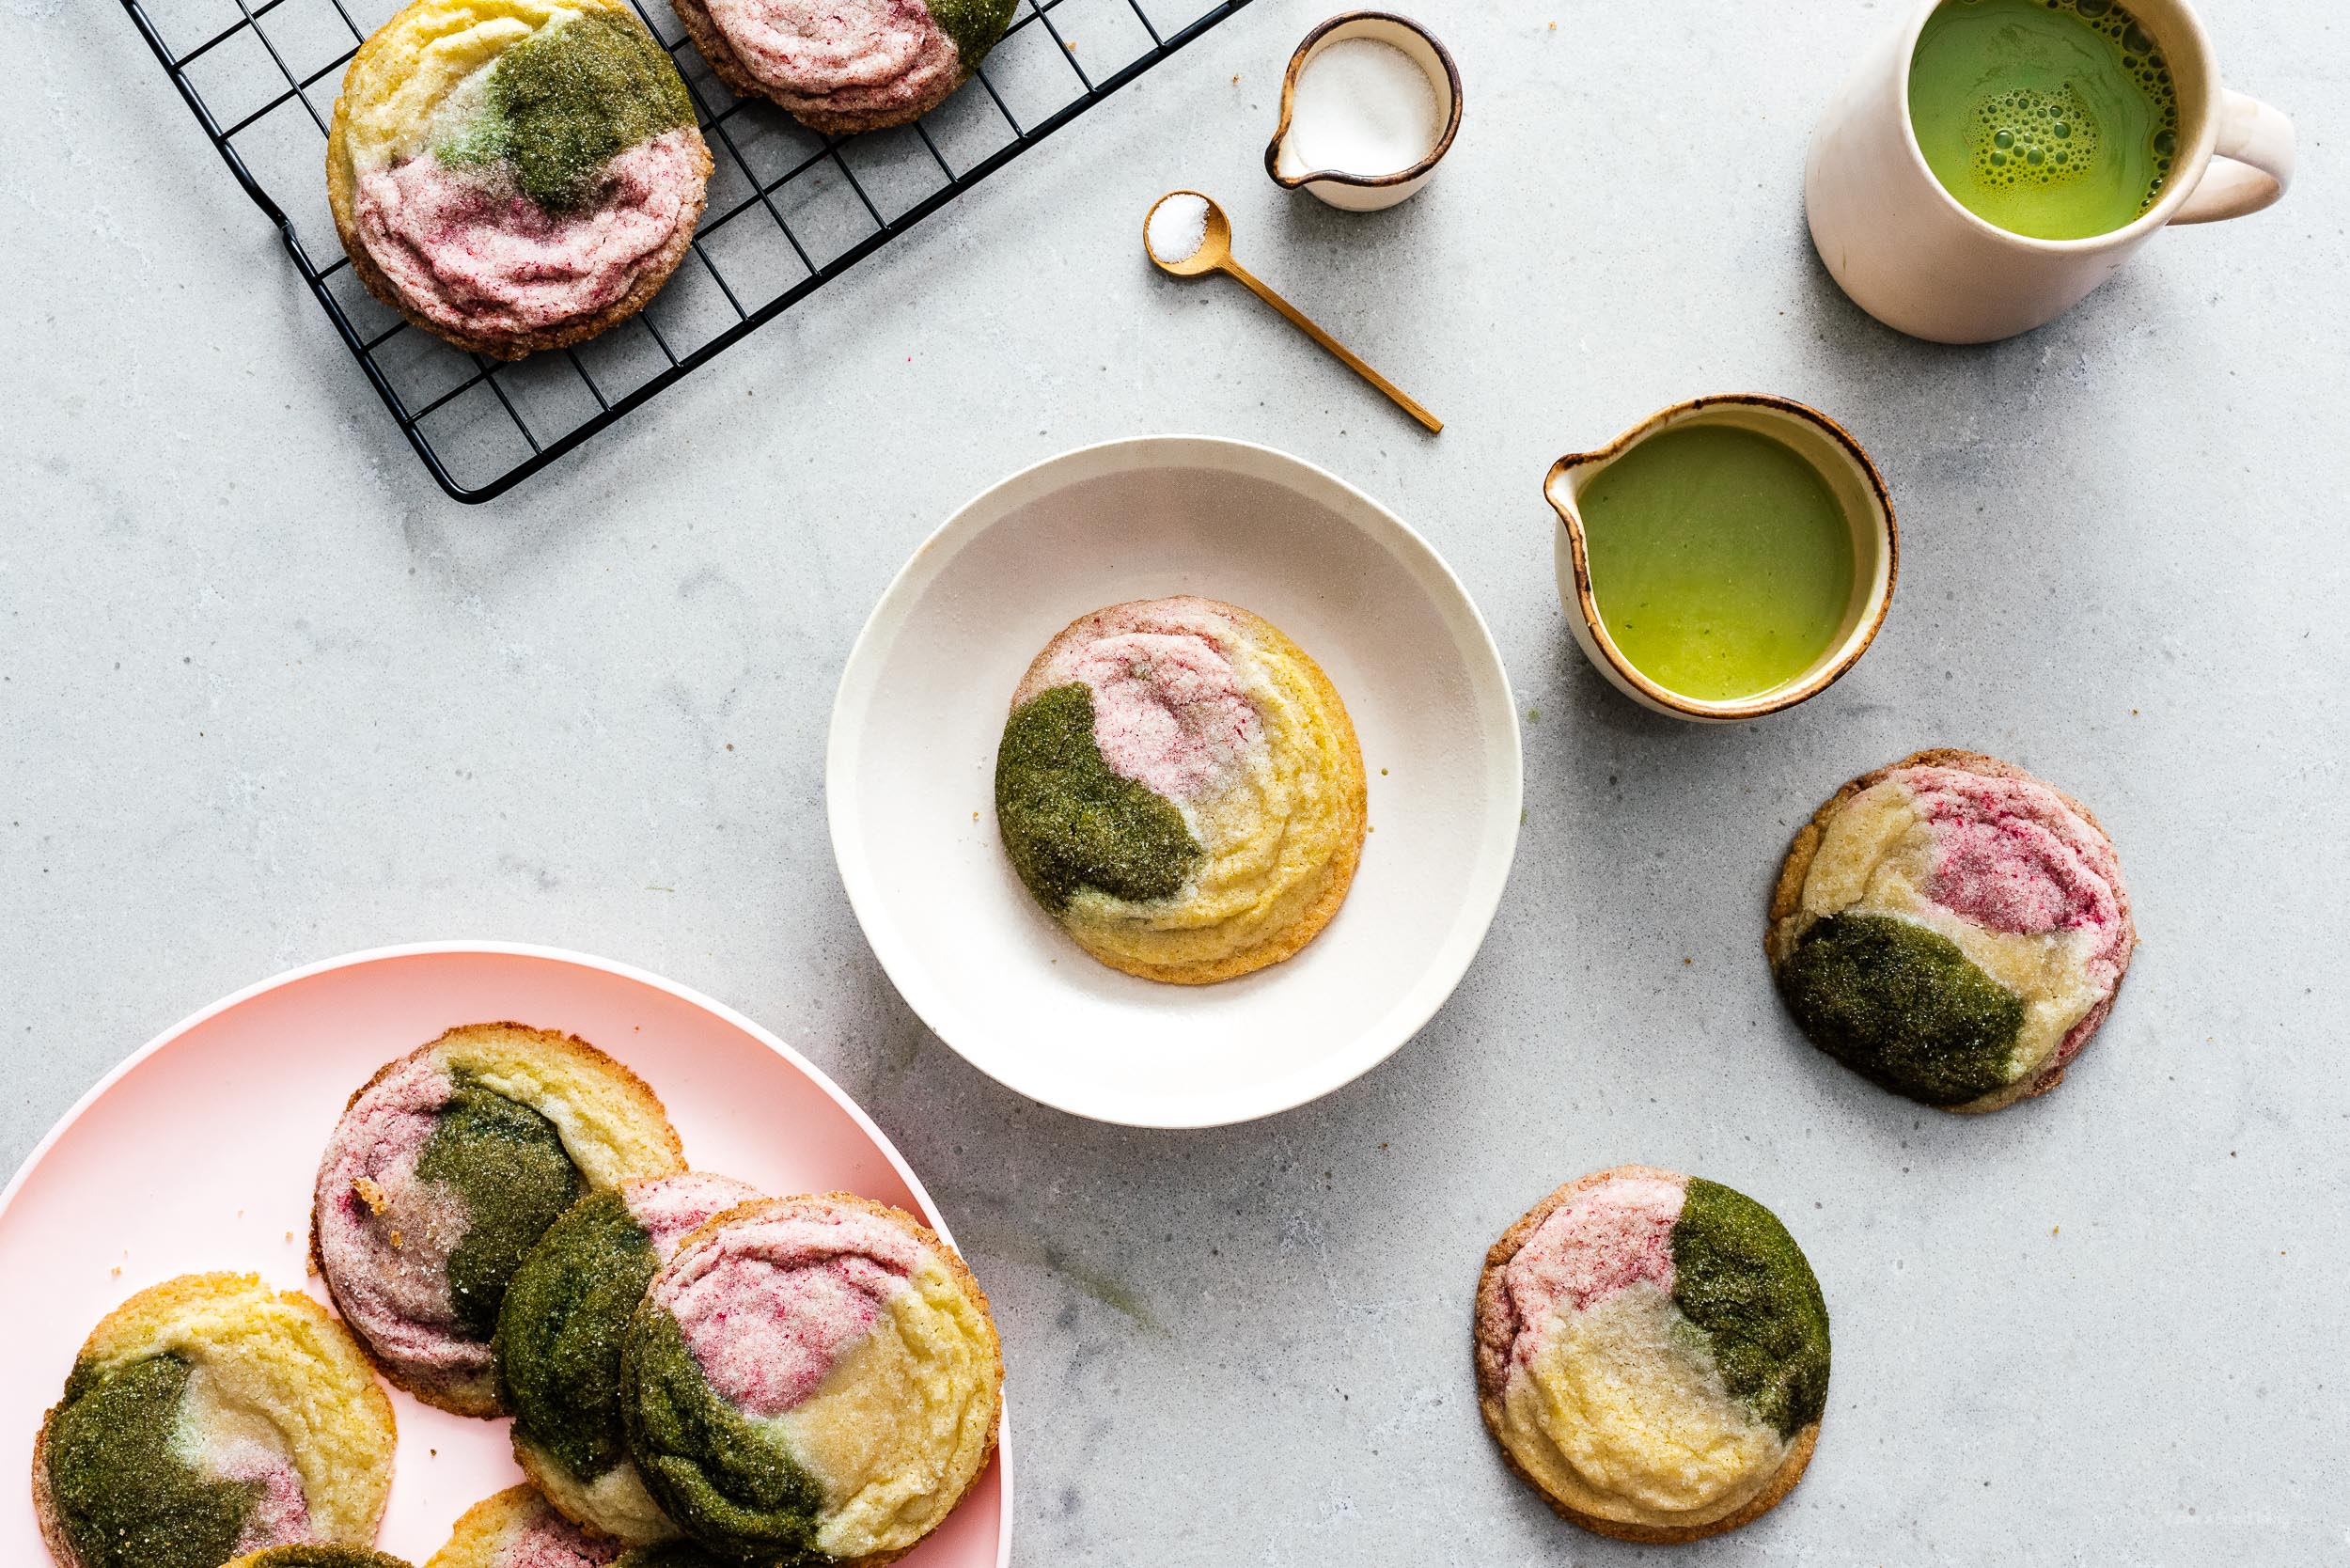
I Am... Neapolitan Cookies
Neapolitan Cookies! What could be better than matcha, strawberry, and vanilla sugar all in one cookie?! I am not a baker at heart. Don’t get me wrong - I LOVE baking. So much so that I often just want to bake and not eat. I can definitely follow recipes and most of the time they turn out, but I desperately wish I could be the kind of baker that could confidently and successfully bake all of the creations in my head. That’s why I’m always in awe of the beautiful baked goods that show up again and again in my Instagram feed. One of the people I’ve been following since forever and a IRL friend of mine that I am always inspired by is Amy from Constellation Inspiration. I love the Asian twists she puts on classic baked goods. She loves salted egg yolk which is basically one of my all time favorite flavors (either sweet or savory), chewy mochi things, and her photos of cookies always make me hungry. Amy recently came out with a beautiful new cookbook called Blooms and Baking that is full of glorious baked treats that feature florals, both in flavor and in presentation. Flipping through it, I wanted to make everything but I saw her matcha strawberry neapolitan soft and chewy sugar cookies on insta and I just had to make them even though I was planning on this post being an ode to her book. She gave me her blessing and here we are!
Neapolitan Cookies
Hot-take: neapolitan ice cream is the best ice cream flavor. Agree or disagree? I actually LOVED neapolitan as a kid. I never actually ate all three flavors together, but I liked having the option of having either strawberry, chocolate, or vanilla. Now though, there are so many better flavors out there - I would never choose neapolitan. Maybe I would if it was a matcha strawberry vanilla situation studded with these sugar cookies and chewy mochi bits. That would be pretty bomb, I think. Back to these cookies, they are an Asian take on neapolitan. Instead of chocolate, there’s matcha. The strawberry and vanilla are the same but I’ve seen a bunch of people make these exact cookies with other variations like black sesame, hojicha, and sakura flavors. The genius of this recipe is the chewy, soft sugar cookie base. The same recipe is in Amy’s book but with a lavender twist. These cookies come together quickly and the dough lends itself well to flavor add ins. The key to adding in different flavors to sugar cookies is trying not to alter the wet to dry ingredient ratios too much. Matcha works because it’s a powder and the strawberry is thanks to freeze dried strawberry powder.What are freeze dried strawberries?
Freeze dried strawberries are simply strawberries in which the water content has been removed. Strawberries are quickly frozen so they retain their shape and cell structure, then the water is vaporized in a vacuum. Freeze dried strawberries look like little dehydrated pieces of strawberry. You can reconstitute them with water or use them in baked goods. Freeze dried strawberry powder is simply freeze dried strawberries that have been blitzed in a food processor. You can find either whole pieces or powder in the aisle where they keep the dried fruit.How do I add freeze dried strawberries to baked goods?
Because the water is removed from freeze dried fruit, they have a more intense flavor, making them perfect for adding to baked goods. You can add them to muffins, quick breads, cakes, cookies, essentially anything you want to add fruit to without changing the baking ratios too much.How do I make matcha strawberry vanilla neapolitan cookies?
- Mix together your dry ingredients.
- Beat together your butter, sugar, egg, and vanilla.
- Mix the flour mix into the butter mix. Divide the dough into three bowls. Mix the matcha into one and the strawberry powder into another.
- Shape the dough by rolling equal portions of each dough into a ball. Roll in sugar.
- Bake and enjoy!
Tips for perfect neapolitan cookies
- Preheat your oven. it makes for more even baking. Bonus points if you have an oven thermometer* make sure all of your ingredients are at room temp
- Don’t overmix your cookies. stir in the flour only until there are no streaks
- If you need to bake your cookies in batches, keep the cookie dough balls in the fridge. if they get too warm they will spread not not have those thick and chewy ripples
If you like neapolitan cookies, you'll love these too:
- Brown Butter Macadamia Nut Dark Chocolate Chip Cookie Recipe
- Small Batch White Rabbit Snickerdoodle Cookies
- Totoro Soot Sprite Chocolate Sparkle Cookies Recipe
- Gingerbread Corgi Cookies
Neapolitan Cookies: Matcha Strawberry and Vanilla Sugar Cookies
- 1 cup unsalted butter (227g, room temperature)
- 1.25 cups granulated sugar (250g, plus more for rolling)
- 1 large egg (room temperature)
- 2 tsp vanilla extract (10ml)
- 2.25 cups all purpose flour (270g)
- 1/2 tsp baking powder
- 1/4 tsp baking soda
- 1/2 tsp salt
- 3 tbsp freeze dried strawberry powder
- 2 tbsp matcha powder
Heat the oven to 350°F. Line a large baking sheet with parchment paper and set aside. In a medium bowl, whisk together the flour, baking powder, baking soda, and salt. Set aside.
In the bowl of a stand mixer, beat the butter and sugar with the paddle on medium speed until smooth, about 30 seconds. Beat in the egg and vanilla.
Add the flour mix to the butter and mix on low until just combined with no streaks of flour remaining, about 45 seconds. Divide the dough into three equal portions. Mix the strawberry powder into one and the matcha into another. Leave the remaining dough vanilla.
Take a tablespoon of each dough and combine into a ball in the palm of your hands. Roll the balls of dough in sugar until coated.
Bake on the prepared baking sheet, leaving 2 inches between each cookie. Bake for 10-13 minutes or until the edges are a light golden brown. Do not over bake. Remove from the oven and allow to cool on the baking sheet for 10 minutes before cooling completely on wire rack. Enjoy!
via Constellation InspirationConstellation Inspiration

Popular
 2015 Holiday Giveaway
  One-Pot Lemon Scallop Pea Spaghetti
  Beer Battered Onion Rings, Jalapeno Aioli
  2014 Holiday Gift Guide and a Giveaway
  Easy Gourmet Hot Wings and a Giveaway!
 The Ultimate Veggie Sandwich
  Vegan(!) Creamy Corn Soup Recipe
  Sunday Brunch: Grilled Cheese Eggs Benny
